How to Use FLUX AI Image Generator in Make
Imagine being able to create breathtaking images with just a few clicks! FLUX AI Image Generator in Make (formerly Integromat) is revolutionizing how we approach digital art creation. Did you know people created an average of 34 million daily images in the past year alone? In this guide, I’ll walk you through everything you need to know about harnessing the power of FLUX AI in Make. Whether you’re a seasoned automation professional or just getting started, this step-by-step guide will help you unlock the full capacity of AI image generation!

Let’s dive in!
Setting Up Your First FLUX AI Workflow in Make
Step 1: Create Your Account On Replicate
First, go to Replicate.com and sign up for your free account. It only takes a minute, and you’ll be glad you did!

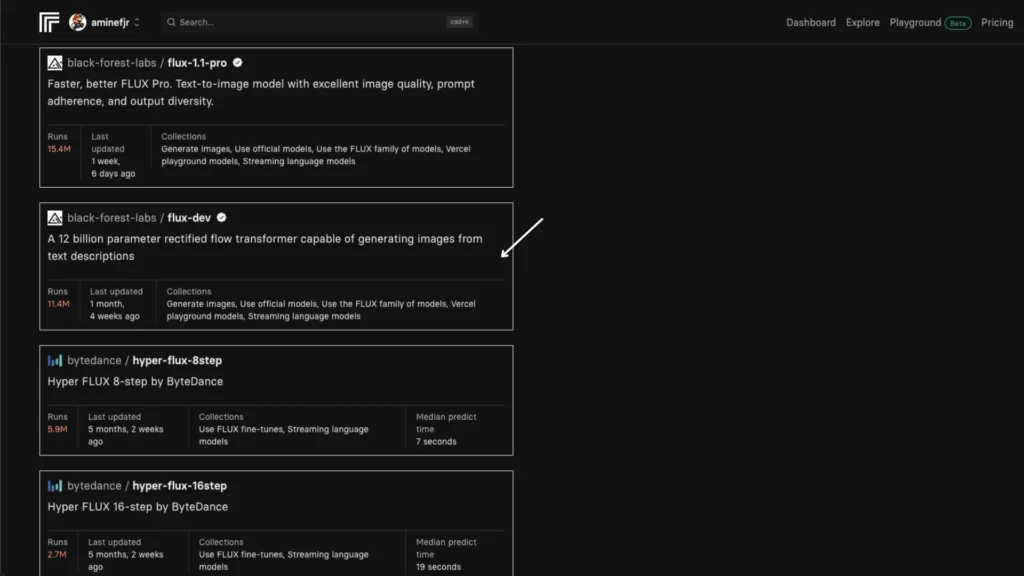
Step 2: Choose the right model
Once you’re logged in, explore the available models. I recommend trying flux-dev—it’s budget-friendly and beautifully does the job! You’ll find it an outstanding balance of performance and cost.
Step 3: Manage Your Account
Now, let’s go to your account settings, which are located at the top-right corner of your screen. This is where all the important stuff happens!

Before we dive in, let’s quickly set up your billing details. Each image you create will cost a small amount – for the flux-dev model, it’s just 2.5 cents ($0.025) per image. This is quite affordable compared to other options! I recommend adding your payment method now so you can create images without interruption. Think of it as buying a digital coffee, just much cheaper!

Step 4: Retrieve Your Token
Great! Now that your billing is set up, you’ll need to grab your API token – it’s like your unique key to use Replicate. Copy it and keep it somewhere safe and private (like a password manager or secure note). We’ll need this token in just a bit, so ensure you can easily find it again. Pro tip: Never share this token with anyone, as it’s linked to your billing account!

Step 5: Create A Folder
Let’s get organized! Open your Google Drive and create a new folder—this will be the home for all the fantastic images you’ll make with Flux. I named mine “Flux-Images.” You can name it Flux Creations or AI Art Gallery, but choose a name that works for you. A dedicated folder will make it easy to find and manage your creations later!

Step 6: Create Your Scenario
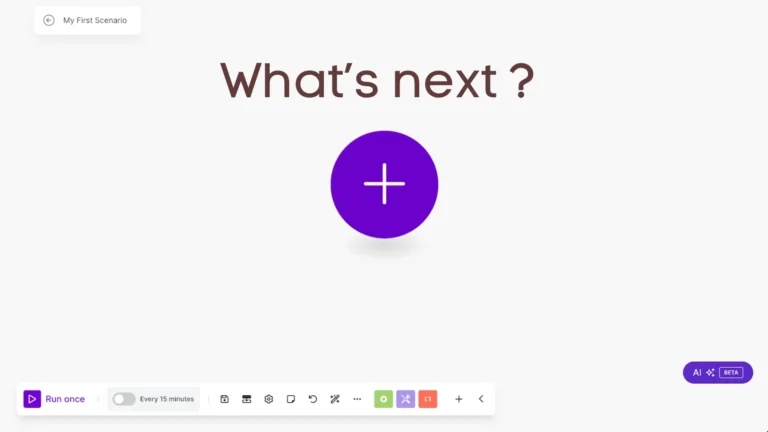
It’s time for the exciting part—setting up your automated workflow! Go to make.com and click on ‘Create a New Scenario.’ This is where the magic starts to happen. We will build a smooth, automated process that brings everything together.
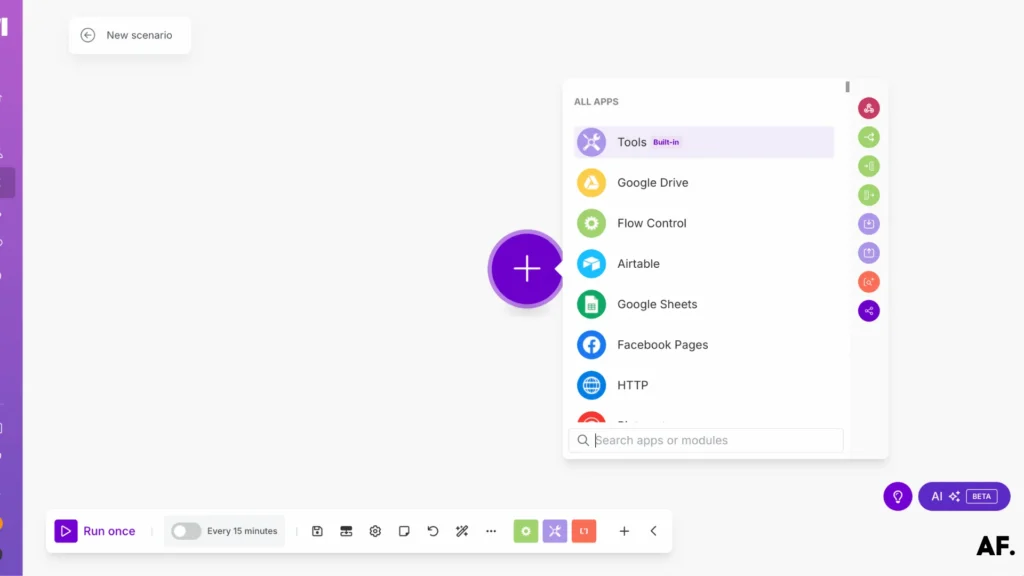
Step 7: Add Your First Module
Let’s start by setting up our variables – think of these as the ingredients for our AI art recipe! Select ‘ Set Multiple Variables ‘ in the ‘Tools’ app as your first module. We’ll begin with the most important one: your prompt. Create a new variable called ‘prompt‘ where you’ll write what you want your image to look like. For example, you might write a serene sunset over a tropical beach or whatever sparks your creativity!

Next, let’s set up two more significant variables that will control how your images look:
First, add ‘aspect_ratio‘ as your second variable. I like to use ‘4:5‘ here – it’s perfect for social media posts and gives you that nice vertical composition. This ratio means your image will be slightly taller than it is wide.
Finally, create an ‘output_quality‘ variable and set it to ‘100‘. This ensures your images are crystal clear and of the highest possible quality.

Step 8: Make A Request
Now comes the exciting part: We connect to our AI model! Head back to your Replicate page, where you found flux-dev earlier, and look for the HTTP/API section. They’ll provide you with some vital information we must copy to make.com.

Time to set up our connection to Flux! Add a new ‘Make a Request‘ module from the HTTP section. Here’s how to fill it out:
First, paste the URL you found on Replicate into the link field at the top. Then, in the Headers section, we need to add your secret handshake – your authorization token! Create a header called ‘Authorization‘; for its value, type ‘Bearer ‘ (with a space after it) followed by your token from earlier. It should look something like ‘Bearer your_token_here.’
A quick tip: Include the space after ‘Bearer’—a small detail that makes a big difference!

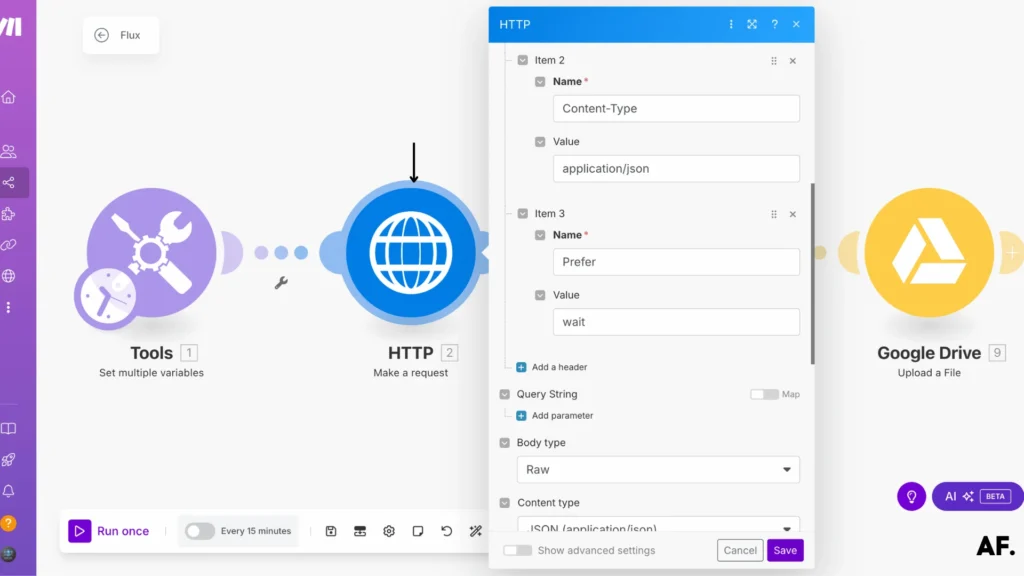
Next, let’s add two more crucial headers that tell Replicate precisely how to handle our request:
Add ‘Content-Type‘ with the value ‘application/json‘—this tells Replicate that we’re sending our instructions in JSON format.
Then, add another header named ‘Prefer‘ and set its value to ‘wait‘ as Replicate’s documentation suggests. This tells the system to wait for your image to be created before proceeding. It’s pretty handy.
Remember, these headers are like speaking Replicate’s language, so it’s important to type them exactly as shown in their documentation!
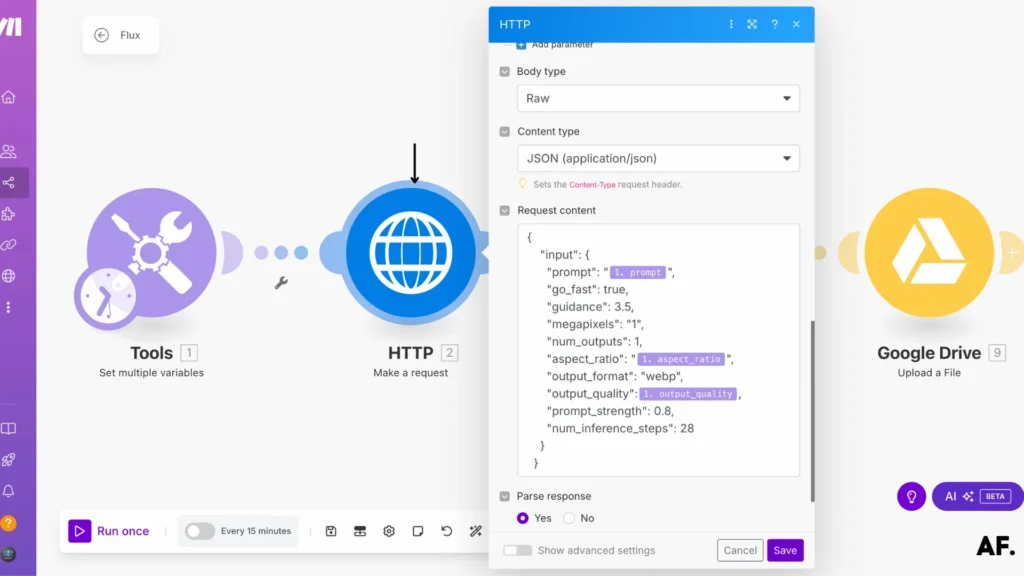
Now for the fun part—let’s tell Flux exactly what image we want! We’ll build our JSON message in your HTTP request’s ‘Body‘ section. Select the three variables we created from the ‘Tools‘ menu on the right: prompt, aspect_ratio, and output_quality.
Step 9: Get Image Data
Now comes the moment we’ve been waiting for – getting your actual image! Let’s set up another ‘Make a Request‘ module to fetch it:
Add a new HTTP ‘Make a Request‘ module. We’ll use some magic from our previous step to create the URL. Look for the image URL in the output of our last module. You can map this directly by selecting it from the results of the previous module.

Step 10: Upload on Google Drive
Now, let’s ensure your beautiful AI creation has a safe home! Add the ‘Upload a File‘ module for Google Drive, and let’s set it up:- Select your special Flux folder we created earlier in Google Drive
- For the filename, get creative! You could name it something like ‘Flux_Creation_{today}’ to keep track of when you made it. The choice is yours!
- Grab the actual file data from the previous module, where we got the image. This is your AI masterpiece, ready to be saved.
Pro tip: You should include the prompt in the filename to remember that each image was supposed to be quick. For example: ‘Flux_sunset_beach_20240218’!

Step 11: Save And Run
It’s time for the moment of truth – let’s bring your AI art creation system to life! 🎨
Hit that ‘Save‘ button to store all your hard work, then take a deep breath and click ‘Run‘ to watch your scenario in action! Your first AI-generated masterpiece appears in your Google Drive folder in just a few moments.
If everything worked as planned, congratulations! You’ve just built your very own automated AI art pipeline. Feel free to experiment with different prompts and settings to create more amazing images. Each new creation will automatically save to your designated folder, ready for you to use or share!
Remember: Each run will use a small amount of credits, but now you’re all set up to create beautiful AI art whenever inspiration strikes!

Step 12: Results
And voilà! 🎉 Your AI-generated image has now found its new home in your Google Drive folder, ready for you to use! The best part? This whole process will now work automatically every time you run your scenario.
You can find your newly created image in the Flux folder we set up earlier. Each new creation will be neatly organized and easily accessible whenever needed. Whether making art for social media, personal projects, or fun, you have a streamlined system that does all the heavy lifting.
Feel free to experiment with different prompts and settings – each new masterpiece will be automatically saved to your Drive. Happy creating! 🎨
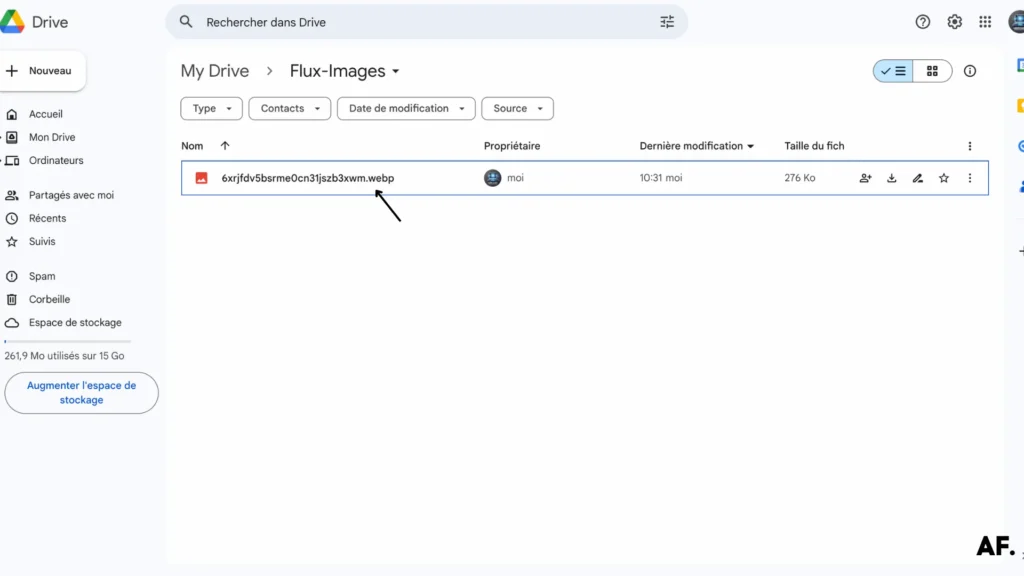
When you click on the file in your Google Drive folder, it is your AI-generated artwork! 🎨 The image you imagined has been brought to life through Flux and safely stored in your Drive. Pretty impressive, right?
Take a moment to admire your creation and the automated system you’ve built. Not only did you create art with AI, but you also set up a seamless workflow that you can use again and again. A new, unique image will appear in your folder each time you run this scenario.
You’re ready to explore endless creative possibilities with your new AI art automation!

What Is Flux AI?
Flux AI is an artificial intelligence-powered tool that generates high-quality images based on text descriptions. Leveraging deep learning models allows users to create stunning visuals quickly and efficiently. Whether you’re a digital artist, content creator, marketer, or just curious about creating with AI art generation, Flux AI can quickly turn imagination into reality.
AI image generation has grown significantly in recent years, with tools like Flux AI making advanced technology accessible to everyone. Unlike traditional design software, which requires artistic skills and experience, Flux AI enables anyone to create professional-looking images with minimal effort.
Flux AI is beneficial for those who need quick visual content. Instead of spending hours designing an image from scratch, you can describe what you want, and the AI will generate a unique image in seconds. This makes it an excellent choice for businesses, bloggers, and social media influencers who constantly need fresh visuals to engage their audience.
One key benefit of Flux AI is its automation capabilities. Integrating with automation platforms like Make (formerly Integromat) streamlines the entire image creation process. Users can automatically set up workflows to generate and store images, saving time and effort.
Flux AI offers a cost-effective alternative to hiring graphic designers or purchasing stock images. With customizable settings like aspect ratio and output quality, users can fine-tune their results to match their needs.
In summary, Flux AI is a powerful tool that combines creativity with automation. It makes image generation accessible, efficient, and affordable and opens up new possibilities for AI-driven art creation, whether for professional projects or personal use.
How Flux AI Works?
Flux AI uses deep learning models to transform text prompts into high-quality images. It relies on advanced artificial intelligence algorithms trained on vast picture and text description datasets. This enables the AI to understand user input and generate visuals that match the instructions.
The process starts with the user entering a text prompt that describes the desired image. For example, if you type “a futuristic cityscape at sunset,” the AI interprets the request and produces an image that aligns with the description. The more detailed the prompt, the more refined and specific the generated image will be.
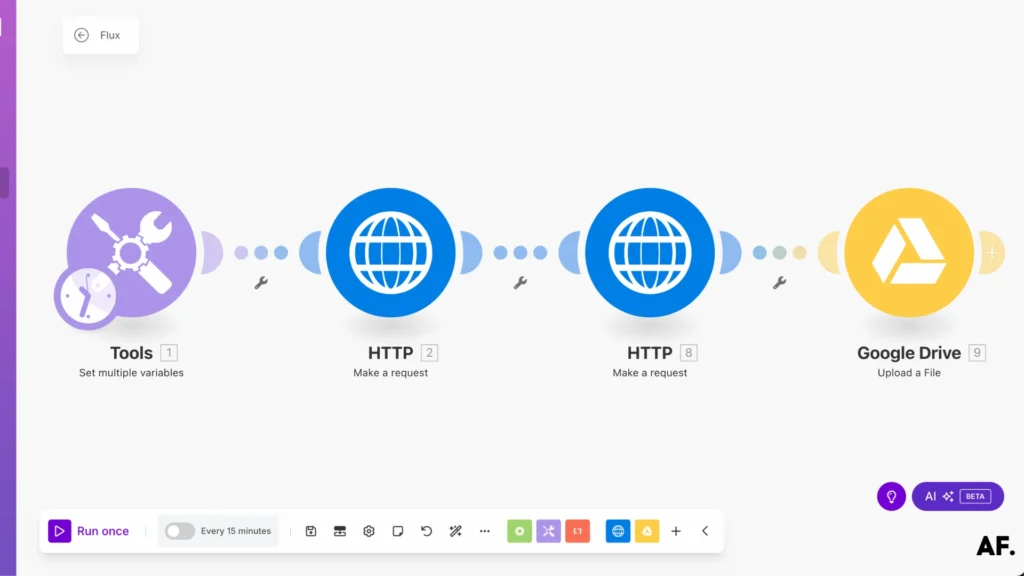
Flux AI is integrated with automation platforms like Make (formerly Integromat), allowing users to create an automated image-generation workflow. This means you can set up a system where images are generated, stored, and organized without manual effort. The workflow typically follows these steps:- User Input – The user provides a prompt, aspect ratio, and image quality settings.
- AI Processing – Flux AI sends the request to its deep learning model, which analyzes the text and creates an image.
- Image Generation – The AI produces an image based on the given description and specified parameters.
- Storage & Automation – The generated image can be automatically uploaded to Google Drive or another cloud storage platform for easy access and organization.
Flux AI works through an API connection with Replicate. Users must retrieve an API token to access the AI model. By integrating with Make, users can automate multiple steps, reducing the need for manual intervention.
With its ability to generate high-quality, AI-powered artwork in seconds, Flux AI is revolutionizing digital content creation, making it easier and accelerating the process for users worldwide.
How Flux AI Can Help You?
Flux AI is a game-changer for anyone who needs quick and high-quality images. Whether you are a content creator, marketer, entrepreneur, or hobbyist, Flux AI simplifies generating unique visuals without requiring advanced design skills.
For content creators, Flux AI can help generate eye-catching images for blog posts, social media, or YouTube thumbnails. Instead of searching for stock images or hiring a designer, you can instantly create unique visuals tailored to your content.
For businesses and marketers, Flux AI efficiently produces high-quality images for advertising, branding, and promotional materials. Whether you need product mockups, infographics, or campaign visuals, the AI can generate professional-looking graphics in seconds.
For artists and designers, Flux AI is an inspirational tool. It allows them to experiment with different styles, compositions, and concepts without spending hours drawing or editing. The AI-generated images can also be a starting point for further creative refinement.
One of Flux AI’s most significant advantages is its automation capabilities. Integrating it with Make allows you to create a seamless workflow in which images are generated and saved automatically. This is especially useful for organizations that need to create large volumes of images regularly.
Additionally, Flux AI is cost-effective compared to hiring professional designers or purchasing stock images. With a low per-image cost, you can generate as many images as needed while staying within budget.
Whether you’re looking to streamline your creative process, enhance your marketing efforts, or explore AI-generated art for fun, Flux AI offers a powerful and accessible solution. Its combination of automation, affordability, and user-friendliness makes it indispensable.
Final Thoughts
Now you have everything you need to create amazing images using FLUX AI in Make! The more you work with it, the better you’ll become – don’t hesitate to get creative and discover what works best with different prompts and settings. Start small, test thoroughly, and gradually build more complex workflows. Ready to begin your AI image generation journey? Jump in and create your first FLUX AI scenario today!
FAQs
How to use Flux Image AI?
To use Flux AI, sign up on Replicate.com, choose the flux-dev model, and get your API token. Then, create a workflow in Make (formerly Integromat) to automatically generate images. Enter your prompt, set image preferences, and let AI create stunning visuals for you!
How do I use an AI image generator?
Generating an AI image is actually simple! Just type a description of what you want, choose settings like aspect ratio and quality, and let the AI create the image. Some tools, like Flux AI, allow automation so that you can generate and save pictures effortlessly.
How to use Flux Dev AI?
Flux-dev is a budget-friendly AI model on Replicate. To use it, sign up on Replicate, select flux-dev, and copy your API token. Then, connect it to Make and set up an automated workflow to create images based on your prompts.
How does the Flux AI model work?
Flux AI uses deep learning to analyze text prompts and generate images based on them. It processes your input, applies advanced AI models trained on vast datasets, and produces unique visuals. Automation can create and store images without manual effort.

Further Ressources
- How to Convert a PDF to Text in Make
- How to Run Custom Code on Make: Step-by-Step Guide
- PDF to Google Sheets: Quick Automation with Make & ChatGPT
- How to Automate Google Reviews with Make
- How To Use Deepseek AI In Make: Step-By-Step Guide
- How to Convert Videos into Blog Posts Automatically with Make
- How to Extract an Item from an Array in Make
- What Are Make’s Data Iterators & Array Aggregators? Full Guide