How To Use Variables in Make: Full Guide

Have you ever felt overwhelmed by data management in your Make workflows? You’re not alone! When I started working with Make, variables seemed like a mysterious puzzle. But here’s the game-changing truth: according to recent automation statistics, proper variable usage can reduce workflow execution time by up to 40%! In this comprehensive guide, we’ll unlock the secrets of variables in Make and transform you from a beginner to a confident automation expert.

Let’s dive in!
Understanding Variables in Make: Basic Concepts
In Make, variables are essential for storing and managing dynamic data within an automation workflow, also known as a scenario. A variable acts as a container that holds a value, which can be a number, text, date, or any other data type. Each variable has a name, a unique identifier, and a value representing the stored data. Variables help automate processes by allowing information to be passed between different modules.
For example, if you are automating an order processing system, you might create an order status variable and assign it the value “Processing,” which can then be used to update a database, send an email notification, or trigger another action. There are different variables in Make, including local variables, which are used within a specific scenario, and global variables, which can be accessed across multiple scenarios. Additionally, Make provides built-in variables, such as {{now}}, which dynamically store the current date and time.
Using variables effectively allows you to build flexible and efficient automation workflows by dynamically adjusting outputs based on input data. Variables enable seamless data flow across different automation steps, whether you are working with customer information, timestamps, or transaction statuses.
Creating and Setting Variables in Make
1. One Variable
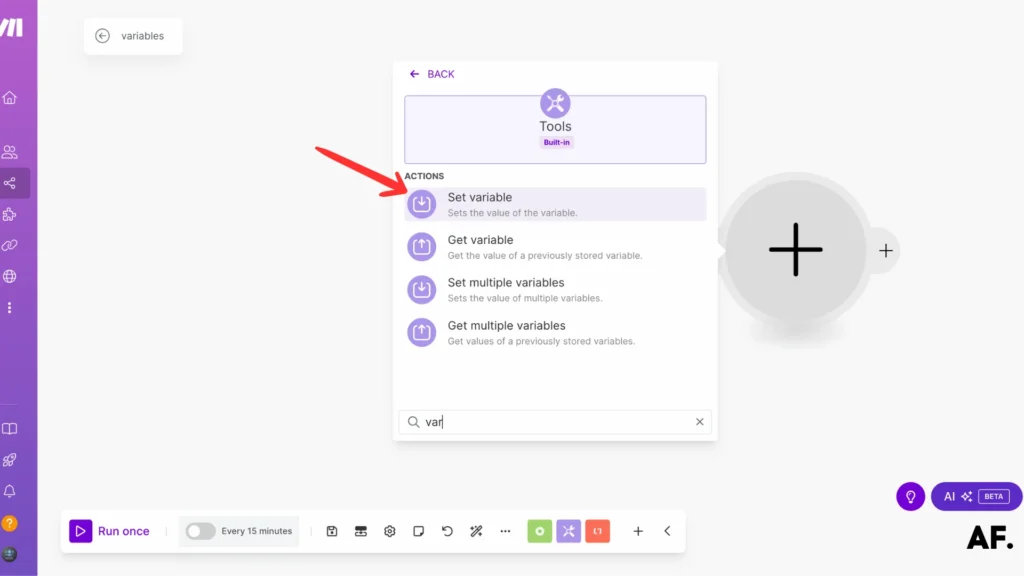
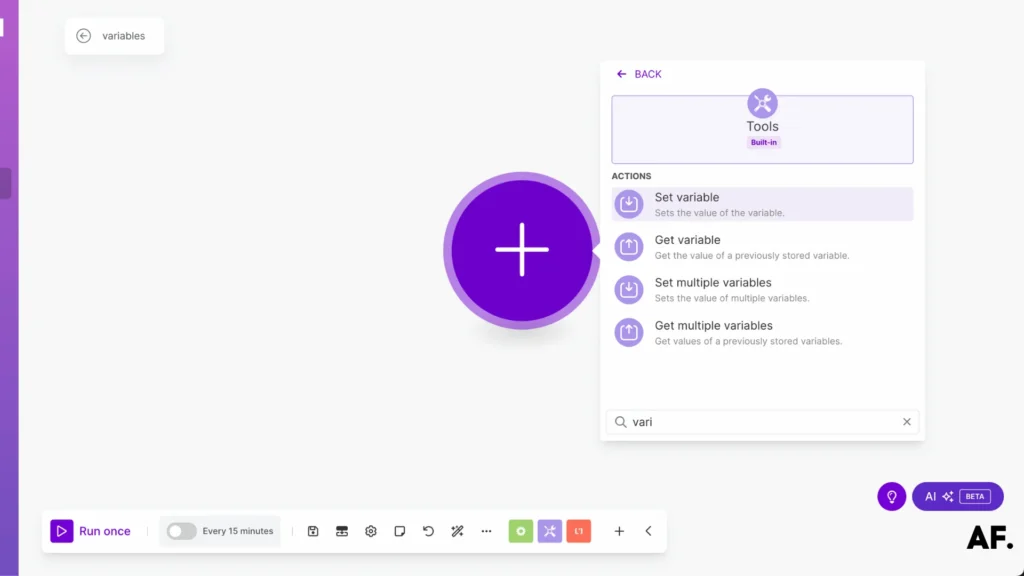
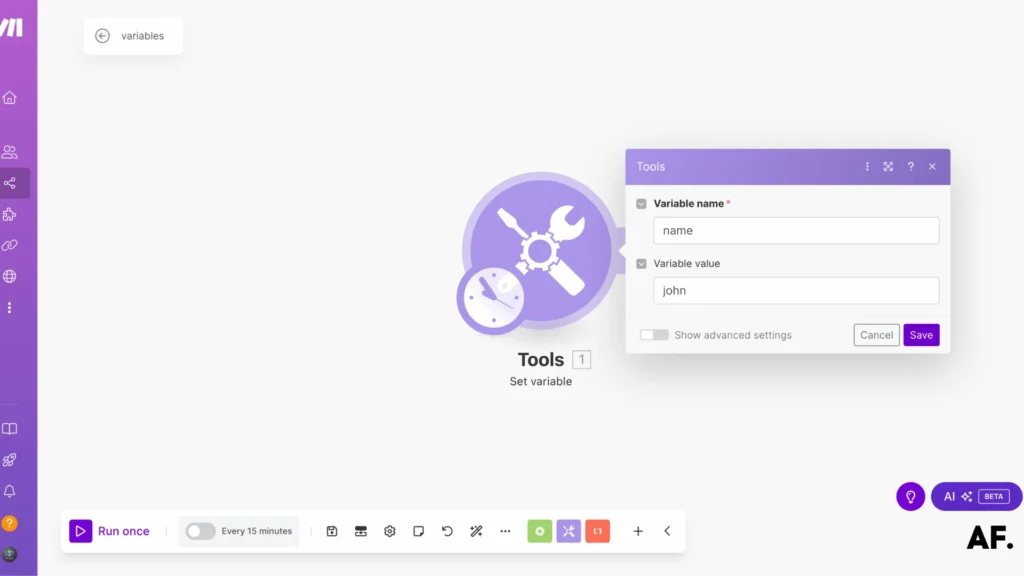
Let’s start with the basics: creating a variable! To do this, you’ll need two key things—a name for your variable and the value you want to store in it. Think of it as giving your data a label so it is easy to find and use later.
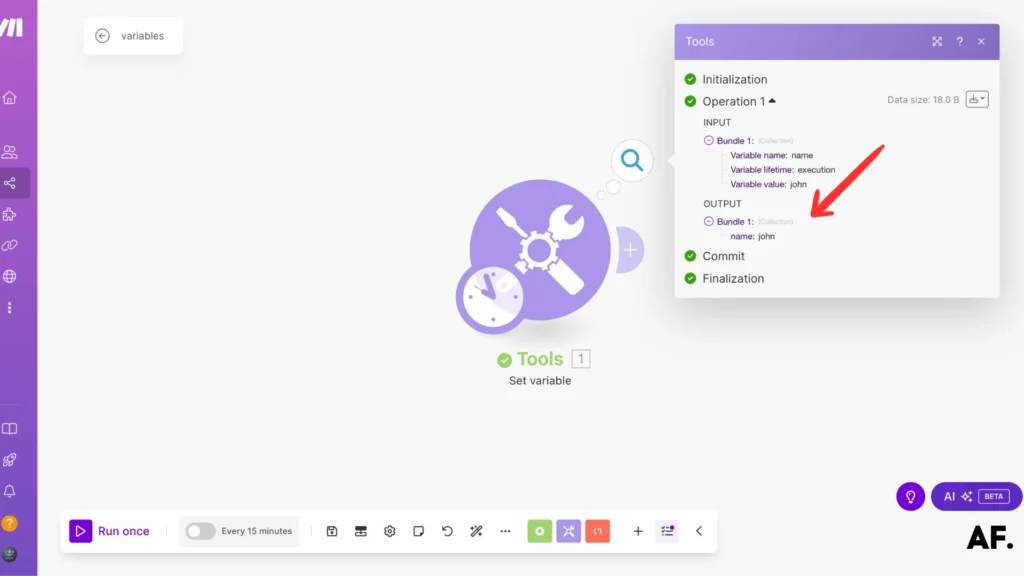
When you run this set variable module in your scenario, you’ll see something happen – your variable springs to life, displaying both the name you chose and its corresponding value. It’s that simple!
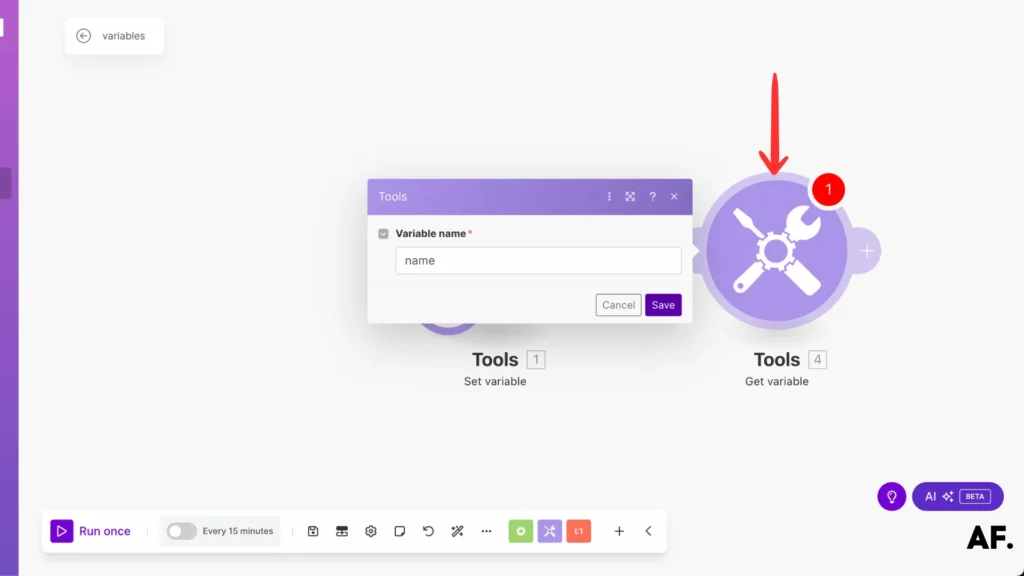
To retrieve the variable you set earlier, enter its name. It’s like calling your data by the nickname you gave it!
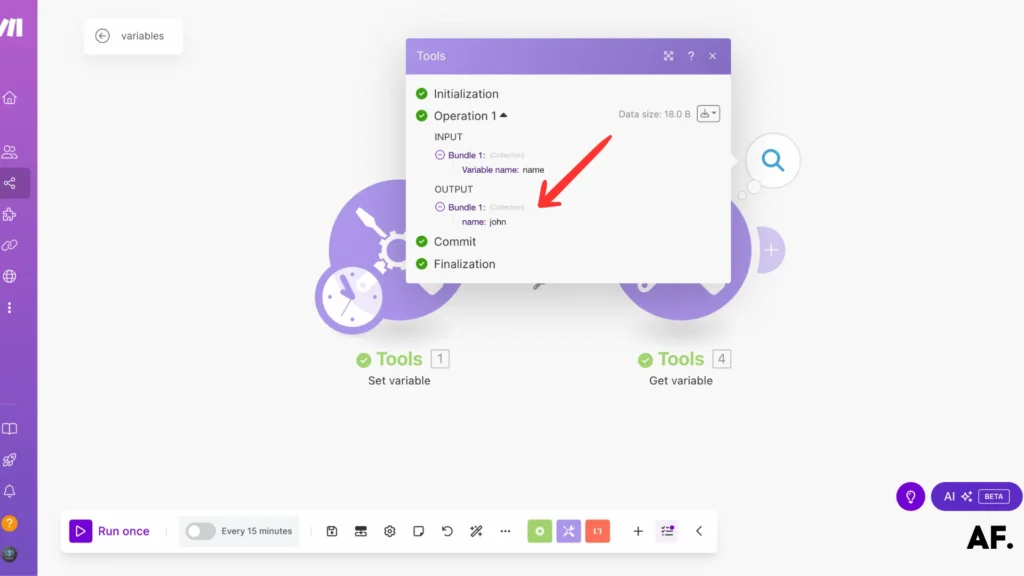
And just like that, you’ll see your value appear on screen! It’s like opening a labeled box and finding what you store inside.
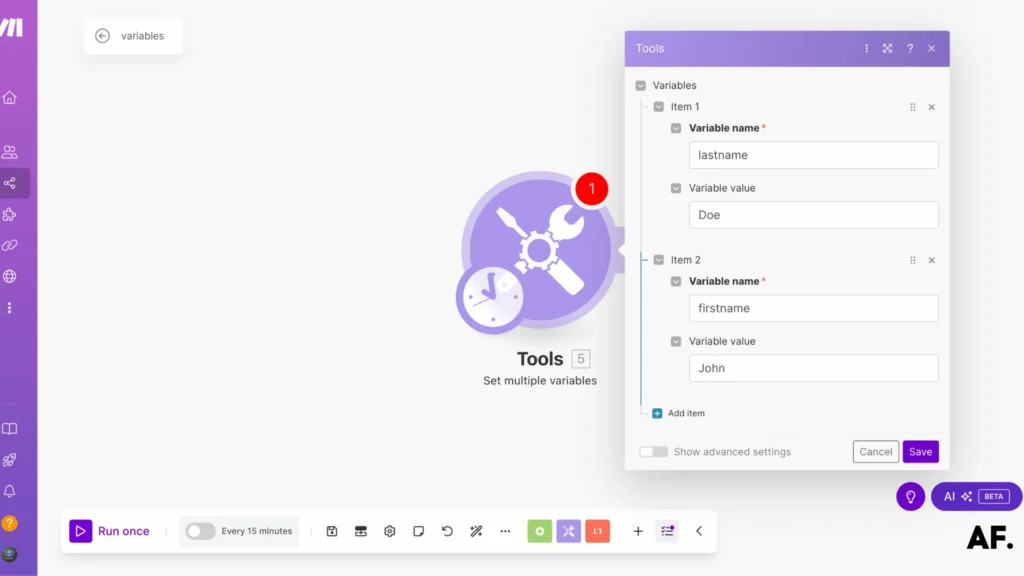
2. Multiple Variables
Let’s explore something even more powerful – the ‘Set Multiple Variables‘ module! This handy feature lets you create several variables simultaneously, saving you time and effort. Here’s where you can list all the variables you need:
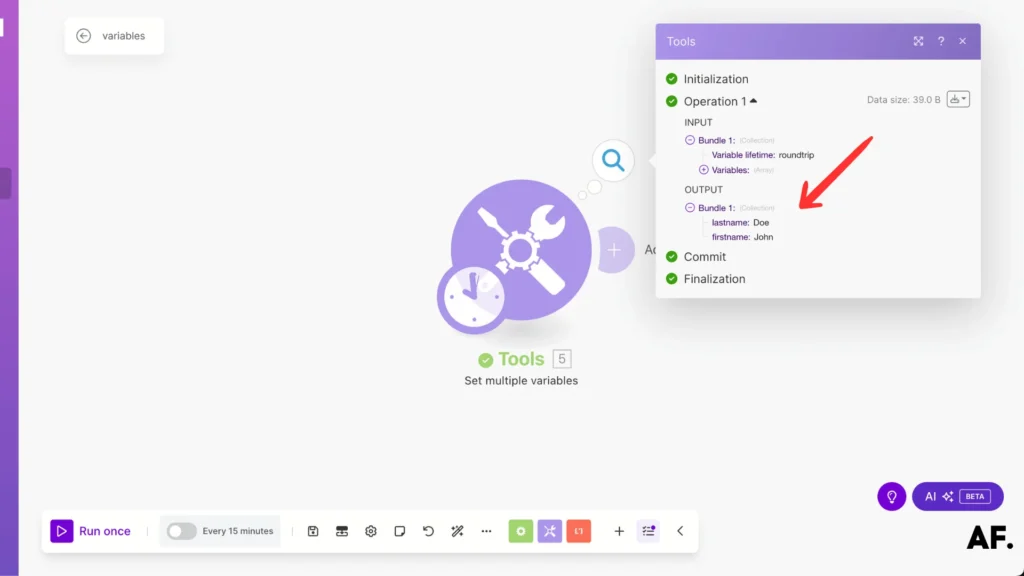
Run your scenario, and voilà! You’ll see all your variables come to life, with each name and value neatly displayed. It’s like watching all your data containers fill up at once!
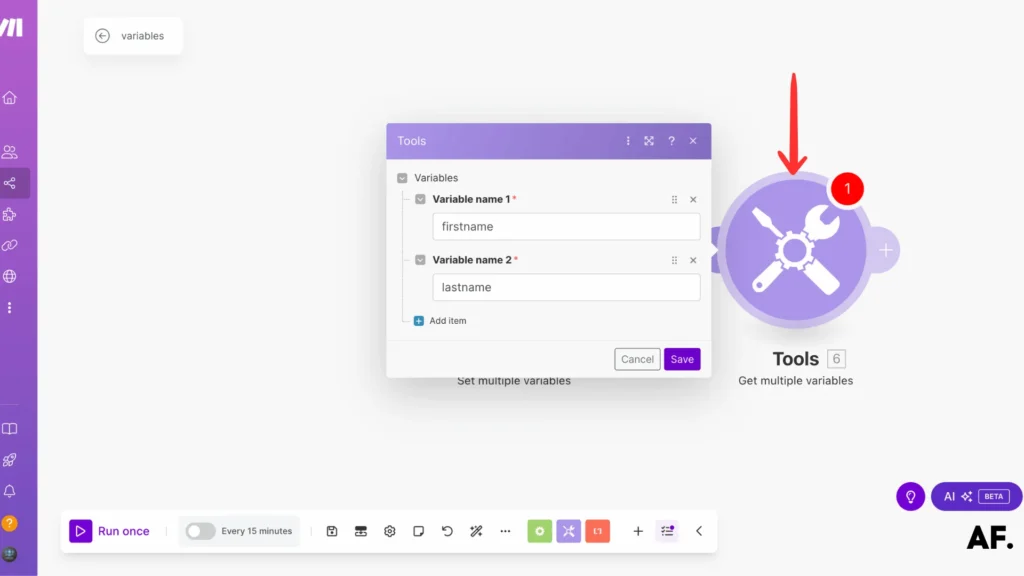
Next up, let’s retrieve all those variables we created! Add the ‘Get Multiple Variables‘ module and list the variable names you want to access. It’s like having a master key that unlocks multiple data boxes simultaneously!
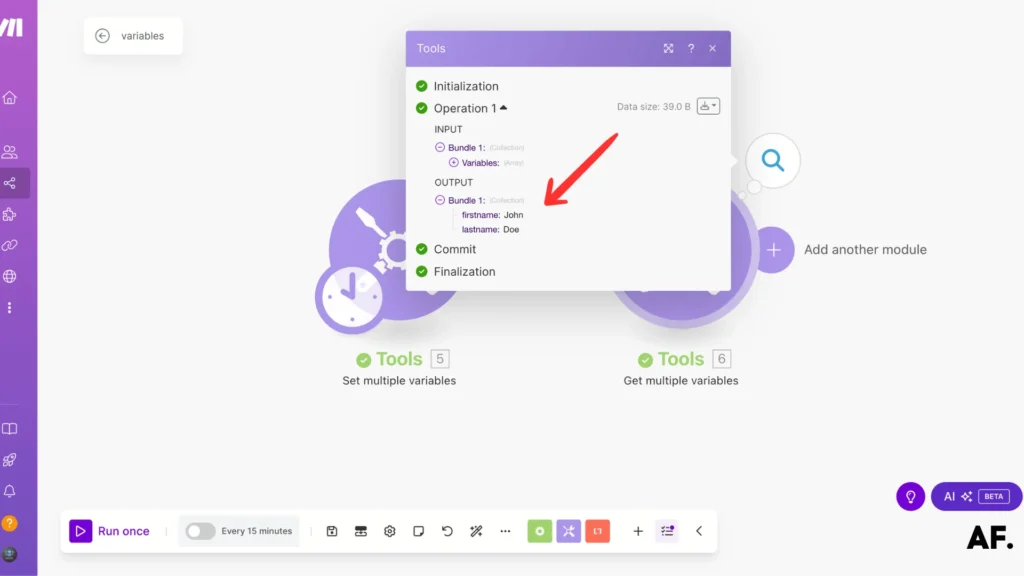
When you run the scenario now, watch all your requested values appear on the screen! It’s that rewarding moment when you can see all your data lined up exactly as you stored it. Pretty neat, right?
Router Use Case Variables
Let’s dive into a more advanced and practical scenario: using variables within routers! Sometimes, your router needs to make decisions based on data from earlier steps in your workflow. This is where variables become super handy – they act like messengers, carrying important values from one step to the next.
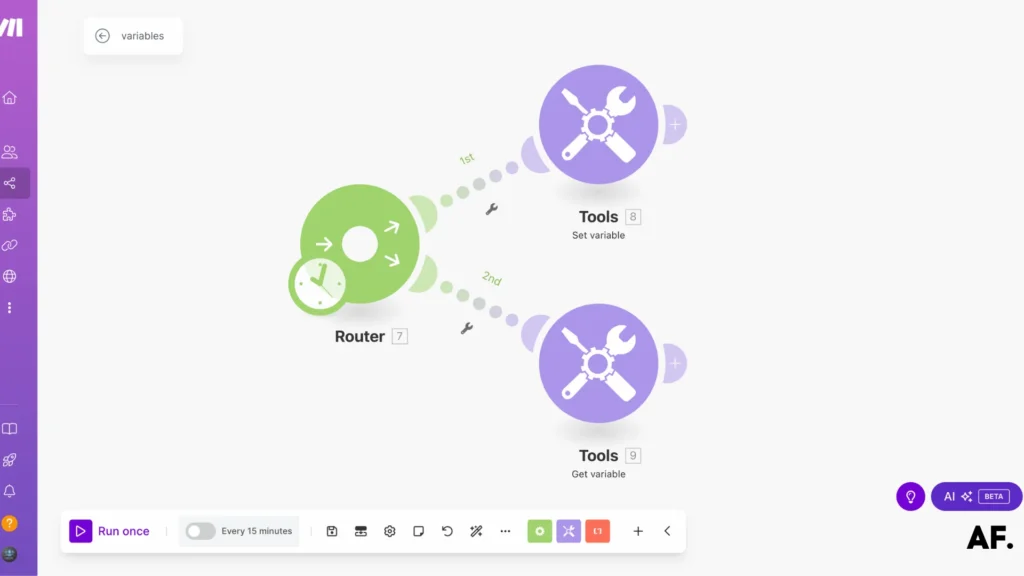
Moving to the first route in your router: Add another ‘Set Variable‘ module here. This time, we’ll create a route-specific variable with its own name and value. This allows us to handle different scenarios within our router path.

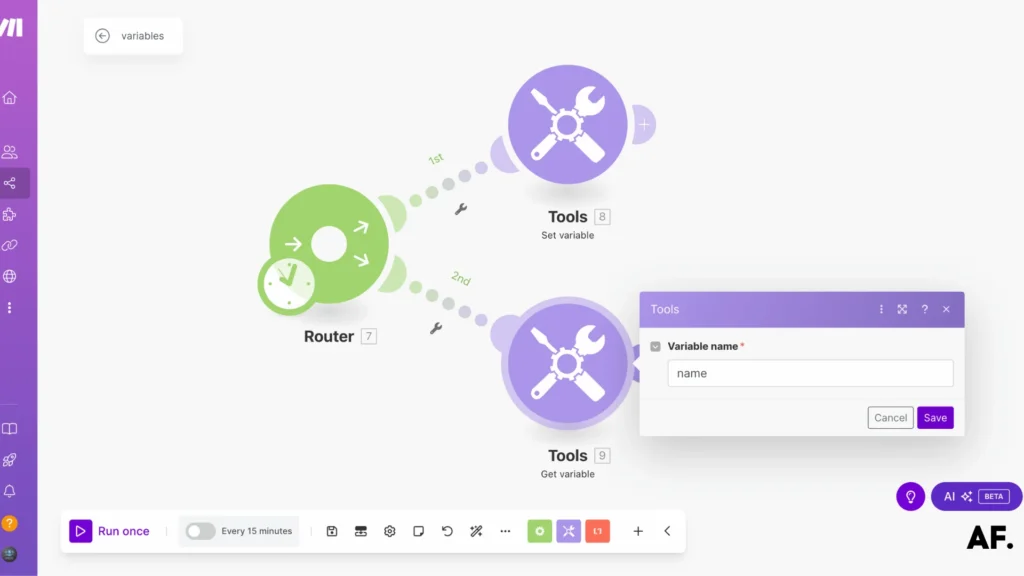
For our second step, we’ll retrieve our stored information using the ‘Get Variable‘ module. Enter the variable name you want to access – it’s like unlocking the data container we created earlier. This will let us use that value in our workflow.
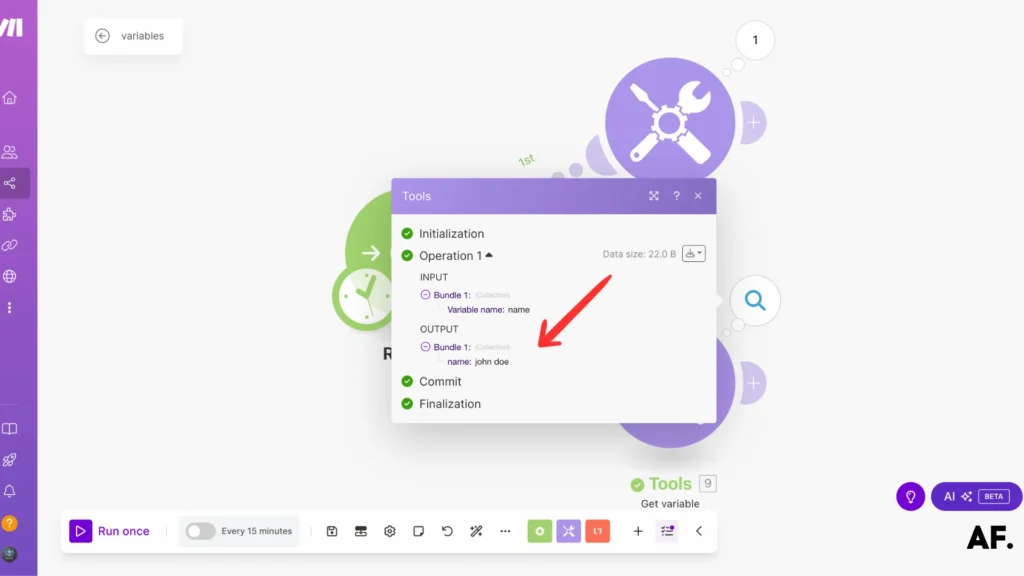
And there you have it! When you run this, you’ll see the value from your first step appearing right where you need it. It’s like watching your data successfully travel through your workflow – the exact value you set at the beginning is now available in your router. Pretty powerful.
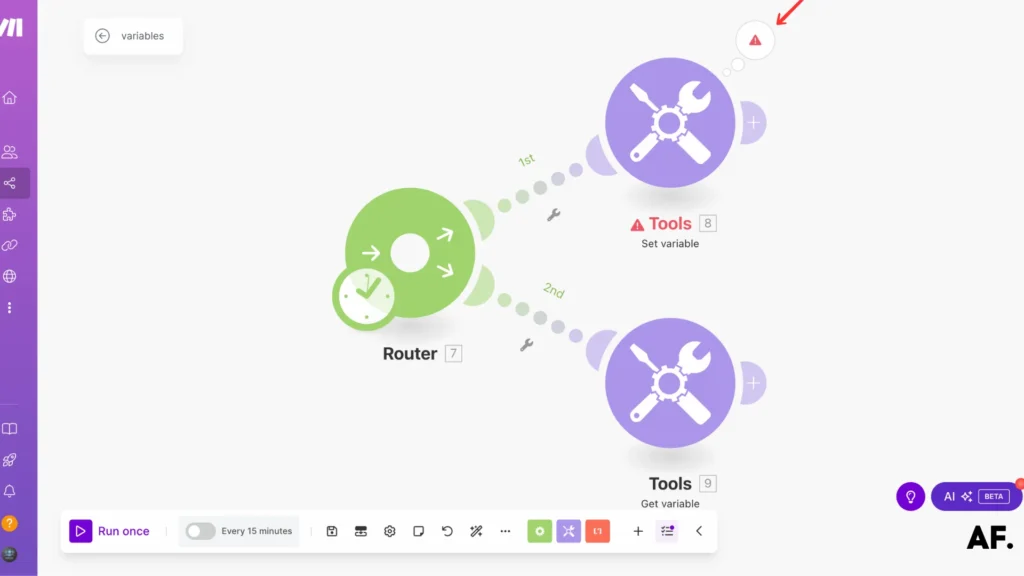
Troubleshooting Variable Issues
Don’t worry if you occasionally encounter errors when working with variables – it’s a normal part of the learning process! Let’s look at some common issues that might pop up when setting variables and learn how to handle them.
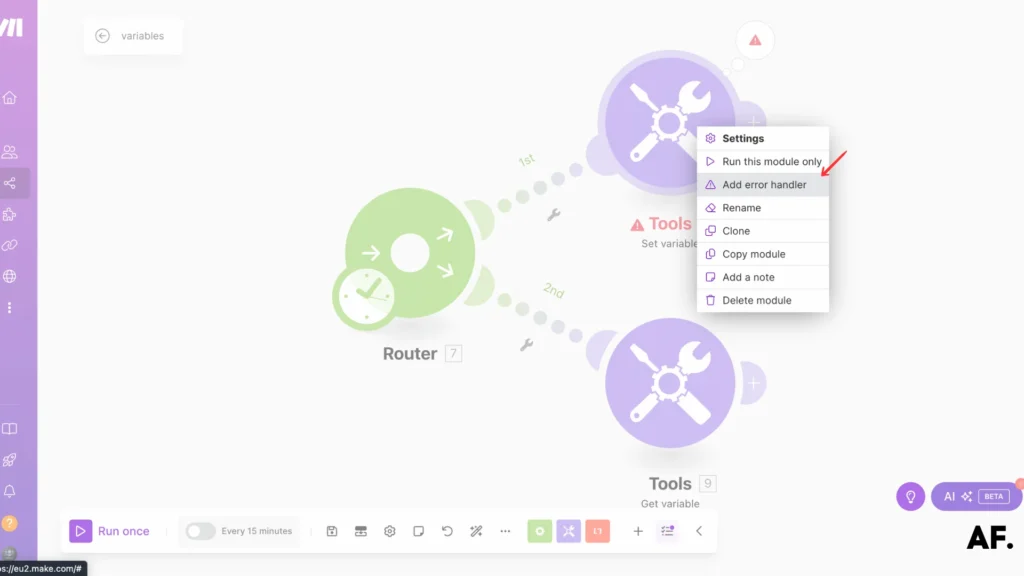
Let’s protect our workflow by adding error handling! Click ‘Add error handler‘ to create a safety net for your variables. This way, your scenario can gracefully handle any unexpected issues that might come up.
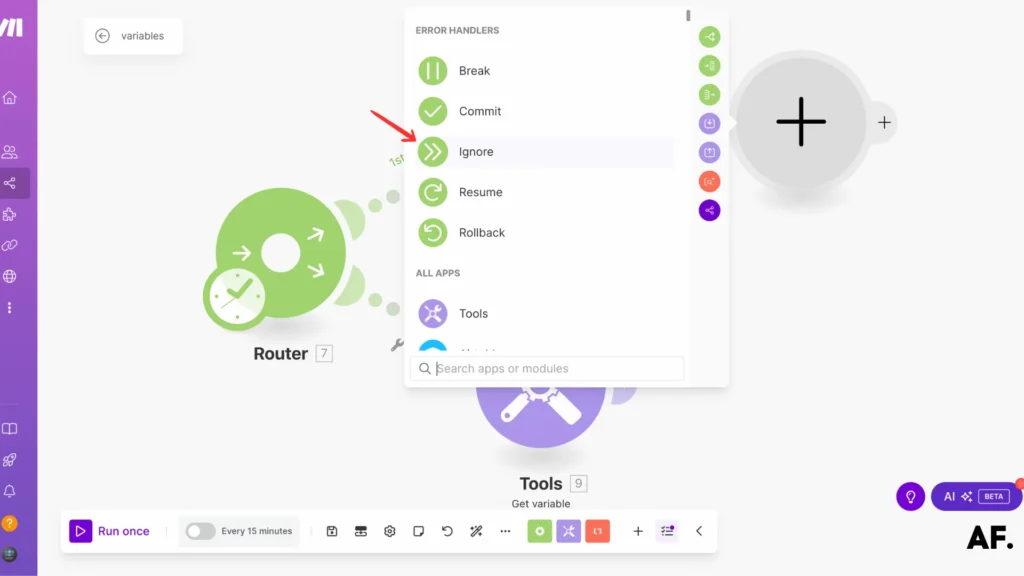
Select the ‘Ignore‘ option in your error handler for this case. This tells your workflow to continue running even if it encounters a minor hiccup with the variables. It’s like telling your scenario, ‘Keep calm and carry on!
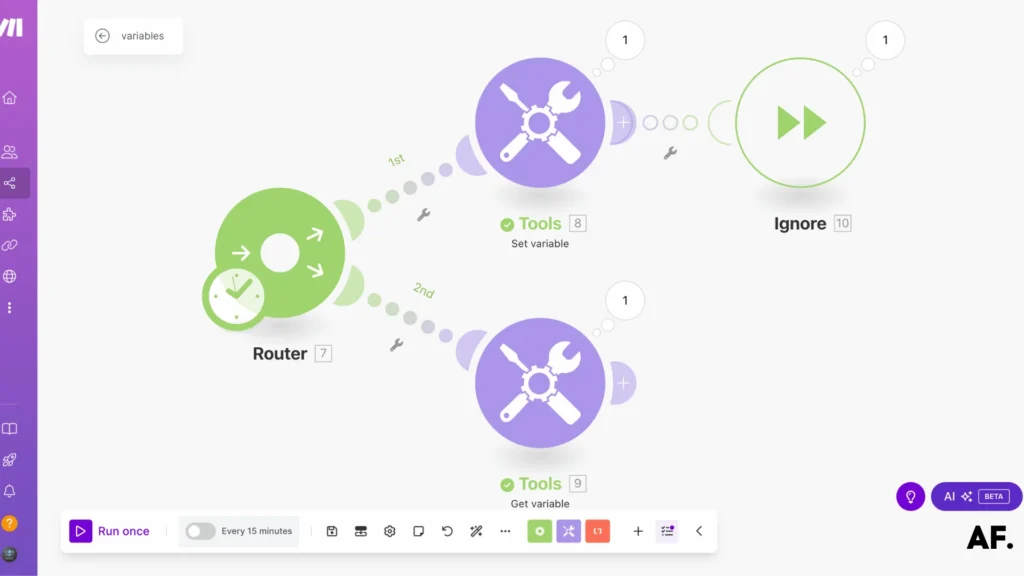
Success! With error handling in place, your scenario now smoothly continues its execution, even when small issues arise. It’s like having a backup plan that keeps your workflow moving forward.
Conclusion
Mastering variables in Make is your key to creating more efficient and powerful automation workflows. Remember, practice makes perfect, and don’t hesitate to experiment with different variable implementations. Start small, test thoroughly, and gradually build more complex scenarios. Ready to transform your Make automation game? Begin implementing these variable techniques today, and watch your workflows become more dynamic and robust!
FAQs
How do you use variables in workflow?
Variables store and transfer data between different parts of your Make workflow. You can use Set Variable to save information and Get Variable to retrieve it later.
How do you work out variables?
Create variables with the Set Variable module, give them names and values, and then access their stored data using Get Variable wherever needed in your workflow.

Further Ressources
- How to Do Web Scraping in Make
- How to Build an Automated Time Tracking System on Make
- The Ultimate Guide to Data Mapping in Make
- How to Automate Employee Onboarding in Make
- How to Send Automated Emails from Google Forms Using Make
- How to Use Canva to Automate Social Media Posts with Make
- How to Automate Invoice Processing with Make
- How to Build a Customer Support System Automation in Make