How to Use Filters in Make: A Complete Guide

Have you ever felt overwhelmed trying to manage your workflow automation in Make? You’re not alone! One of the most powerful yet often misunderstood features is the filtering system. Did you know that studies on data filtering indicate that properly implemented filters can significantly reduce unnecessary data processing, with platforms like Make reporting potential reductions of up to 80%? That’s a game-changer for your automation efficiency! In this comprehensive guide, we’ll walk you through everything you need to know about using filters in Make, from basic concepts to advanced techniques.

Let’s dive in!
What is Filter
Filters in Make are powerful tools that allow you to refine your data by applying specific conditions to your workflows. You can evaluate data based on various criteria, such as text, numbers, dates, etc. This enables you to create precise and efficient workflows that only process the needed data.
Make’s filter settings are highly versatile, allowing you to create complex filtering logic using operators like AND, OR, and NOT. These operators help you combine multiple conditions to fine-tune your data filtering. For example, you can set a filter to proceed only if a text contains a particular string and a number is within a specific range.
Filters can be applied to various data sources, including files, APIs, and databases. This flexibility ensures that no matter where your data comes from, you can always apply the necessary conditions to manage it effectively. Understanding filters is essential for creating efficient workflows that automate tasks and improve productivity.
Routes
Think of routes as pathways that connect different parts of your modules. They’re like signposts that guide your data from one module to another.
For a detailed guide on setting up routes, follow this link.

Filter settings
Filters allow you to set specific conditions and rules that shape your data’s behavior. You can easily add custom requirements to control your application’s flow with them.
Filters can also manage user data by setting specific conditions, such as filtering users by attributes like name and address.

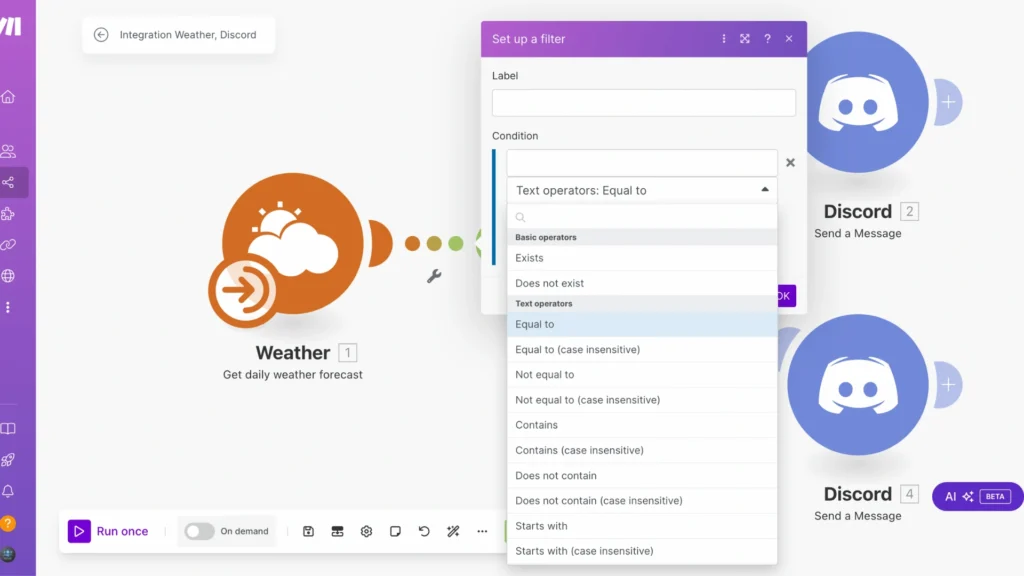
Setting up a filter is straightforward; click the filter option in your menu. Let me walk you through the process:

A modal window will pop up, presenting you with two or three key options: a label field where you can name your filter and a conditions section to set your specific requirements.

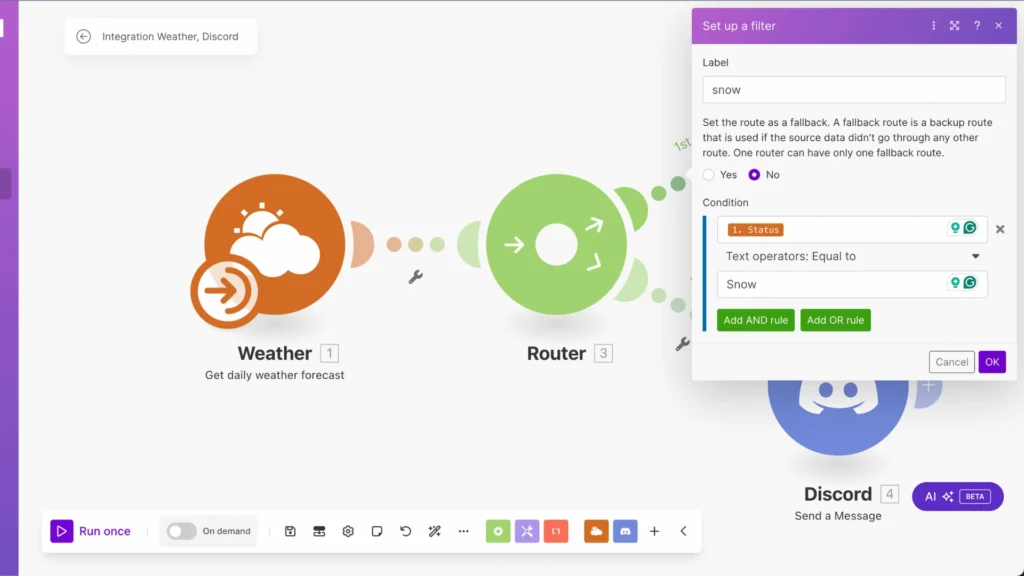
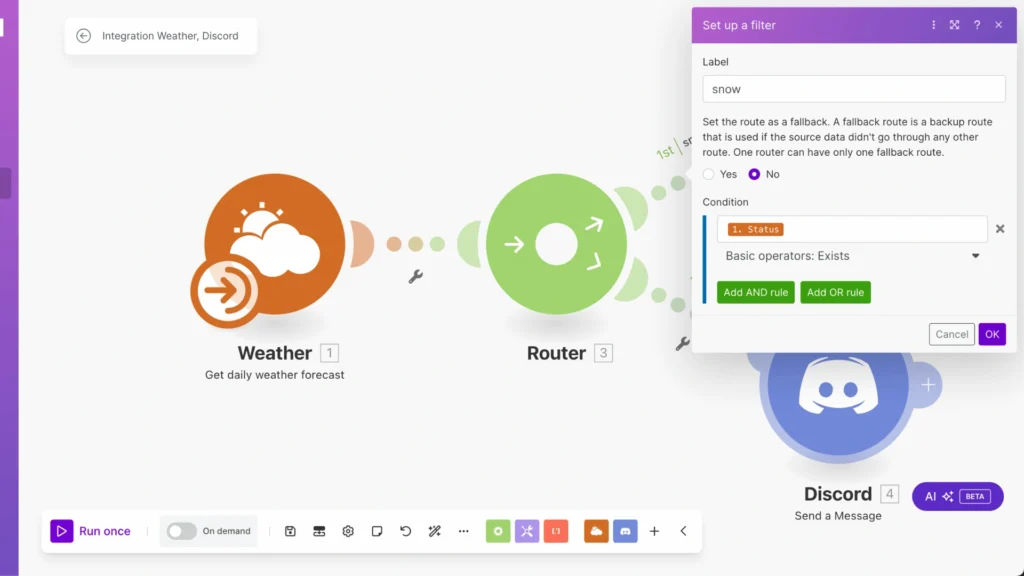
Let me demonstrate with a practical example: I’m creating a weather notification filter. In this case, I’ve set the filter to trigger when the ‘Status’ condition equals ‘snow’.
I’ve also labeled this filter ‘snow’ for easy reference. When these conditions are met, the system will automatically notify you. Similarly, you can filter users by setting conditions such as ‘name equals John’ and ‘address contains Main Street.’
After clicking ‘OK,’ your filter will appear like this:

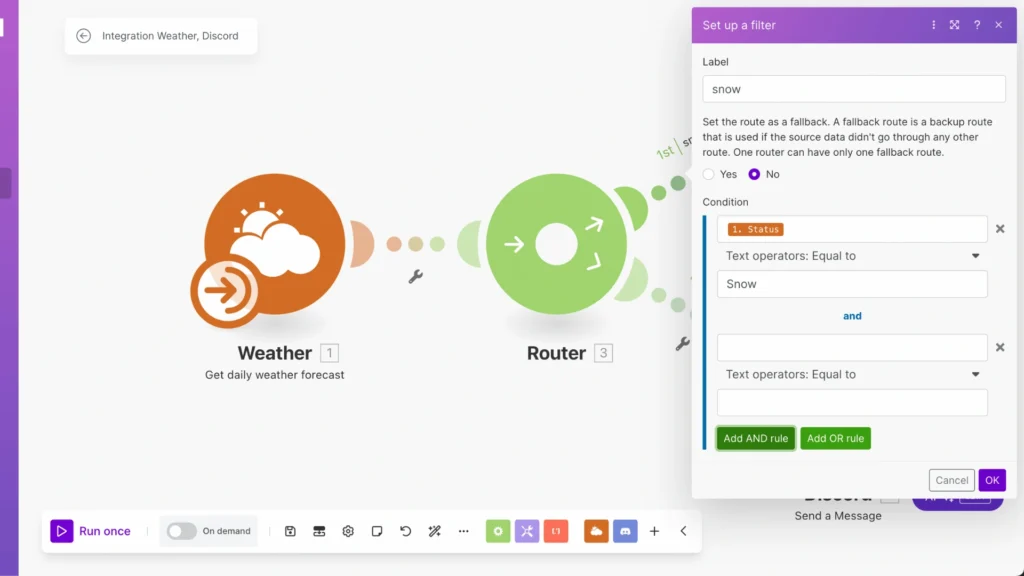
To make your filter more specific, you can combine conditions using the ‘Add AND rule’ button. This allows you to create filters that check for multiple conditions at once.
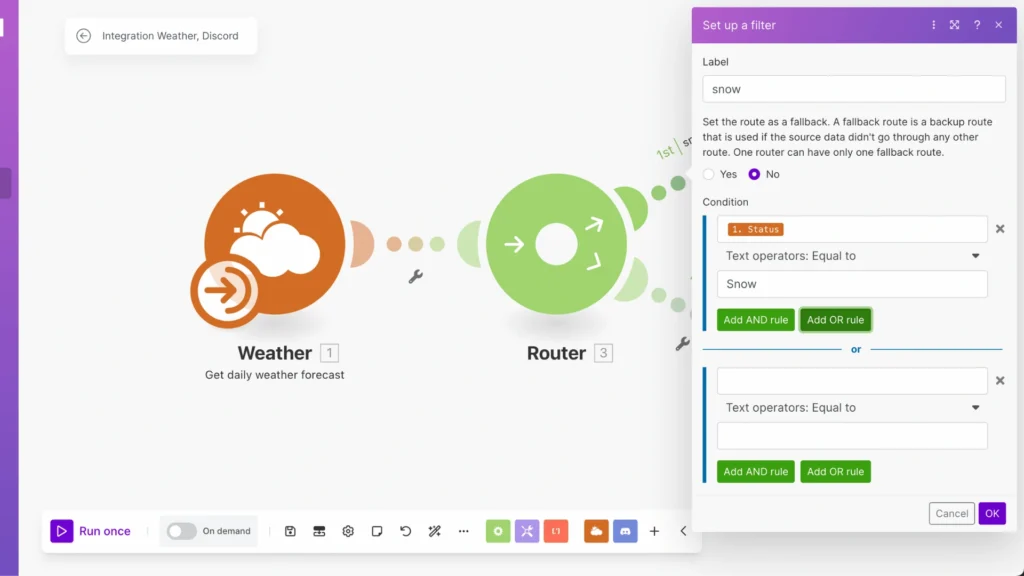
Need a more flexible filter? Click the ‘Add OR rule’ button to create alternative conditions. This lets your filter trigger when any one of your specified conditions is met.
Data types
- ‘Exists’ – checks if a value is present
- ‘Does not exist’ – verifies when a value is absent
- ‘Is equal to’ – matches exact values
1. Exists
The “Exists” operator is used to verify if a specific value is present. If the data is found, the route will proceed and execute the remaining modules. However, if the data is absent, the process will halt for that particular item and not continue with the subsequent modules.
2. Does not exist
The “Does Not Exist” operator functions as the inverse of the “Exists” operator. When data is missing, the route will proceed and execute the remaining modules. Conversely, if the data is present, the process will halt for that specific item and not continue with the subsequent modules.

3. Is equal to
The “Is Equal to” operator verifies if a specific value precisely matches the one you input into the filter. This is particularly helpful when you want only items with a particular value to proceed.

Fallback
If data passes through all the filters in a Router without matching any, you can utilize an else expression, known as a fallback route.
The fallback route handles all data that doesn’t align with any other specified routes, allowing you to process that data item. To activate this, ensure the “fallback route” option is set to ‘Yes‘ for the route you intend to use:
For a detailed guide on fallback routes, you can follow this link.


Working with Filters in Workflows
Filters can be used at various workflow stages to refine data and improve automation. By strategically placing filters throughout your workflow, you can ensure that only relevant data is processed, enhancing your automation’s overall efficiency.
You can use filters to evaluate data from previous steps and make decisions based on the results. For example, if a previous step retrieves a list of items, a filter can be used only to pass items that meet specific criteria to the next step. This selective processing helps in creating more streamlined and effective workflows.
Make’s filters can be combined with other workflow elements, such as conditions and actions, to create complex logic. This allows you to build sophisticated workflows that can handle a variety of scenarios. For instance, you can set up a workflow that sends different notifications based on the filtered data.
Filters also enable the creation of dynamic workflows that adapt to changing data and conditions. By using filters, you can ensure that your workflows remain flexible and responsive to new data inputs. This adaptability is crucial for maintaining efficient and effective automation solutions.
Using workflow filters can create more efficient and effective automation solutions. Filters help you manage data more precisely, ensuring your workflows are powerful and efficient. Start incorporating filters into your workflows today to improve your automation processes significantly.
Conclusion
Mastering filters in Make is a crucial skill that dramatically improves automation workflows. Remember, effective filtering isn’t just about setting conditions; it’s about creating more intelligent, efficient automation that saves you time and resources. Start implementing these techniques today, and you’ll see the difference in your workflow efficiency tomorrow!
Join the Newsletter
Subscribe to get our latest content by email.
We won’t send you spam. Unsubscribe at any time.
✅ You’re subscribed!
FAQs
How do you use the filter option?
To use the filter option in Make, click the filter icon between modules in your workflow. In the window that opens, enter a label for your filter and set your conditions (like “equals,” “contains,” or “greater than”). Click OK to save; your filter will only let data that matches your rules through. It’s as easy as setting up a basic if-then rule!