How to Use JSON in Make: A Comprehensive Guide

Did you know that over 95% of web APIs use JSON as their primary data format? If you’re working with Make (formerly Integromat), understanding JSON is crucial for creating powerful automated workflows! In this comprehensive guide, I’ll walk you through everything you need to know about handling JSON in Make, from basic concepts to advanced techniques. Whether you’re a beginner or an experienced user, you’ll find valuable insights to enhance your automation game!

Let’s dive in!
What You’ll Learn
This guide will show you how to:
- Set up an automation workflow.
- Create a JSON.
- Parse a JSON.
- Convert JSON into XML.
- Transform Data Records into JSON.
What is JSON
JSON (JavaScript Object Notation) is a universal language that helps different applications communicate. Think of it as a super-organized way to store and share data, like writing a detailed shopping list that any store worldwide could understand!
JSON uses a simple structure of key-value pairs and arrays at its core. The data is written in plain text, which makes it both human-readable and easy for machines to process. For example, if you were describing a person in JSON, it might look like this:
{ "name": "Sarah", "age": 28, "hobbies": ["reading", "hiking", "photography"] }JSON has become incredibly popular in modern web development because it’s:
- Lightweight and fast to process
- Easy to understand and write
- Supported by virtually all programming languages
- Perfect for APIs and web services
- Flexible enough to handle complex data structures
Whether you’re building a web application, working with APIs, or storing configuration settings, JSON will likely be part of your toolkit. Our tutorial above shows how JSON can help transform spreadsheet data into a format ready for modern web applications, and we’ll walk you through some JSON tools along the way.
How To Create Json
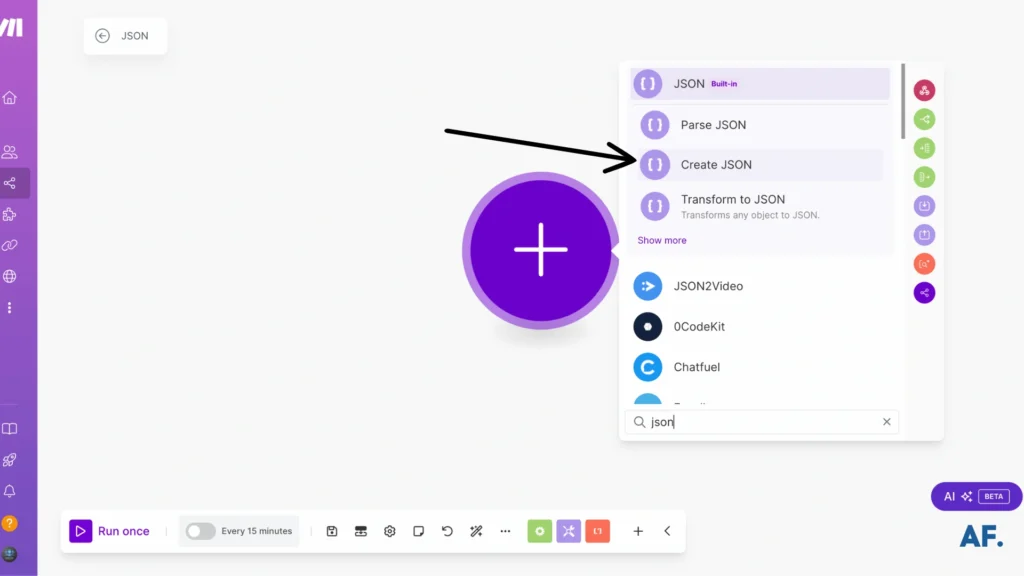
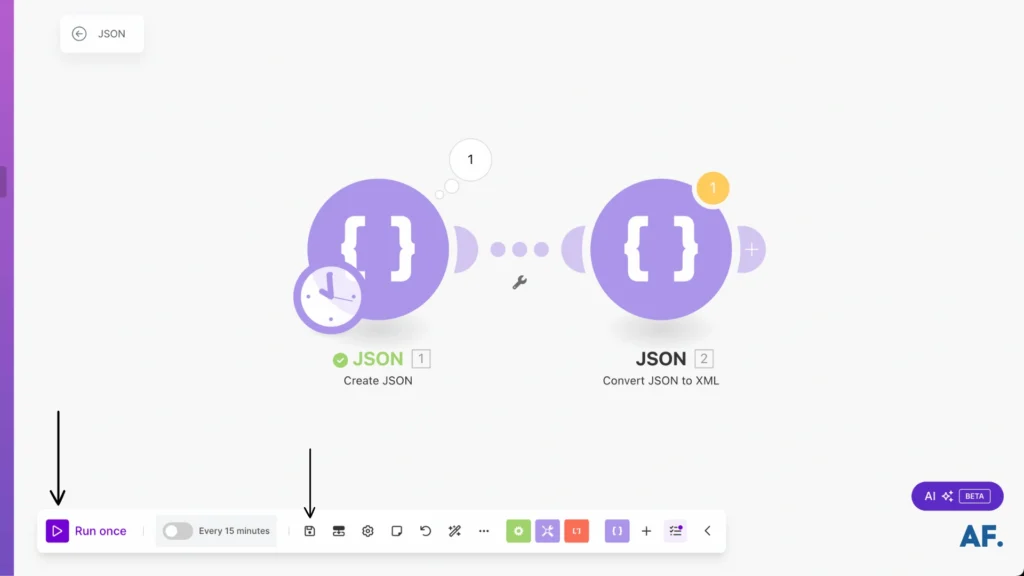
Let’s start by adding a new module to our project! First, go to Make’s dashboard and create your scenario; once created, look for the ‘+‘ button with the rounded edge. Click it, and a search bar will appear. Just type ‘JSON‘ there. Once you find it, go ahead and create your JSON module. Don’t worry; I’ll guide you through the following steps!
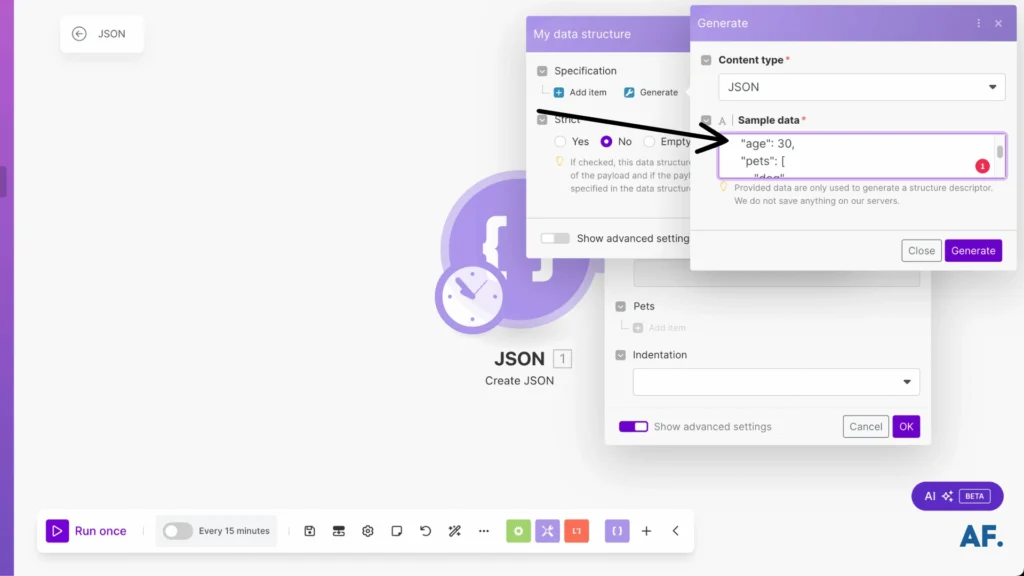
Now that you’ve added your module, let’s open it! You’ll see an ‘Add‘ button inside, go ahead and click that. Then, look for the ‘Generate‘ button and click it. This will help us set up our configuration.
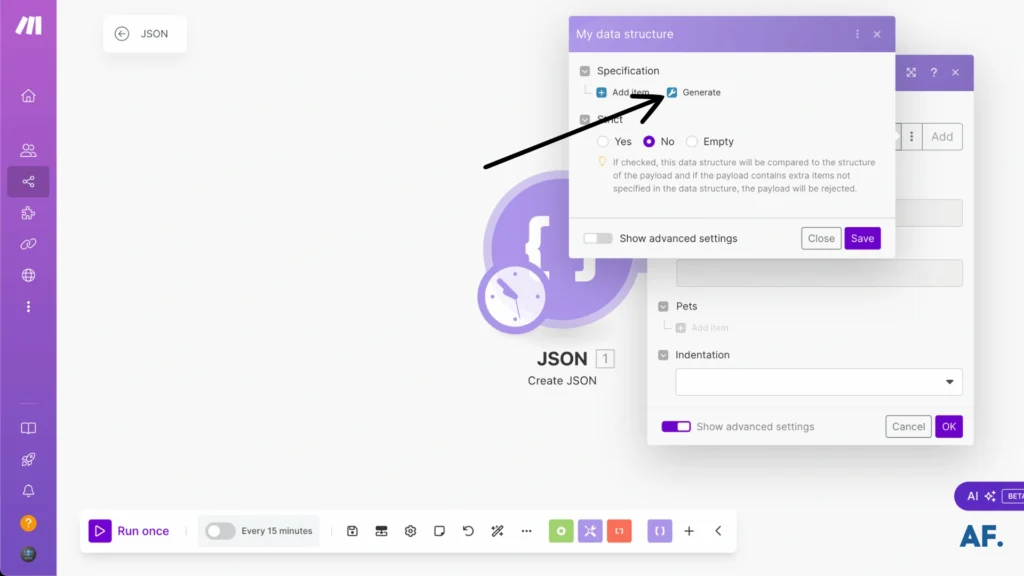
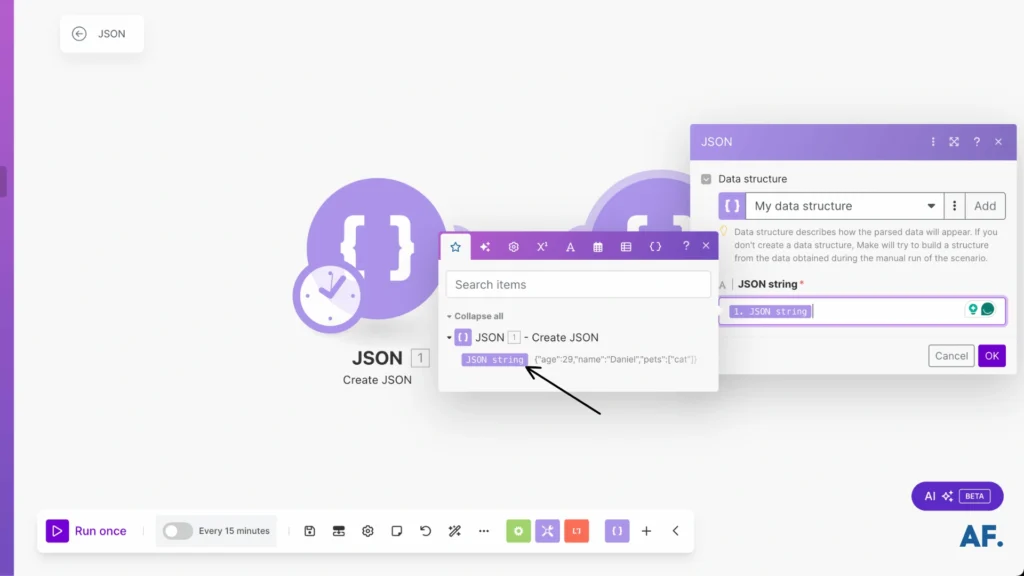
For this example, let’s use a simple JSON structure. Copy and paste the following JSON code:
{ "name": "John", "age": 30, "pets": ["cat"] }This is a basic example that shows different types of data: text (name), number (age), and an array (pets). Feel free to modify these values to match your needs!
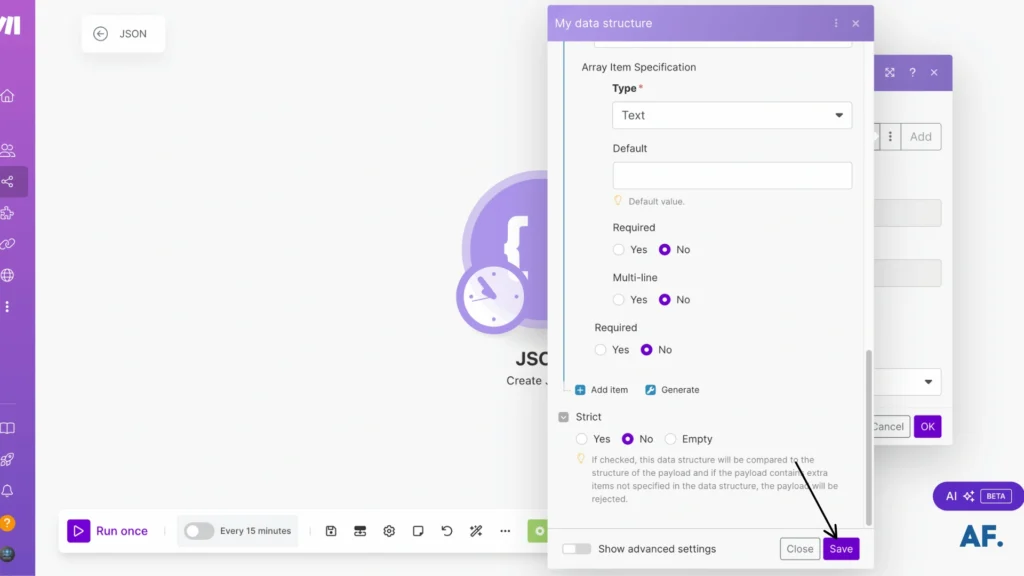
Great! Now that we’ve added our JSON remember to click the ‘Save‘ button to save our changes.
Now comes the fun part! After saving, you’ll see several input sections ready for your data. Feel free to let your creativity flow; you can add any information you’d like in these fields. Whether it’s text, numbers, or lists, fill them with data that makes sense for your project.
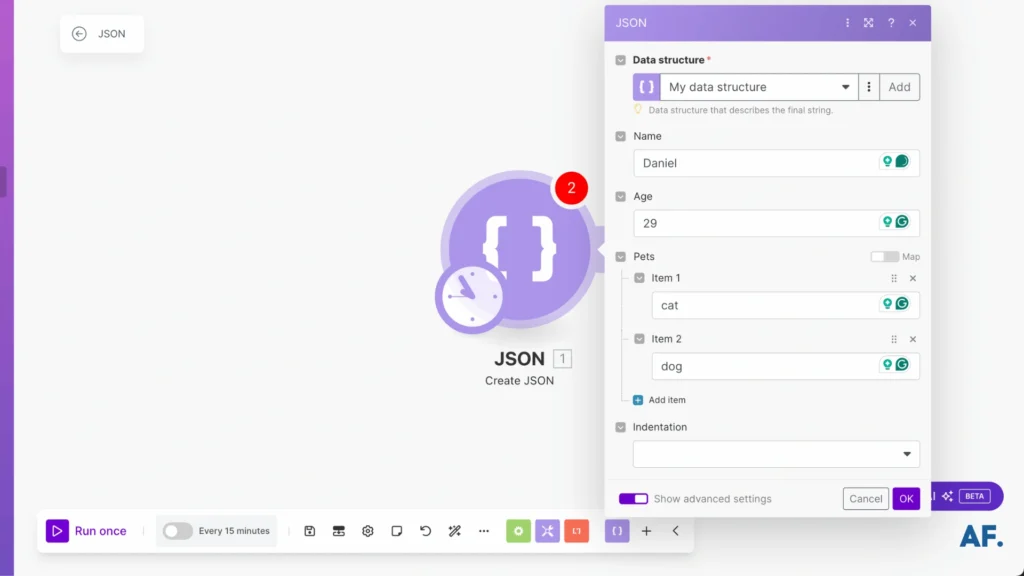
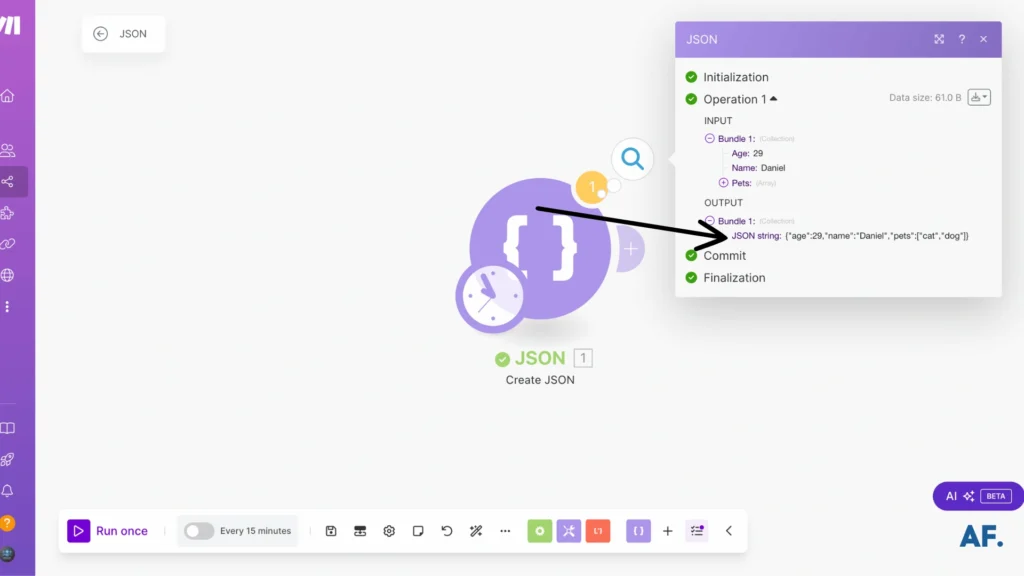
Perfect! Now that you’ve added all your data click the ‘OK‘ button and run your scenario. When it’s done processing, you’ll see your results appear, just like in the example below. ↓
How To Convert JSON to XML
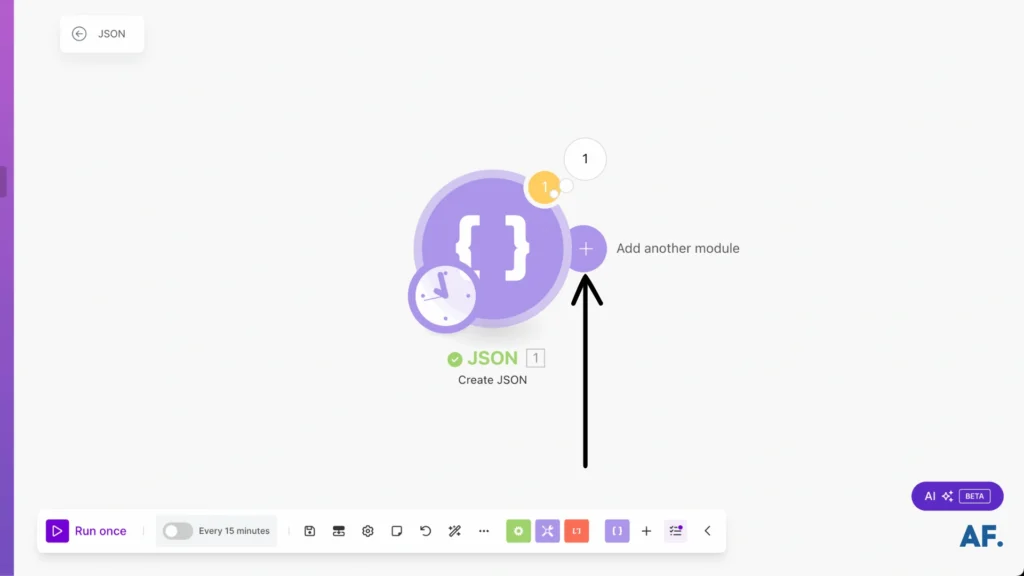
Let’s take our project to the next level by converting our JSON into XML format! Just like before, look for that friendly ‘+‘ button to add a new module. This will help us transform our data into a different structure.
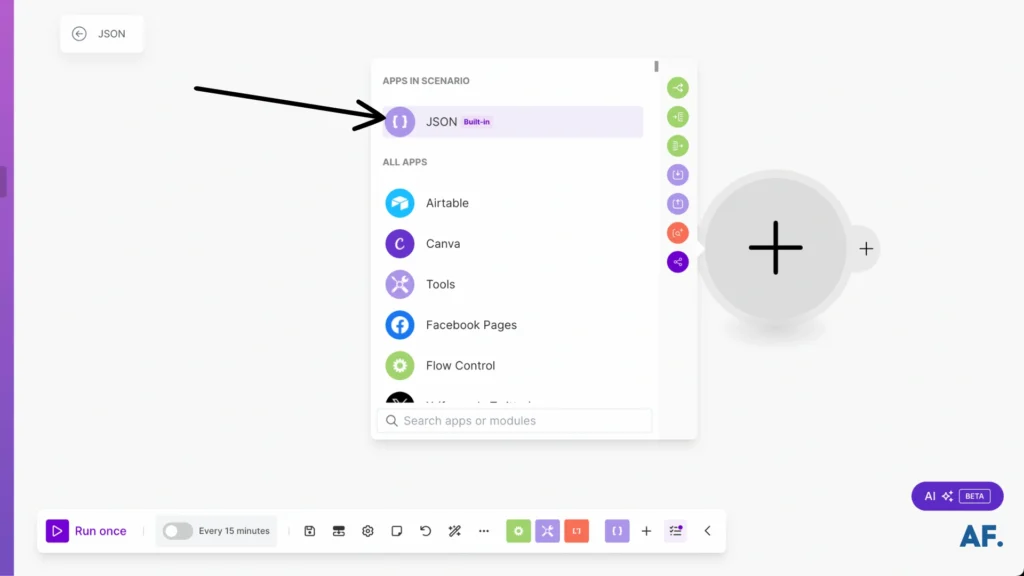
Look for ‘JSON‘ in the app selection menu and click it! This will enable us to work with our JSON data in the following steps. It’s similar to what we did earlier, but now we’ll use it for our XML conversion.
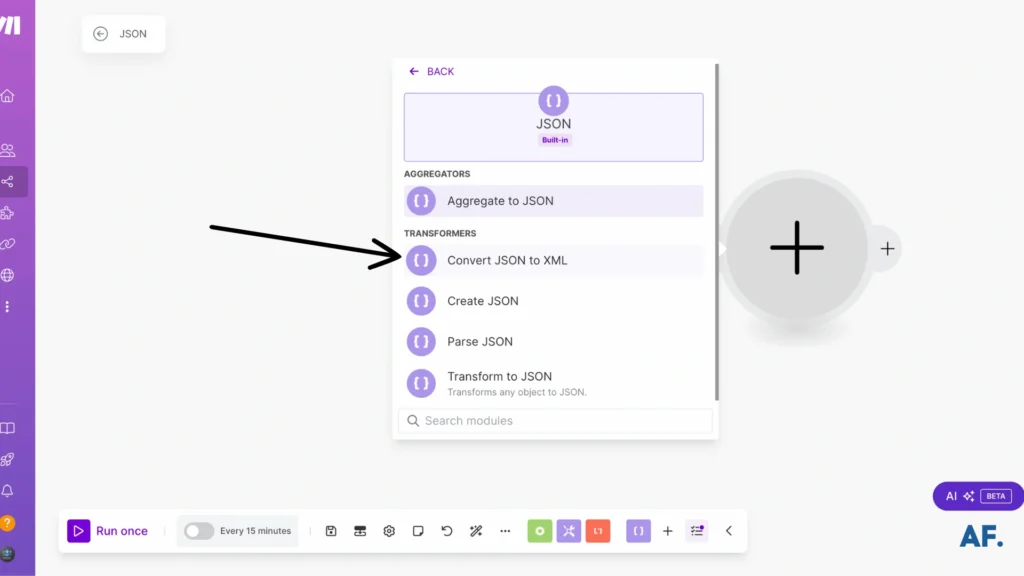
When the options menu appears, look for ‘Convert JSON to XML‘ that’s the one we want! This handy option will help us transform our JSON data into XML format. Go ahead and select it, and we’ll be one step closer to our goal!
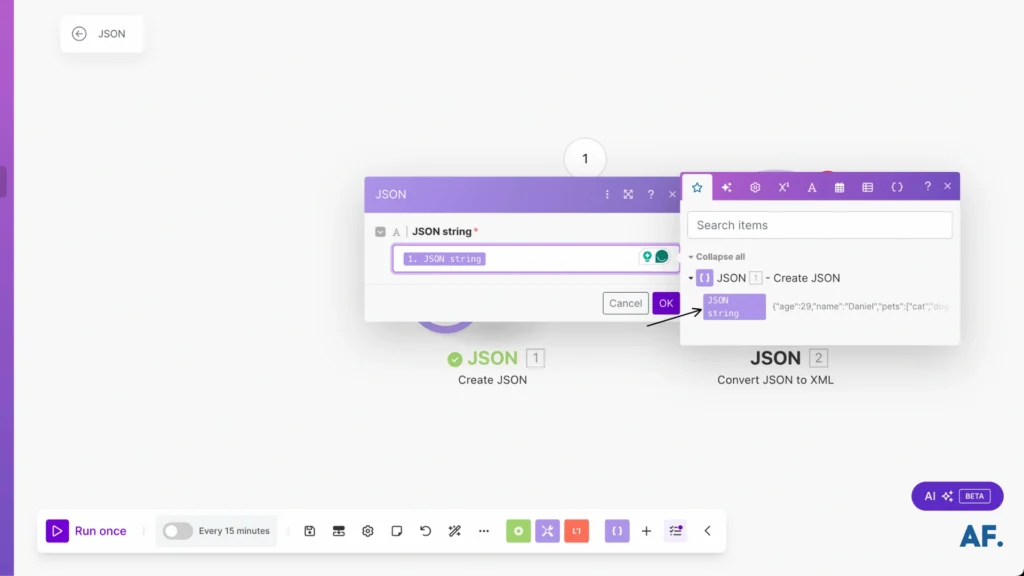
Now, we’ll connect our original JSON data from the ‘Create JSON‘ module we made earlier. This will be the source that we’ll transform into XML. Simply link it to our converter, and we’re almost ready to see the transformation happen!
Great progress! Now just hit the ‘Save‘ button to store your settings, and then execute your scenario.
And there you have it, your JSON has been beautifully transformed into XML! Take a look at the output below, where you’ll see your data now structured in XML format with tags and elements. Pretty cool, right? If everything matches what you were expecting, congratulations, you’ve successfully converted your JSON to XML! 🎉

How To Parse JSON
Next up, let’s explore something really useful, parsing our JSON data! This will help us break down and work with specific parts of our JSON structure. I’ll show you how to do this step by step.
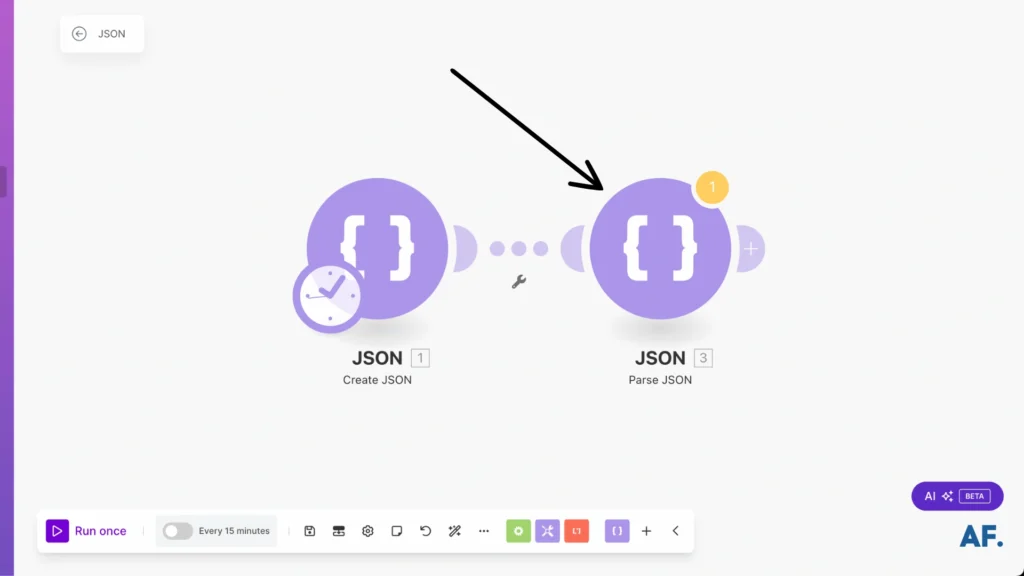
First, let’s grab the JSON we created earlier from our ‘Create JSON‘ module. Take that JSON data and insert it into the ‘JSON string‘ value field. This will be the source data that we’ll parse through
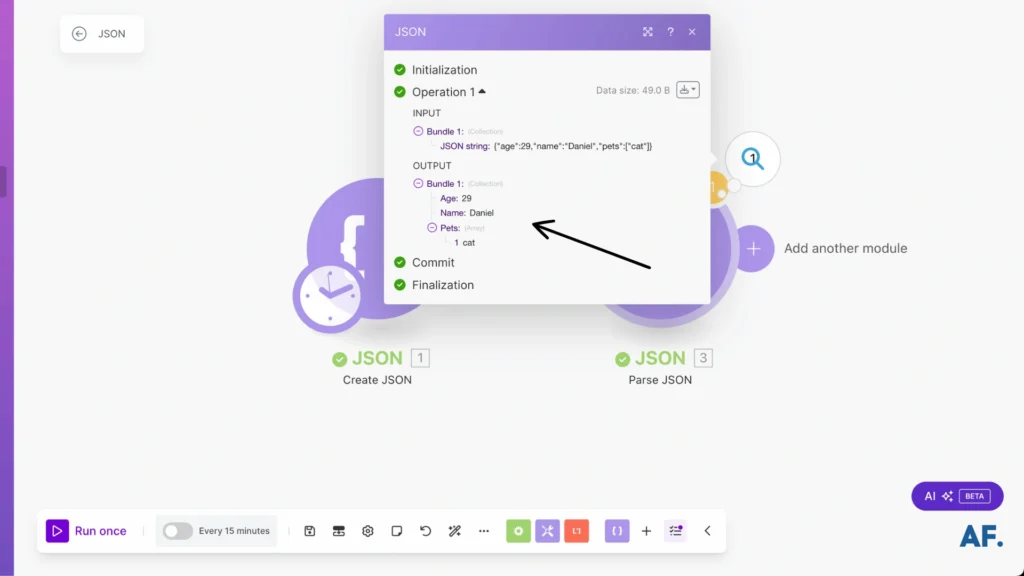
Now for the exciting part, hit that Run button and watch what happens! Your JSON will be neatly parsed, breaking down each piece of data into an easy-to-read format. You’ll see all your data elements clearly laid out, making it much simpler to work with individual pieces of information. Take a look at the results below! ⬇️
How To Transform Data Records to JSON
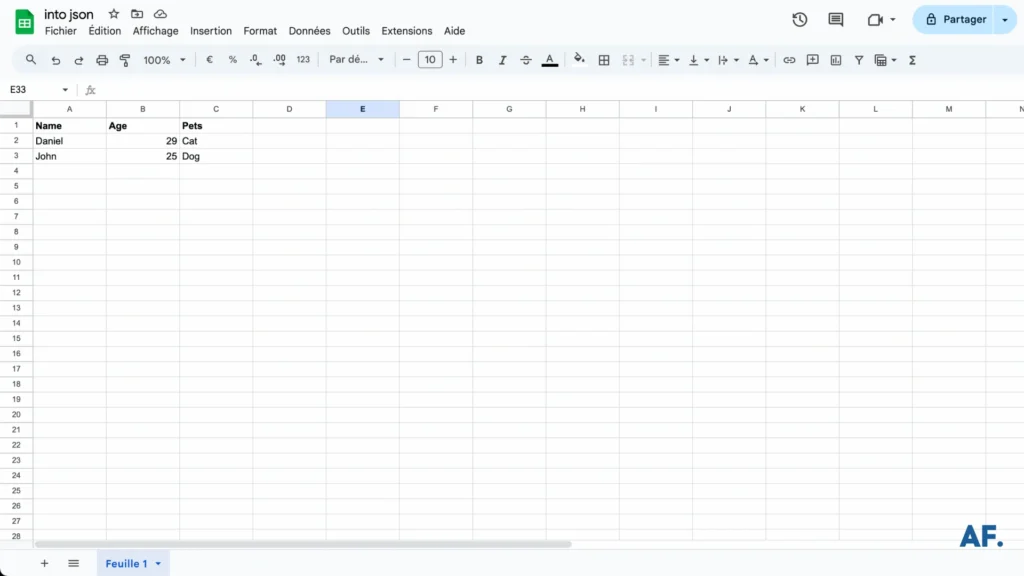
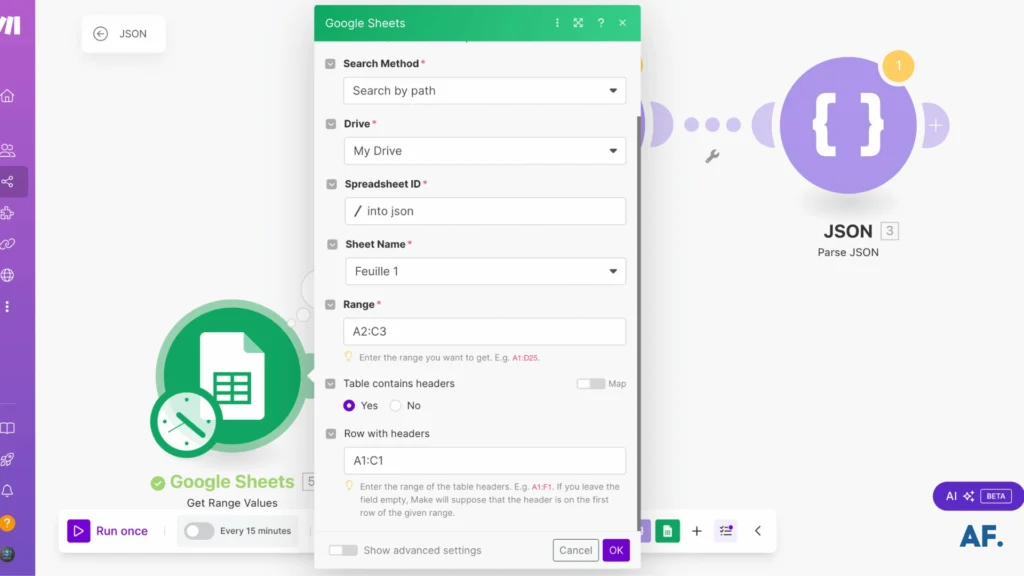
Now we will explore something practical, converting Google Spreadsheet data into JSON format! Let’s start at the beginning. I’ve already created a Google spreadsheet that we’ll use for this tutorial. This is perfect for when you have data in spreadsheet form that you need to work within your applications
- Put your spreadsheet ID
- Add your credentials
- Select the specific sheet you want to work with
Don’t worry if this seems like a lot; we’ll ensure everything connects smoothly!
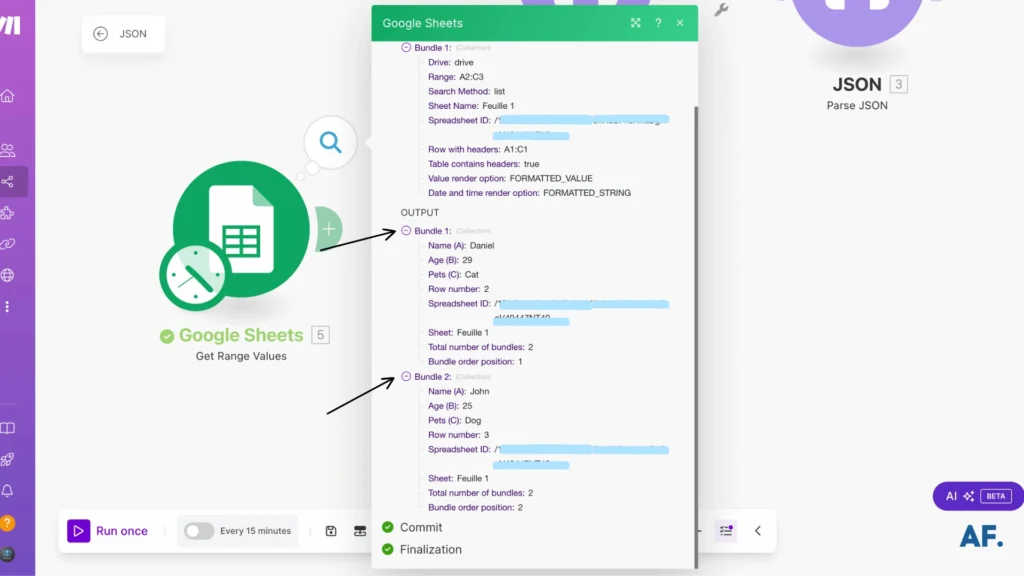
Once you run the scenario, you’ll see all your Google Sheets data appear! In our example, we can see all the information I entered in the spreadsheet, including the 2 bundles of data rows. Now you can confirm that all your spreadsheet data has been successfully pulled into our workflow. Pretty cool, right?
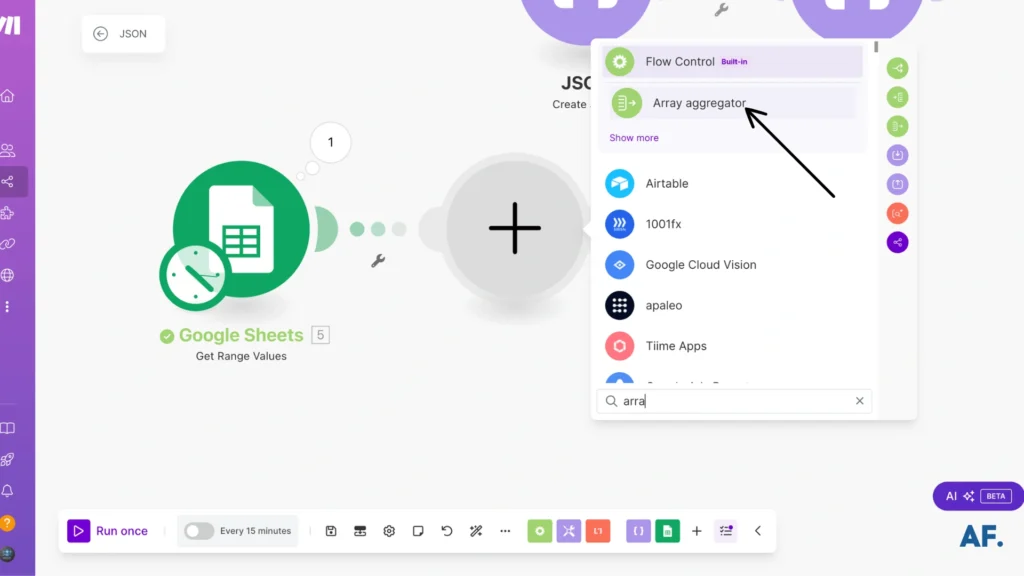
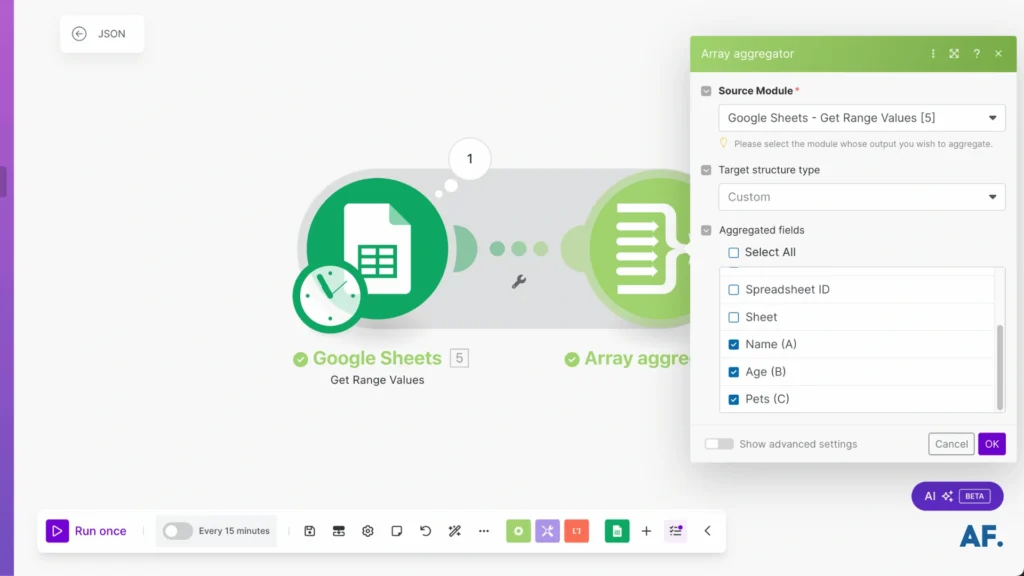
Now it’s time to organize our data! Let’s add an Array Aggregator module; this tool will help us properly collect and structure our spreadsheet rows. Just click the ‘+‘ button again and search for ‘Array Aggregator‘ to add it to our workflow.
- name
- age
- pets
Just click on each of these fields to include them in your array. This helps us organize exactly which pieces of data we want to process further. Your selection will determine what shows up in our final JSON output!
Time to bring everything together! Let’s create one more module – just like we did before, click the ‘+‘ button and search for ‘Create JSON‘. This module will help us transform our organized data into the final JSON format we’re looking for.

Now that your module is open let’s set up the data structure. Copy and paste this JSON template that will define how our data should be formatted:
{ "persons": [ { "name": "John", "age": 30, "pets": ["dog", "cat"] } ] }This structure will help organize our spreadsheet data into a neat JSON format, where each person’s information (name, age, and pets) will be stored in an array under ‘persons.’ As we did in the earlier JSON example, we’re now preparing it to handle multiple entries from our spreadsheet!
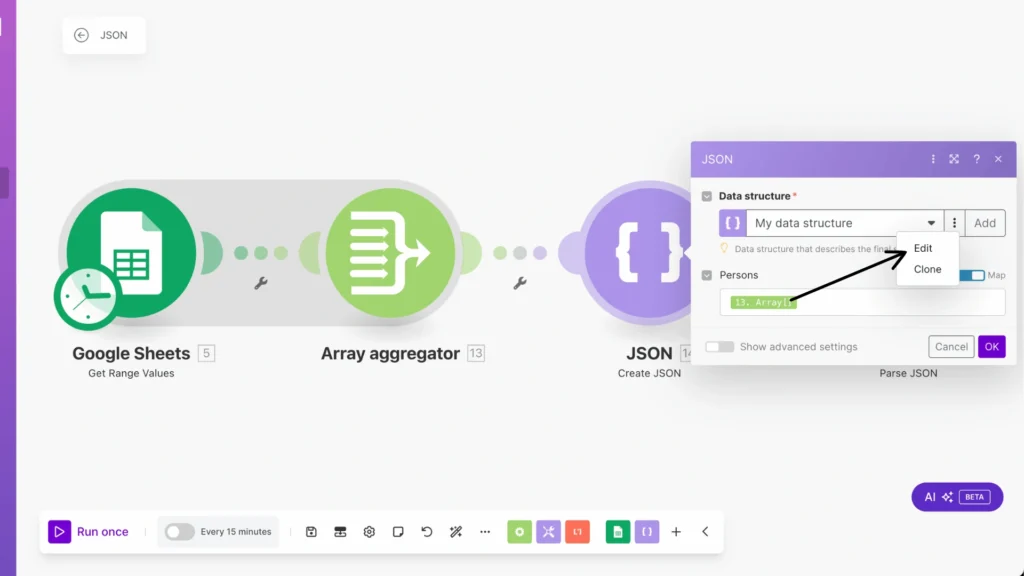
Let’s connect our data! Take the array we just created in the Array Aggregator and add it as the value for our ‘persons’ array.
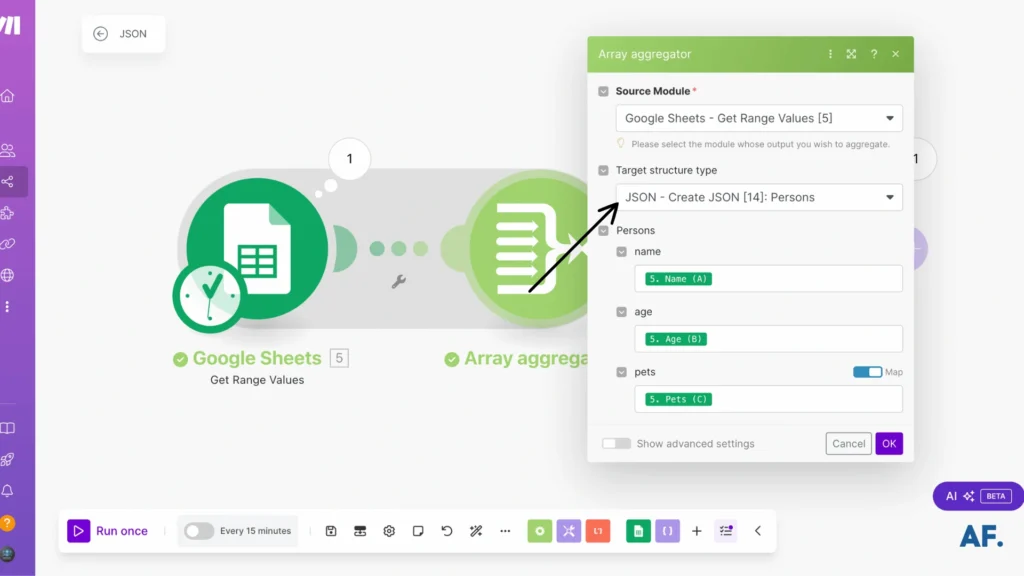
Now let’s make one quick connection! Return to your Array Aggregator module, and find the ‘Target Structure Type‘ setting. From the options available, select the ‘Create JSON‘ module we just set up. This tells our aggregator how to format the data perfectly for our JSON structure!
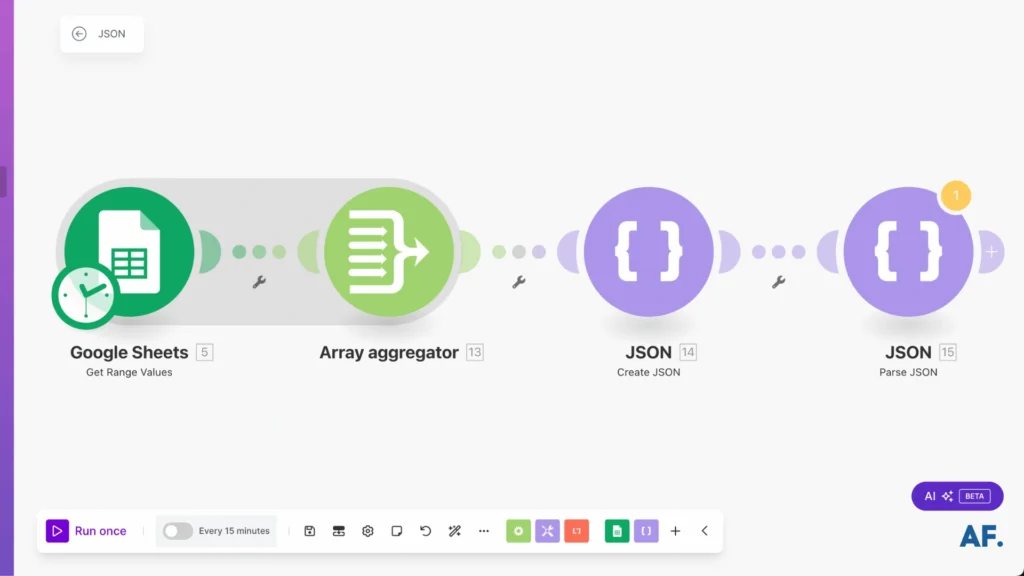
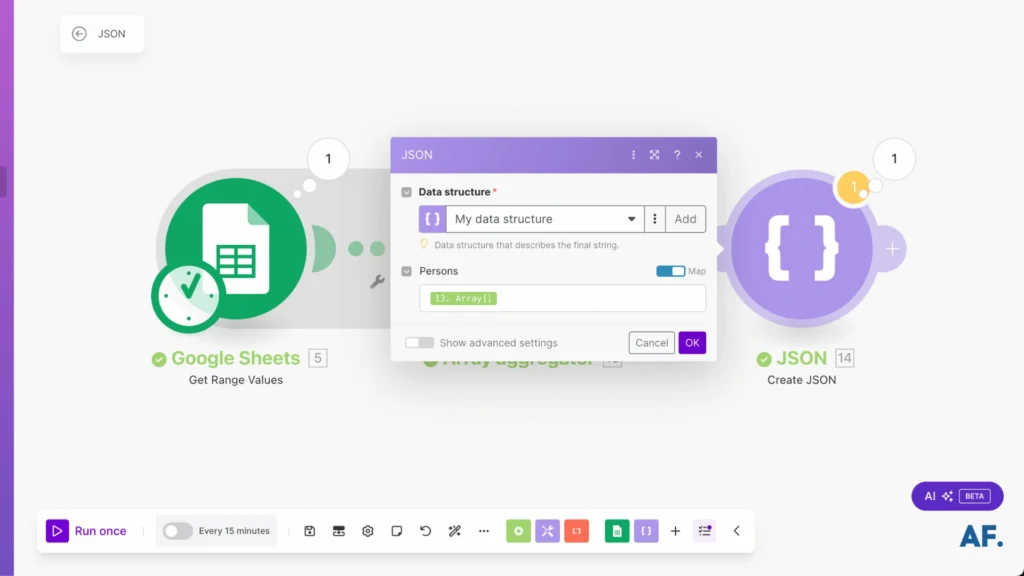
Take a look at your complete scenario workflow – everything should be connected and ready to go! As a bonus tip, you can add a Parse JSON module at the end if you want to break down and verify your JSON output. This can be super helpful for testing and ensuring everything works exactly as planned!

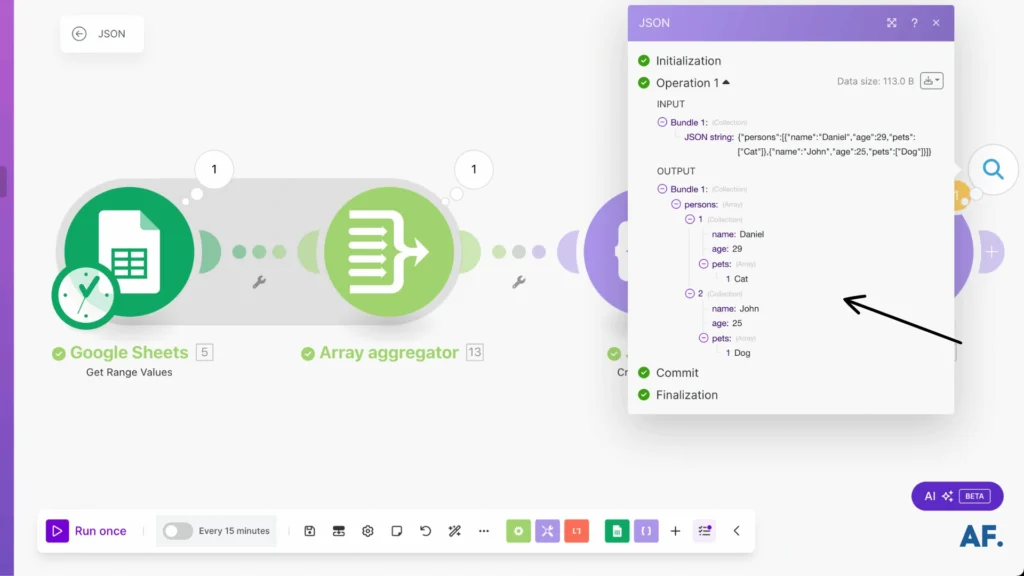
And there you have it, your Google Sheets data has been successfully transformed into perfectly formatted JSON! 🎯 Take a look at the output below, where you’ll see all your spreadsheet rows neatly organized in JSON format, complete with the structure we designed. If you add the Parse JSON module, you can even see your data broken down into its individual components.
You’ve just created a powerful automation that converts spreadsheet data into JSON, which is a super helpful skill for data processing and API integrations!

Conclusion
Working with JSON in Make doesn’t have to be intimidating! Following this guide’s techniques and best practices, you’ll be well-equipped to handle JSON data in your automated workflows. Remember to validate your JSON structures, use appropriate parsing methods, and organize your mappings. Ready to put these skills into practice? Start by implementing one new JSON technique in your following Make scenario!
Further Resources
- How to Schedule Automations in Make
- How to Automate Photo Pins on Pinterest with Make
- How to Automate Twitter with Make
- How to Automate YouTube Shorts with Make
- How to Automate Facebook Posts with Make
- How to Automate Instagram Posts with Make
- How to Easily Use the Router Module in Make
- How to Automate Photo Posts on Reddit with Make