How to Automate Twitter with Make
Are you tired of manually posting tweets throughout the day? Did you know 75% of businesses say automation saves them at least 4 hours weekly? Welcome to your comprehensive guide on automating Twitter posts with Make! Whether you’re a social media manager juggling multiple accounts or a business owner looking to maintain a consistent online presence, automation is your secret weapon.
In this guide, we’ll walk you through the steps to set up powerful Twitter automation workflows using Make (formerly known as Integromat), one of the most versatile automation platforms available! We’ll keep it simple: You only need Canva and Twitter modules, and we’ll show you how to automate Twitter via posting videos and photos directly with Make.

Let’s dive right in!
What You’ll Learn
This step-by-step guide will show you how to:
- Set up Twitter automation workflow.
- Connect Canva for automated design publishing.
- Post automatically to the Twitter
Prerequisites
Before we begin, you’ll only need:- A Make account
- A Twitter Account
- Canva accounts for design creation
Remember to save :

Setting Up Your Twitter Account

- Create a developer account at developer.twitter.com
- Generate your API keys and tokens
- Enable read and write permissions
Understanding Make and Its Twitter Integration Capabilities
Let me share my experience working with Make’s Twitter integration capabilities. Learning all the ins and outs of this powerful automation tool has been quite the journey.
First, Make (formerly Integromat) offers incredibly robust Twitter integration options that I’ve found invaluable for social media management. When I started exploring the platform, I was amazed by how many Twitter-specific modules were available right out of the box.
The core Twitter modules in Make allow you to do almost anything with your Twitter account. You can post tweets, monitor hashtags, track mentions, and manage your follower lists. One feature that particularly impressed me was the ability to search tweets using complex queries, which saved me countless hours of manual social listening.
Here’s what I’ve found to be the most useful Twitter modules in Make:- Tweet Creation (supports text, images, and videos)
- Tweet Search (with advanced filtering options)
- Tweet Monitoring (for hashtags and keywords)
- Follower Management
- Direct Message handling
Something that initially caught me off guard was the rate-limiting. Twitter’s API has specific constraints that Make must work within. I learned that you must carefully plan your scenarios to avoid hitting these limits, especially if you run through frequent automation.
The authentication process is straightforward, but keep your Twitter API credentials secure. Make handles most of the complex OAuth stuff behind the scenes, which is a massive relief if you’re not technically inclined.
Pro tip: Always test your Twitter scenarios with small batches first. I once made the mistake of running an untested automation that accidentally posted the same tweet 50 times – not my finest moment!
Creating Your First Twitter Automation Scenario
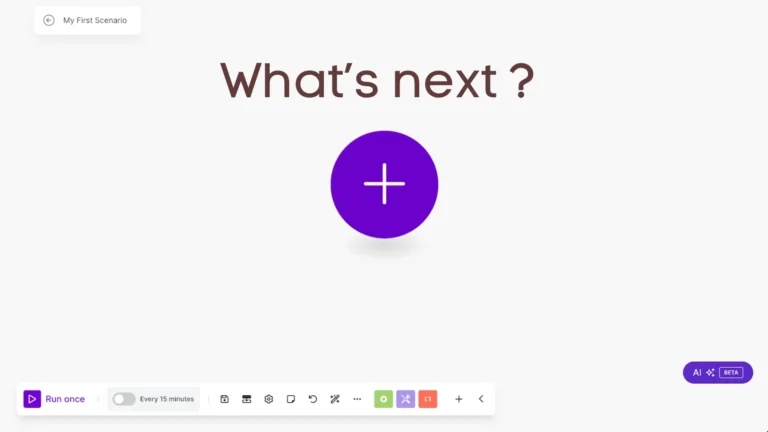
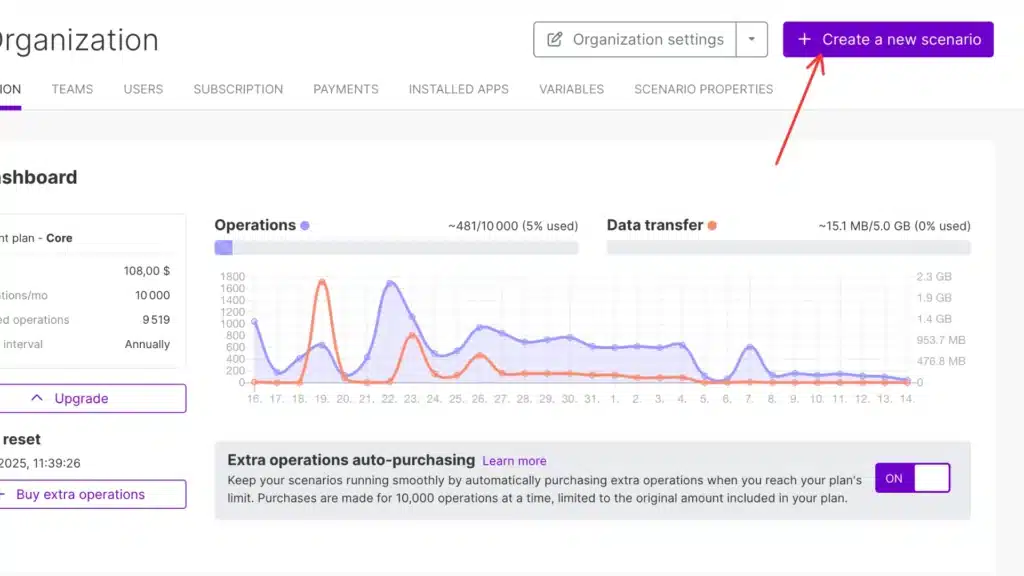
Step 1: Create your scenario
First, let’s create your scenario
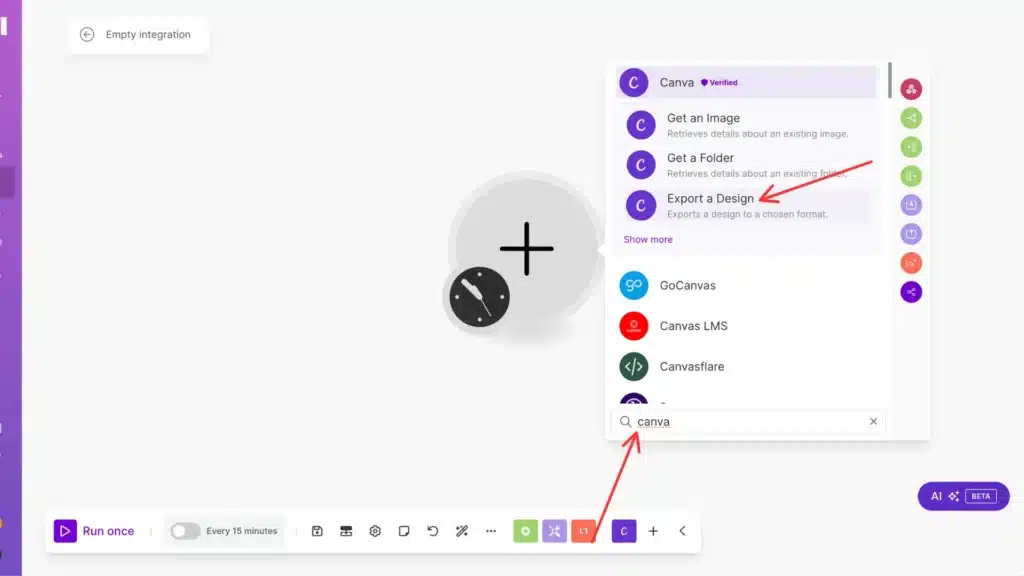
Step 2: Add Your first module
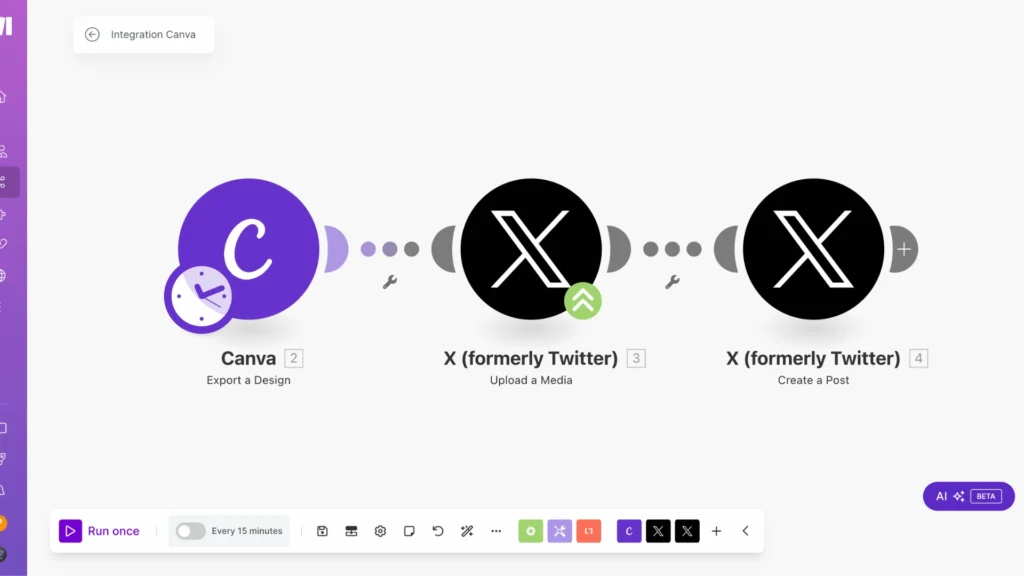
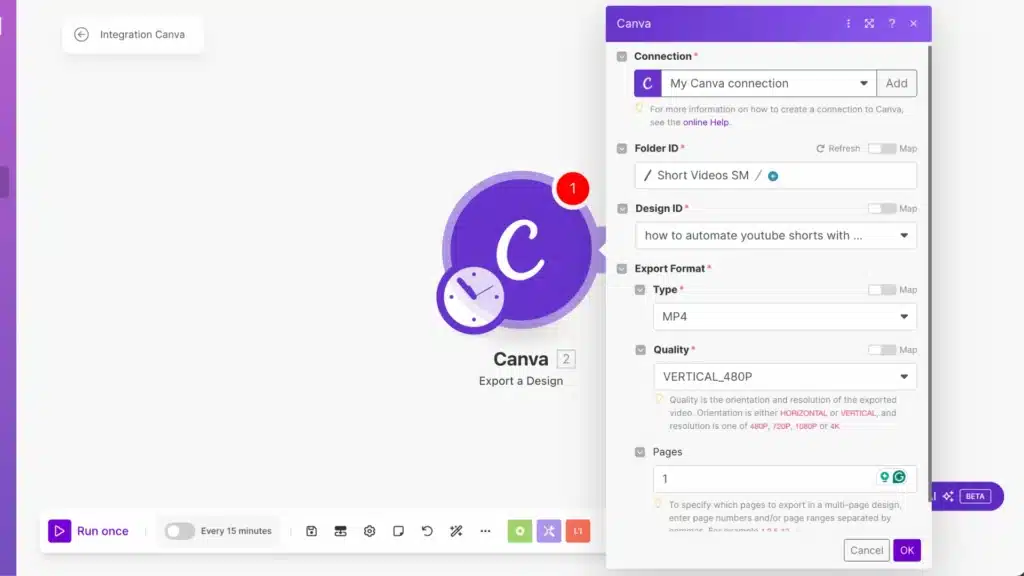
First, type ‘Canva‘ into your search bar. Once there, look for the ‘Export a Design‘ module and add it to your workspace.
Export image :
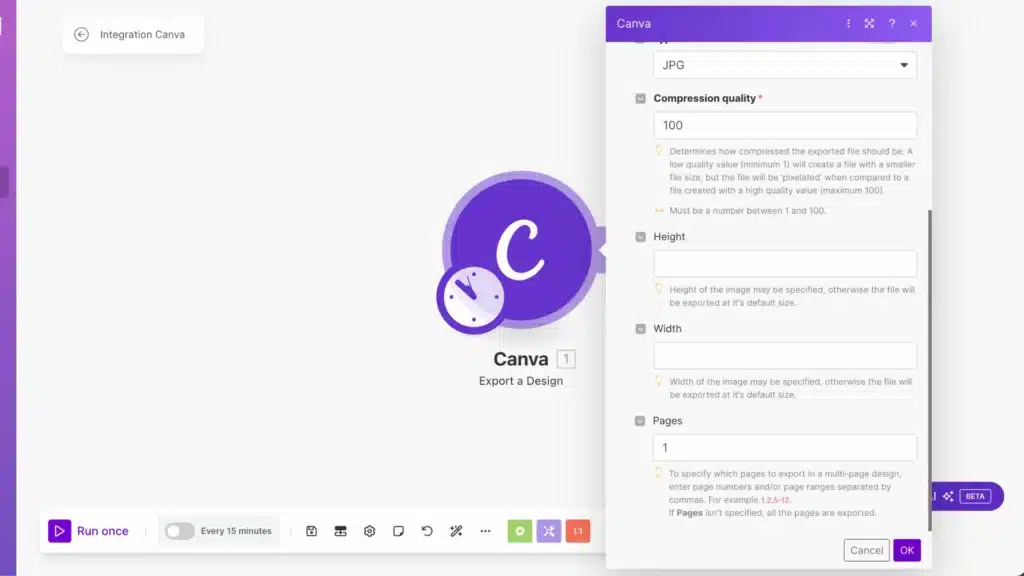
When you’re ready to export an image, follow these steps: First, pick a folder. Then, click on the design you’d like to export. Let’s choose JPG as the image format; it’s standard and works well for most purposes.
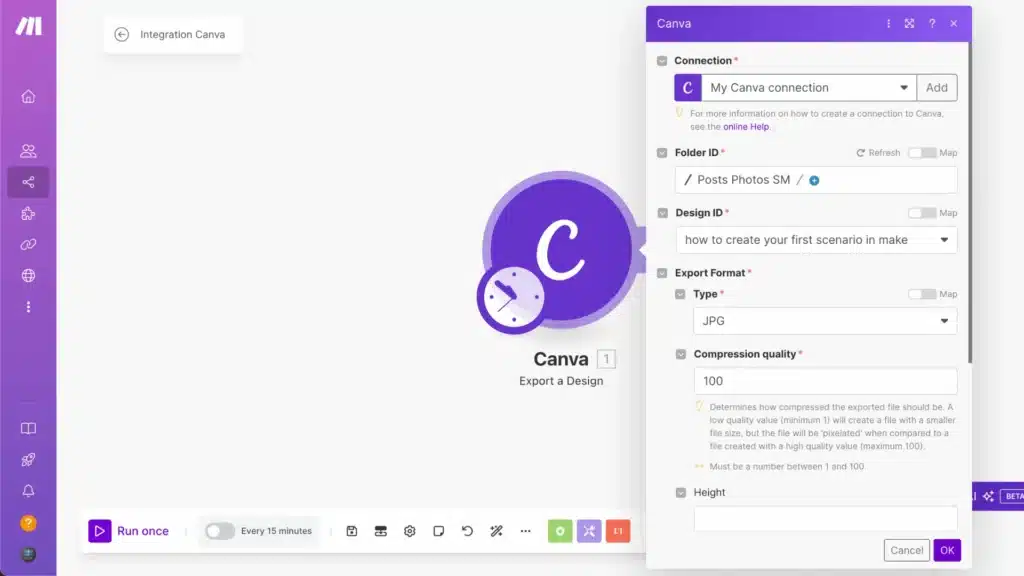
If your design has multiple pages, remember to type in the page number you want to export.
Export video :
Now, let’s talk about exporting videos; it’s pretty similar but with a few extra steps. Here’s what you’ll want to do: Start by picking the folder where you have the design. Then, click on your design to select it. You’ll see some video options for the format choose the one that works best for you.
Oh, and don’t forget to set the quality level; depending on how you plan to use the video, this can be important. Last thing: if your design has multiple video pages, type in which page number you want to export. Easy peasy!
Step 3: Add the Twitter module
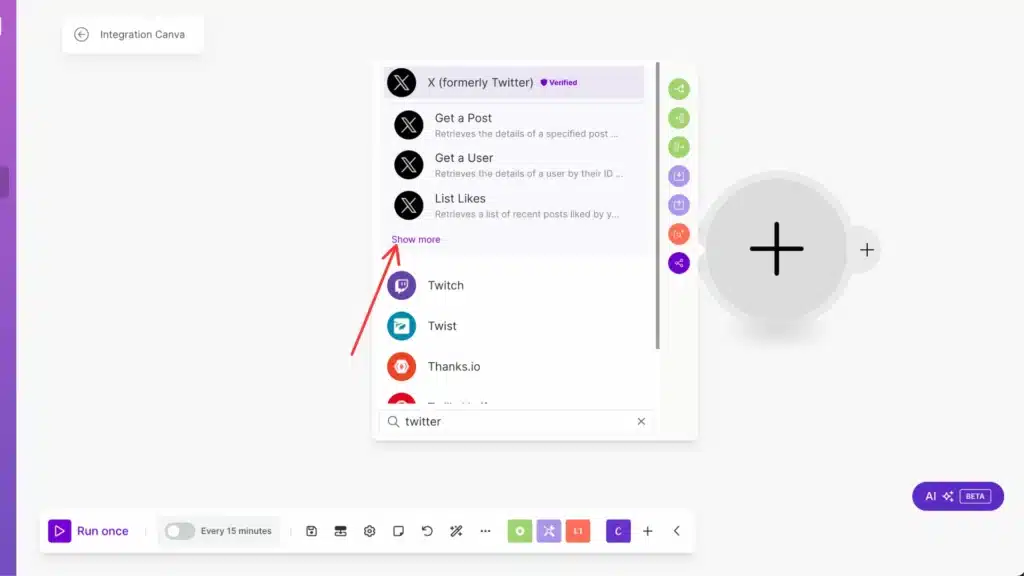
Great! The next step is super simple: just type ‘Twitter‘ then click “Show more“:
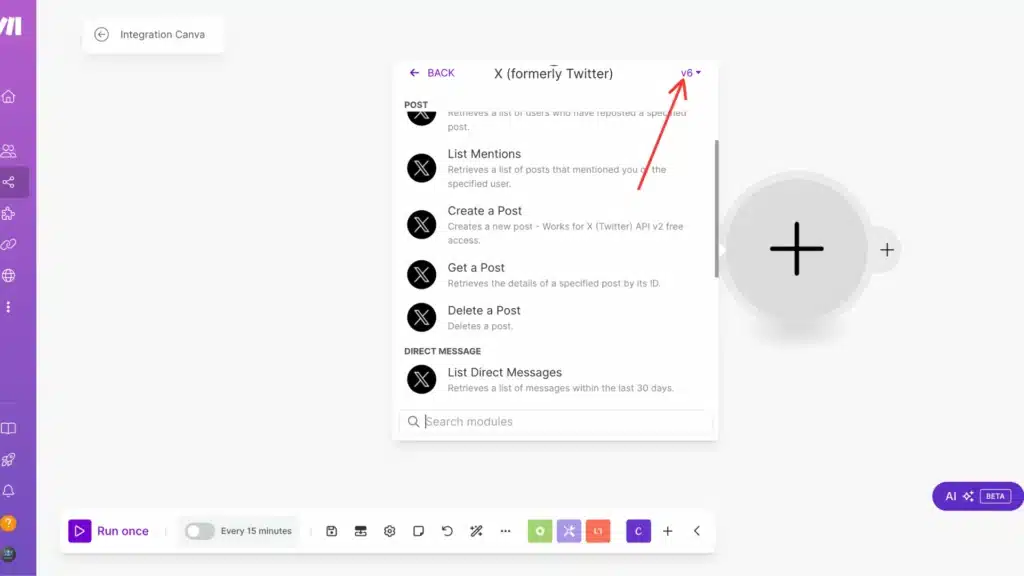
After that, you’ll need to switch quickly – just change ‘v6‘ to ‘v5‘. It’s a small but important detail!
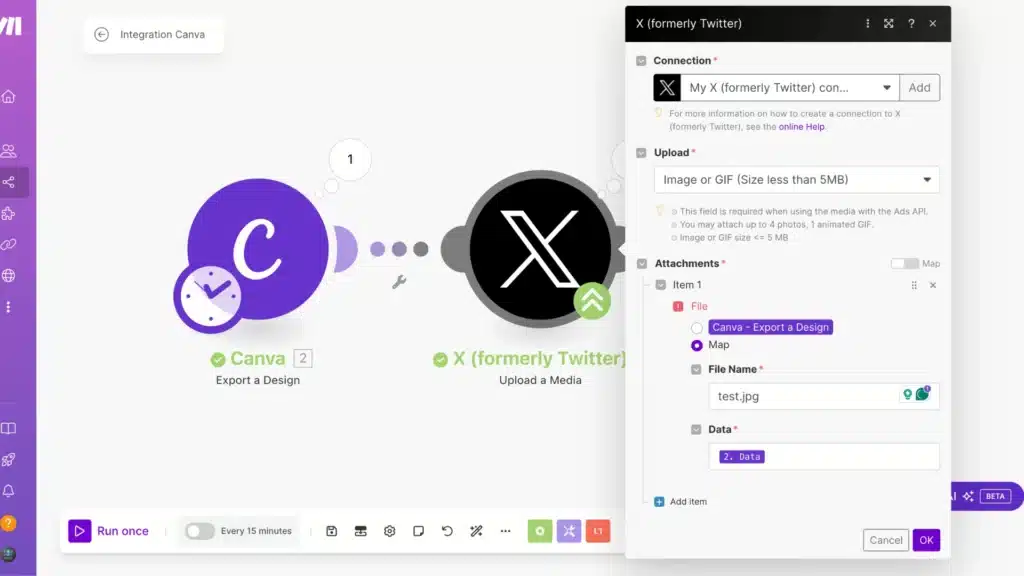
Next, look for the ‘Upload a Media‘ option and click it. That’s where we’ll handle your media files.
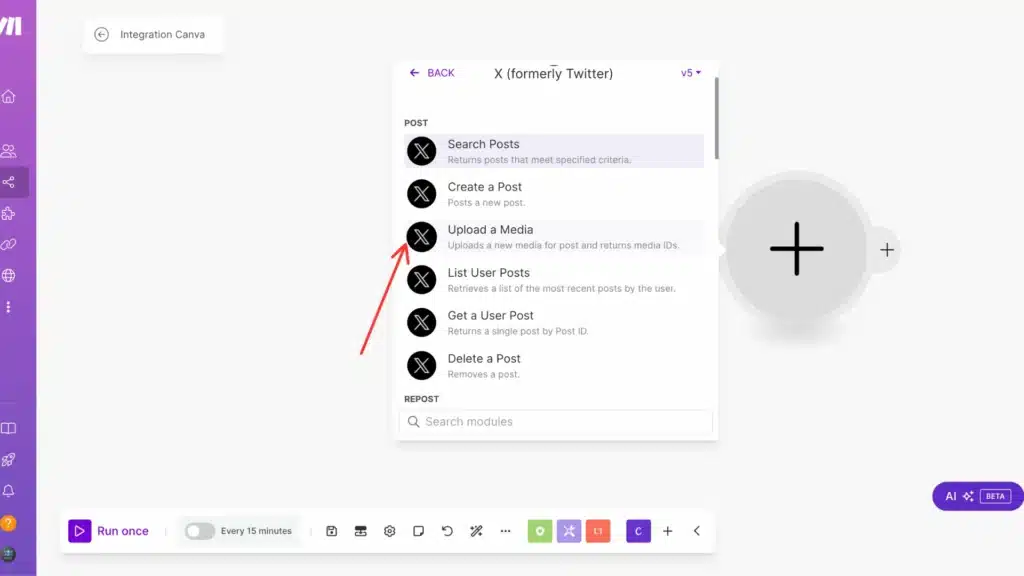
Then, here, you can choose an image or video option to start uploading :
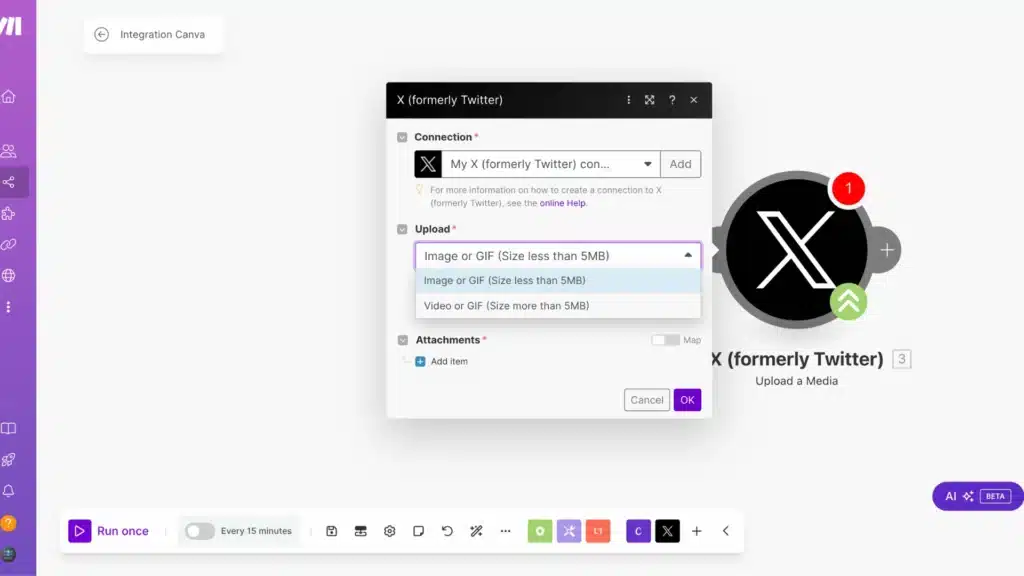
Image :
If you choose an image, select the map folder, then give your file a name. Don’t forget to add ‘.jpg‘ at the end. This tells the system we’re working with a JPEG image.
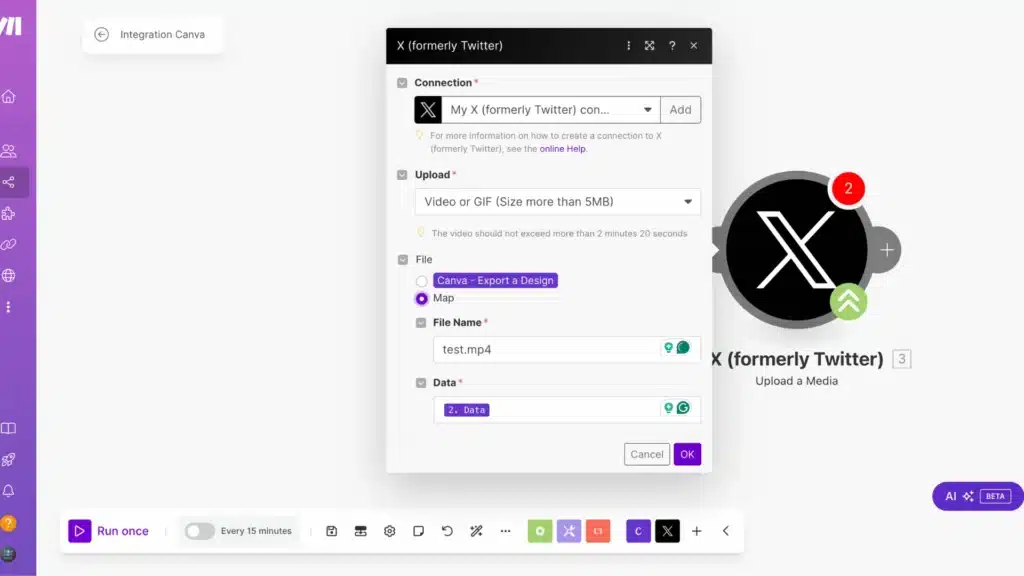
Video :
if you’re uploading a video instead, do the same thing, but add ‘.mp4‘ to your filename. That’s the standard format for videos!
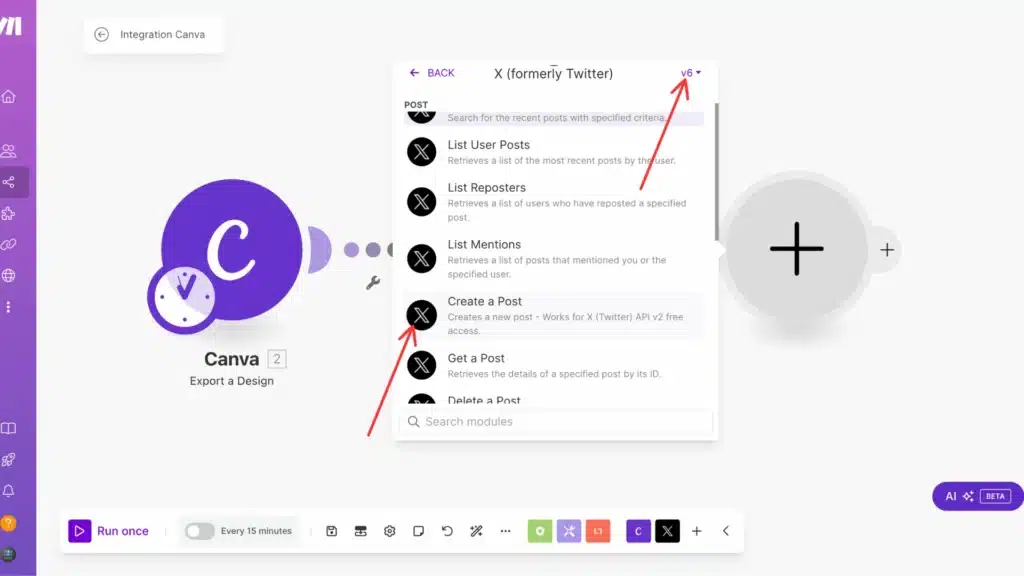
Step 4: Create a Post Twitter module
All right, we will add one more module. First, switch that v5 back to v6 (basically undoing what we did earlier), and then look for ‘Create a Post’ and select it. It’s as easy as that!
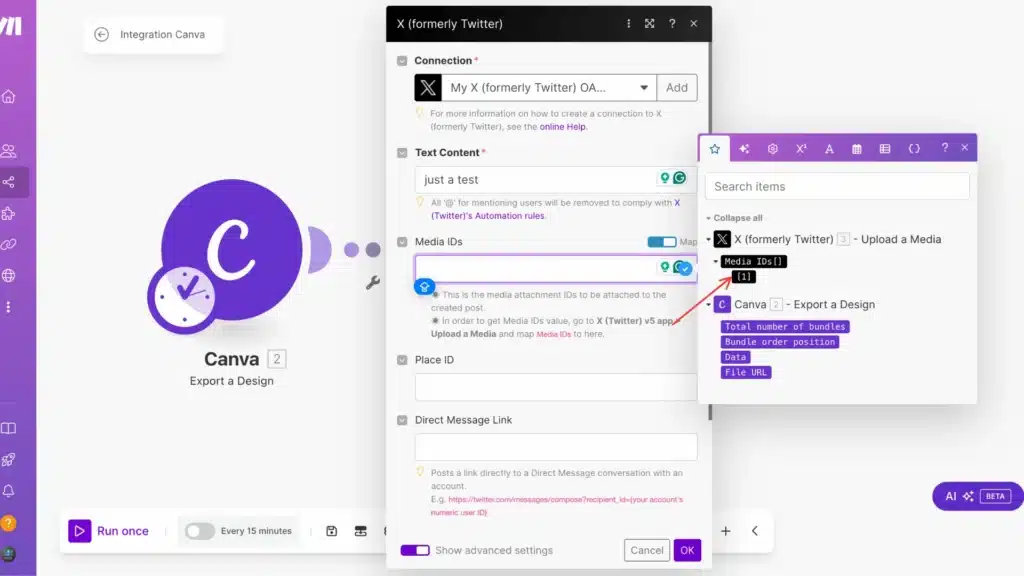
Next up, you’ll want to find and click on ‘Show advanced settings, ‘ which will give us a few more options!
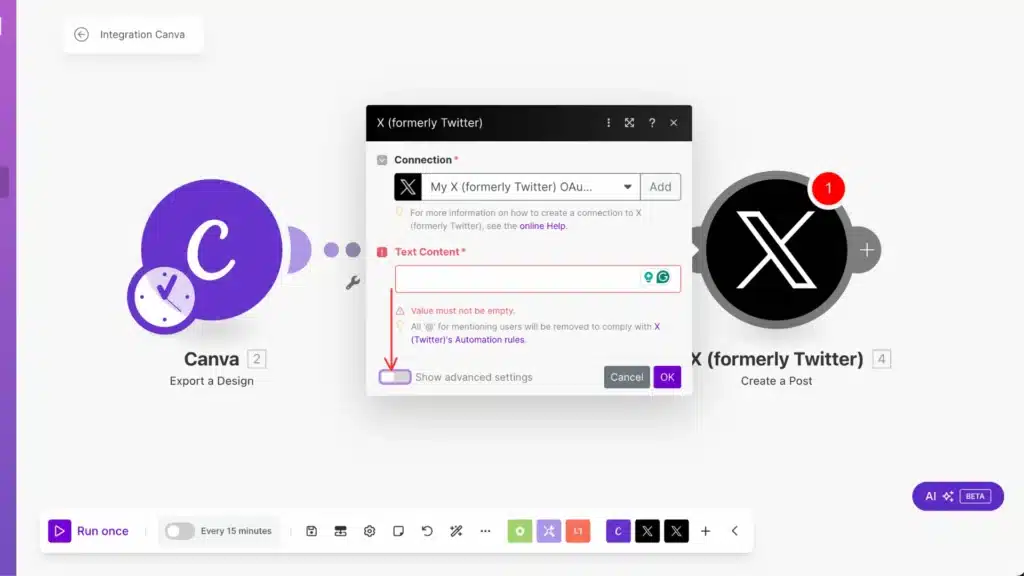
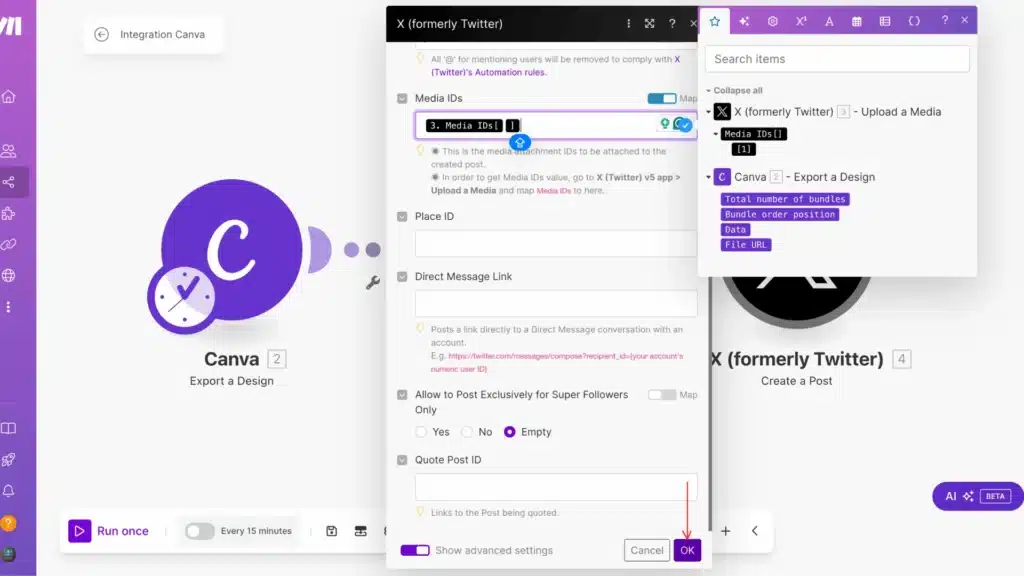
then put your media ID, the unique number that identifies your upload!
Just hit that ‘OK‘ button, and you’re all set!
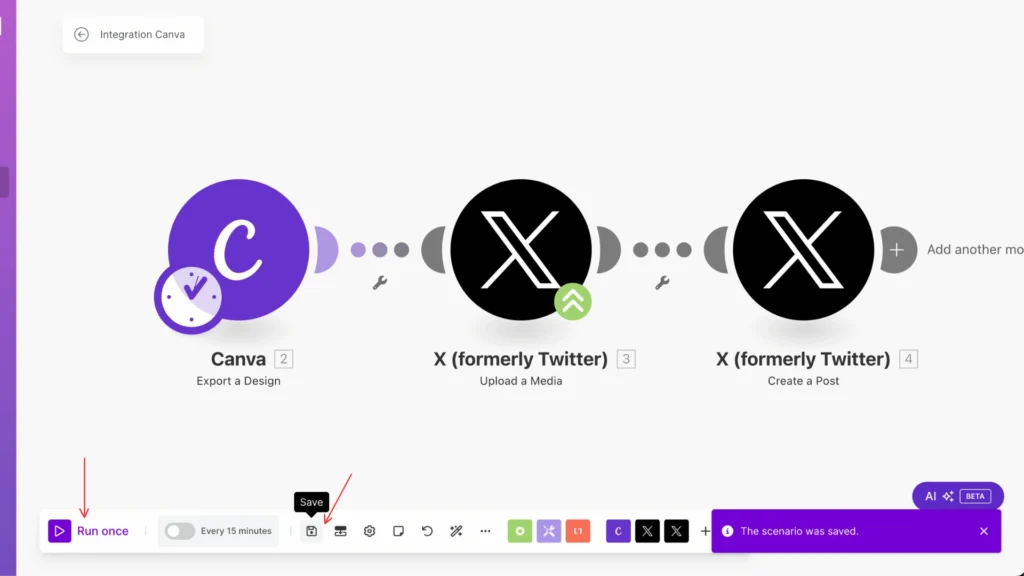
Step 5: Save and Run Your Scenario
Remember to save everything you’ve done, and then run your scenario to see it in action. And that’s it—you’ve done it!
Step 6: See Your Automated Tweets
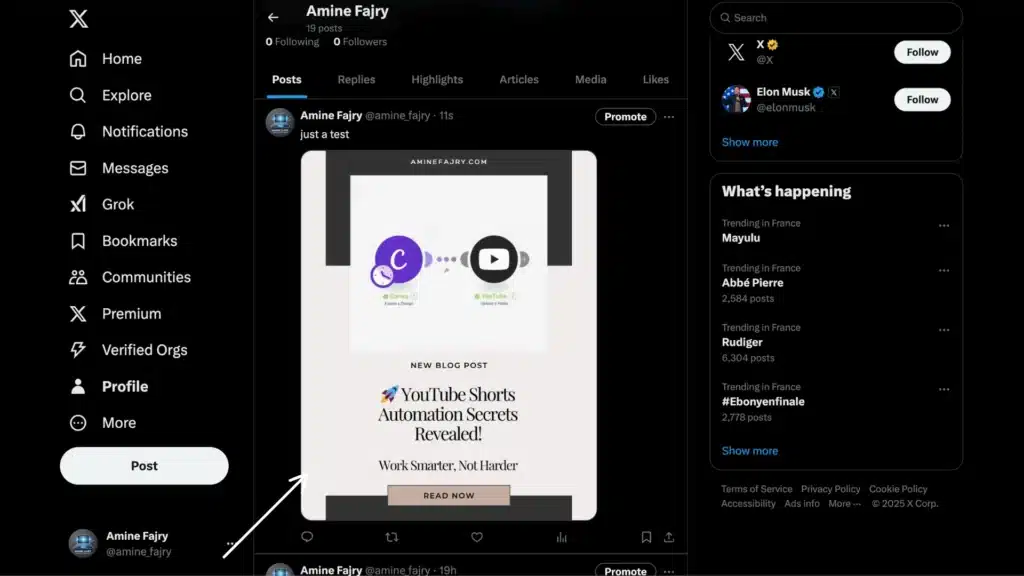
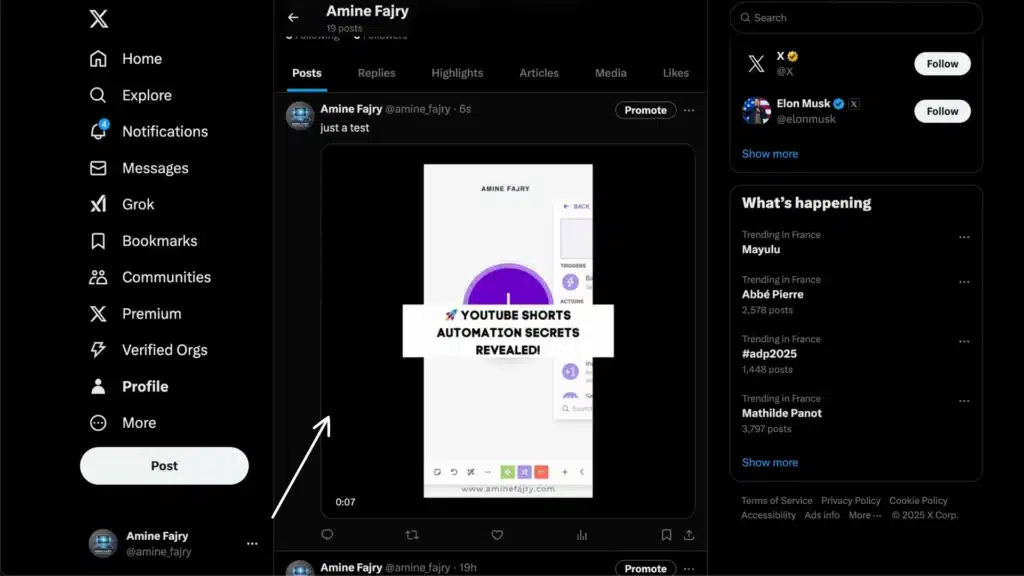
And there you have it; check out your finished result! Pretty cool, right?
Image:
Video:
Step 7: Schedule Your Automation
This final step focuses on scheduling. I’ve created a comprehensive guide that walks you through the process; here is the article below:
You know what’s cool? You’ve got options here! While you could use AI tools to create your posts and content, this guide is about keeping things authentic and personal by using your creative skills with Canva. We’re showing you how to automate the posting process while still maintaining that human touch, letting your natural talent shine through!
This way, you get the best of both worlds: the efficiency of automation combined with your unique creative style. It’s a clever way to streamline your workflow while keeping things genuine.
Get this scenarioBest Practices and Tips for Twitter Automation
Let me share what I’ve learned about Twitter automation after years of managing social media accounts and making many mistakes.
Listen, Twitter automation can be compelling but destroy engagement if handled poorly. I learned this the hard way. When I tried automating every aspect of my Twitter presence, it turned my account into a soulless broadcasting machine.
The key is finding the sweet spot between efficiency and authenticity. Here’s what works: First, schedule your core content during peak engagement times (I’ve found that 9-11 AM and 2-4 PM work best for business content). Use tools like Buffer or Hootsuite, but please don’t link them all together in a way that makes your posts look robotic.
One practice that’s made a massive difference for me is the 80/20 rule: Automate about 20% of your content (like curated articles and evergreen tips) but keep 80% real-time and personal. This helps maintain that human touch while still saving time.
Here are some specific dos and don’ts I’ve discovered:- DO automate your content scheduling and analytics tracking
- DON’T automate direct messages or follow/unfollow actions
- DO use automation tools to monitor brand mentions and keywords
- DON’T auto-reply to mentions (this usually backfires)
Remember to check your automated posts for relevance regularly. I once had a computerized post about “summer marketing tips” go out during a major winter storm—not my finest moment! Set up weekly checks of your automation queue to prevent awkward timing issues.
The bottom line? Automation should enhance your Twitter presence, not replace genuine interaction. Use it as a tool to support your strategy, not as the strategy itself.- Maintaining authenticity in automated posts
- Avoiding common automation pitfalls
- Monitoring your automated workflows
- Compliance with Twitter’s automation rules
Conclusion
Now, you have all the tools and knowledge needed to automate your Twitter presence effectively with Make! Automation should enhance your social media strategy, not replace the human touch entirely. Start with simple workflows and gradually expand as you become more comfortable with the platform. Ready to take your Twitter game to the next level? Get started with Make today and watch your social media efficiency soar!
FAQs
Can I automate my Twitter posts?
Yes, absolutely! You can automate your Twitter posts using Make. It’s a super handy way to schedule and publish your content while maintaining that personal touch. Just remember to balance automated posts with real-time engagement for the best results.
How do you create an automated Twitter?
Creating automated Twitter posts is simple with Make! First, set up a Make account and connect it to your Twitter account. Then, create a scenario using Canva for your visuals and Twitter modules for posting. You can automate images and videos by following the step-by-step process we covered in this guide. The key is to maintain authenticity while saving time on routine posting tasks.

Further Resources
- How to Set Up Webhooks in Make: Complete Guide
- How to Automate Photo Posts on Reddit with Make
- How to Easily Use the Router Module in Make
- How to Automate Instagram Posts with Make
- How to Automate YouTube Shorts with Make
- How to Automate Facebook Posts with Make
- How to Automate Photo Pins on Pinterest with Make