How to Automate YouTube Shorts with Make

Have you ever felt overwhelmed trying to keep up with YouTube Short’s content creation? You’re not alone! In today’s fast-paced digital world, automation is becoming a game-changer for content creators. Have you seen the research showing that YouTube Shorts attract more views and likes per view than regular videos? That’s where Make (formerly Integromat) comes in as your secret weapon for YouTube Shorts automation.
In this comprehensive guide, we’ll walk you through everything you need to know about automating your Shorts production process. This will save you countless hours while maintaining quality content output. You will need only two modules: Canva and YouTube.

Let’s dive right in!
What You’ll Learn
This step-by-step guide will show you how to:
- Set up YouTube Shorts automation workflow
- Connect Canva for automated design publishing
- Post automatically to the YouTube channel
Prerequisites
Before we begin, you’ll only need:- A Make account
- A Youtube Account
- Canva accounts for design creation
Remember to save :
Understanding Make Platform and Its Capabilities
Let me share my experience with Make (formerly Integromat) and explain what makes it a powerful tool for content creators, especially those working with YouTube Shorts.
I remember feeling overwhelmed when I first encountered Make’s interface. There were so many modules and connections that I frustratedly closed the browser tab! But once I got the hang of it, it became my secret weapon for content automation.
Make’s core strength lies in its visual automation builder, where you create what it calls “scenarios.” Think of scenarios as digital assembly lines for your content. Each scenario consists of modules that perform specific tasks. For YouTube Shorts specifically, I’ve found it incredibly useful for monitoring analytics, scheduling posts, and even generating video ideas based on trending topics.
One of the game-changing features is Make’s ability to connect with practically any content tool you’re already using. I’ve set up workflows that pull data from Google Sheets, automatically format it, and prepare it for YouTube Shorts descriptions. The platform integrates beautifully with tools like Canva and Kapwing, essential for Shorts creation.
The basic building blocks you need to understand are:- Triggers (what starts your automation)
- Actions (what happens when triggered)
- Aggregators (combining data from multiple sources)
- Iterators (processing items one by one)
What sets Make apart is its error handling. Unlike other automation tools I’ve used, Make shows you exactly where things went wrong and lets you retry failed operations. This has saved me countless hours of troubleshooting.
The HTTP/REST modules are particularly valuable for YouTube short creators. They let you interact with YouTube’s API to automatically fetch metrics, manage comments, and update video details. I’ve even used them to track competitor content and receive notifications when they post new Shorts.
Remember, though – start simple. My biggest mistake was trying to build complex scenarios right away. Start with basic automation and gradually add complexity as you understand the platform better.
Setting Up Your First YouTube Shorts Automation Scenario
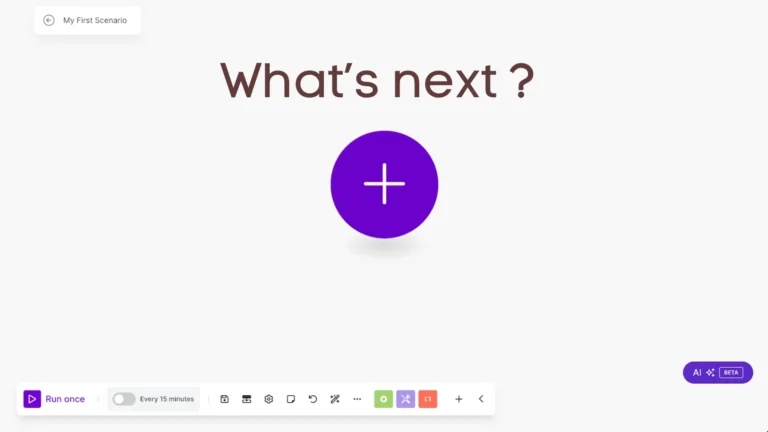
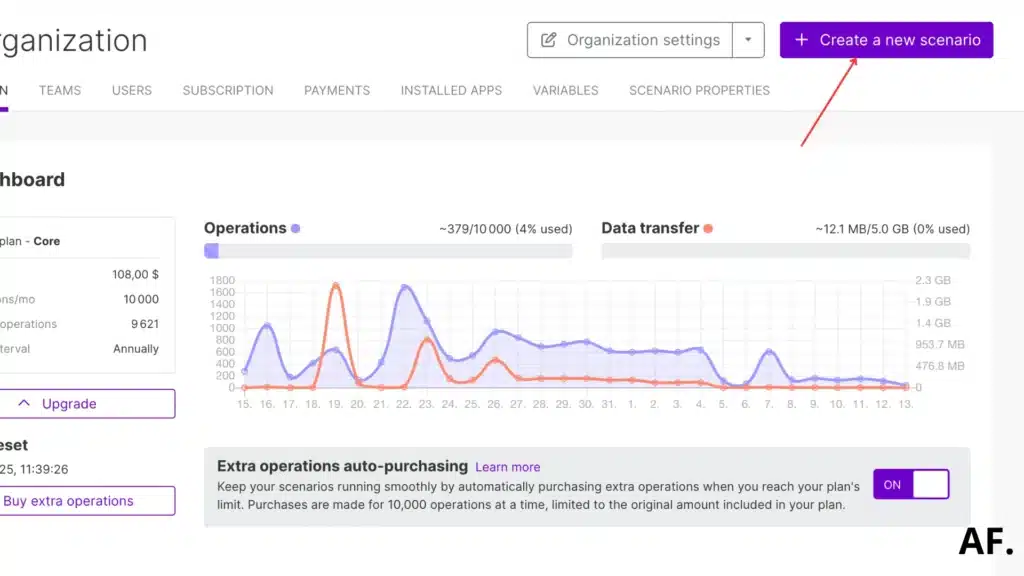
Step 1: Create your scenario
Head to your dashboard and initiate your scenario by selecting “Create a new scenario.”
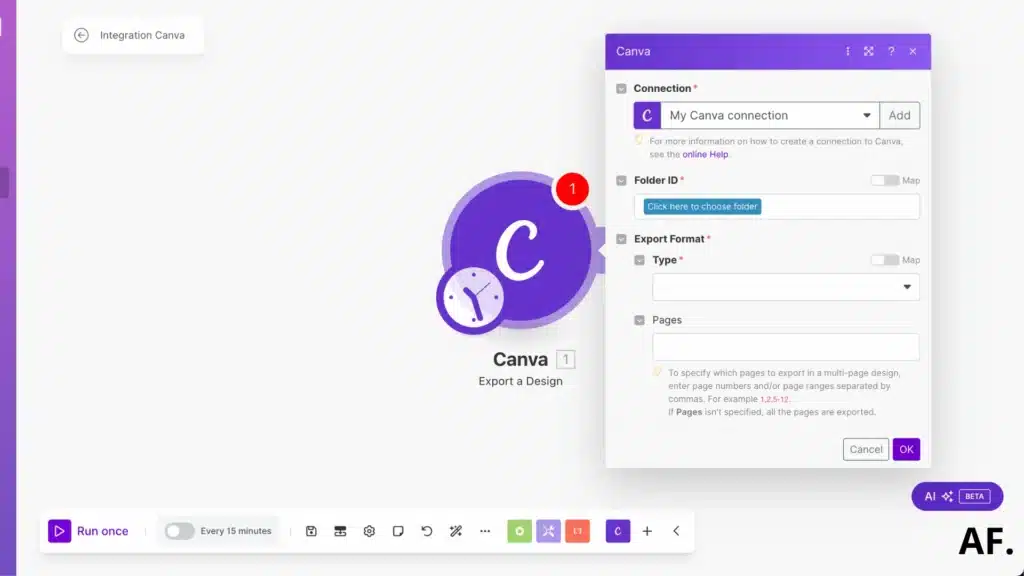
Step 2: Add your first module
Once you type “Canva” in the search bar, you’ll find the Canva module options at the top. Click on the “Export a Design” module:

Here’s what you’ll see:
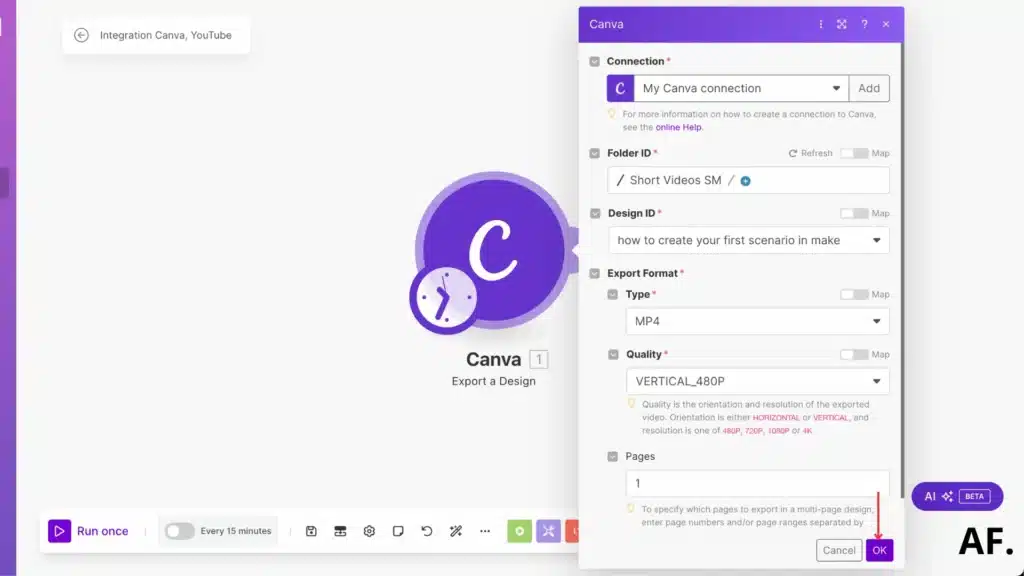
Complete this section by ensuring you place your design in your folder, select the MP4 format, and if you have multiple short videos within one design, make sure to choose the specific page you want to export:
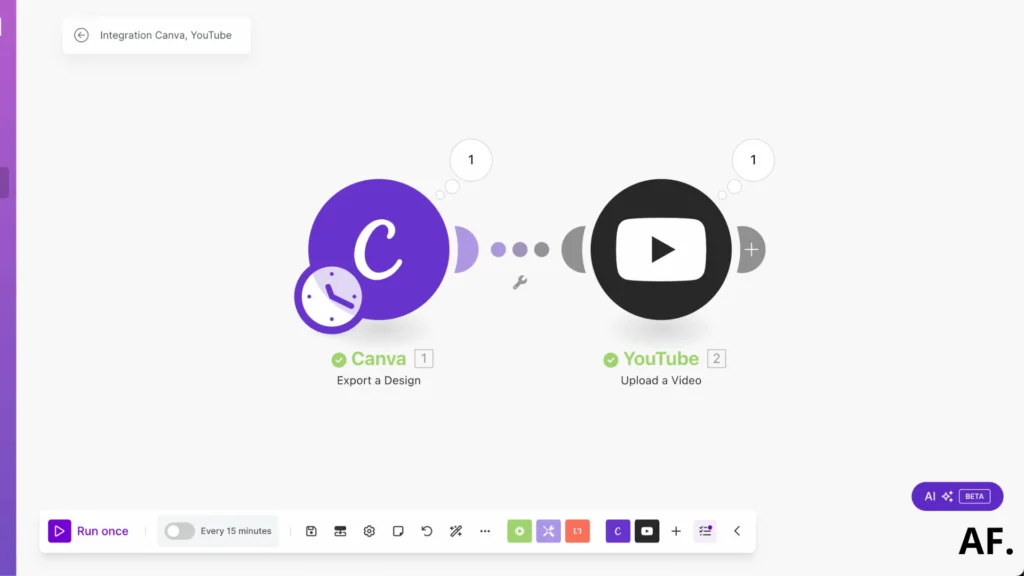
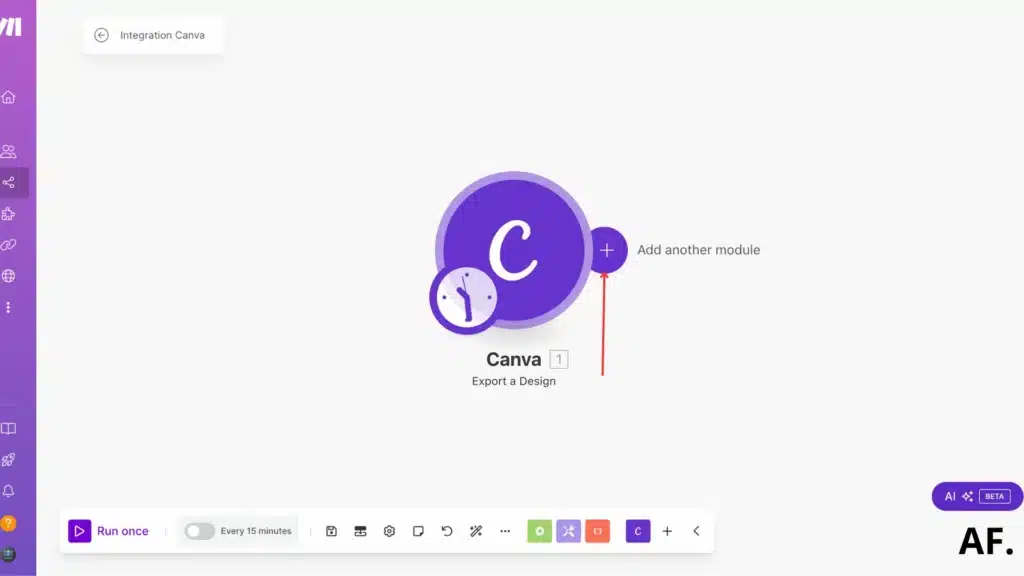
Step 3: Add Youtube module
Once you’ve completed the first module and clicked “OK,” it’s time to add another module:
Type “YouTube” in the search bar and select “Upload a Video.”
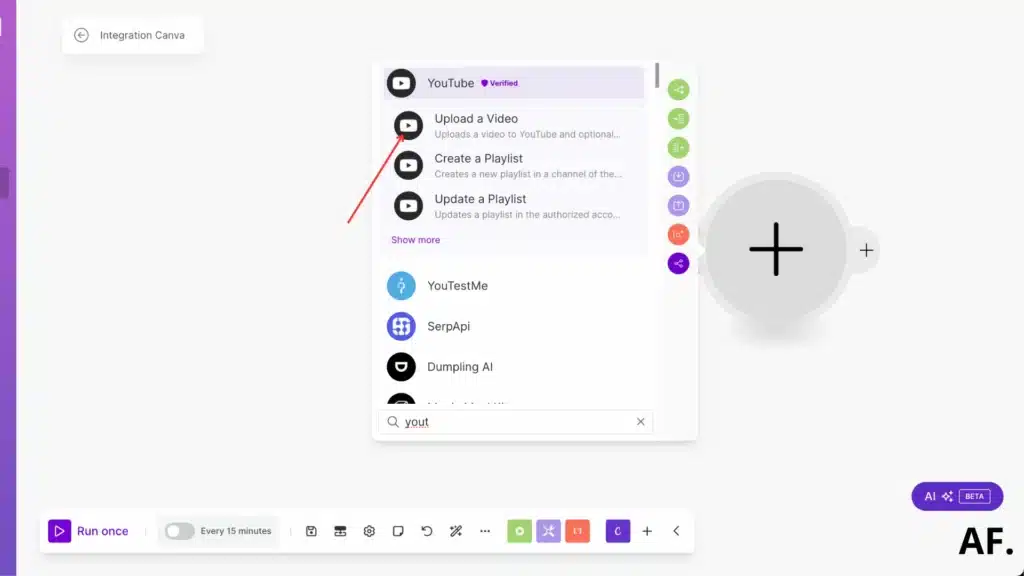
Here’s what you’ll initially encounter:

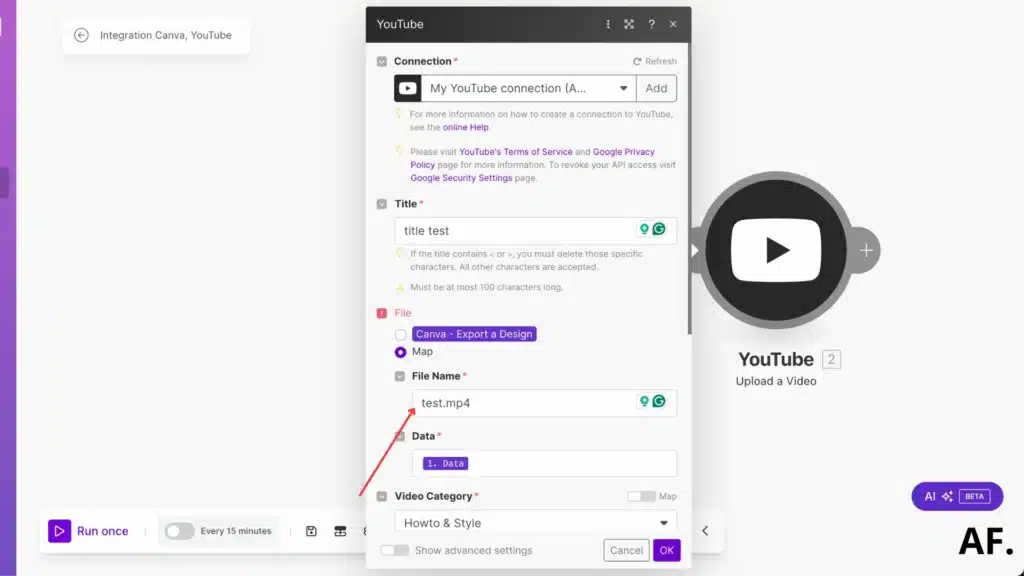
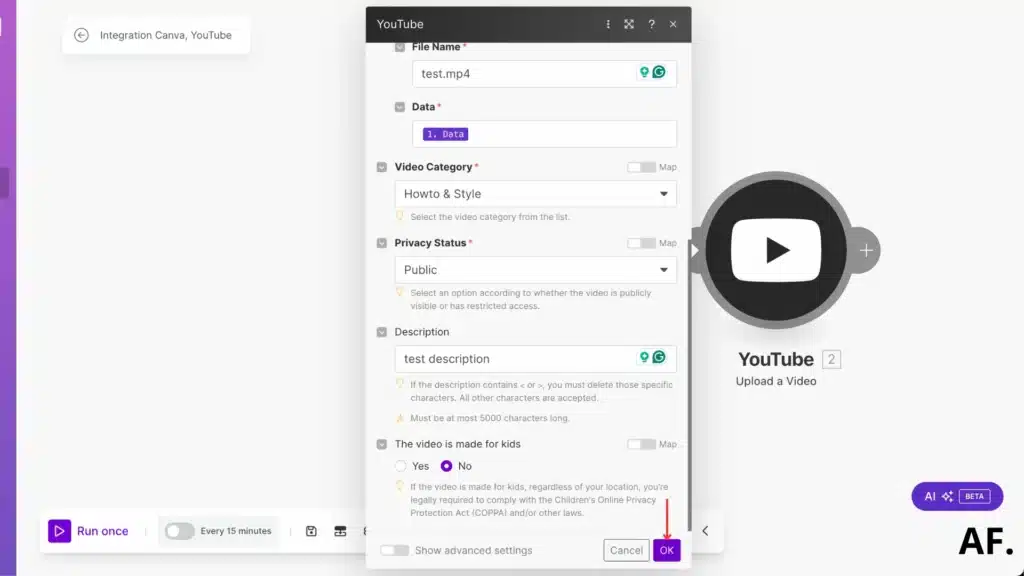
Then complete the required fields, ensuring you append “.mp4” to the filename:
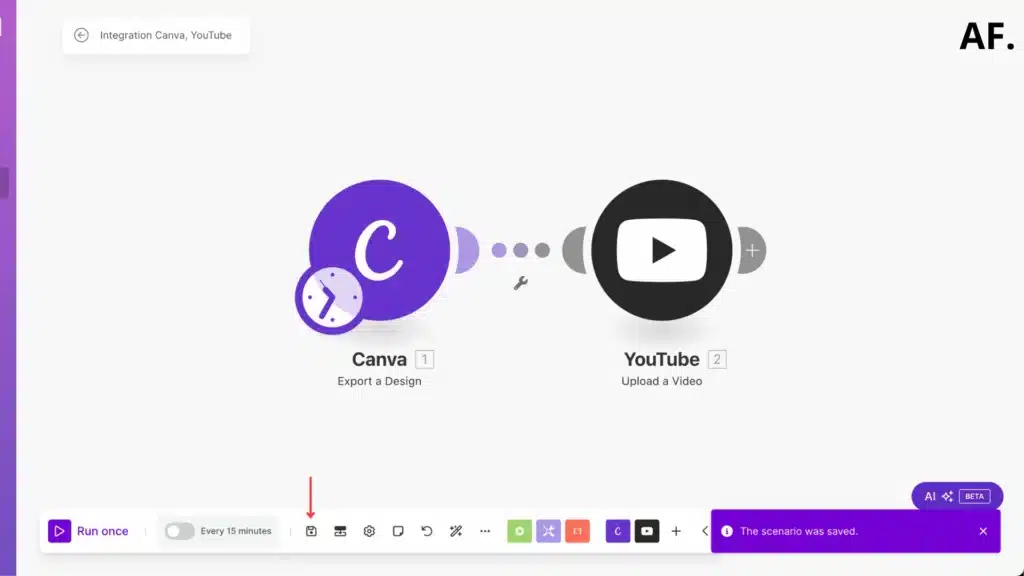
Step 4: Save and Run Your Scenario
Ensure you save your scenario, and after running it
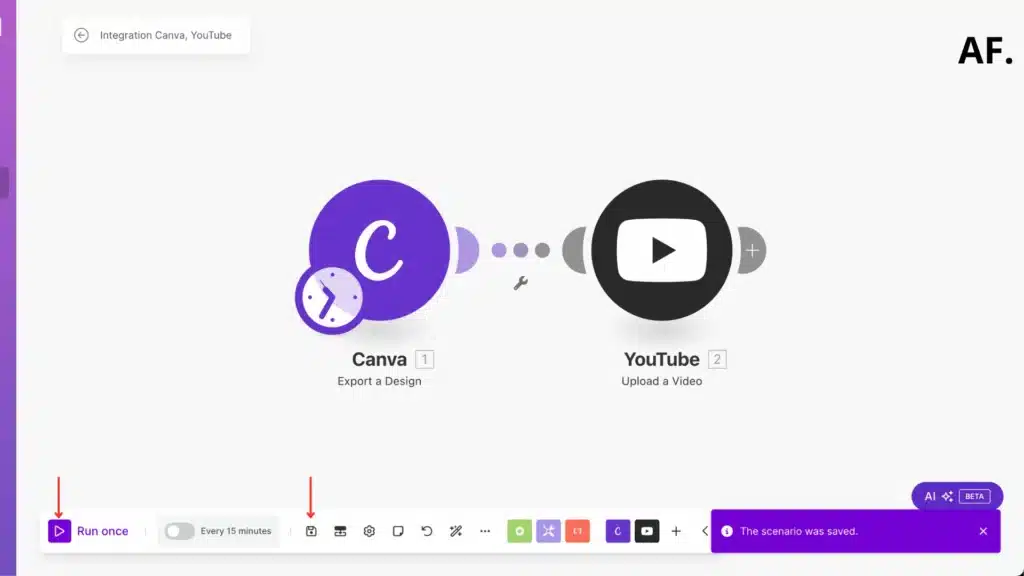
Step 5: Results
And here’s the outcome: it was successfully published on the YouTube channel:
Step 6: Schedule Your Automation
The final step is scheduling; I’ve created this step-by-step guide for you. Below, you’ll find everything you need to know about scheduling, complete with examples to help you get started.
Get this scenarioBest Practices and Tips for Successful Automation
After years of managing content across different platforms, let me share what I’ve learned about automation best practices. Trust me, I’ve had my fair share of automation mishaps before getting it right!
First up, quality control is non-negotiable. I learned this the hard way when I once scheduled 30 posts without proper review and ended up with embarrassing typos. I consistently implement a three-step verification process: automated spell-check, manual review, and a final check using a quality assurance checklist. It’s worth the extra time.
Content variation is crucial for keeping your audience engaged. I’ve found that using a content matrix helps tremendously. My matrix typically includes 40% educational content, 30% entertaining posts, 20% promotional material, and 10% community engagement. This mix has consistently shown better engagement rates than sticking to just one content type.
Timing is everything when it comes to maintaining engagement while using automation. After testing different posting schedules, I’ve discovered that engagement drops by about 23% when posts feel too robotic or predictable. I now use dynamic scheduling to combat this, which varies posting times by ±2 hours and incorporates real-time response windows.
For compliance, you absolutely must stay up-to-date with platform guidelines. I keep a digital folder with current guidelines from each platform and update it quarterly. One thing that’s helped me tremendously is creating a compliance checklist that includes the following:- Platform-specific content requirements
- Disclosure guidelines for sponsored content
- Image and video specifications
- Prohibited content categories
Remember, automation should enhance your strategy, not replace authentic interaction. Even with automated posts running, I set aside an hour daily for real-time engagement. This hybrid approach has helped me maintain a genuine connection with followers while enjoying the benefits of automation.
The key is finding the right balance between efficiency and authenticity. Don’t try to automate everything at once – start with maybe 25% of your content and gradually increase as you perfect your process.
Conclusion
Automating your YouTube Shorts with Make isn’t just about saving time – it’s about scaling your content strategy while maintaining quality and consistency. By implementing the techniques and methods we’ve covered, you’ll be on your way to creating a sustainable and efficient content production system. Remember, automation is a tool to enhance your creativity, not replace it. Start small, experiment with different scenarios, and gradually build up your automation ecosystem.
FAQs
Can you automate YouTube Shorts?
Yes! You can automate YouTube Shorts using the Make platform. The process is simple: connect Canva for your designs and use YouTube’s module for automatic uploads. This automation saves hours while keeping your content consistent! 🚀
How to auto-schedule YouTube Shorts?
Auto-scheduling YouTube Shorts is easy with Make! Create your scenario, connect Canva to export your designs in MP4 format, and then use the YouTube upload module to schedule your posts. Remember to vary posting times by ±2 hours to keep engagement natural! ⏰

Further Resources
- How to Build a Social Media Automation System with Make
- How to Set Up Webhooks in Make: Complete Guide
- How to Automate Photo Posts on Reddit with Make
- How to Easily Use the Router Module in Make
- How to Automate Instagram Posts with Make
- How to Automate Facebook Posts with Make
- How to Automate YouTube Shorts with Make
- How to Automate Twitter with Make