How to Set Up Webhooks in Make: Complete Guide
Have you ever felt stuck by the webhook setup in Make? You’re not alone! Webhooks are like digital postal workers, delivering real-time data between applications, and they’re crucial for creating powerful automation workflows. This guide will show you how to set up webhooks in Make into simple, digestible steps. Whether you’re a beginner or looking to refine your webhook skills, we’ve got you covered. Did you know that many developers consider webhooks essential for modern application integration due to their ability to enable real-time communication and seamless process automation?

Let’s dive in and master this fundamental automation tool!
What is Webhooks
Think of webhooks as digital mailboxes that wait for information to arrive. When I first started using Make, I visualized them as little notification systems, like when your doorbell rings to let you know a package has arrived. Rather than constantly checking if data is available (like I used to do with traditional APIs), webhooks notify your automation instantly when something happens.
Unlike traditional APIs, where you actively request data (like checking your email), webhooks are passive listeners. They sit quietly until triggered by an external event. In Make’s ecosystem, they’re incredibly powerful because they can kick off entire automation scenarios when data arrives.
The key terms you’ll encounter when working with webhooks in Make include:- Webhook URL: This is your unique “address” where data gets sent
- Payload: The actual data package being delivered
- Custom Headers: Extra information that helps identify or authenticate the webhook
- Response: What does your webhook send back to confirm receipt
What makes webhooks unique in Make is their real-time nature. While traditional APIs might check for updates every 15 minutes, webhooks instantly trigger your scenarios. This became super valuable when I was building time-sensitive automation for clients, such as instant order notifications or urgent support tickets.
Step-by-Step Webhook Configuration
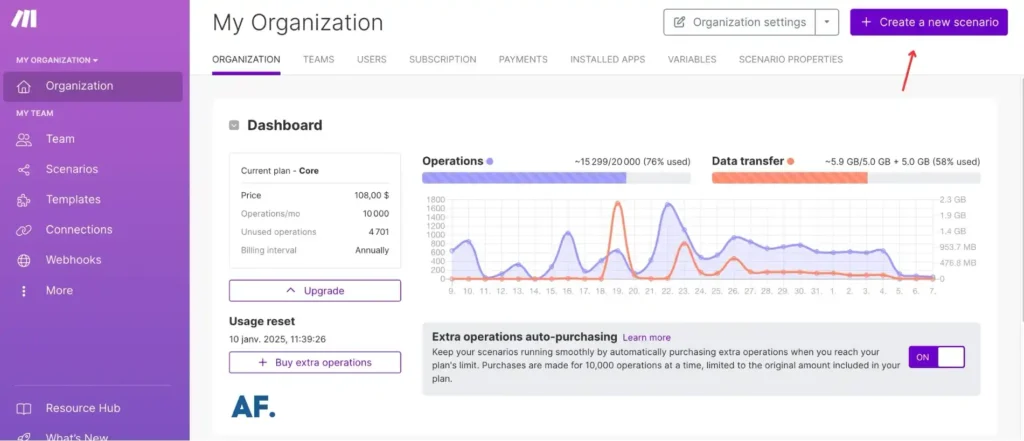
1. Create a scenario
Go to your dashboard and click “Create a new scenario” to start your webhook integration.
2. Choose a Custom webhook
After you create a scenario, you can add a webhook module. Choose “Custom webhook” to get started.

Next, click “Copy address to clipboard” to quickly grab your webhook URL:

3. Setting up a button field in Airtable
Once you’re in your Airtable account, go ahead and create a base:

Create a column where you can easily add a webhook button:

Once you have your webhook URL, paste it into the formula input in Airtable. Don’t forget to include RECORD_ID() to ensure you capture the specific record details!

4. Back to Make: receiving a notification
Start your scenario:

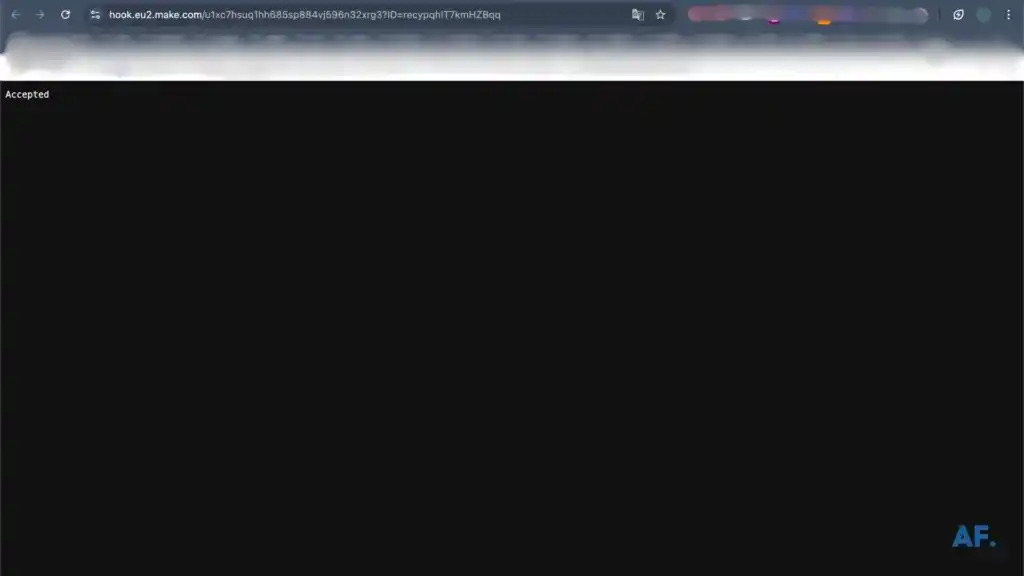
Hit the “start” webhook button :

Then you’ll see a message confirming that your webhook request was accepted:
When you return to your scenario, you’ll notice a notification: the ID of the row where you clicked the button is now visible!

5. Set up a Get a Record module
click on the “Get a Record” option:

Enter the “ID” into the Record ID input field:

Then click “OK“:

6. See it in action!
Go ahead and run your scenario:


Next, head over to your Airtable table and click the “start” webhook button:

Returning to your scenario, you’ll see a small bubble notification indicating success!

Next, go ahead and click on the Airtable notification one. You’ll see a response from Airtable, presenting you with all the data you need neatly organized in the row you’ve selected.

Last thing, remember to always save your scenario

Final Thoughts
Congratulations! You’ve just unlocked the power of webhooks in Make! 🎉 Following this guide, you’ve learned to set up these fantastic digital messengers to supercharge your automation workflows. Remember, while the setup might initially seem technical, the real-time benefits are absolutely worth it.
Here’s what you can do next:- Start small with a simple webhook test
- Monitor your webhook performance regularly
- Keep your webhook URLs secure
- Build gradually more complex automation as you get comfortable
Don’t be afraid to experiment – every automation expert started precisely where you are now. Ready to give it a try? Go ahead and set up your first webhook.
Faqs
How do I add a webhook to make?
To add a webhook in Make, create a new scenario, select “Custom webhook” as your trigger, and copy the generated URL. This URL is where you’ll send data to trigger your automation. It’s as simple as copying, pasting, and configuring!
What is a webhook in make?
A webhook in Make is like a digital doorbell for your automation. It allows other apps to notify your Make scenarios when something happens instantly. Instead of constantly checking for updates, webhooks tell your scenarios exactly when to spring into action, making your automation faster and more efficient.