How to Automate Invoice Processing with Make
Are you drowning in a sea of manual invoice processing? You’re not alone! Businesses spend countless hours manually handling invoices, which is time-consuming and prone to errors. Here’s an eye-opening stat: businesses can save up to 60-70% of their processing costs by automating their invoice management! In this comprehensive guide, we’ll walk you through how to automate invoice processing using Make (formerly Integromat), transforming your accounting workflow into a streamlined, efficient system.


Let’s go!
Creating Your First Automated Invoice Workflow
Step 1: Create Your Folder On Google Drive
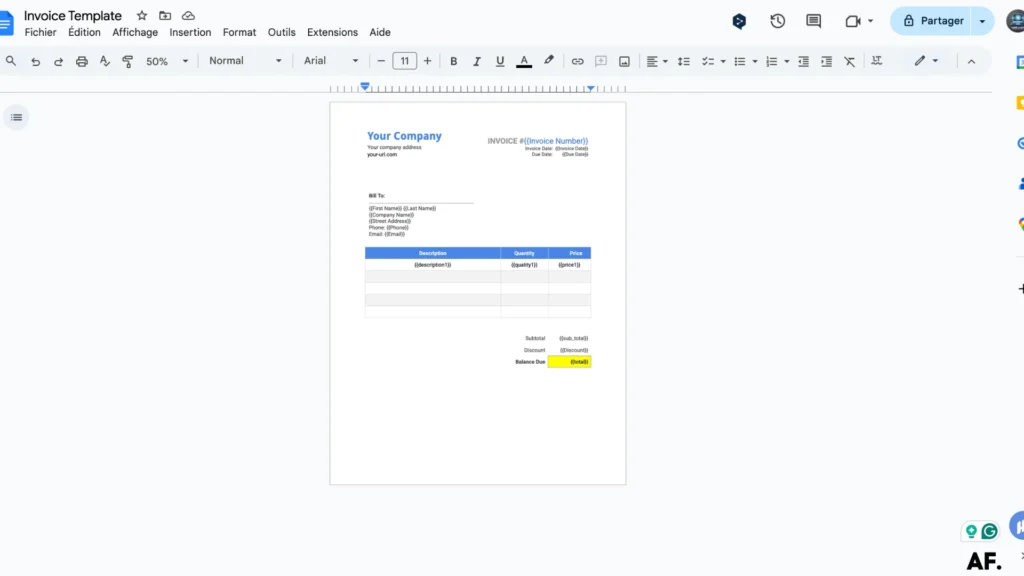
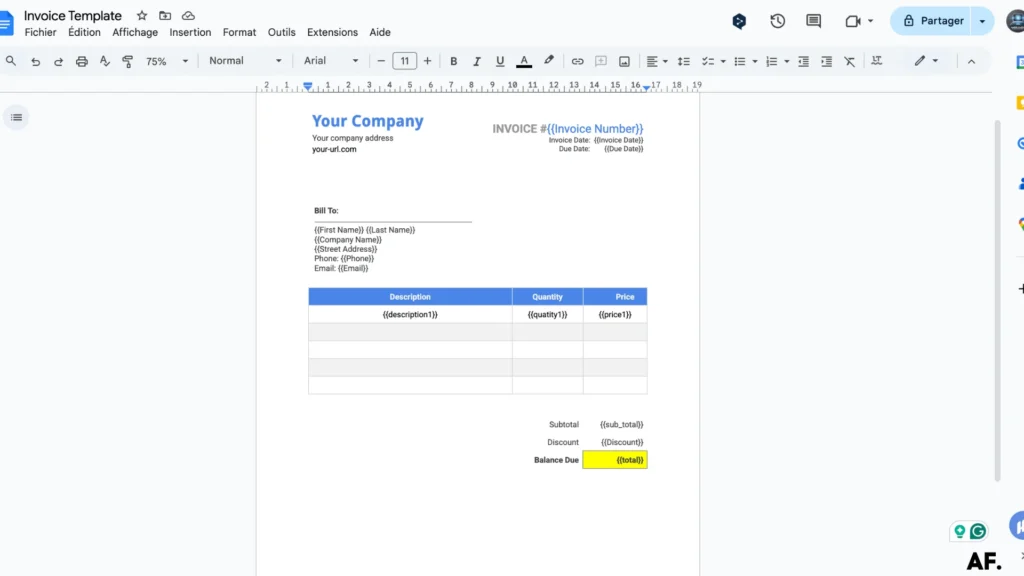
Let’s set up your invoicing system in Google Drive! First, create a dedicated ‘Invoice‘ folder to keep everything organized. Then, create an invoice template document inside this folder—this will be your go-to template for all future invoices.
Quick steps:- Inside your new folder, create a document for your invoice template
- Open your Google Drive
- Create a new folder named ‘Invoice‘.

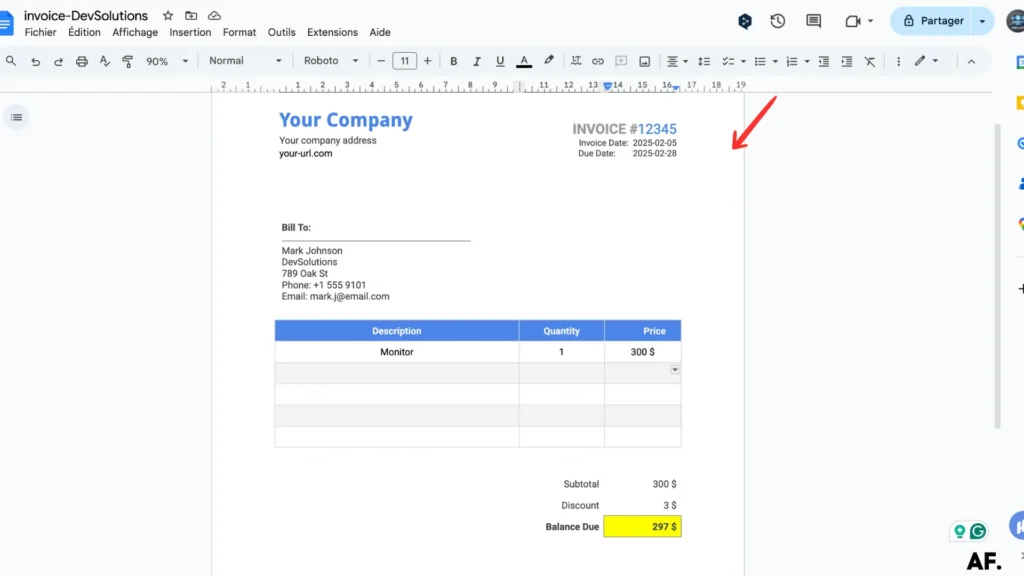
Let me walk you through my invoice template design! You’ll notice some sections marked with {{…}} – these are special placeholders where I automatically populate data into the template. They are dynamic fields that get filled in with the right information every time.
Step 2: Airtable, Create Your Table
Now that your folder and template are ready, setting up your data source in Airtable is the next exciting step. First, let’s create a new table in your Airtable workspace.
Step 3: Add Data on Your Table
With your new table set up, it’s time to populate it with your data! This is where you’ll add all the important information that will later flow into your invoice template. Take time to enter each detail accurately – client information, prices, or project descriptions.
Step 4: Create Your Scenario
Ready to get started? If you haven’t already, head to Make.com to create your free account. Once you’re logged in, we’ll dive into creating your first automation scenario. Don’t worry – the basic plan is free, so you can explore all the features we’ll need for this project!
Step 5: Add Airtable Module
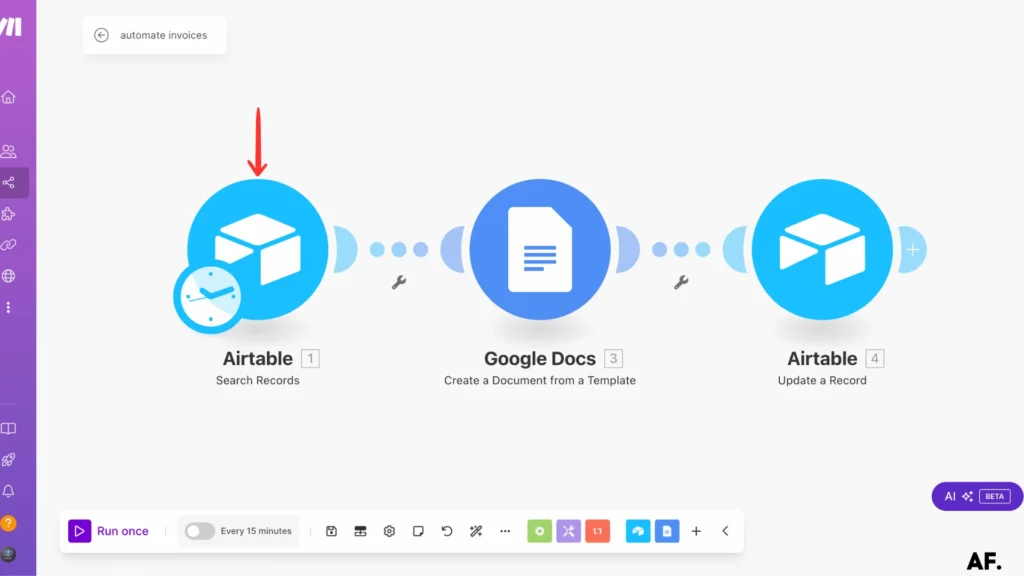
- Select your base and table from the dropdown menus
- In the formula section, we’ll add an important condition: {InvoiceCreated} = BLANK()
This formula checks for rows where the ‘InvoiceCreated‘ column hasn’t been checked yet, meaning invoices haven’t been generated.
Here’s a crucial tip: Set the ‘Limit‘ to 1. This ensures we create just one invoice at a time, which helps keep everything organized and running smoothly. Think of it as processing your invoices individually, like a well-organized assembly line!
Step 6: Add Google Docs Module

Next, we’ll use the ‘Create a Document from a Template‘ module, where the magic happens! This powerful module automatically pulls your data from Airtable and injects it into all those placeholder spots (remember those {{…}} we set up?) in your template. It’s like having a personal assistant who fills out your invoices perfectly every time!
Step 7: Update Your Data
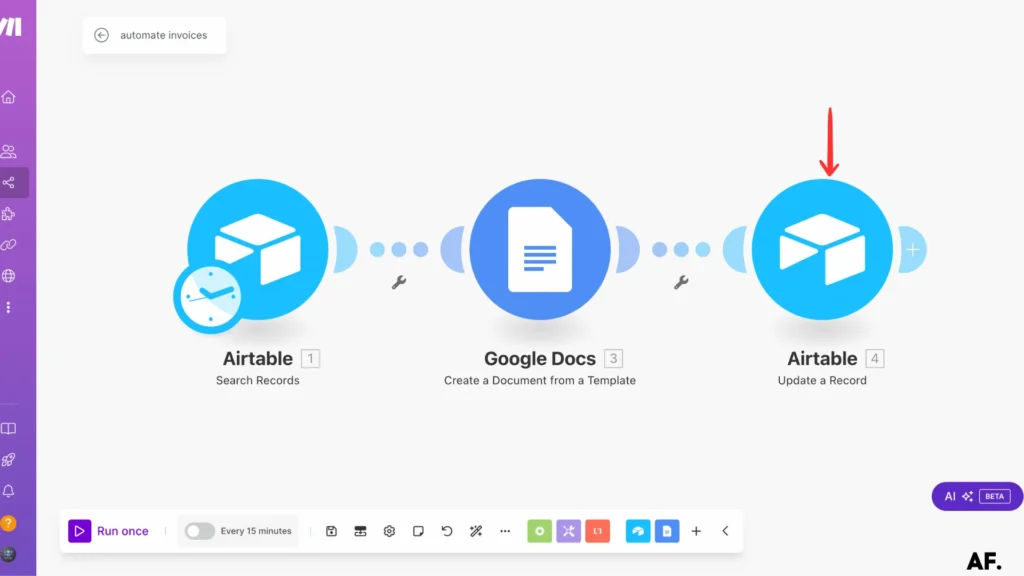
- First, locate the Record ID field at the top of the module and select it
- Scroll down to find the ‘InvoiceCreated‘ field
- Set its value to ‘Yes‘
This prevents duplicate invoices and keeps everything organized. Pretty cool, right?
Step 8: Save and Run

Step 9: Results
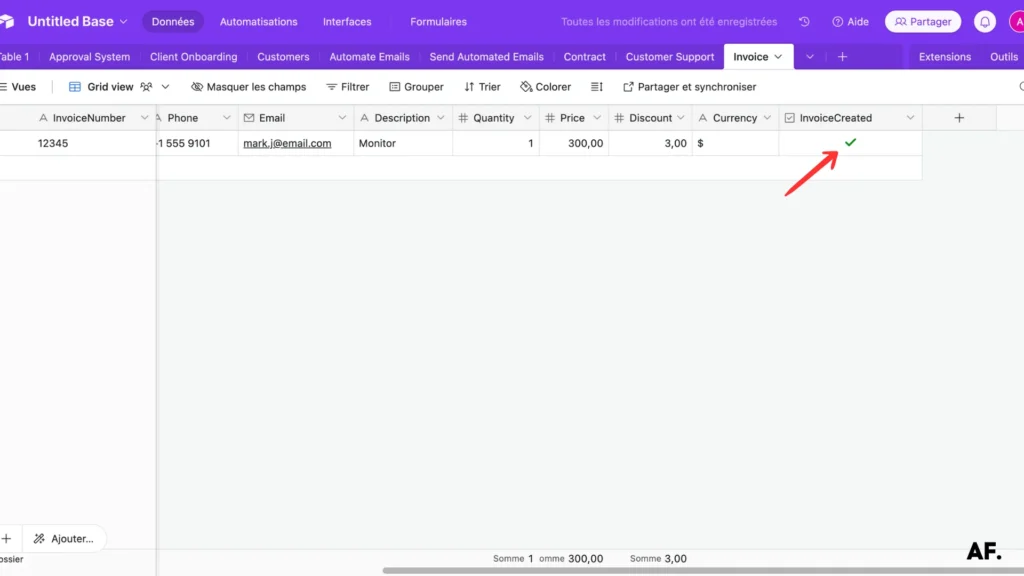
And there you have it – your automation is now complete and running like clockwork! Let’s see what happened:- Your Airtable record automatically gets marked as complete with a checkmark in the ‘InvoiceCreated‘ column
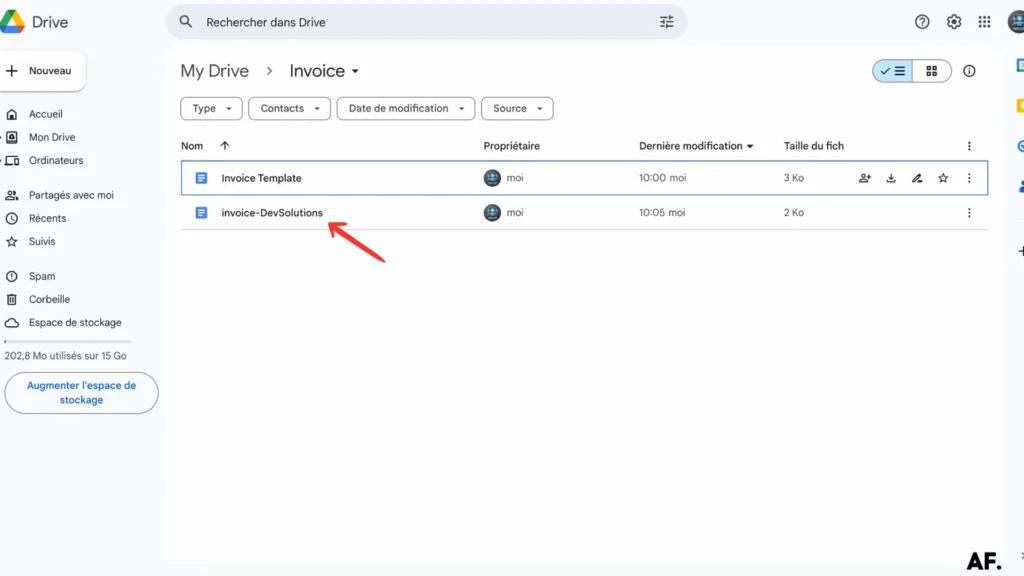
- A perfectly formatted invoice appears in your Google Drive, ready to go
- All your data flows seamlessly into the right places in your template
Congratulations! You’ve just automated your invoice creation process. No more manual copy-pasting or formatting – just smooth, automated efficiency. Pretty amazing what a few simple steps can accomplish, right?
- Add email notifications to alert your team or clients
- Automatically send invoices to clients right after creation
- Set up custom notifications in Slack, Discord, or other platforms
- Create summary reports of your invoices
The sky’s the limit with what you can automate! I hope this guide has inspired you to explore more possibilities for streamlining your work. Stay tuned for my next article, where we’ll dive into more automation magic!
Happy automating! 👋
Get this scenarioFinal Thoughts
By implementing invoice processing automation with Make, you’re taking a significant step toward improving your business efficiency. Remember to start small, test thoroughly, and gradually expand your automation capabilities. The time and resources you’ll save will allow you to focus on more strategic aspects of your business.
FAQs
How do you automate an invoice process?
Connect your invoice template to a data source like Airtable, then use automation tools like Make to automatically populate and generate invoices when new data entries are created.
How to send automated invoices?
Please set up an automation workflow that creates invoices from your template and sends them via email. Tools like Make can trigger email sending once an invoice is generated.
How to Create an automated invoice in Airtable?
Create a table in Airtable to store your invoice data, connect it to Make, and link it to a Google Docs template. Make will automatically generate invoices when new records are added to your Airtable base.

Further Ressources
- How to Automate Contract Management with Make
- How to Send Automated Emails with Make
- The Ultimate Guide to Data Mapping in Make
- How to Automate Employee Onboarding in Make
- How to Send Automated Emails from Google Forms Using Make
- How to Use Canva to Automate Social Media Posts with Make
- How to Build a Pinterest Automation System with Make
- How to Build a Customer Support System Automation in Make