How to Use Canva to Automate Social Media Posts with Make
Are you tired of spending countless hours creating and scheduling social media posts? Here’s an exciting solution that’s revolutionizing social media management! You can transform your social media workflow by combining Canva’s design capabilities with Make‘s automation powers. Did you know businesses using automation tools save an average of 6 hours per week on social media management?

Let’s explore how you can leverage Canva to automate social media posts, streamline your content creation process, and maintain a consistent online presence.
Setting Up Your Make Account and Creating Your First Scenario
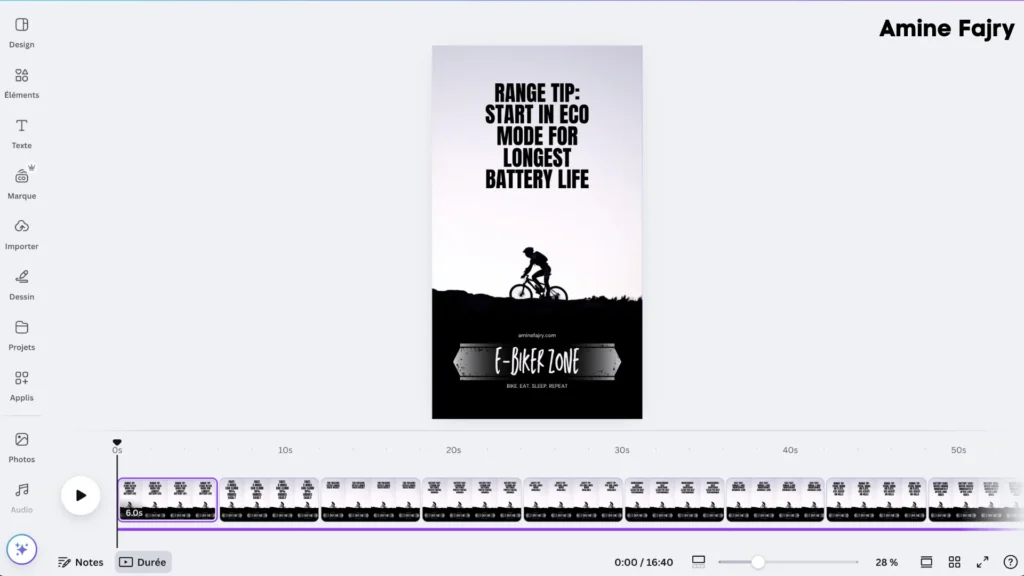
Step 1: Create Your Design On Canva
I have many short videos on Canva that I haven’t used for a while, so I will use it for the sake of this article :
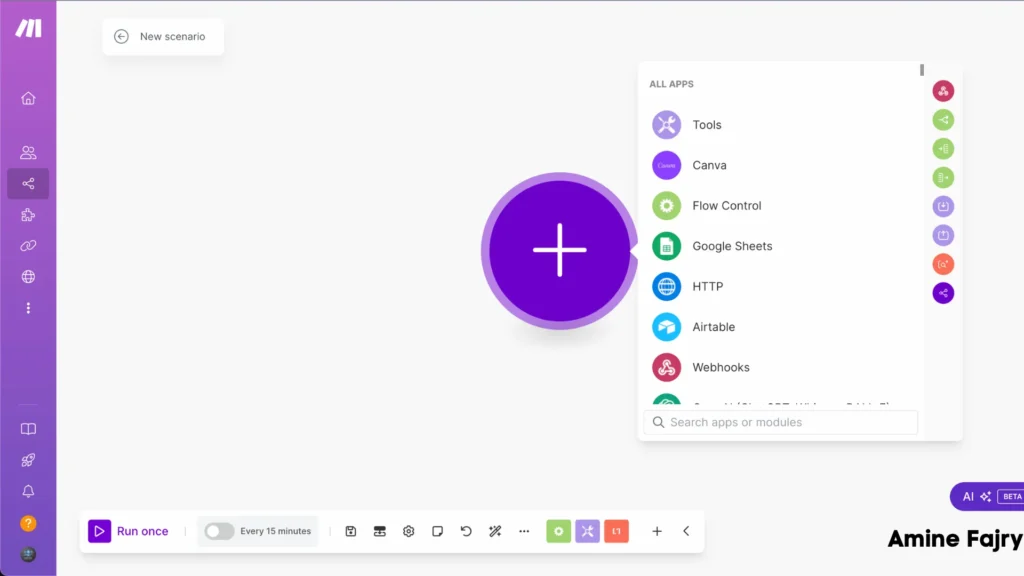
Step 2: Create Your Scenario
First, head over to Make.com to create a new scenario. Don’t have an account yet? No worries – signing up is completely free and only takes a minute!
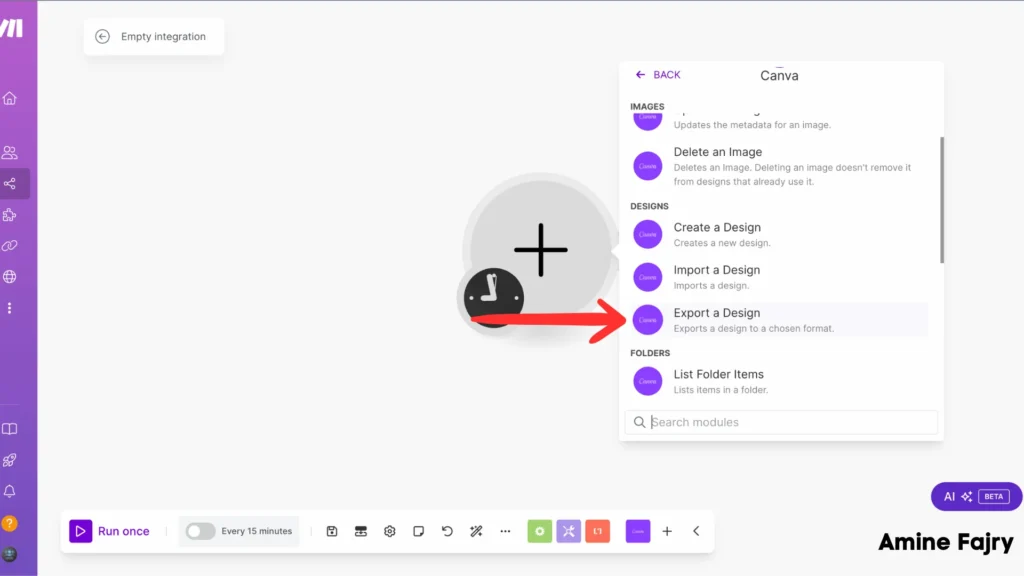
Step 3: Add Canva Module
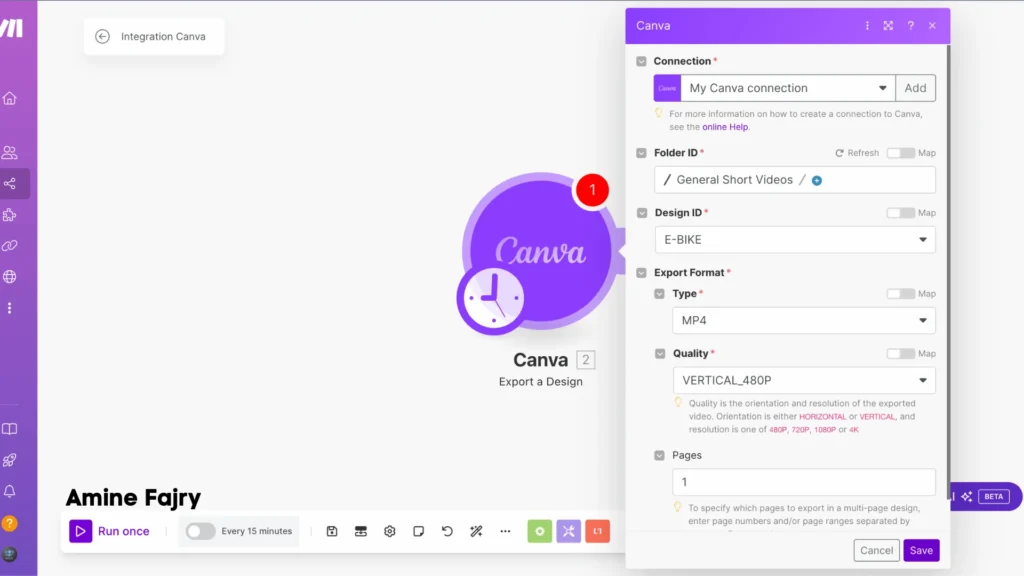
Let’s begin by integrating Canva into our workflow. The first module we’ll need is ‘Export a Design‘ from Canva – this will be our starting point!
- Select your folder
- Enter your design name
- For video format, select MP4 (perfect for Reels!)
- Under quality settings, I recommend using vertical_480p for testing; afterward, you can switch to 1080p resolution.
- Don’t forget to specify the page number you want to export
In my case, I’m exporting a Reel, but you can adjust these settings based on your specific needs!
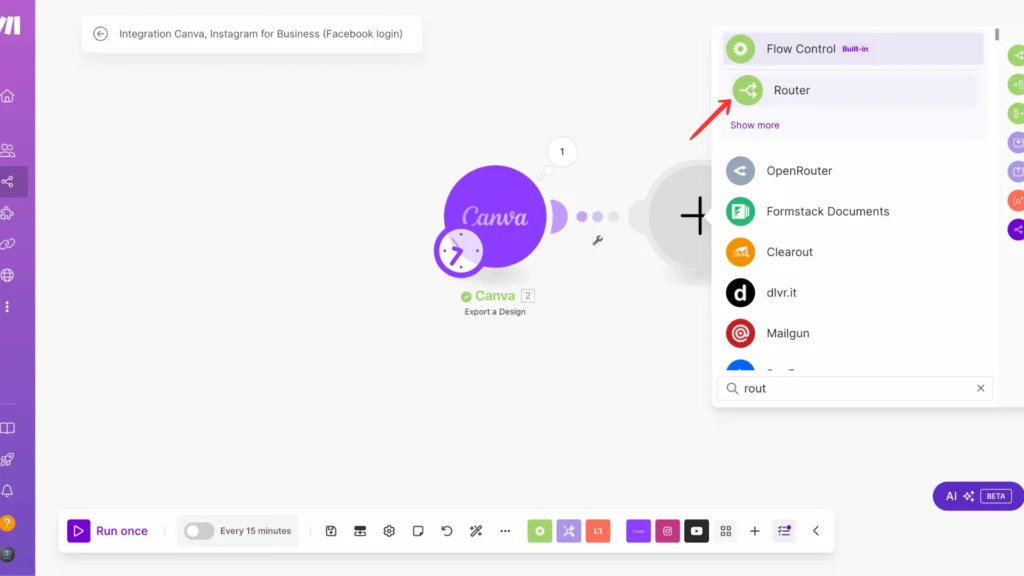
Step 4: Add Router
Add a router module if you’d like to share your content across multiple social media accounts! This handy tool lets you split your workflow and customize how your Reel gets distributed to different platforms.
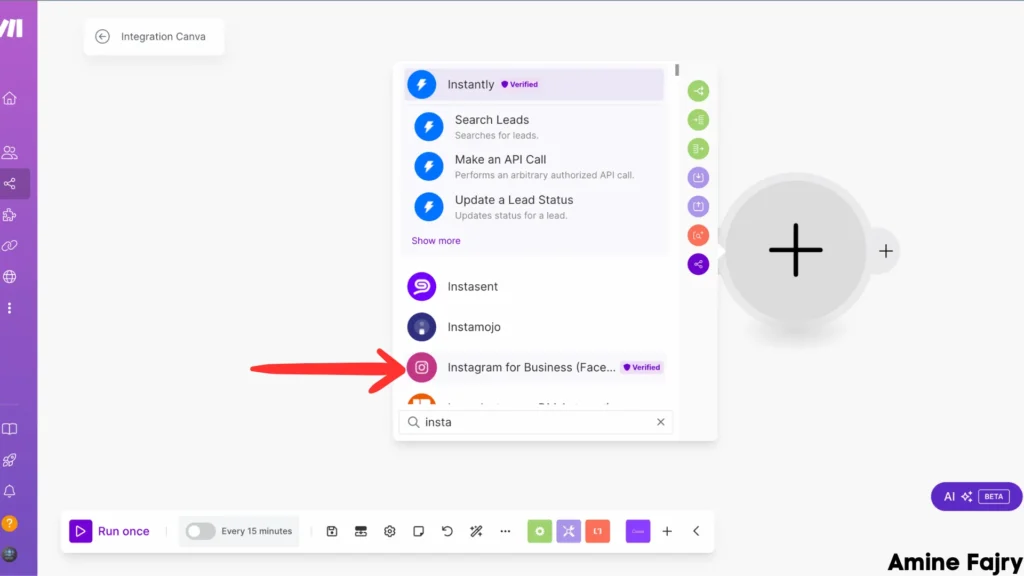
Step 5: Add Social Media
Now, let’s set up our Instagram connection! Look for and select the ‘Instagram App‘ module – this is what we’ll use to post our Reel directly to Instagram.
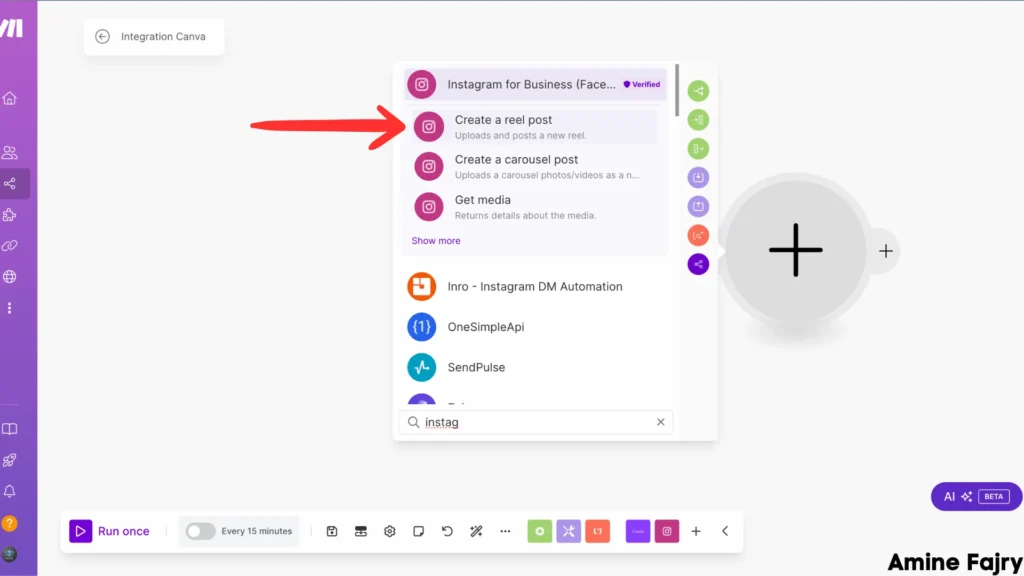
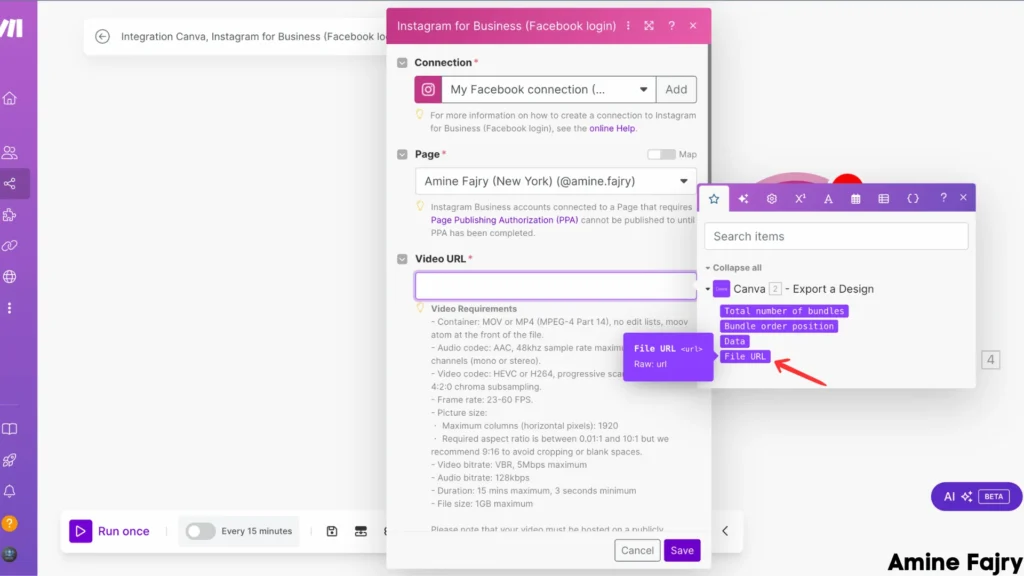
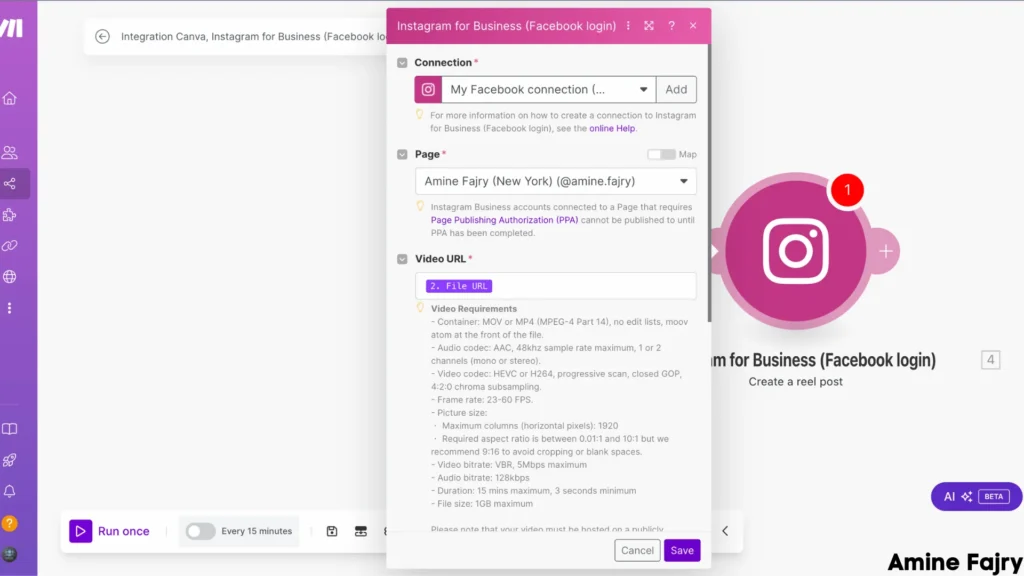
Select ‘Create a reel post‘ from the Instagram options – this is precisely what we need to share our video as a Reel!
In the settings panel, locate and click on the ‘File URL‘ field – this is where we’ll connect our exported Canva video to Instagram.
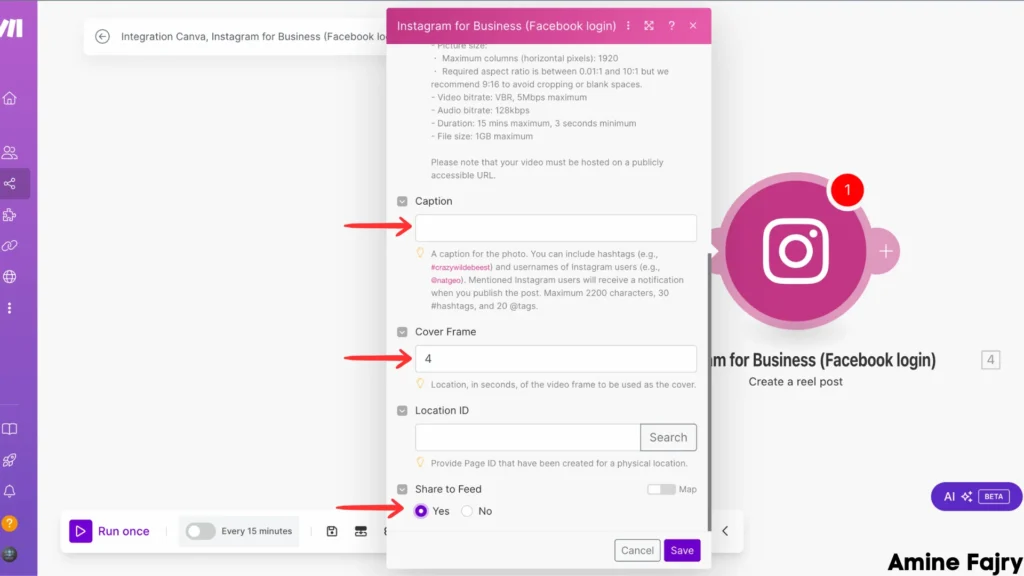
- Add a compelling caption to tell your story (totally optional, but recommended!)
- I’ve set mine to appear in 4 seconds for the cover frame. This will be the thumbnail that shows up on your Instagram profile.
- Don’t forget to toggle ‘Share to Feed‘ to ‘Yes‘ so your Reel appears in both your Reels tab and the primary feed.
Pro tip: Choosing the right cover frame is crucial since it’s the first thing your followers will see when scrolling through your profile!
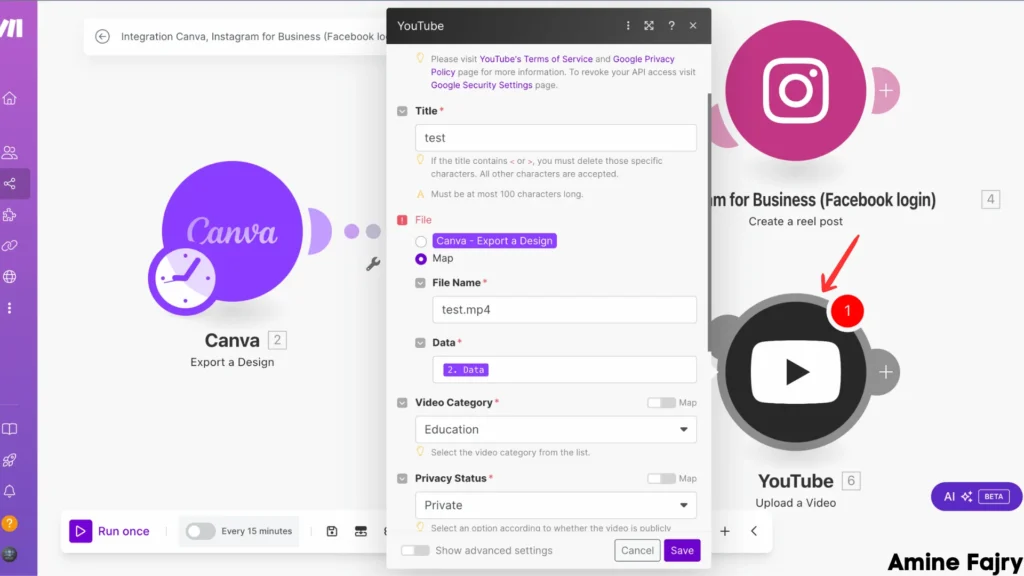
Youtube
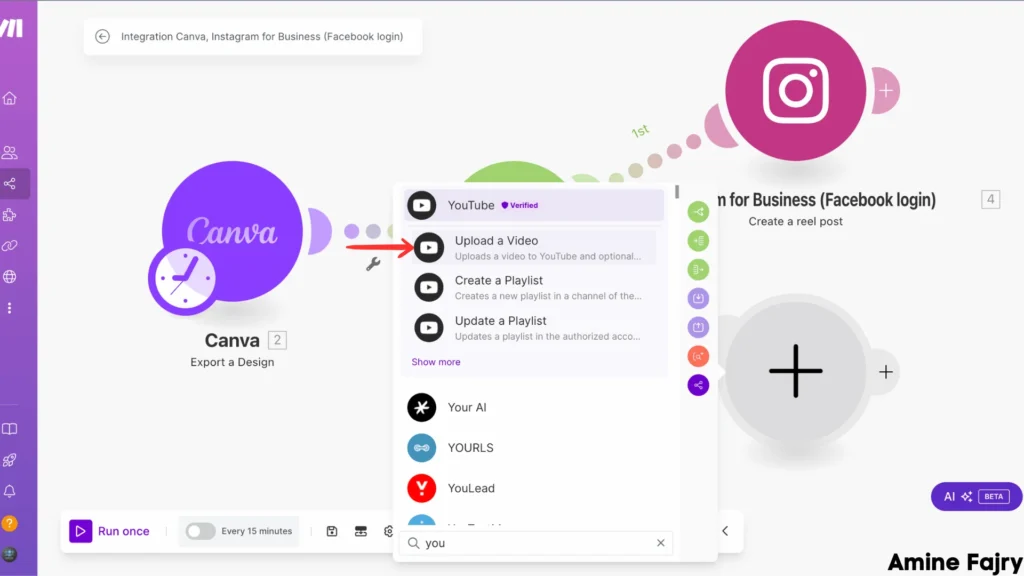
YouTube sharing is super straightforward: look for and select the ‘Upload a Video‘ option. It’s as simple as that!
- Enter an engaging title for your video
- For the filename, connect it to your Canva module data by mapping the file
- Necessary: Set the privacy status to ‘Public‘ so everyone can watch your content!
Pro tip: While pulling the file from our Canva export, ensure your title is catchy and descriptive to help viewers find your content.
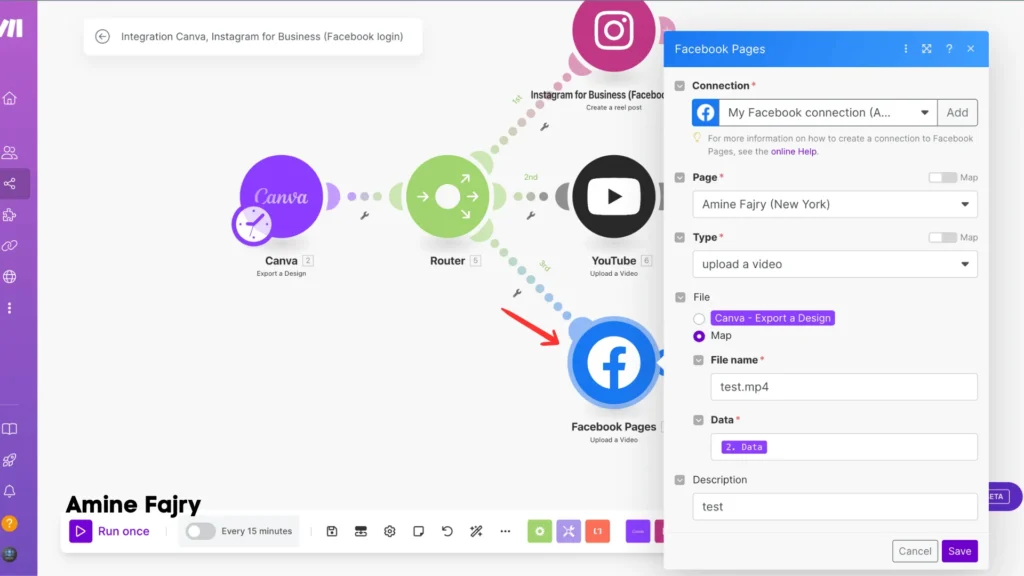
- First, select your Facebook page where you want the video to appear
- Connect the filename from your Canva export
- Map the video data from the previous steps
- Add an engaging description to tell your followers what your video is about
Pro tip: Your description can differ from your Instagram caption and YouTube title – feel free to customize it for your Facebook audience!
Step 6: Save And Run
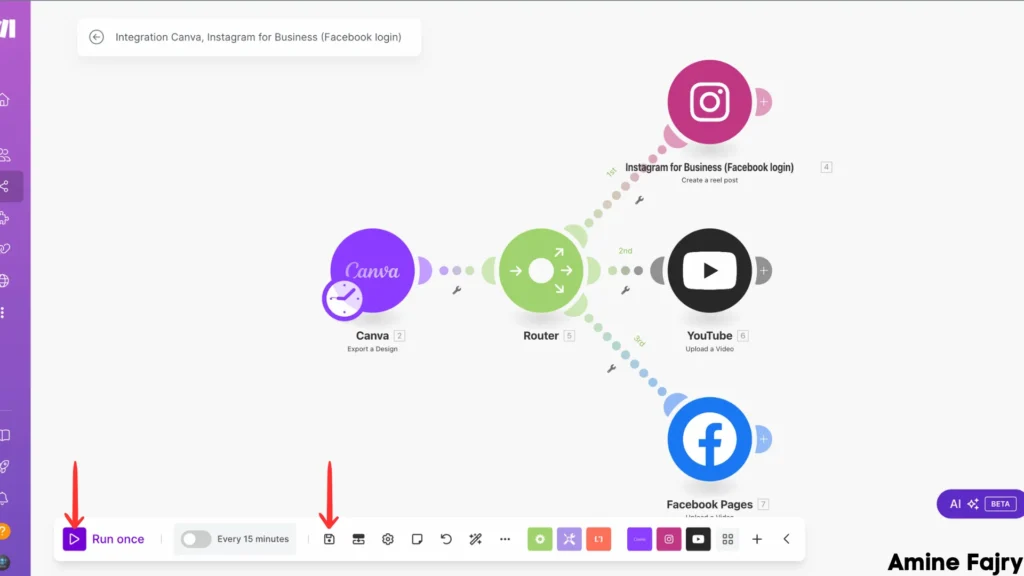
Step 7: Results
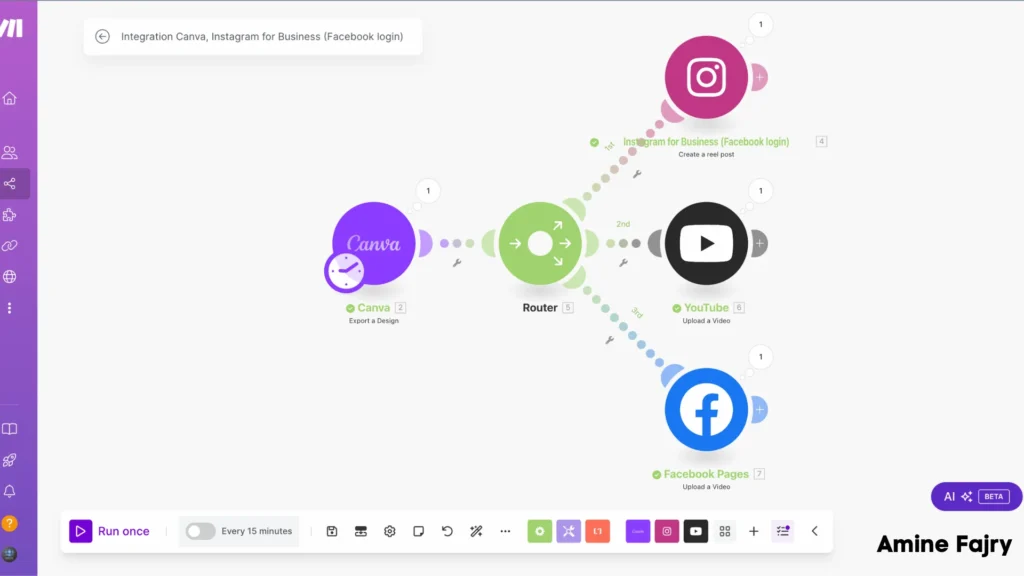
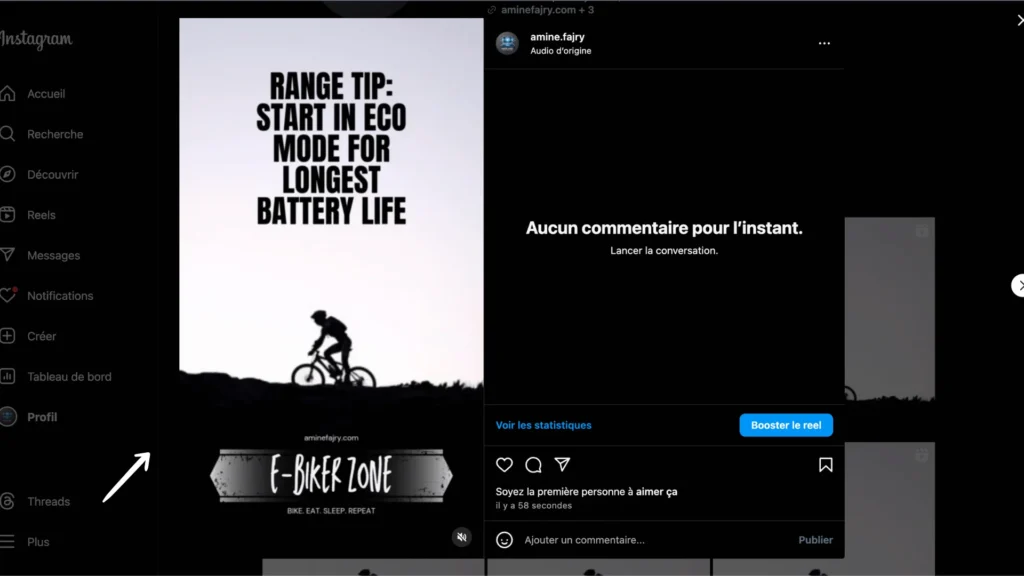
And voilà! Here’s the exciting part: Our video has successfully gone live on Instagram! Let’s check out how it looks.
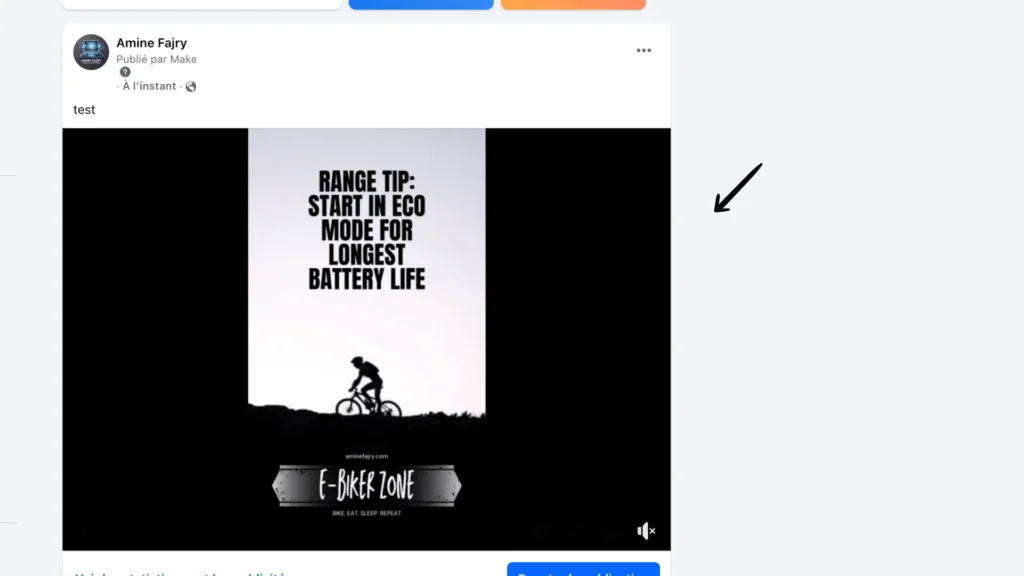
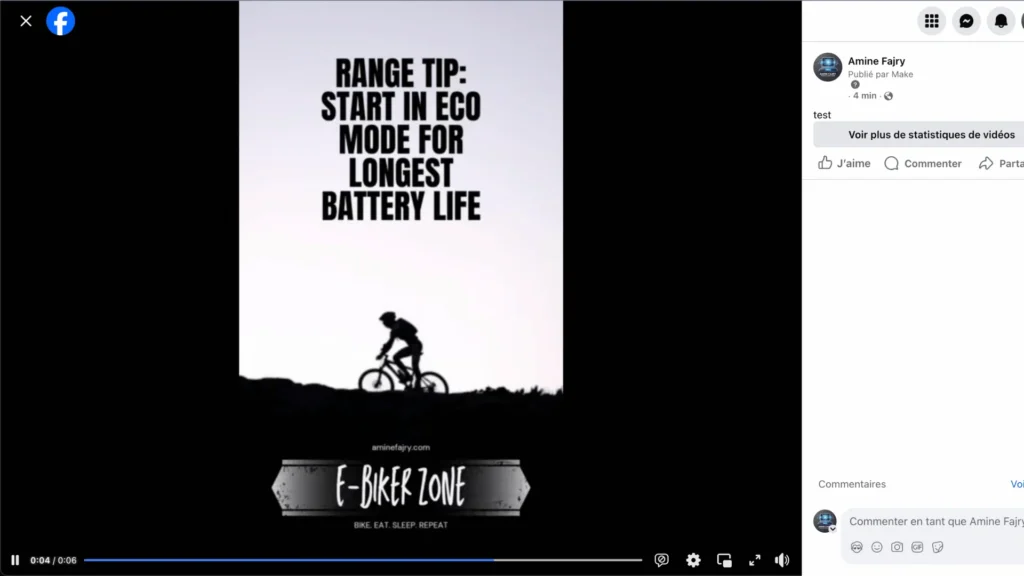
And here it is on Facebook as well! As you can see, our automation also worked perfectly to share the same video here.
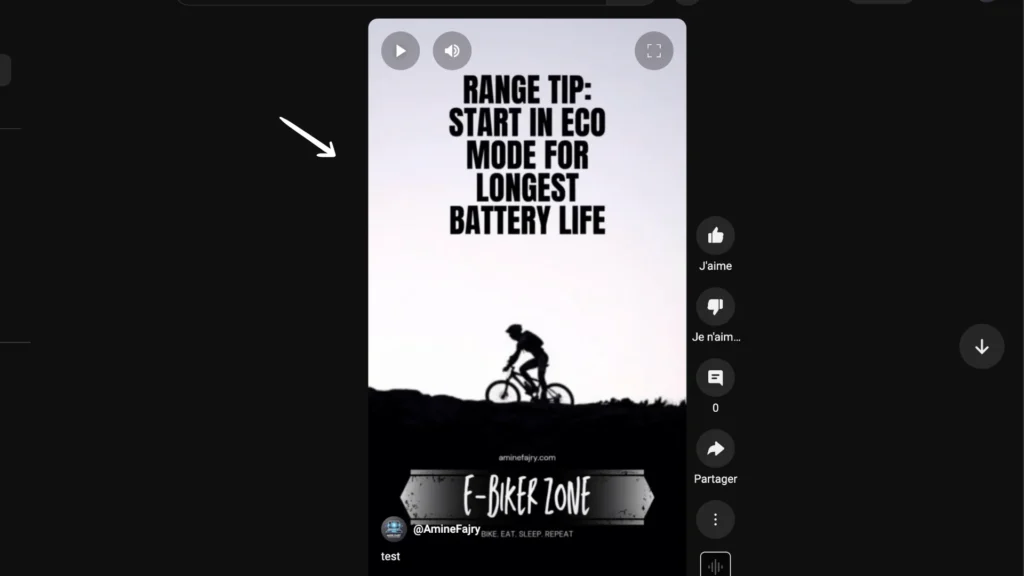
And finally, here’s our video, which was successfully published on YouTube! With this automation setup, we’ve shared our content across three significant platforms with just a few clicks.
Step 8: Schedule Your Automation
Want to take your automation game to the next level? You can schedule all of these posts for the perfect timing! I’ve written a detailed guide about Make’s scheduling features – check out this article to learn all about timing your content just right:
This is just the beginning of what you can do with this automation! Here are some exciting ways to expand and enhance your setup:- Scale up by adding more social media platforms to your workflow
- Keep everything organized by integrating Airtable as your content hub
- Create a parallel automation for photo posts
- Set up email notifications to track your posts
- Use Discord for real-time updates and monitoring (this is my favorite!)
The possibilities are endless; the best part is that you can mix and match these features to create your perfect workflow. I’ve been using Discord extensively for my automation, and it’s been a game-changer for keeping track of everything.
Remember, the beauty of Make is that you can start simple and gradually increase your automation as your needs grow. Why not try some of these ideas?
Get this scenarioConclusion
Ready to revolutionize your social media workflow? Implementing this automation system will free up valuable time to focus on strategy and engagement. Review and update your templates and automation scenarios regularly to ensure optimal performance. Start small, test thoroughly, and gradually expand your automation as you become more comfortable with the process.
FAQs
Can Canva automate social media posts?
Yes, Canva can automate social media posts when integrated with automation tools like Make. You can export your Canva designs automatically and schedule them to post across multiple platforms.
Is there a way to automate social media posts?
Absolutely! Using Make with Canva, you can create an automated workflow that posts your content to Instagram, Facebook, YouTube, and other social media platforms simultaneously or on a schedule.
Can I use Canva for my social media?
Yes, Canva is excellent for creating social media content. It offers templates specifically designed for various social media platforms, ensuring your content maintains each platform’s correct dimensions and formatting.
Does Canva have automation?
While Canva doesn’t have built-in posting automation, it can be connected to automation platforms like Make to create powerful automated workflows for social media management and content distribution.

Further Ressources
- How to Automate Contract Management with Make
- The Ultimate Guide to Data Mapping in Make
- How to Send Automated Emails with Make
- How to Automate Employee Onboarding in Make
- How to Send Automated Emails from Google Forms Using Make
- How to Convert Base64 to PDF Using Make
- How to Build a Pinterest Automation System with Make
- How to Automate Pinterest Video Posts with Make