How To Automate Lead Nurturing Workflows In Make

Did you know businesses using marketing automation experience a 451% increase in qualified leads? That’s right! Automation is your golden ticket to transform your lead-nurturing process. In this comprehensive guide, I’ll walk you through everything you need to know about setting up automated lead-nurturing workflows in Make (formerly Integromat). Whether you’re a marketing professional or a business owner, you’ll discover how to turn manual follow-ups into a streamlined, efficient system that works while you sleep!

Let’s GO !!
What is Lead Nurturing?
Lead nurturing is like building a friendship with your potential customers. Instead of pushing for an immediate sale, you’re developing a relationship by sending them helpful information at just the right moments.
Think of it as staying in touch with someone who showed interest in your business but isn’t quite ready to buy. Maybe they downloaded your ebook or signed up for your newsletter. Rather than bombarding them with “Buy now!” messages, you send them valuable content that addresses their specific needs and challenges.
The magic happens when you automate this process. Instead of manually remembering to follow up with each lead, your system sends personalized emails based on their behavior and where they are in their buying journey.
Effective lead nurturing keeps your business top-of-mind and positions you as a helpful expert. When leads finally reach the decision stage, they’re more likely to choose you because you’ve built trust through consistent, valuable communication.
The best part? With tools like Make, you can set up these nurturing sequences once and let them work for you 24/7, turning cold leads into warm prospects without constant manual effort.
Step-by-Step Guide to Creating Lead Nurturing Workflows in Make
Step 1 – Create Your table in Airtable
Step 2 – Create A New Scenario
Step 3 – First Module
Step 4 – Interview Link
Step 5 – Router
Step 6 – Set Up First Email
Step 7 – First Follow Up Email
Step 8 – Second Follow Up Email
Step 9 – Add Filters
Step 10 – Save And Run Your Scenario
Step 11 – Automate Your Scenario

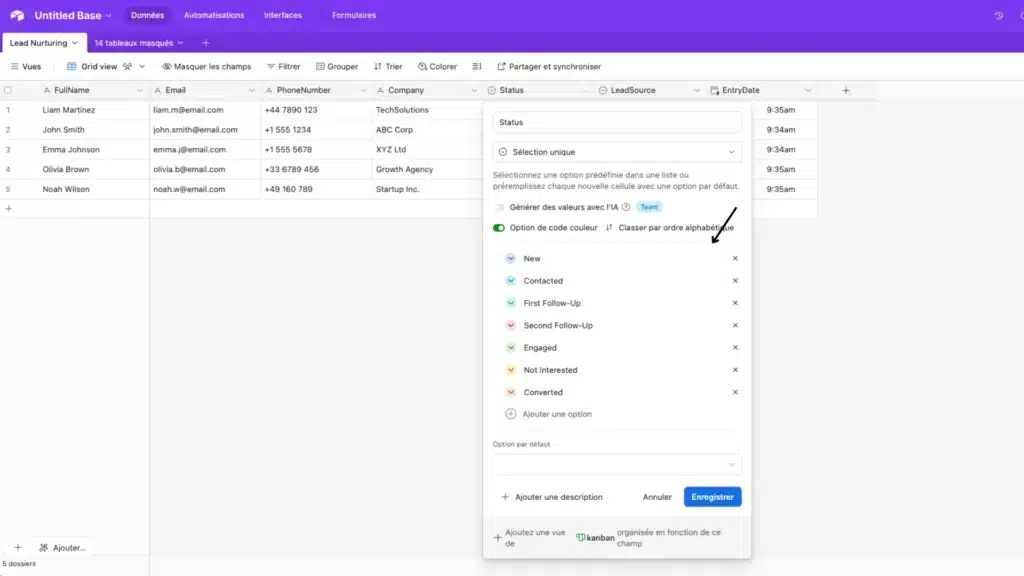
Step 1 – Create your table in Airtable
Let’s start by setting up your lead tracking system in Airtable. First, create a new table with the essential columns you’ll need. Starting with these seven key fields works perfectly: FullName, Email Address, Phone Number, Company, Status, Lead Source, and Entry Date. Of course, you can customize this with as many columns as your business requires!

- New → These fresh leads just entered our system—waiting for that initial contact!
- Contacted → I’ve sent the first email and await a response.
- First Follow-Up → A gentle nudge sent after 3-5 days of silence (because we all know how emails can get buried).
- Second Follow-Up → My final check-in before I adjust my approach or timing.
- Engaged → Success! The lead has responded positively or shown genuine interest in what we offer.
- Not Interested → They’ve explicitly declined or gone silent after multiple follow-ups. It’s time to respect their choice and move on.
- Converted → The ultimate win! This lead has officially become a customer and deserves to be celebrated.
- LinkedIn — Professional connections and outreach that often yield high-quality leads
- Website — Visitors who found us organically or through our content marketing efforts
- Event — Those valuable face-to-face connections from conferences, workshops, and networking meetups
- Referral — The golden leads recommended by existing clients (these tend to convert beautifully!)
- Cold Email — Direct outreach campaigns that help us reach new prospects
I track these sources religiously because understanding where my best leads come from helps me invest my time and marketing budget more strategically. Feel free to customize this list based on your unique business channels!

For the EntryDate column, I recommend using Airtable’s ‘Created time‘ field type—it’s one of my favorite time-saving features! When configured, this special field automatically stamps each new lead with the exact date, hour, and minute they entered your system.
No manual data entry is needed! This timestamp becomes incredibly valuable when analyzing response times or identifying patterns in your lead generation efforts. I can’t tell you how many insights I’ve gathered just by having this accurate timeline data at my fingertips.

Step 2 – Create A New Scenario
Now for the automation magic! Head to make.com and create a new scenario. New users can sign up for free (1,000 operations monthly). Already have an account? Create a new scenario and get your lead management system working for you.
Step 3 – First Module
Select the ‘Watch Records‘ trigger in Make.com for our first automation module. This powerful trigger will monitor your Airtable base and activate whenever new leads are added—no more manual checking needed! Connect it to your lead tracking table, and we’ll be ready for the next step.

Step 4 – Interview Link
Next, I connected Calendly as my interview scheduling tool. This integration automatically sends your leads a booking link after they enter your system. If Calendly isn’t your preference, Make.com easily connects with Zoom, Microsoft Booking, or other scheduling platforms to match your workflow.

Step 5 – Router
Now, add a router module—your workflow’s traffic controller. This essential component will direct your leads down different paths based on specific criteria, such as lead source or status, ensuring each contact receives the appropriate follow-up sequence.

Step 6 – Set Up First Email
Add an email module configured with HTML formatting for the first router path. This allows for a professional, branded appearance. Map the essential fields from your Airtable database—like lead name and email address—directly into your message using Make’s dynamic mapping feature. Be sure to embed your Calendly interview link prominently in the email content. This personalization shows leads you’re reaching out specifically to them, not just sending generic messages.

Next, add an “Update a Record” module from Airtable. This clever step automatically changes your lead’s status from “New” to “Contacted” when your email is sent. This status update maintains an accurate pipeline view without manual intervention, ensuring you know exactly which leads have received your initial outreach.

Step 7 – First Follow-Up Email
For your first follow-up route, add another “Send an Email” module with carefully crafted content that gently reminds leads about your initial message. I’ve found that mentioning a specific benefit or addressing a common pain point works wonders here. Map your Airtable fields—lead name, company, and any previous interaction notes—to create a personalized follow-up that doesn’t feel automated. Remember to include your scheduling link again, making it effortless for them to take action.

After your follow-up email is sent, add another “Update a Record” module that automatically changes the lead’s status from “Contacted” to “First Follow-Up” in Airtable. This automatic status progression creates a clear visual trail of your outreach efforts and helps you quickly identify which leads need additional attention at a glance.

Step 8 – Second Follow-Up Email
Create another “Send an Email” module with more direct content that creates gentle urgency for your second follow-up route. Map your lead’s name, company, and previous contact dates from Airtable to reference your earlier communications. In my experience, asking a specific question or offering additional value in this email significantly increases response rates. Keep your tone helpful rather than pushy, and include your scheduling link one final time with a clear call to action.

Add another “Update a Record” module that automatically changes the lead’s status from “First Follow-Up” to “Second Follow-Up” in your Airtable. This critical automation step accurately tracks your outreach progression and helps you identify which leads have received multiple touchpoints without requiring manual status updates.

Step 9 – Add Filters
Now, let’s set up our essential filtering system. Create your first filter labeled “First Email” with a simple but powerful condition: Status equals “New“.
This filter ensures that your initial outreach only targets fresh leads who have yet to be contacted, preventing duplicate messages and maintaining a professional impression with your prospects.

Create one named “First Follow-Up” for your second filter with the condition Status equals “Contacted.” This smart filter targets only leads who have received your initial email but haven’t responded yet. By automatically identifying these leads, you’ll ensure your follow-up message reaches the right people at the right stage in your nurturing sequence.

Create one labeled “Second Follow-Up” for your third filter with the condition: Status equals “First Follow-Up“. This filter specifically targets leads who’ve already received your initial email and first follow-up but haven’t engaged yet. It ensures your final outreach attempt is properly timed and only sent to those who need this additional touchpoint in your sequence.

Step 10 – Save And Run Your Scenario
Now, save your scenario, and let’s move to testing. Since the ‘Watch Records‘ trigger won’t activate during a test, we’ll need to select a record manually. Right-click on your trigger module, select “Choose where to start,” then “Choose manually.” This allows you to pick a specific lead record from your Airtable to test your entire automation sequence without waiting for a new lead to arrive naturally.

Results
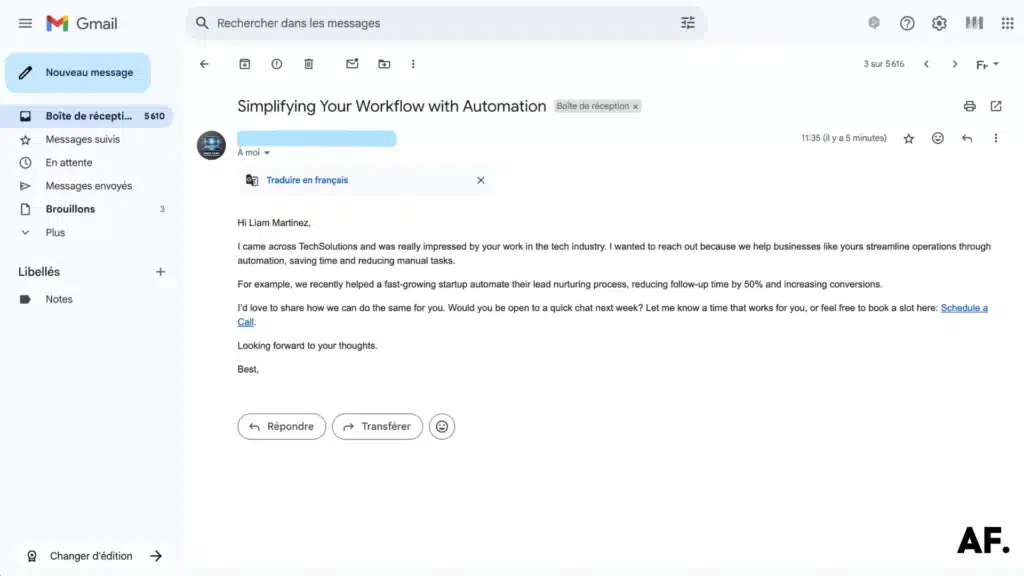
First Email :


First Follow-Up Email :


Second Follow-Up Email :

Step 11 – Automate Your Scenario
Once testing is complete, activate the real power of the “Watch Records” module by setting your automation schedule. You can configure your scenario to run every minute, hour, or day, depending on your lead volume and response urgency. This scheduling feature ensures your system continuously monitors for new leads without any manual intervention. For a deeper dive into advanced scheduling strategies, check out my detailed article on maximizing Make.com’s scheduling capabilities.

Benefits of Automating Lead Nurturing in Make
- Time Efficiency: Eliminate manual follow-ups and repetitive tasks
- Consistency: Ensure every lead receives timely, appropriate communication
- Personalization: Deliver targeted content based on lead behavior and attributes
- Scalability: Manage thousands of leads simultaneously without adding resources
- Analytics: Track performance and optimize your nurturing strategy
How Can This Lead Nurturing Automation Help You?
Imagine waking up to find new leads already moving through your sales pipeline—without you lifting a finger. That’s the power of lead-nurturing automation in Make.
First, it saves you countless hours. Instead of manually tracking who needs a follow-up and when, your system handles it automatically. Those tedious, repetitive tasks? Gone. You can focus on high-value activities like closing deals and strategy instead.
Your leads also get a more consistent experience. No one falls through the cracks because they’re contacted at the right time with the right message. The personalization makes them feel valued, not like they’re just another name on a list.
What about when your business grows? Your automated system scales effortlessly whether you’re handling 10 leads or 10,000. No need to hire more people to manage follow-ups.
Perhaps most importantly, you’ll convert more leads into customers. With timely, relevant communication at each journey stage, prospects receive the nudges they need to move forward. The data shows businesses using automation see dramatic increases in qualified leads and conversions.
In short, this automation becomes your tireless assistant, nurturing relationships while you focus on what matters most.
Wrapping Up
Automating your lead nurturing process in Make isn’t just about saving time – it’s about creating a more effective, personalized experience for your prospects. Remember to review and optimize your workflows based on performance data regularly. Ready to transform your lead-nurturing strategy? Start implementing these automation techniques today!
FAQs
How to generate leads automatically?
While the article doesn’t specifically cover automatic lead generation, it mentions tracking lead sources like LinkedIn, website, events, referrals, and cold emails. To generate leads automatically, you need to set up systems that capture information from these sources and feed it into your database (like Airtable in the example).
What is automated lead nurturing?
Automated lead nurturing uses software to automatically send personalized follow-up messages to potential customers based on their behavior or status. The article explains how to set up an automated system in Make that sends initial emails and follow-ups without manual work and updates lead statuses along the way.
What is an example of nurturing?
An example of nurturing from the article is the three-step email sequence: an initial outreach email with a scheduling link, a follow-up email sent to leads who haven’t responded, and a second follow-up that creates gentle urgency. Each email is personalized with the lead’s information and designed to guide them toward booking a meeting.
What is a lead nurturing workflow?
A lead-nurturing workflow is a structured sequence of automated actions that move potential customers through your sales process. In the article, the workflow includes watching for new leads in Airtable, sending an initial email with a meeting link, updating the lead’s status, sending follow-up emails after specific periods, and automatically updating their status at each step. The workflow uses filters to ensure leads receive the right messages at the right time.

Further Ressources
- How To Automate Expense Reports with Make in 9 Steps
- How to Use Midjourney to Create AI-Generated Images in Make
- How to Automate Data Entry with Make: Step-By-Step Guide
- How To Send Emails From Google Sheets Using Make
- How to Automate Your Follow-Up Emails in Make
- How to Use FLUX AI Image Generator in Make: Step-By-Step
- How to Automatically Write Blog Posts With Make and AI
- How to Use Leonardo AI Image in Make: Step-By-Step Guide