How To Automate Expense Reports with Make in 9 Steps

Managing expense reports can be tedious and time-consuming, draining productivity and increasing the risk of human error. Did you know that companies spend an average of 20 minutes manually processing a single expense report? That’s valuable time that could be better spent on strategic tasks! In this comprehensive guide, I’ll show you how to leverage Make‘s powerful automation capabilities to transform your expense reporting process into a streamlined, efficient system.

Let’s start!
Setting Up Your Expense Reports Automation
Step 1 – Create a Table
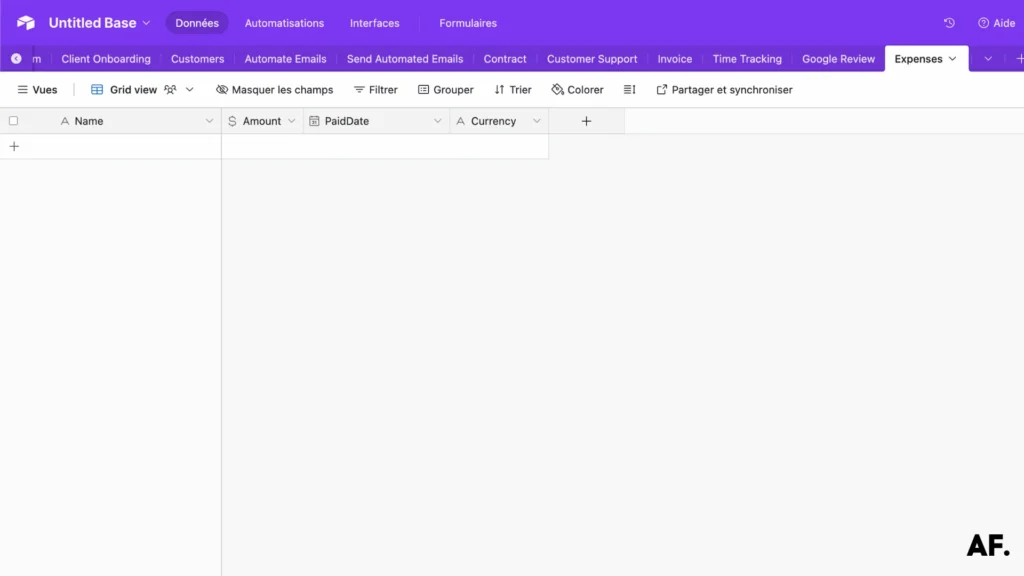
Ready to organize your finances? Let’s start by setting up a simple but powerful Airtable workspace together. We’ll create a table with these essential columns:- Company Name (this will automatically capture the company name)
- Payment Amount
- Payment Date
- Currency
Think of this as your digital financial dashboard – I use this exact setup to track every payment I make, and it’s been a game-changer for my expense management!
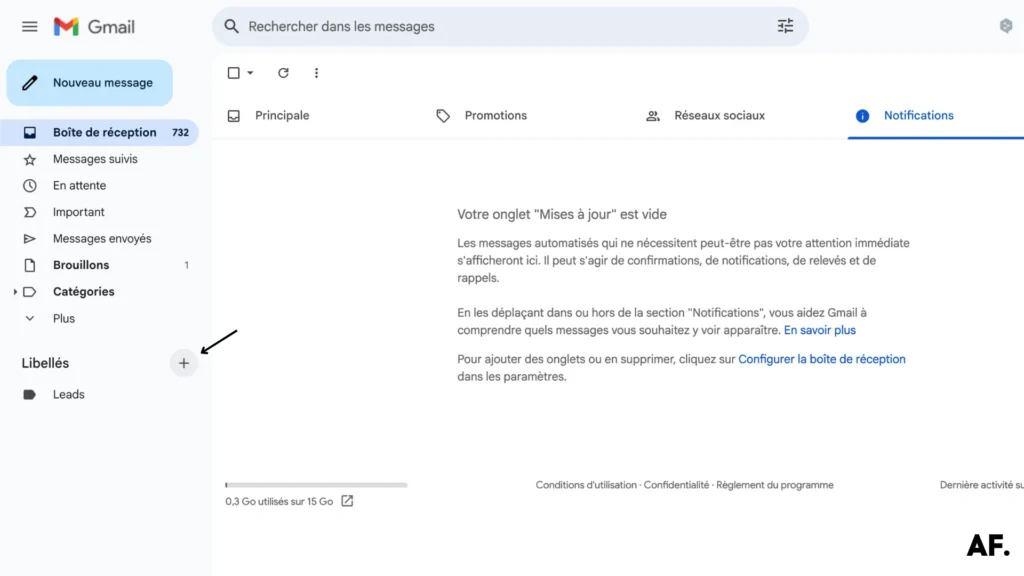
Step 2 – Create Labels
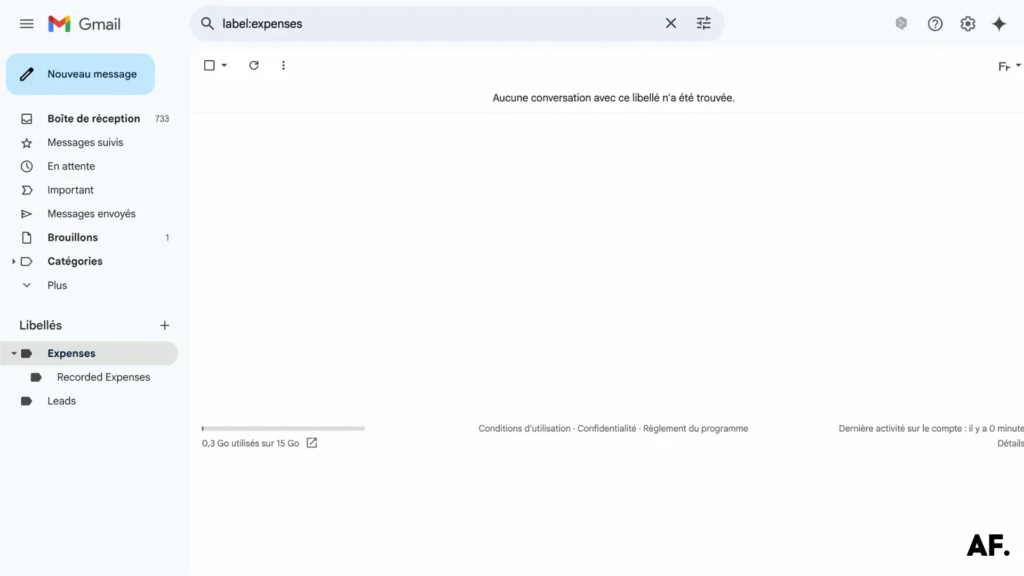
Next, we’ll organize your Gmail inbox by creating a dedicated ‘Expenses‘ label. Head over to Gmail, look for the ‘+‘ button in the labels section, and create your new label – this will be our central hub for managing all expense-related emails.
Here’s a quick peek at what your setup should look like now. I’ve included this screenshot so you can easily confirm that you’re on the right track!

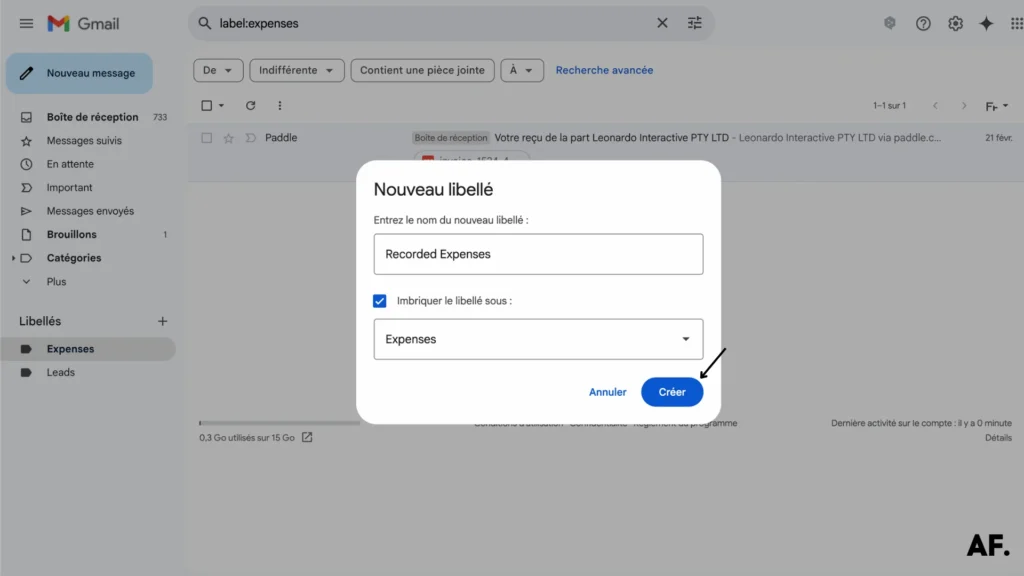
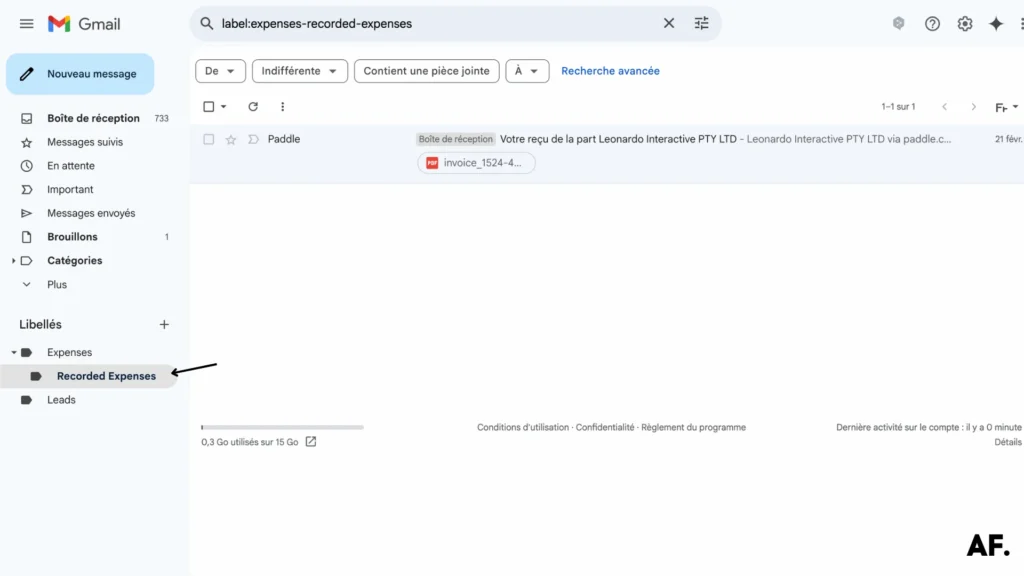
Let’s get more organized by creating a ‘Recorded Expenses‘ subfolder under your main Expenses label. This will help you track which receipts you’ve already processed!
Step 3 – Move your Expenses Emails
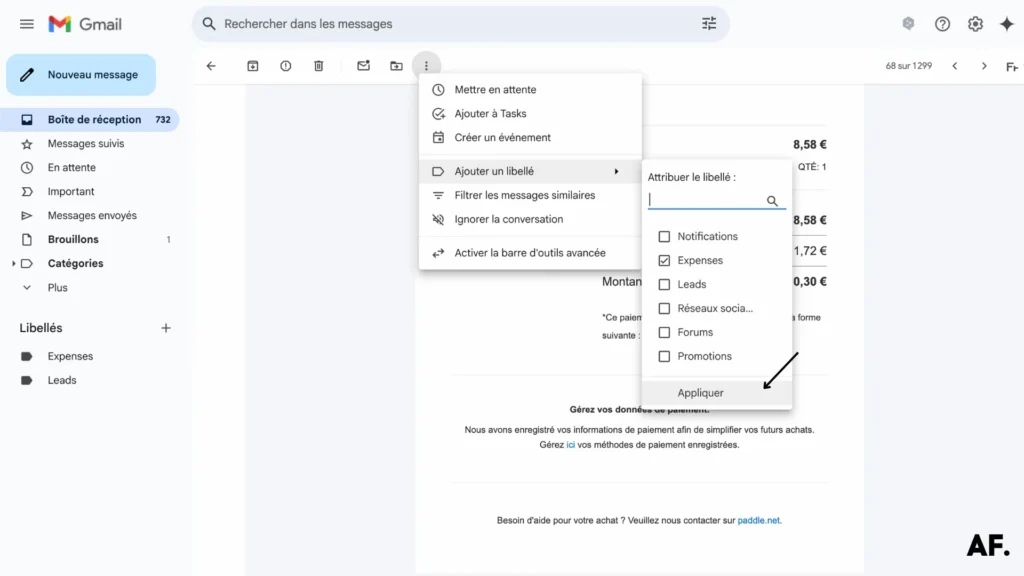
It’s time to gather your invoices! In Gmail’s search bar, type in your invoice-related keywords. When you find a relevant email, click the three-dot menu icon (⋮) to access more options.
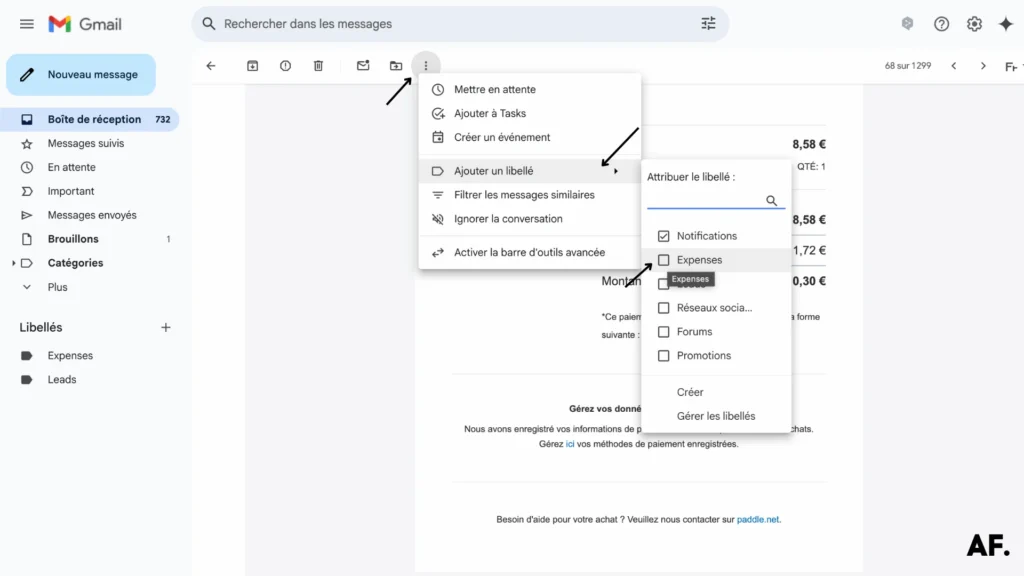
Select ‘Expenses‘ from the label menu, and click ‘Apply‘ to tag your invoice. This simple action keeps your financial emails neat and easy to find later!
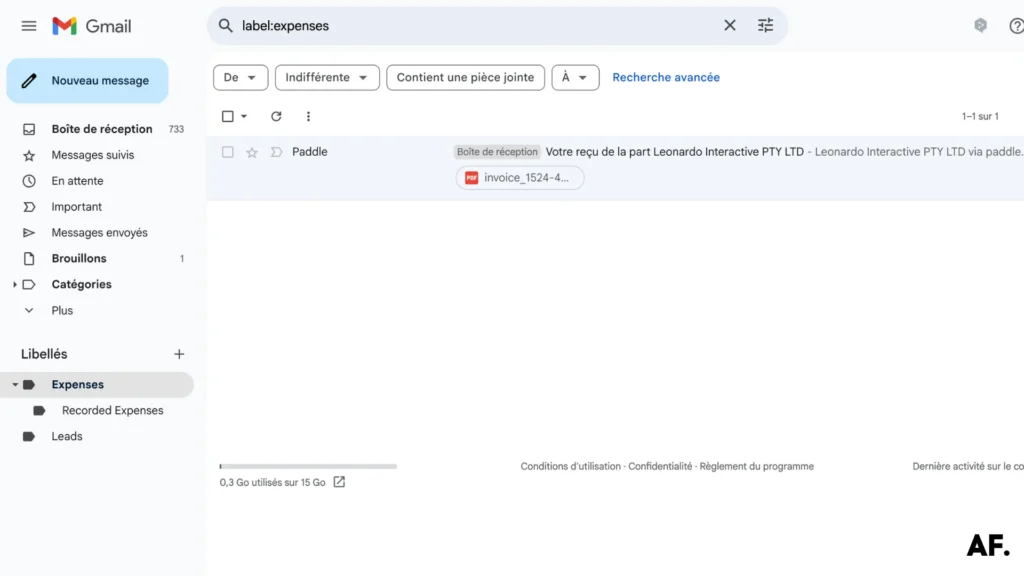
Perfect! Your email appears instantly under the Expenses label – this is your first successfully organized invoice! Please see your Expenses folder to see it, proving that your organization’s system is already working.
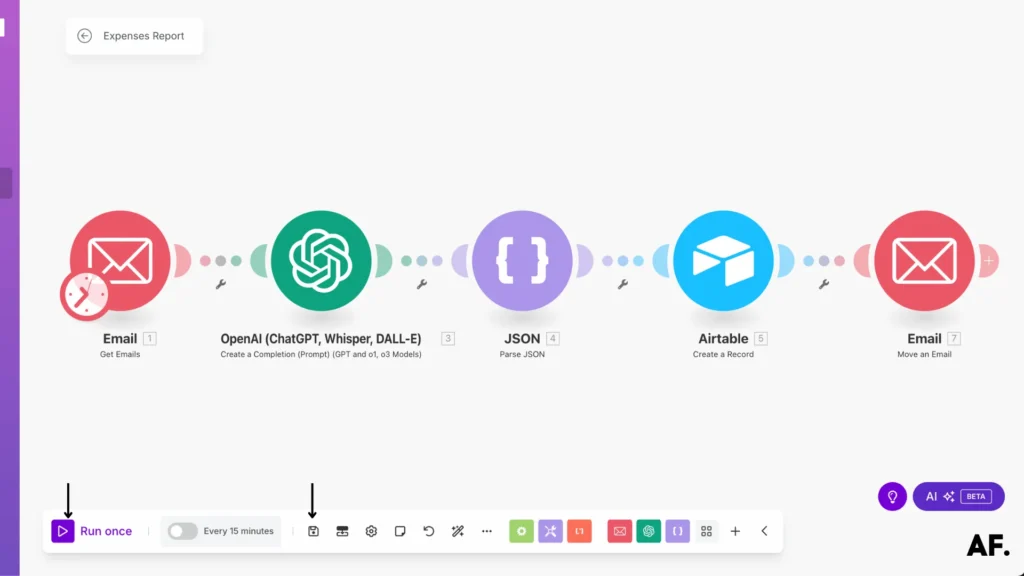
Step 4 – Create your Scenario
Now that we’ve organized our emails, let’s create the automation magic! Head over to Make.com and create a new scenario, where we’ll build the workflow that does the heavy lifting for us.

Step 5 – Start Building
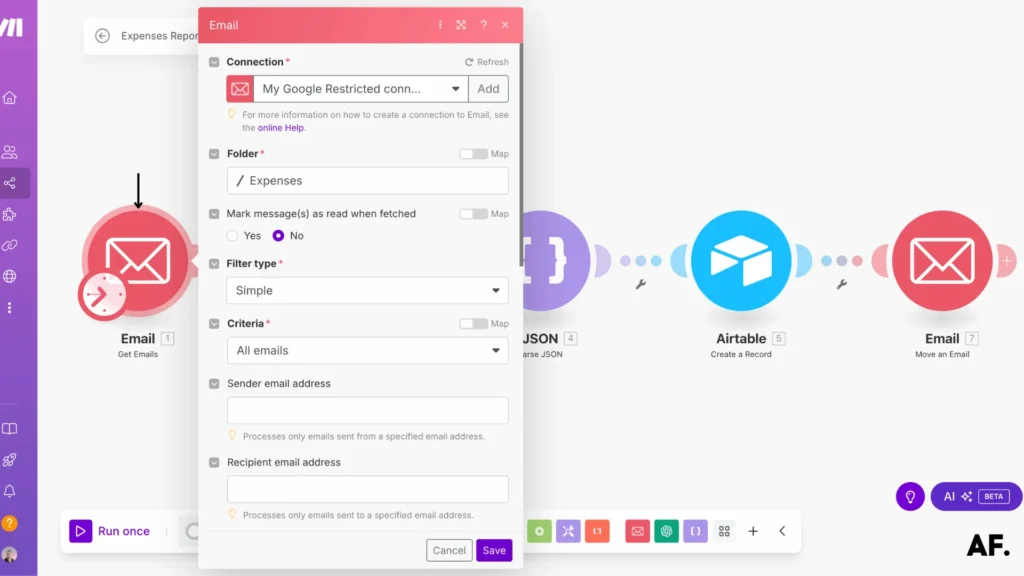
First, in our automation journey, we’ll connect to your inbox by adding the ‘Get Emails‘ module from the Email app. This will be our trigger—the starting point for new expense-related emails.
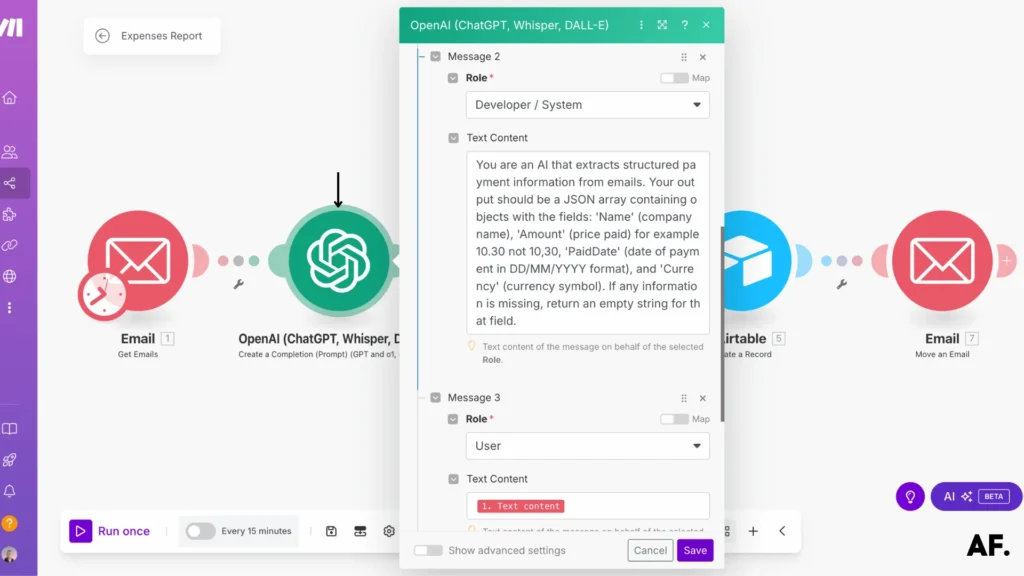
Step 6 – ChatGPT Module
Next, we’ll add some AI power to our automation! Connect the ChatGPT module and select the GPT-4 model. We’ll set up two key components here:- The System prompt: This sets the foundation for how ChatGPT will process our data
- The Assistant prompt: This tells ChatGPT exactly what we want it to do with our emails
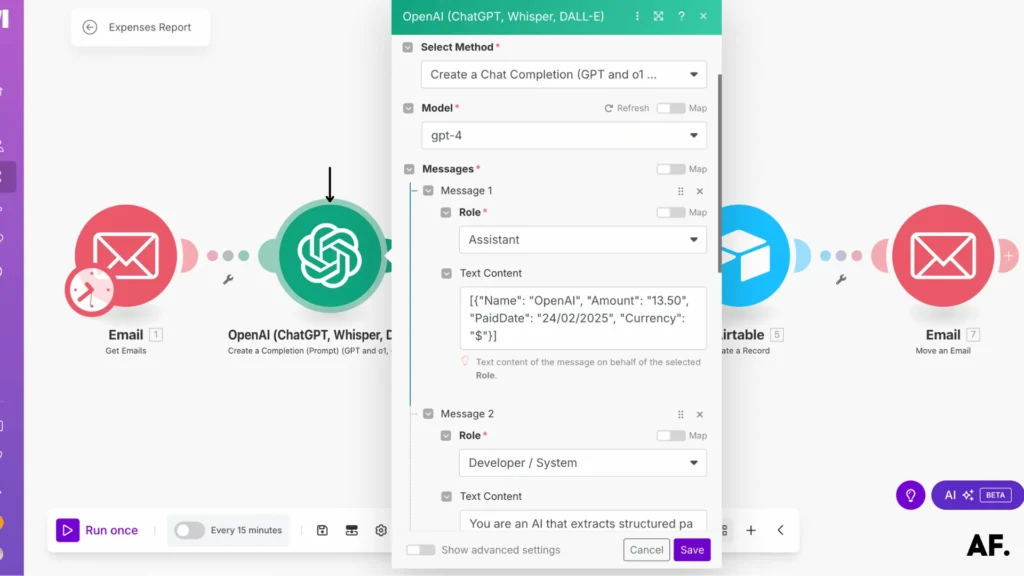
We’ll feed in the raw email content for the ‘User‘ input field in the ChatGPT module. Click the little wand icon and select ‘Email Content‘ from your previous Get Emails module – this gives ChatGPT the raw material it needs to work with.
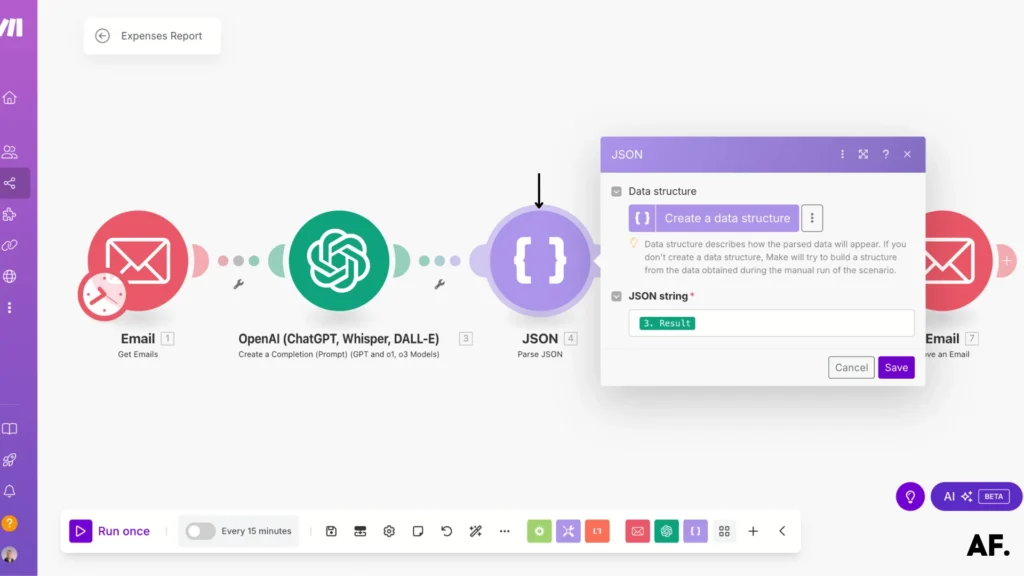
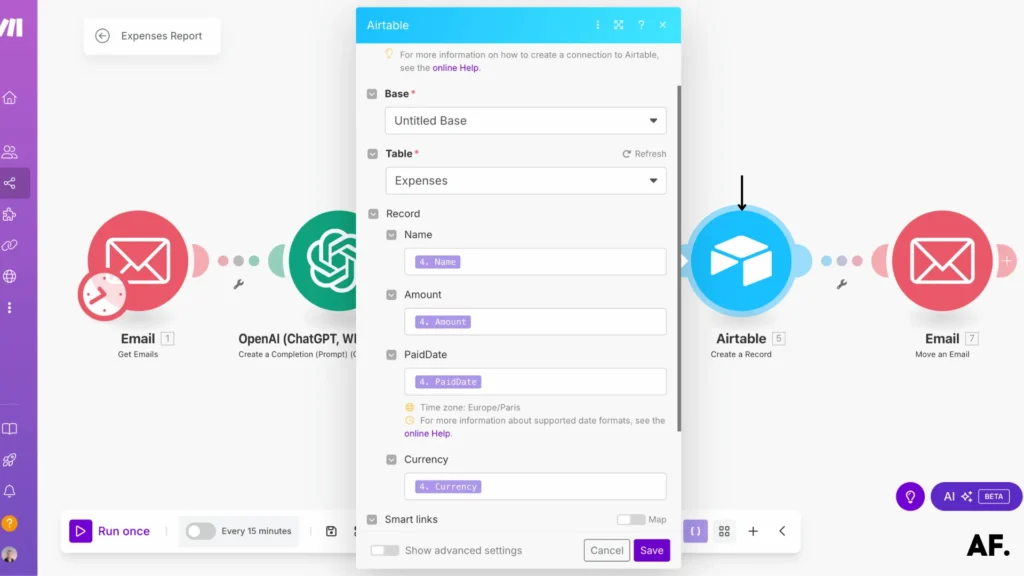
Step 7 – Create a Record
Now, we’ll parse ChatGPT’s structured data. Add a ‘JSON Parse‘ module and connect it to ChatGPT’s output—just map the ChatGPT response to the ‘JSON string‘ field. This transforms ChatGPT’s response into data we can actually use!
It’s time to store our processed data! Add the ‘Create a Record‘ module from Airtable and connect it to our parsed JSON. Match each field in your Airtable with the corresponding JSON data using the mapping tool—this automatically fills your expense tracking table with all the details ChatGPT extracted.
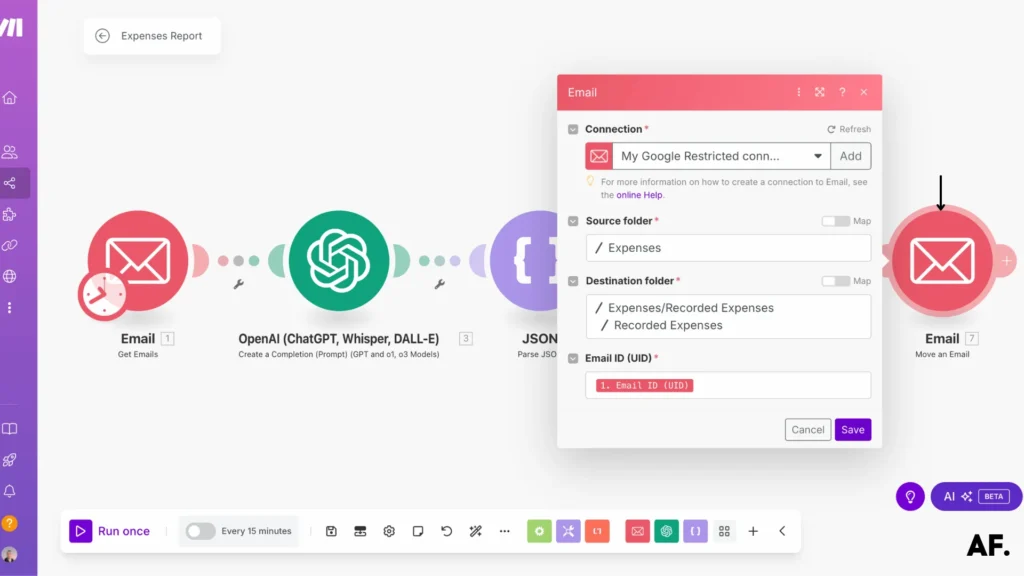
Step 8 – Move Email
For our finishing touch, let’s add the ‘Move Email‘ module to file away processed receipts automatically. Set it to move emails from your ‘Expenses‘ label to ‘Recorded Expenses‘ – this keeps your inbox organized by showing which invoices have been successfully logged in Airtable!
Step 9 – Save and Run
Now for the exciting part – let’s bring your automation to life! Click ‘Save‘ to lock in all your hard work, then hit ‘Run‘ to watch your scenario. Your first automated expense tracking run is about to happen!
Results
And there you have it – watch the magic unfold! Your Airtable is now automatically populating with perfectly organized expense data. Look at your table – every column is filled with the right information, extracted, and categorized without you lifting a finger. From email to organized data in seconds!

Check your ‘Expenses‘ label in Gmail. Do you notice how it’s empty now? That’s because all your processed invoices have automatically moved to ‘Recorded Expenses,’ giving you a clear visual confirmation that everything has been logged in your Airtable. A clean Expenses folder means your automation is working perfectly!
And for the final proof that our automation is working like a charm – take a peek at your ‘Recorded Expenses‘ folder. There’s your processed invoice, automatically moved and safely stored! The email has found its new home, and your expense data is now logged in Airtable. One seamless flow, zero manual work!
Conclusion
By following these nine steps, you’ll be well on your way to creating an efficient, automated expense reporting system using Make. Remember that automation is an iterative process—start small, test thoroughly, and gradually expand your automation scenarios as you become more comfortable with the platform. The time and effort you invest in setting up this automation will pay dividends in reduced manual work and improved accuracy.
FAQs
How to use AI to track expenses?
Use Make to automate expense tracking. It organizes emails, extracts data with ChatGPT, and logs expenses in Airtable.
How do you process an expense report?
Make gathers expense emails, extracts key details using AI, and saves them in a table. It also moves processed emails for easy tracking.
How to make an expense report spreadsheet?
Use Airtable to create a table. AI fills it with data from expense emails, reducing manual work.
How to make your own expense report?
Set up labels in Gmail, create an Airtable table, and use Make to automate data entry. This keeps everything organized without manual effort.

Further Ressources
- How to Run Custom Code on Make: Step-by-Step Guide
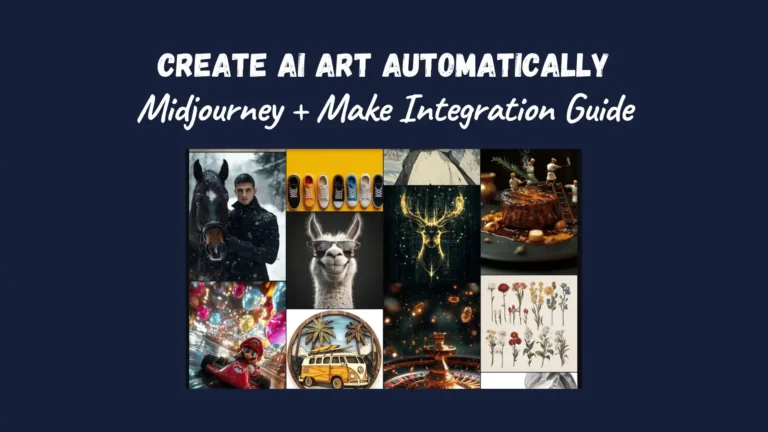
- How to Use Midjourney to Create AI-Generated Images in Make
- How to Automate xAI Grok with Make : Comprehensive Guide
- How To Use Deepseek AI In Make: Step-By-Step Guide
- How to Automate Your Follow-Up Emails in Make
- How to Use FLUX AI Image Generator in Make: Step-By-Step
- How to Automate Perplexity AI with Make
- How to Use Leonardo AI Image in Make: Step-By-Step Guide