How To Use Deepseek AI In Make: Step-By-Step Guide
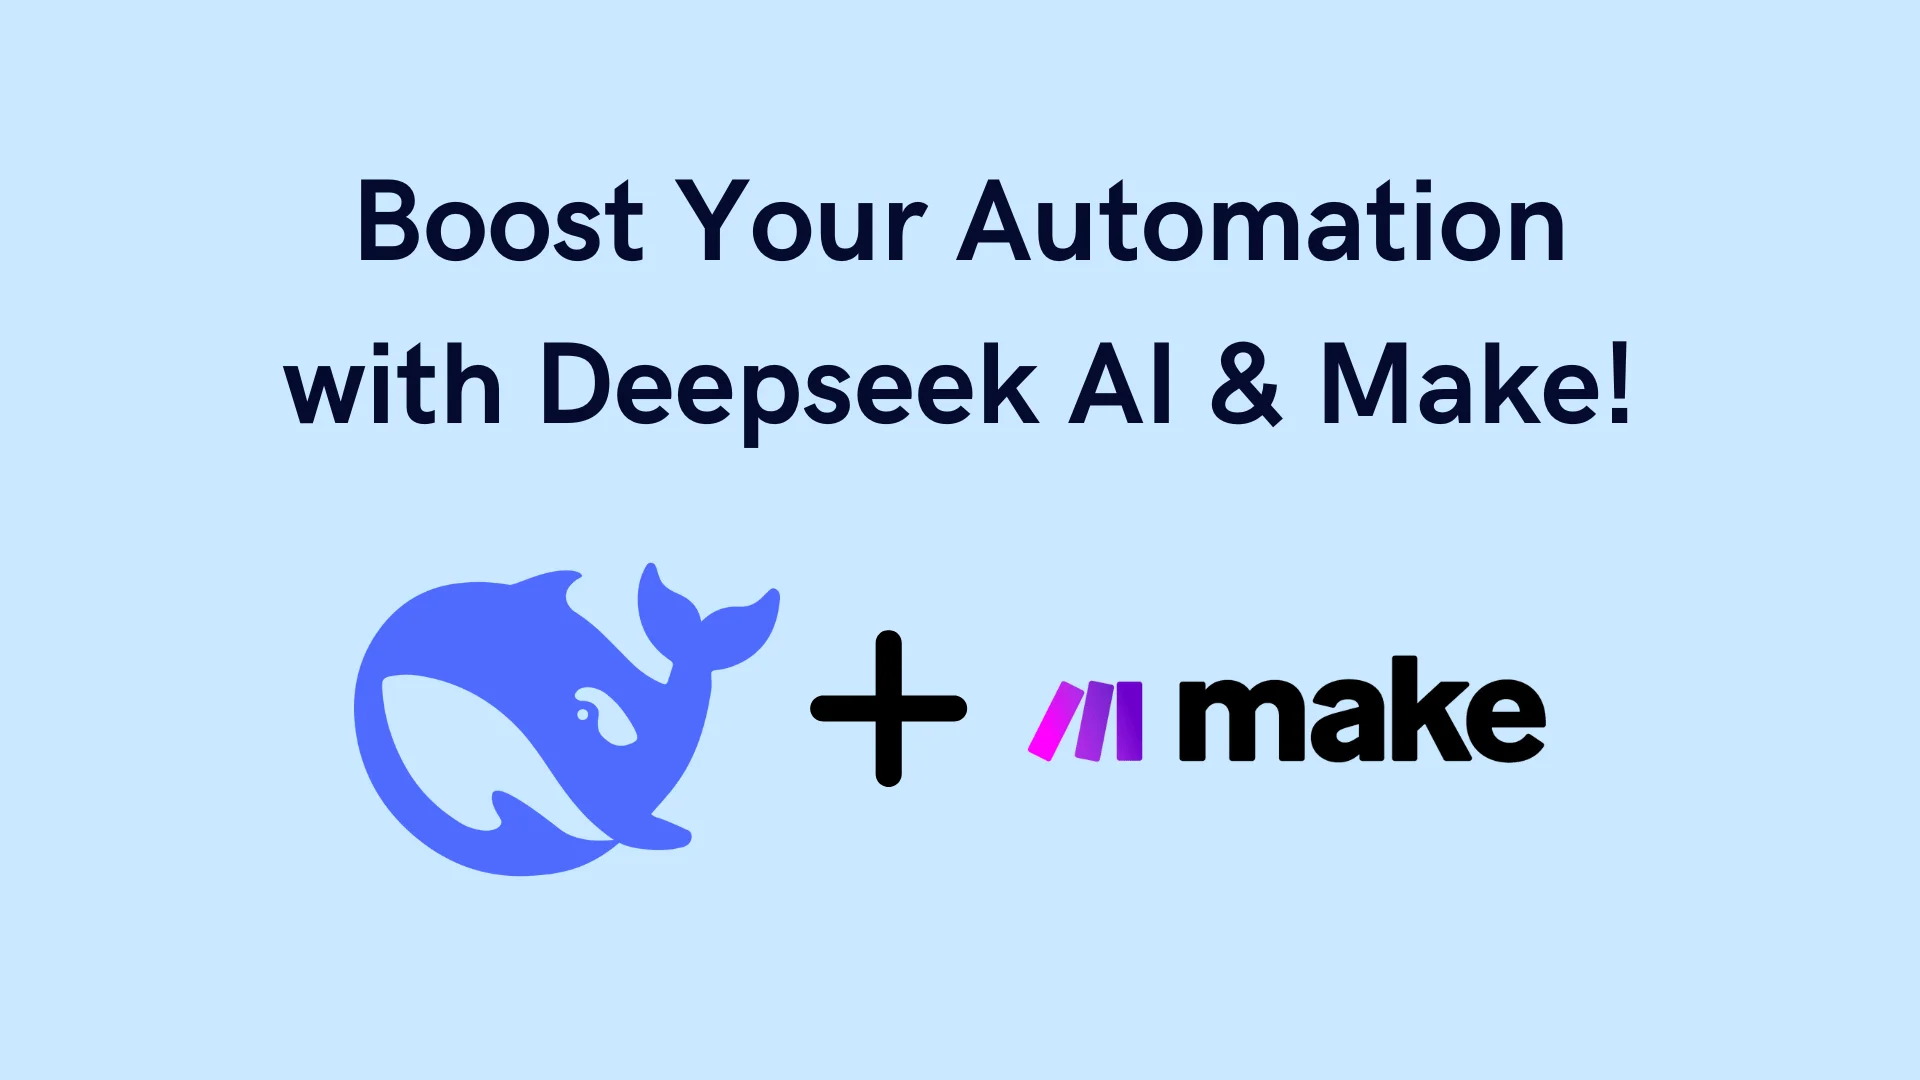
Imagine having the power of advanced AI at your disposal within your Make automation! Deepseek AI has emerged as a game-changing tool for automation enthusiasts, and I’m excited to show you exactly how to harness its potential. According to recent statistics, businesses using AI-powered automation see a 40% increase in productivity! In this comprehensive guide, I’ll walk you through everything you need to know about implementing Deepseek AI in your Make workflows – from initial setup to advanced techniques.

Let’s dive in and transform your automation game!

Setting Up Your First Deepseek AI Module in Make
Step 1: Create Your OpenRouter Account
Let’s start with creating your OpenRouter account! I chose OpenRouter because it gives you access to various Large Language Models (LLMs) in one place. This will save you time and make your AI journey much smoother as you explore different options.
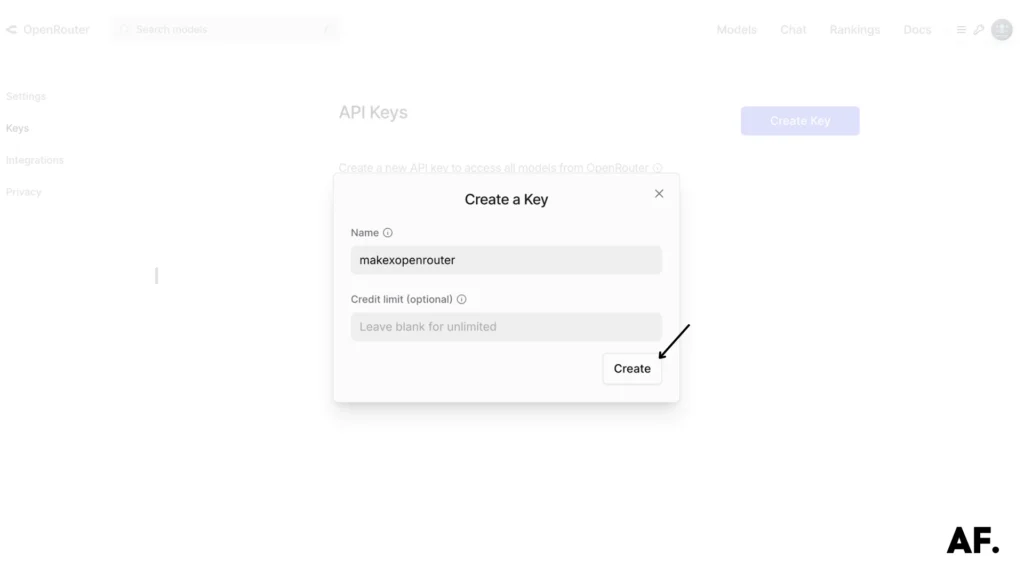
Step 2: Create Your Key
Now, let’s set up your OpenRouter key—it’s quick and simple! Hover over your profile icon at the top right corner and select ‘Keys‘ from the dropdown menu. Then, look for the bright ‘Create Key’ button and click it. This key will be your personal access pass to all the AI models.

Give your key a memorable name (maybe something like ‘My AI Key’ or whatever helps you remember its purpose), and click ‘Create‘. Once it’s generated, copy that key and keep it handy—we’ll need it in just a moment! Pro tip: Store this key somewhere safe, as you’ll use it to connect with the AI models.
Step 3: Create Your Scenario
Now comes the fun part – heading to Make to create your first scenario! This is where we’ll bring your automation to life. Click on the ‘Create a Scenario‘ button, and you’ll be one step closer to setting up your AI-powered workflow.
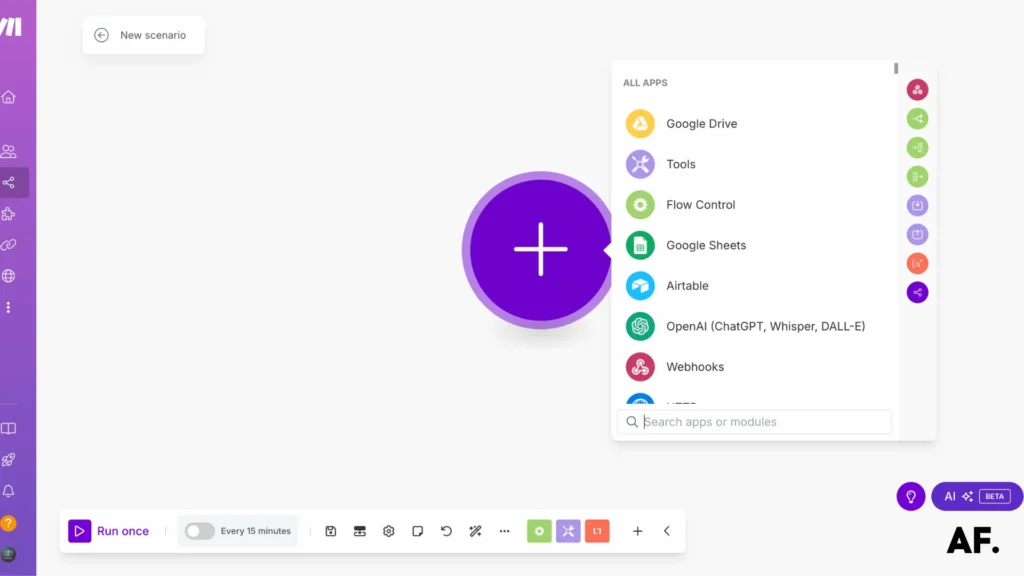
Step 4: First Module
Let’s start with the Tools module to keep things simple and organized. I created two variables here – and here’s a fun fact: these prompts were actually AI-generated for me! The first variable is for the user input (where your messages will go), and the second is for the system instructions that guide the AI’s behavior. This dual-variable setup gives us more control over our conversations with the AI.

Step 5: OpenRouter
For your next step, we’ll add the OpenRouter magic! Search for the OpenRouter module in Make and select ‘Create a Chat Completion‘ – where the AI conversation happens. Connect everything by clicking ‘Add‘ to create a new connection. Remember that key we copied earlier? This is where it comes in handy! Paste your OpenRouter key here to establish the connection, and you’re all set to communicate with your chosen AI models.
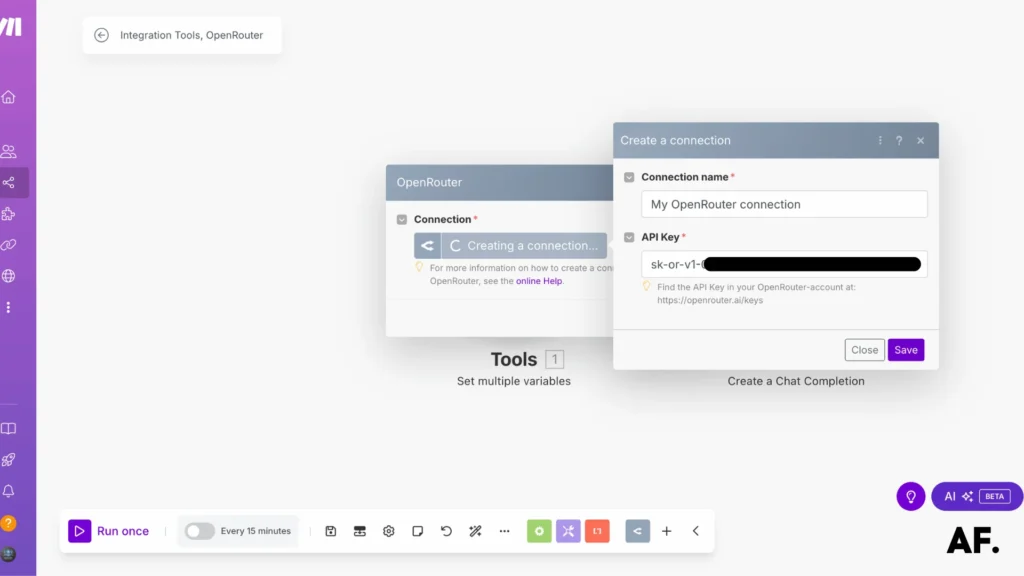
Let’s go with ‘DeepSeek: R1‘ for this test run—it’s completely free and perfect for trying things out! This model will help you get familiar with everything without any costs involved. Once you’re comfortable with the setup, you can explore other models.

Now it’s time to connect those variables we created earlier! Click into the module to see fields where we can add variables. Map the user and system variables from our Tools module into their corresponding spots in the OpenRouter module. This connection ensures our AI will receive the user messages and system instructions we set up. Think of it like connecting puzzle pieces – each variable finds its perfect place!

Step 6: Save And Run
Great job setting everything up! Now comes the exciting part – let’s bring your scenario to life. Hit that ‘Save‘ button to store all your hard work, then click ‘Run‘ to see your automation. You’ll witness your first AI interaction through the system you just built! Feel free to test it out with a simple message and watch the magic happen.

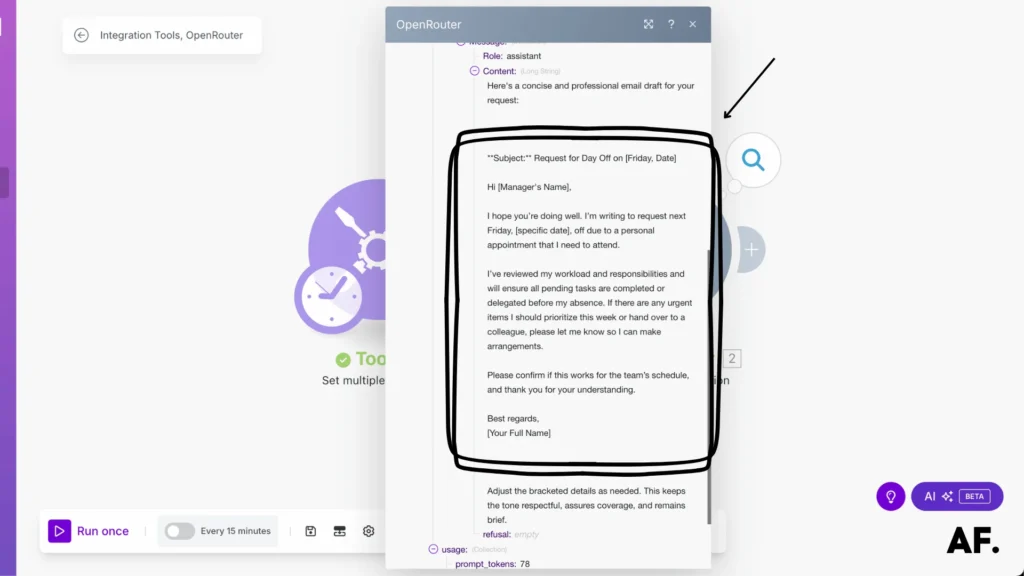
Step 7: Result
And voilà – look at this beautiful result! 🎉 Your automation is now running smoothly, transforming simple inputs into AI-powered responses. You’re seeing the successful combination of all the pieces we put together – from the OpenRouter connection to our variable setup. It’s pretty amazing how it all comes together, right? This is just the beginning of what you can create with this setup!
- Connect it to your favorite apps
- Add more sophisticated processing steps
- Experiment with different AI models
- Create multi-step conversations
Feel free to explore and make it your own. Remember, what we built today is the beginning of what’s possible with your automated AI setup. I can’t wait to see what you’ll create!
What is DeepSeek AI?
DeepSeek AI is an advanced artificial intelligence platform designed to help businesses and individuals make more intelligent decisions by extracting large amounts of data quickly and accurately. It uses cutting-edge machine learning and natural language processing (NLP) technologies to understand, interpret, and generate insights from complex information.
DeepSeek AI can adapt to various industries, from finance and healthcare to marketing and customer service. It can automate repetitive tasks, predict trends, and even assist in creative processes like content creation. Whether you’re looking to optimize operations, improve customer experiences, or uncover hidden patterns in data, DeepSeek AI simplifies the process.
In short, DeepSeek AI is a powerful tool that brings the future of AI-driven decision-making, making complex tasks easier and more efficient.
How Deepseek AI Can Help You?
Deepseek AI enhances automation within Make, helping users streamline workflows, reduce manual effort, and improve efficiency. Integrating Deepseek AI into your Make scenarios allows you to automate repetitive tasks, generate AI-powered responses, and optimize decision-making without writing complex code.
With Deepseek AI, you can create automation that processes user inputs, interprets data, and generates meaningful outputs. For instance, businesses can use it for automated customer support, content generation, or workflow optimization. By leveraging its natural language processing (NLP) capabilities, Make users can build AI-driven scenarios that interact dynamically with different apps and services.
One of its key benefits is easy integration—by simply connecting Deepseek AI via OpenRouter in Make, users can start automating tasks immediately. Whether you want to build chatbots, auto-generate reports, or streamline data processing, Deepseek AI simplifies the process within Make’s automation environment.
Best of all, Deepseek AI offers free models like DeepSeek R1, allowing users to experiment and refine their workflows. If you’re looking to supercharge your Make automation, Deepseek AI is the perfect tool to enhance efficiency and intelligence in your automated scenarios.
Conclusion
Ready to revolutionize your Make workflows with Deepseek AI? You now have all the tools and knowledge needed to get started! Remember, the key to success is starting simple and gradually building more complex automation. Don’t forget to monitor your workflows and optimize them based on performance regularly. Have questions? Join our community of automation enthusiasts – we’re here to help! Now go ahead and create something amazing with Deepseek AI in Make!
FAQs
How can I use Deepseek AI in Make?
You can integrate Deepseek AI in Make through OpenRouter. Create an API key, set up a scenario, add the OpenRouter module, and connect it to Deepseek AI for automation.
Is the Deepseek API key free?
You can generate a free API key on OpenRouter, but some AI models may have usage limits or paid plans.
Is Deepseek R1 free?
Yes, DeepSeek R1 is a free model available through OpenRouter, making it a great starting point for AI-powered automation in Make.

Further Ressources
- How to Convert a PDF to Text in Make
- How to Run Custom Code on Make: Step-by-Step Guide
- PDF to Google Sheets: Quick Automation with Make & ChatGPT
- How to Automate Google Reviews with Make
- How To Handle Errors In Make: A Complete Guide
- How to Convert Videos into Blog Posts Automatically with Make
- How to Extract an Item from an Array in Make
- What Are Make’s Data Iterators & Array Aggregators? Full Guide