How to Build a Customer Support System Automation in Make

Have you ever felt overwhelmed by managing customer support requests? You’re not alone! In today’s fast-paced business environment, automating customer support isn’t just a luxury – it’s a necessity. According to Zendesk, companies using automation in their customer service see a 48% increase in efficiency! In this comprehensive guide, I’ll walk you through creating a robust customer support system automation system in Make (formerly Integromat). Whether you are a small business owner or a customer service manager, this step-by-step guide will help you transform your support operations into an efficient, scalable system.

Let’s start!
Setting Up Your Customer Support Foundation
Step 1: Create Your Table
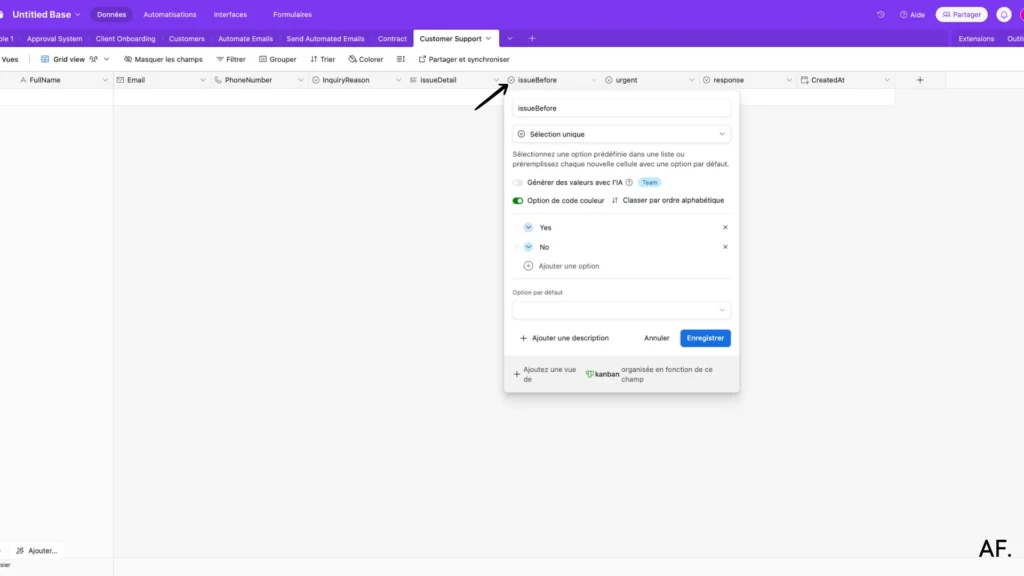
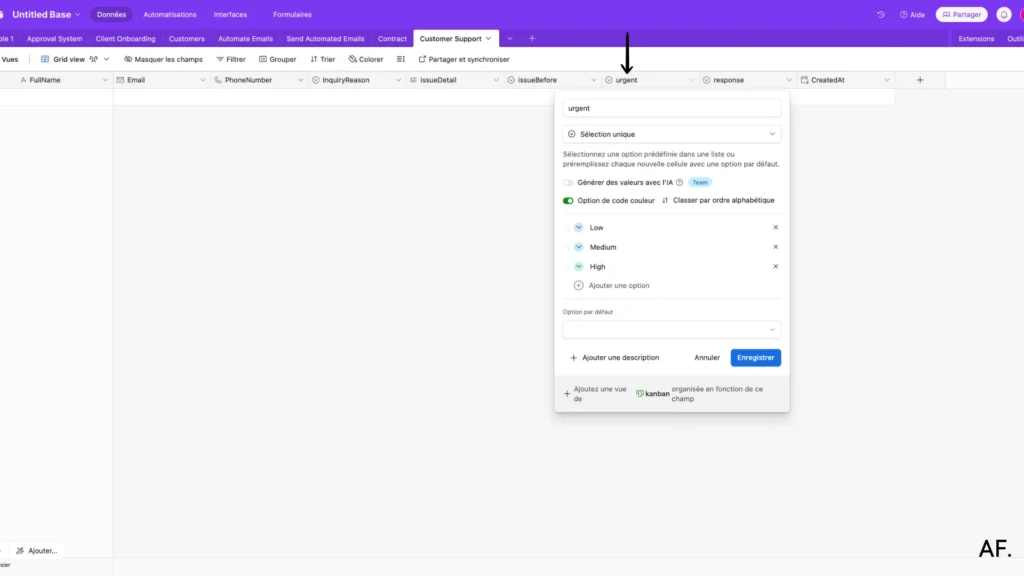
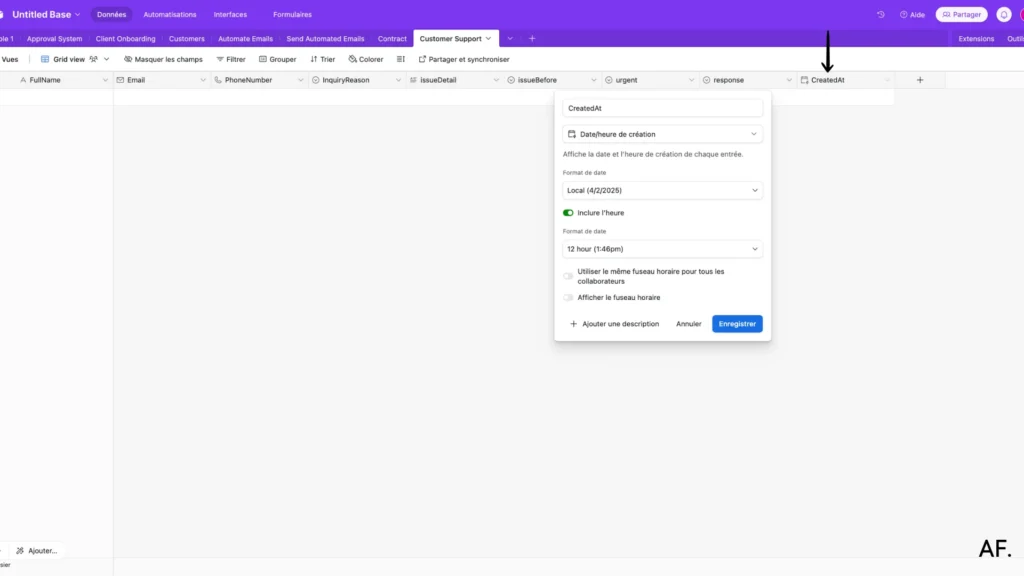
Let’s start by setting up your customer service tracking system in Airtable! First, create a new table with all the necessary essential information fields. Here’s what I recommend including:The basics:- Full Name
- Email Address
- Phone Number
- Reason for Inquiry
- Issue Details
- Previous Occurrences (Has this happened before?)
- Urgency Level
- Preferred Contact Method (Email or Phone)
Don’t forget the most important part – add a ‘Created At‘ field to track when each inquiry comes in. This timestamp will be crucial for managing your responses and tracking patterns over time.


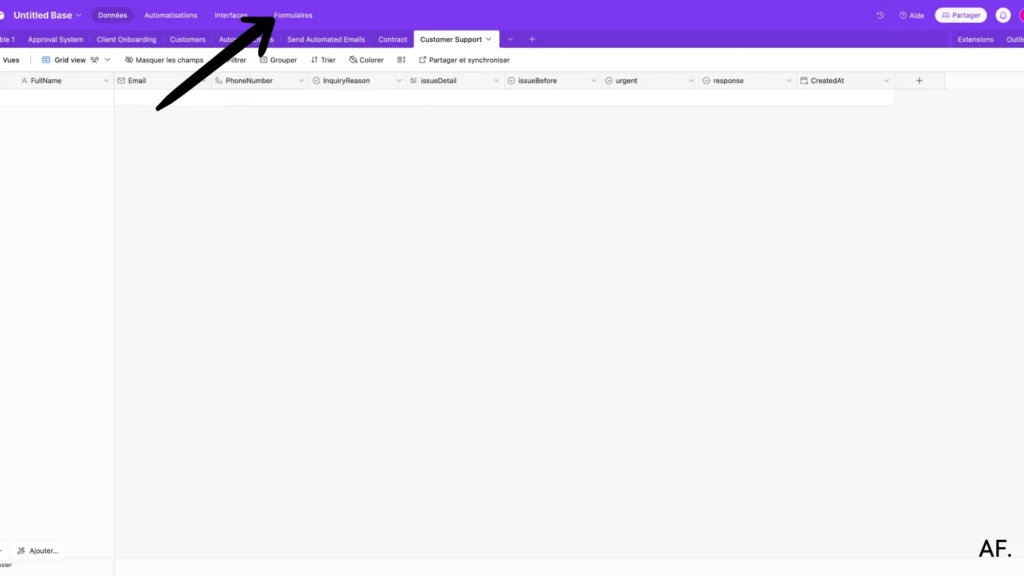
Step 2: Create Your Form
Now that we’ve set up our table, let’s create a user-friendly form in Airtable that your customers can fill out. This is where the magic happens!
Click on the ‘Forms‘ button in your Airtable workspace (it’s right at the top of your screen), and voilà —you’re ready to start building your customer inquiry form. Airtable will automatically include all those fields we just created, but here’s the best part: you can customize how they appear to make the experience smooth and intuitive for your customers.
A quick tip: Take a moment to organize your form fields logically. It’s like having a natural conversation with your customers, starting with their basic info before diving into their specific needs.
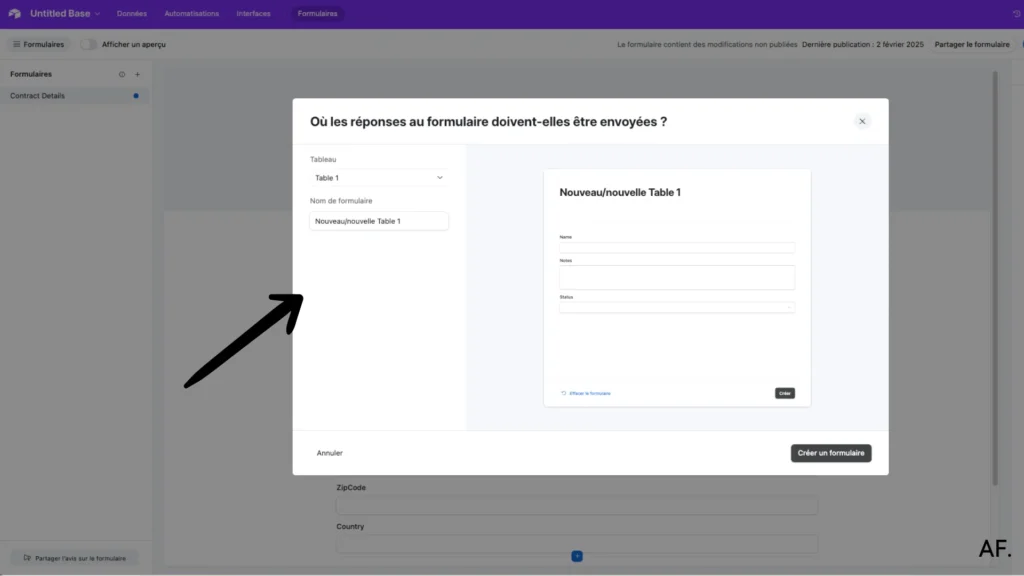
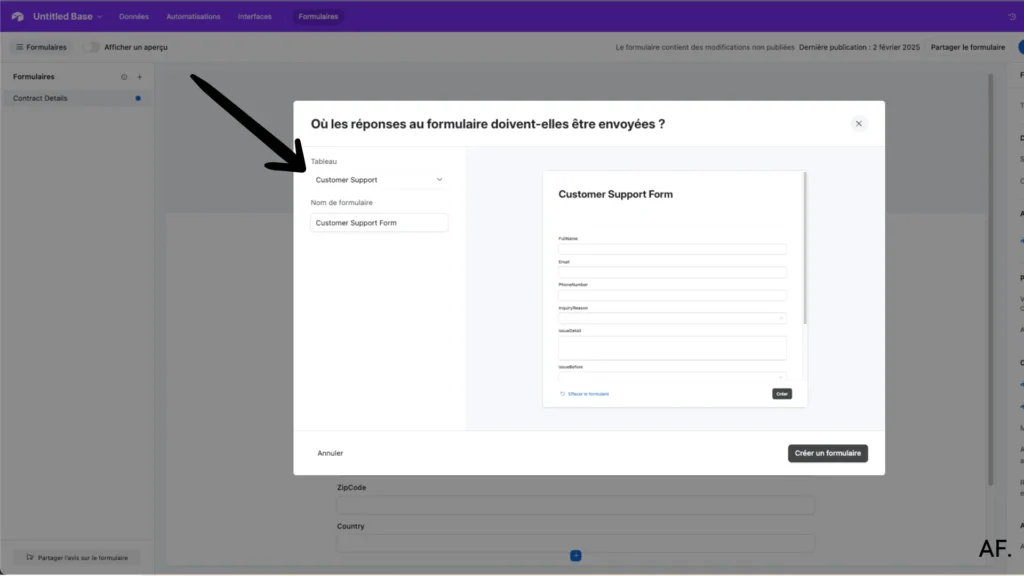
- Select the table we just created – this ensures all your customer responses will flow right into your organized database
- Give your form a meaningful title that welcomes your customers. Something like ‘How Can We Help You Today?‘ or ‘Customer Support Request‘ works great!
Pro tip: Make your title warm and inviting. Remember, this is often your customers’ first point of contact!
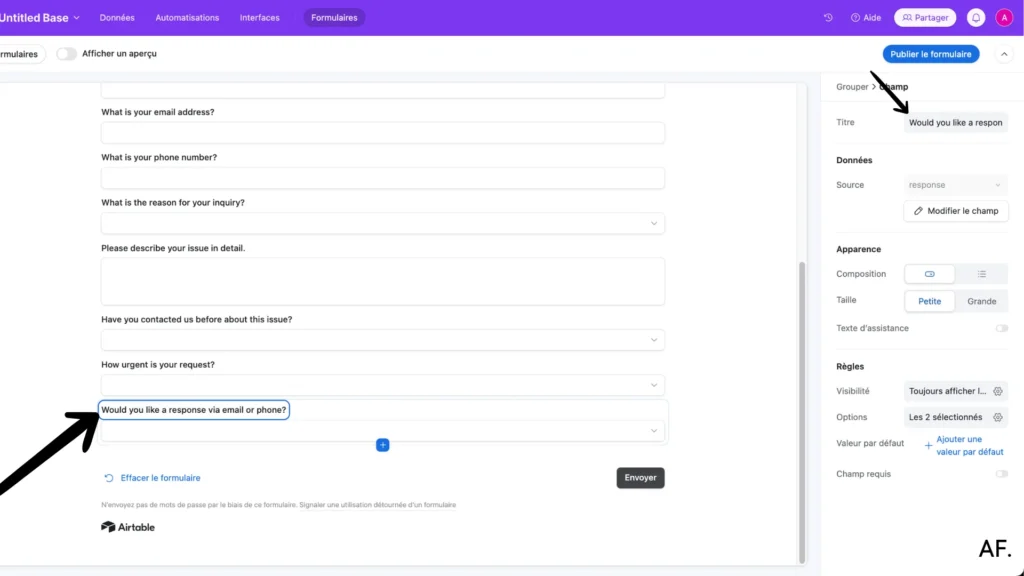
Now comes the fun part – setting up your questions! Think of this as crafting a friendly conversation with your customers. Let’s add all those important fields we created earlier, but phrase them in a way that feels personal and approachable:
Start with the welcoming basics: ‘Please share your full name with us.’ ‘What’s the best email to reach you?‘ ‘Your contact number, just in case we need to call‘
Then, guide them in explaining their needs: ‘Could you tell us more about your issue?‘ ‘Has this happened before?‘ ‘How urgent is this for you?‘ ‘Would you prefer we contact you by email or phone?‘
A quick tip: Keep your questions clear and conversational. This will help your customers feel more comfortable sharing their concerns!
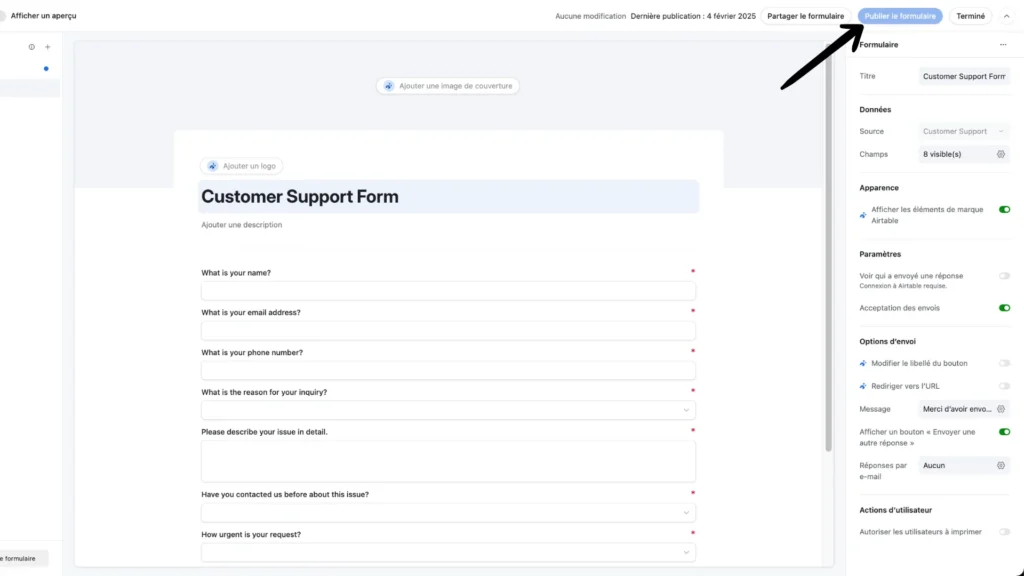
Awesome! Now that everything is set up perfectly, it’s time to make your form live and accessible to your customers. Just hit that ‘Publish‘ button at the top right of your screen, and… congratulations! 🎉 Your form is ready to start collecting customer inquiries.
Pro tip: Before sharing it with your customers, why not take a quick test run yourself? Fill out the form once to ensure everything flows exactly as you want.
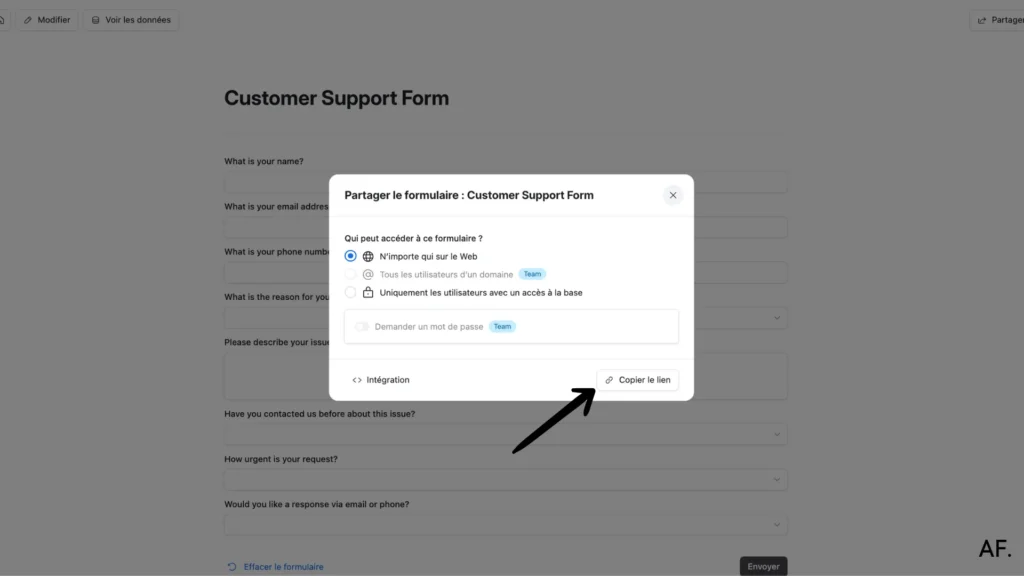
It’s time to grab your form’s link and put it to work! Look for the ‘Share Form‘ button. When you click it, you’ll see your form’s unique URL. Copy this link, and you can share it with your customers.
A quick tip: Keep this link handy – you might want to bookmark it or save it somewhere easily accessible. You’ll often use it to share with customers or embed it on your website!
Step 3: Test Your Form
Let’s test-drive your new form! Click on the link you just copied, and it should open in your browser. This is exactly what your customers will see when they need to contact you.
Pro tip: Take a moment to view it through your customer’s eyes – this preview gives you the perfect opportunity to ensure everything looks inviting and easy to understand!

- Type in a test name
- Pop in your email
- Add a phone number
- Please fill out all those helpful details we set up earlier
Once you’ve filled everything out, hit that ‘Submit‘ button at the bottom of the form. This test submission will help you see exactly how your customers’ responses will look when they start rolling in.
Pro tip: Use realistic test data to give you the best picture of how your customer information will appear in your Airtable base!

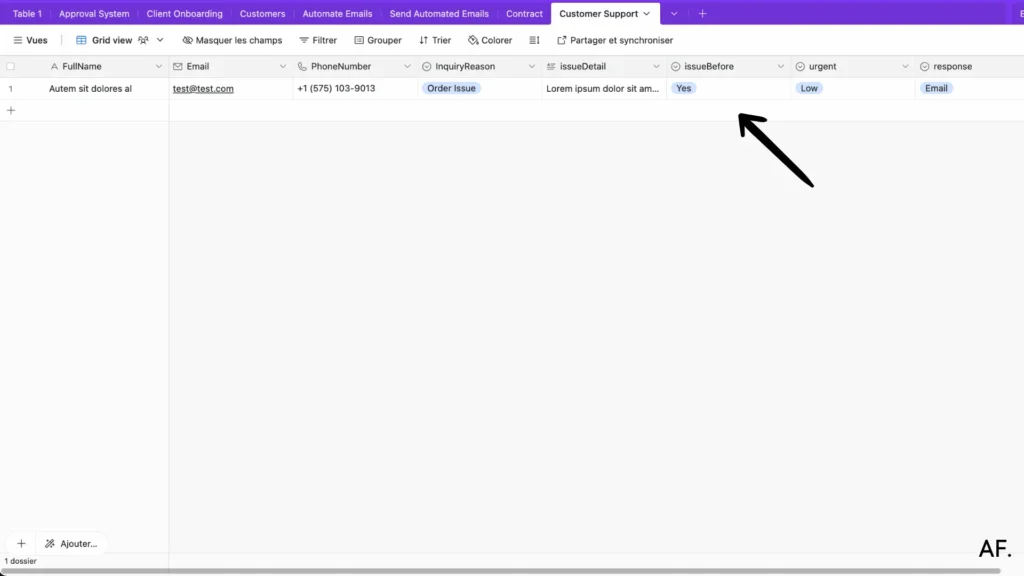
Return to your Airtable base and watch your test submission automatically appear in your table. Pretty cool, right? Every time a customer fills out your form, their information will instantly pop up here, neatly organized in all the right columns.
Pro tip: Keep an eye on that ‘Created At‘ timestamp we set up earlier – it’ll help you track exactly when each submission comes in, making it super easy to manage response times and stay on top of customer inquiries!
This automatic data collection means no more manual data entry – everything’s organized and ready for you to take action right away.
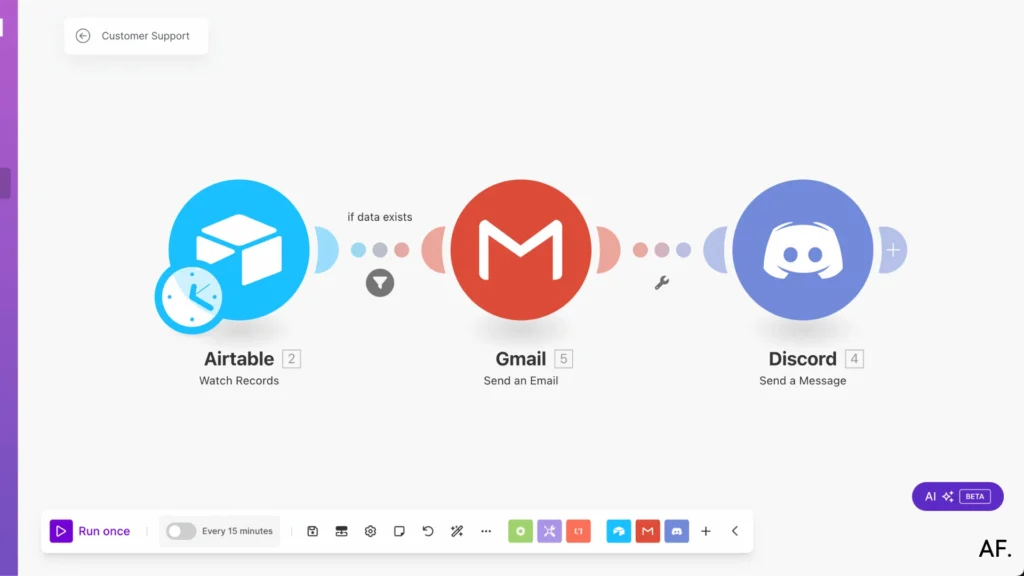
Step 4: Create Your Scenario
Next, let’s set up the automation magic to help you manage these responses! Head over to Make.com, where we’ll create a workflow that handles your form submissions automatically.
Don’t have a Make account yet? No worries! You can sign up for free in just a few clicks. The best part? You can get started without spending a penny – the free plan is perfect for setting up this automation.
Once logged in, click the ‘New Scenario‘ button to create your workflow. We’ll turn those form submissions into instant actions!
Pro tip: Make’s free plan is quite generous for getting started, and you can always upgrade later if your business needs to grow!
Step 5: Start Building
Let’s build your first automation module in Make! Here’s what we’re going to do:
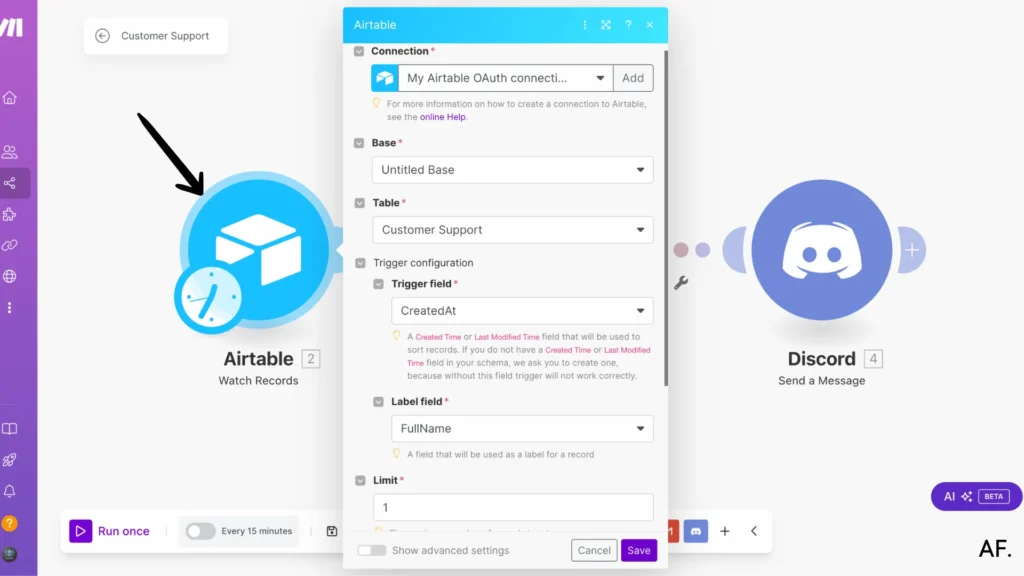
Click the big plus (+) button to add your first module. Search for ‘Airtable‘ and select ‘Watch Records‘ – this will be our trigger for starting the automation.
Now, let’s configure it:- Connect your Airtable account
- Select your base from the dropdown
- Choose your ‘Customer Support‘ table
- Set the limit to 1 (this means it’ll process one submission at a time)
- For the trigger field, select that ‘Created At‘ column we set up earlier – this is crucial! It tells Make to watch for new entries based on when they’re created.
Pro tip: Using ‘Created At‘ as your trigger field ensures you’ll catch every new submission in real time without missing any customer inquiries!
- Select ‘From now on‘ – this tells me to watch for new submissions in the future (perfect for a fresh start!)
- Click that ‘Save‘ button to lock in these settings
Pro tip: The ‘From now on‘ setting means you’ll only catch new submissions, not historical ones. This keeps things clean and organized as you launch your new customer support system!

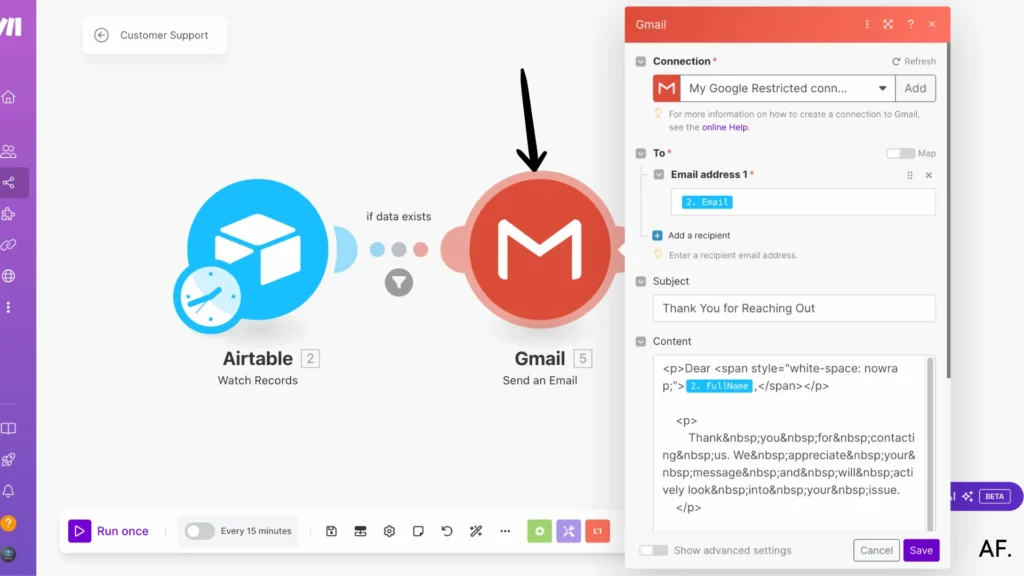
Now, let’s set up the email your customers will receive automatically! We’ll pull in all that helpful information from your Airtable submission:
Start filling out your email template:- Add the customer’s email address from your Airtable record
- Create a friendly subject line for your response
- Build your email content by combining text with your Airtable data
Pro tip: Use the data mapping feature to pull in those Airtable fields – click the little ‘Add Data‘ button (it usually looks like a curly bracket or ‘Add‘ symbol) whenever you want to insert information from your form submission. This ensures each email is perfectly personalized for every customer!
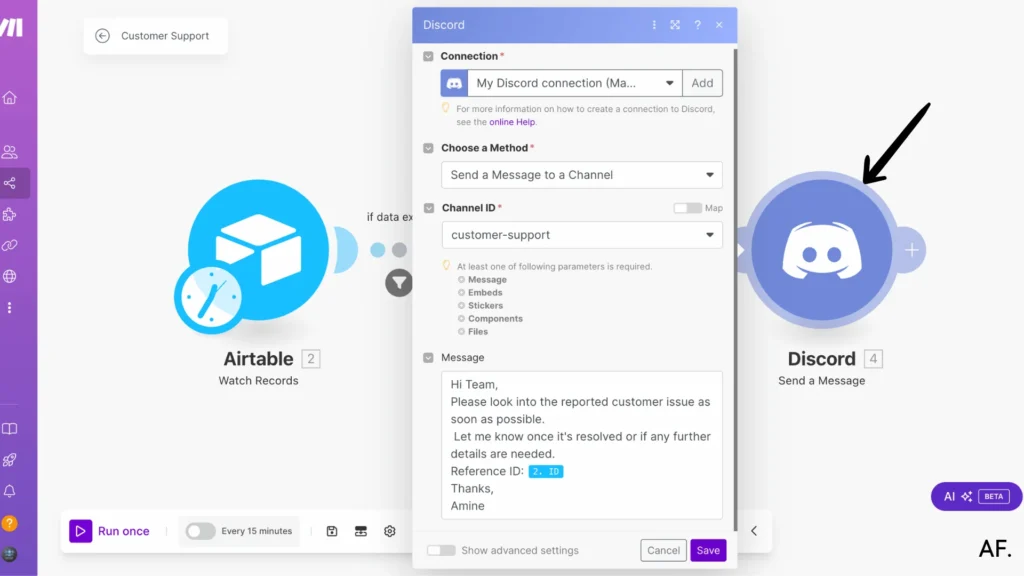
Let’s get those customer requests showing up in your Discord channel! This is a great way to keep your team updated in real-time:
Add another module to your Make scenario by:- Click the plus (+) button after your last module
- Search for ‘Discord‘ and select ‘Send a Message‘
- Connect your Discord account if you haven’t already
- Select the channel where you want the notifications to appear
Pro tip: Using emojis and clear formatting in your Discord notifications makes it easier for your team to spot and understand new requests quickly at a glance!
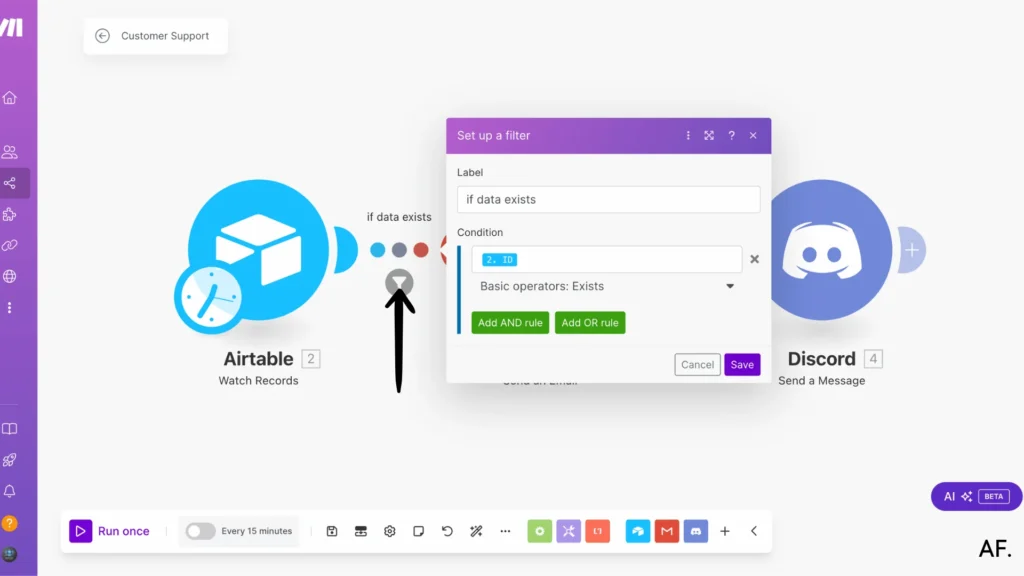
Now, let’s add a smart filter to ensure our automation only runs when needed! This helps keep everything running smoothly:
Let’s set up the filter:- Click the wrench icon between your modules to add a filter
- Set up your condition to check if the important data exists
Pro tip: This filter acts like a quality check, ensuring notifications only go out when you have all the necessary information. If any required field is missing, the automation will pause right there. This prevents incomplete or unnecessary notifications from being sent!
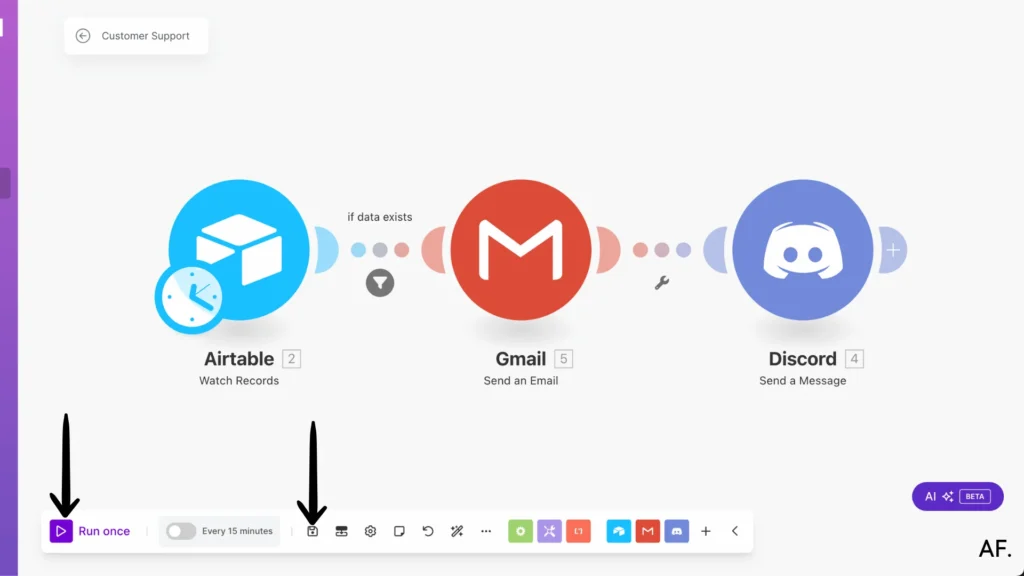
Step 6: Save And Run Scenario
Great job – you’re at the finish line! Time to make your automation live:- Click that ‘Save‘ button to lock in all your hard work
- Hit ‘Run Once’ to test everything out – this is like a dress rehearsal to ensure all the pieces work together perfectly!
Pro tip: Watch your Discord channel and email after running the test – you should see your test notifications come through. It’s always exciting to see your automation working for the first time! 🎉
Once you’ve confirmed everything’s working smoothly, you can turn on the scheduled runs by clicking the toggle switch in Make. Your customer support system is now ready to run automatically!
Step 7: Results
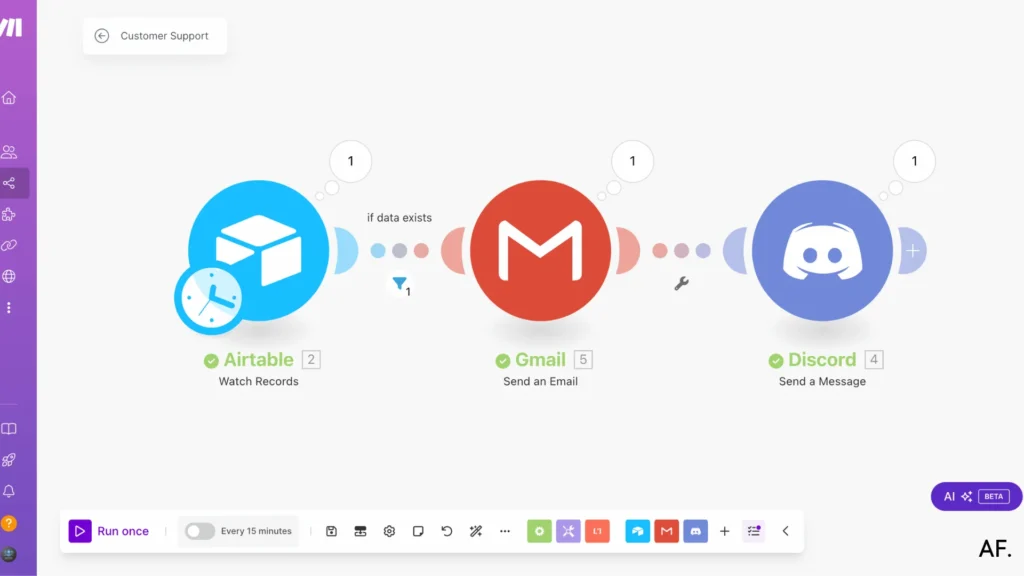
Let’s take a look at what success looks like! Here’s where you’ll see proof that your automation is working beautifully:
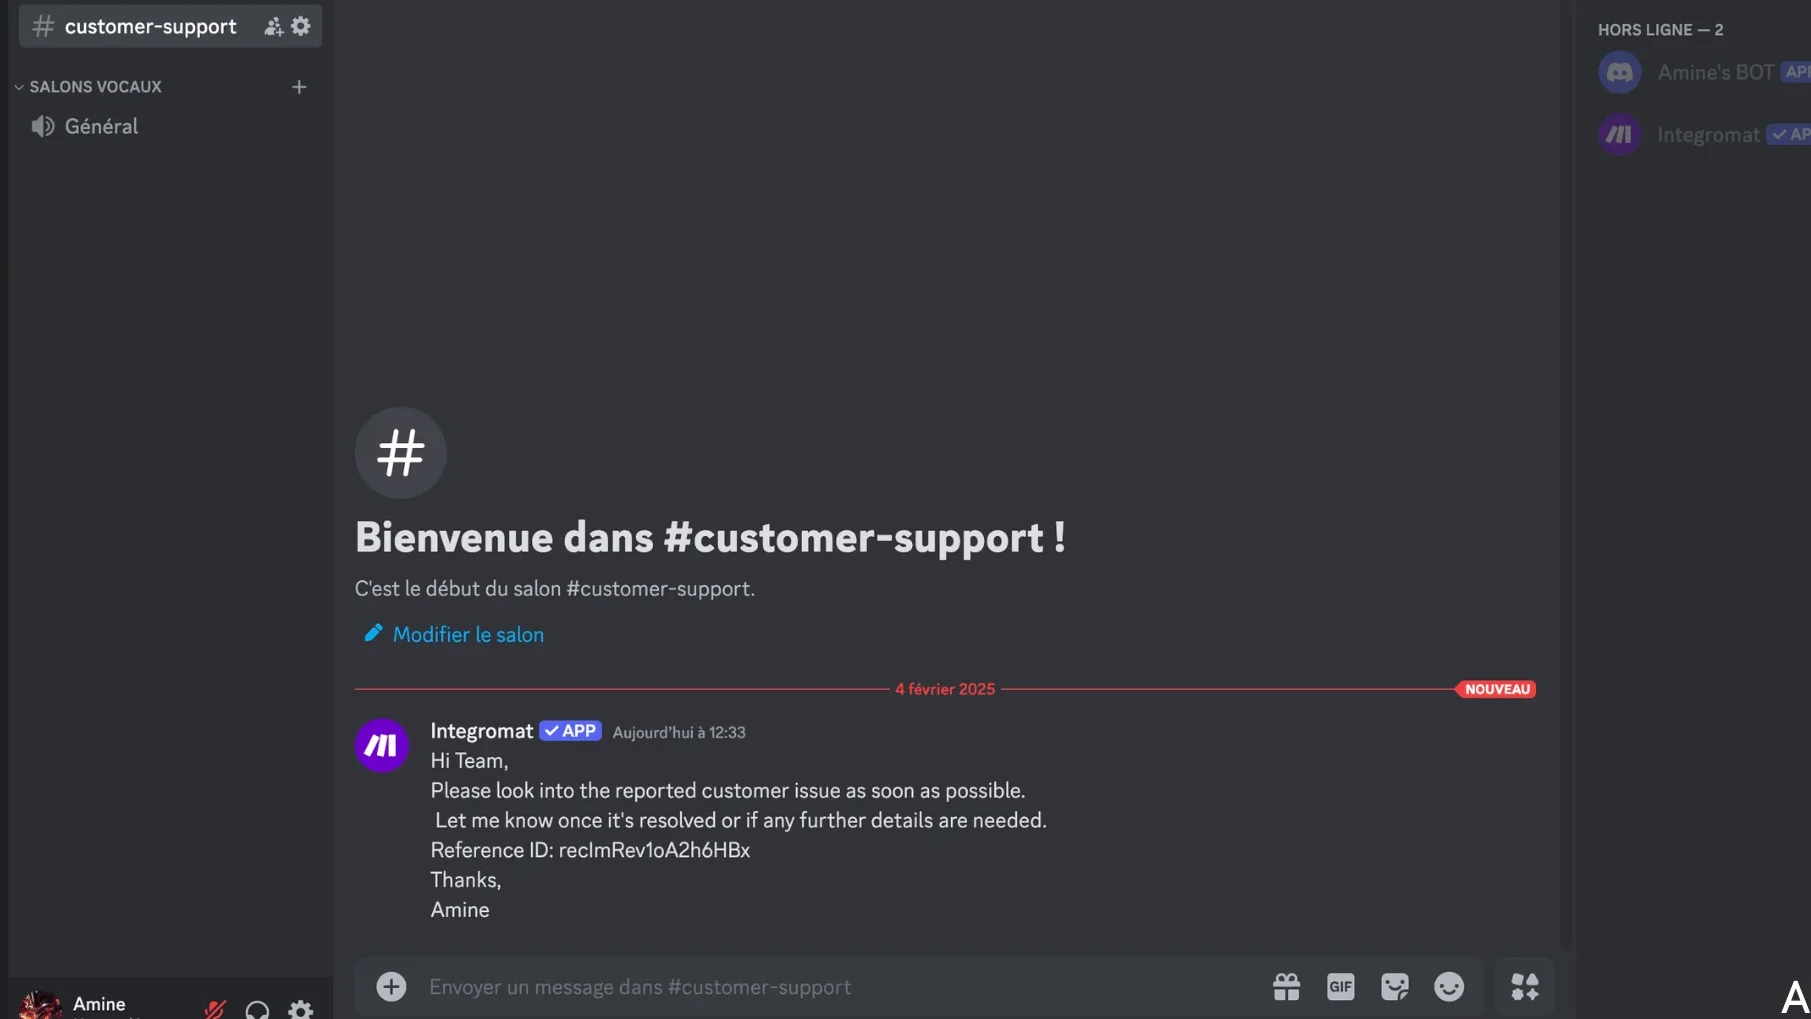
You should be seeing:- The test email that was sent to your customer
- A copy of the notifications sent to your team
- All the data flowing smoothly through your filters
Pro tip: If you’re about to share a screenshot of the results, I’ll help you understand what each part means and confirm everything is working as expected!
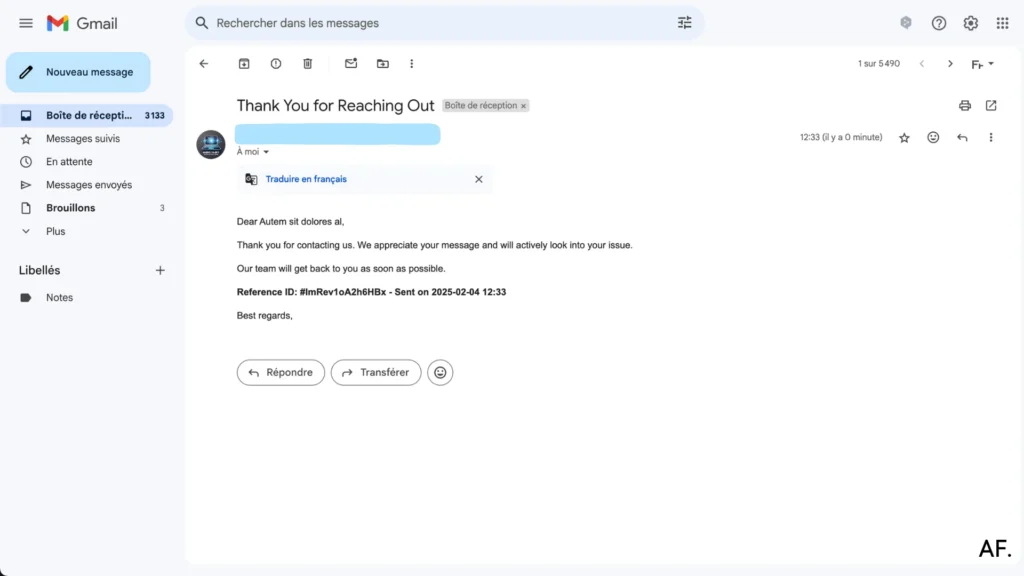
- All the customer details we set up
- The emojis make important information stand out
- Everything is organized in an easy-to-read format
Pro tip: Watch your Discord notifications for a few minutes after the first test. Sometimes, there’s a slight delay in message delivery. This is normal and helps confirm that the integration is working properly!
Step 8: Schedule Your Automation
Perfect timing – now that your automation works smoothly, it’s time to put it on autopilot! 🚀
To help you set the perfect schedule for your customer support automation, I’ve written a detailed article that walks you through every step. You’ll want to check it out below – it covers everything from choosing the right run intervals to optimizing your response times.
Pro tip: Scheduling is crucial for responding to customer inquiries promptly while also managing your Manufacturing operations efficiently!
Please share the article you’d like us to look at, and I’ll help you connect these pieces together!
Conclusion
Remember, building an automated customer support system is an ongoing journey of improvement and refinement. Start with the basics, test thoroughly, and gradually expand your automation capabilities. With Make’s powerful features and the strategies outlined in this guide, you’re well-equipped to create a customer support system that saves time and delivers exceptional service quality.
Get this scenarioFAQs
Q1: How does this automation system help improve customer response times?
A1: The system instantly processes customer inquiries by automatically capturing form submissions in Airtable, sending immediate confirmation emails, and alerting support staff through Discord notifications, eliminating manual data entry delays.
Q2: Can this system be customized for different business needs?
A2: Yes, the Airtable form fields and automation workflow can be modified to include industry-specific questions, custom response templates, and different notification channels based on business requirements.
Q3: What are the cost implications of implementing this automation system?
A3: The initial setup can be done using free plans from Airtable and Make.com, making it cost-effective for small businesses. As support volume grows, paid plans offer additional features and higher automation limits.

Further Ressources
- How to Automate Contract Management with Make
- How to Send Automated Emails with Make
- The Ultimate Guide to Data Mapping in Make
- How to Automate Employee Onboarding in Make
- How to Send Automated Emails from Google Forms Using Make
- How to Use Canva to Automate Social Media Posts with Make
- How to Build a Pinterest Automation System with Make
- How to Automate Pinterest Video Posts with Make