How to Use Airtable on Make
Did you know that 85% of businesses report saving significant time through workflow automation? Combining Airtable’s powerful database capabilities with Make‘s automation platform can improve workflow efficiency! In this comprehensive guide, I’ll walk you through everything you need to know how to use Airtable on Make, from basic setup to advanced automation techniques. Whether you’re a beginner or an experienced user, you’ll find valuable insights to streamline your processes and boost productivity.

What You’ll Learn
This guide will show you how to:Search Airtable Records
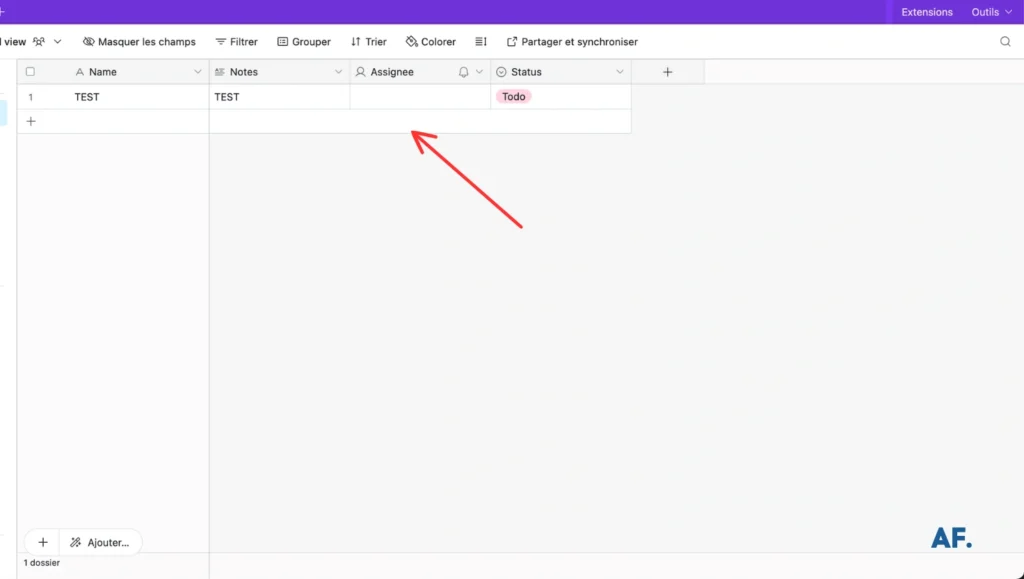
To get started with Make, you’ll need a base and a simple table. I keep my setup pretty simple, as you can see in the image below:
- Head over to Make and start a new scenario
- In the module search bar, type ‘Airtable‘
- Look for the ‘Search Records‘ module and give it a click

- Click to add your Airtable base
- Select the table you want to work with
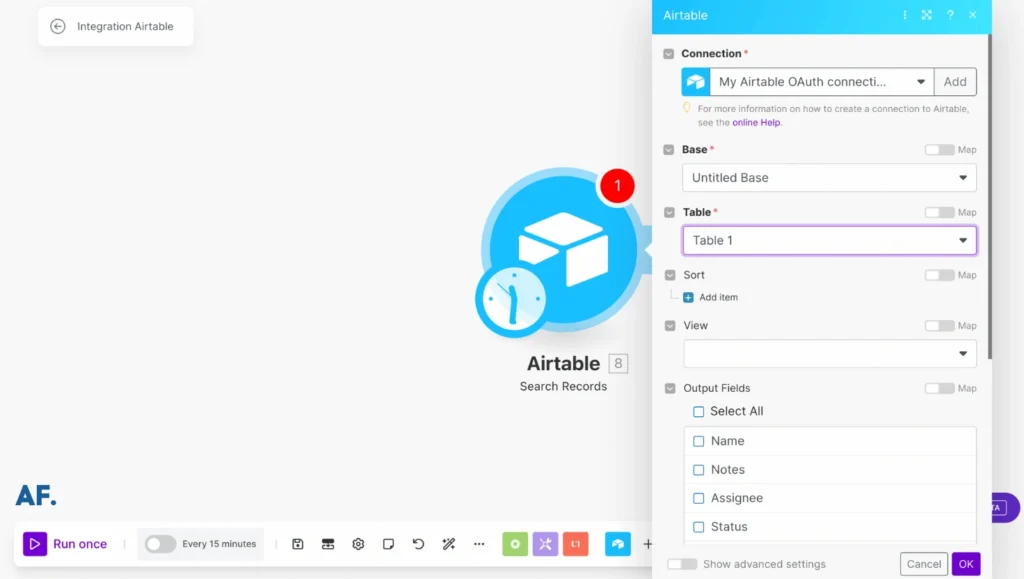
- Click the ‘Save‘ button to store your configuration
- Hit ‘Run‘ to see your module in action

At this point, you should see the results of your successful run. Check the output section; your Airtable data will be displayed there! This means your connection works perfectly, and you’re ready to build more complex automations.
💡 Pro tip: Take a moment to review the output data to make sure you’re getting all the information you need.

Create An Airtable Record
Now, let’s add another module:- Click the plus (+) icon next to your first module
- Search for and select ‘Create a Record‘
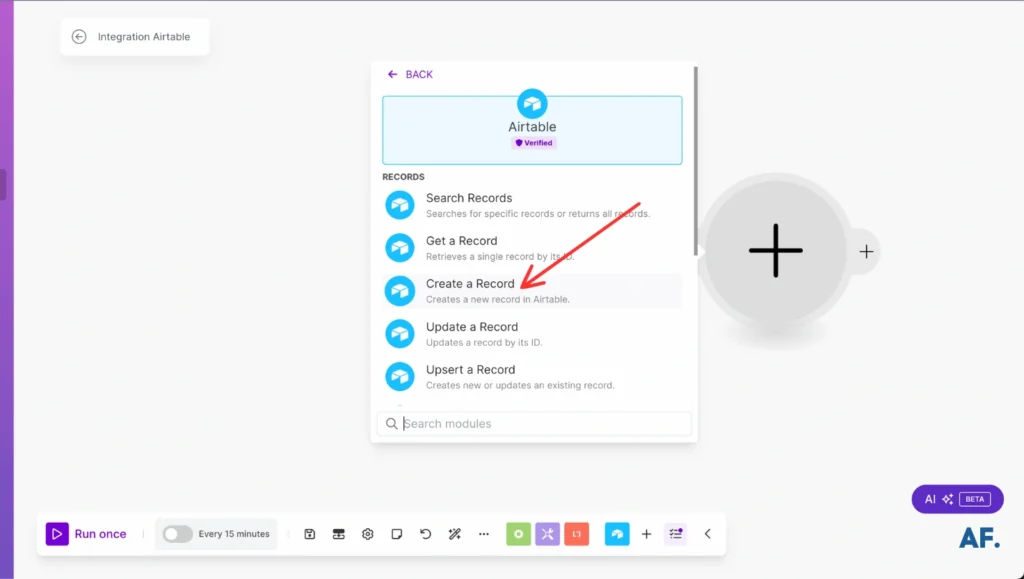
- First, fill in your desired field mappings
- Below, you’ll see exactly how I’ve set up my configuration as an example
Take a look at my setup here:

Run your scenario, and watch the magic happen! When you check your Airtable, you’ll see a new record has been created automatically.
💡 Quick tip: Double-check your new record to ensure all the data is transferred exactly as you wanted.

Update An Airtable Record
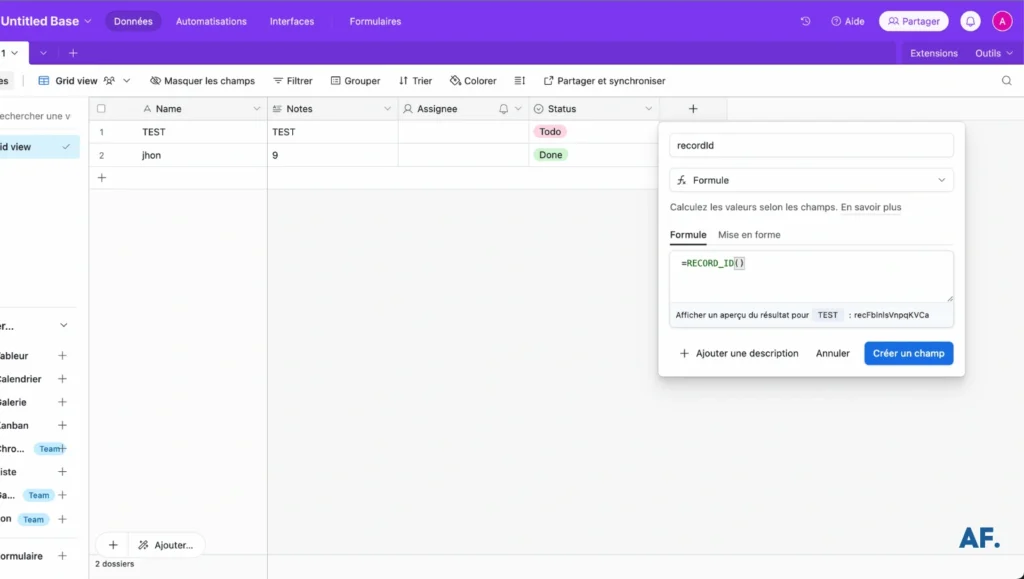
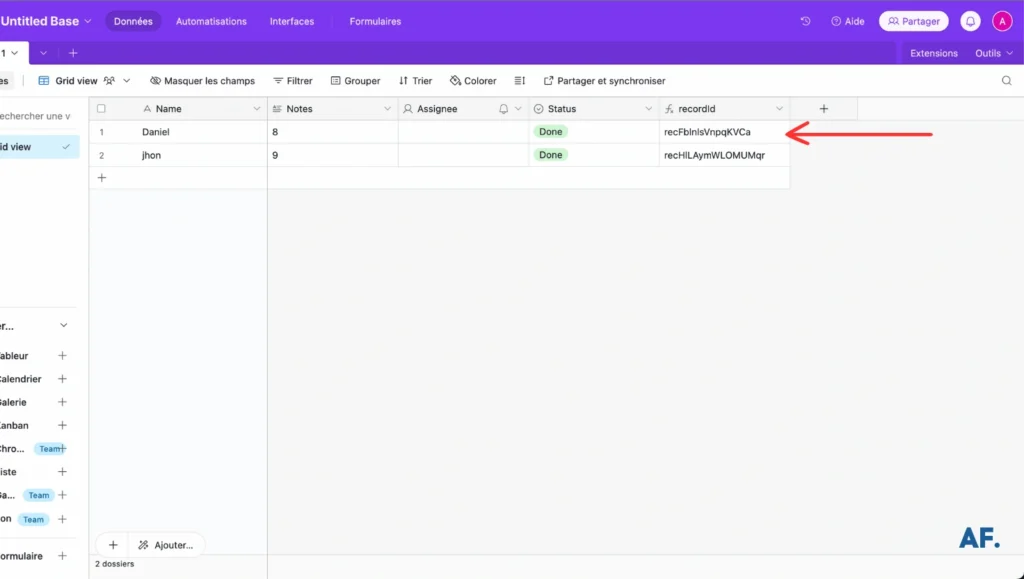
Now, let’s learn how to update existing records in Airtable. First, we’ll need to make our Record ID visible:- Add a new column to your table
- This column will display each record’s unique ID
Take a look at how I’ve configured it below:
Now that you’ve created your new column, locate the specific record you want to update and copy its Record ID. This unique identifier will help us target the exact record we want to modify.
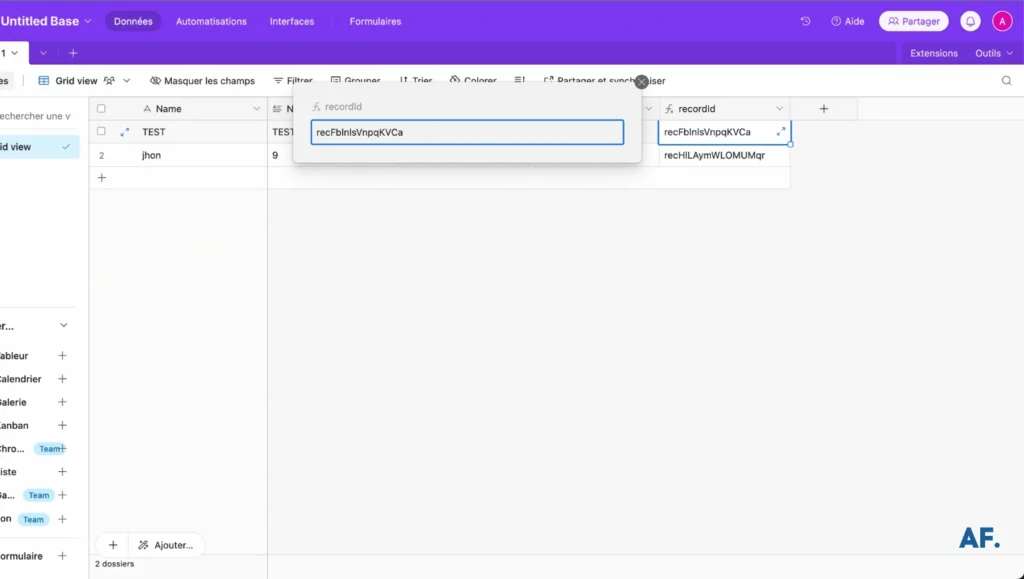
- Paste the Record ID you copied into the ‘Record ID‘ field
- Look for the fields you want to modify – in my case, I’ll update three fields:
- Name
- Notes
- Status
- Enter your new values for each field you want to change
This is where your automation gets really powerful; you can update multiple fields at once, and I’ll show you exactly how I configured mine:

And there you have it, success! When you check your Airtable now, you’ll see that the values have been automatically updated. The Name, Notes, and Status fields should all reflect your new changes.
💡 Tip: Take a moment to compare the old and new values to confirm everything is updated exactly as planned. This is a great way to verify your automation is working perfectly!
Upsert An Airtable Record
This module does two jobs in one:- If a record exists, it updates it
- If a record doesn’t exist, it creates a new one
Let me show you how to use it. I will fill in all field values with information I know isn’t in my table yet. Watch what happens; Upsert will automatically create a fresh record for us since these values don’t exist.
💡 Pro tip: Upsert is perfect when you’re unsure if data already exists in your table. It eliminates the need for separate ‘create’ and ‘update’ scenarios!

Success! Look at your Airtable; you’ll see a new record in your table. The Upsert module did precisely what we wanted: since it didn’t find an existing record matching our criteria, it created a new one with all our specified values.
💡 Quick check: Scroll through your table, and you’ll spot the new entry with all the fields we just filled in!

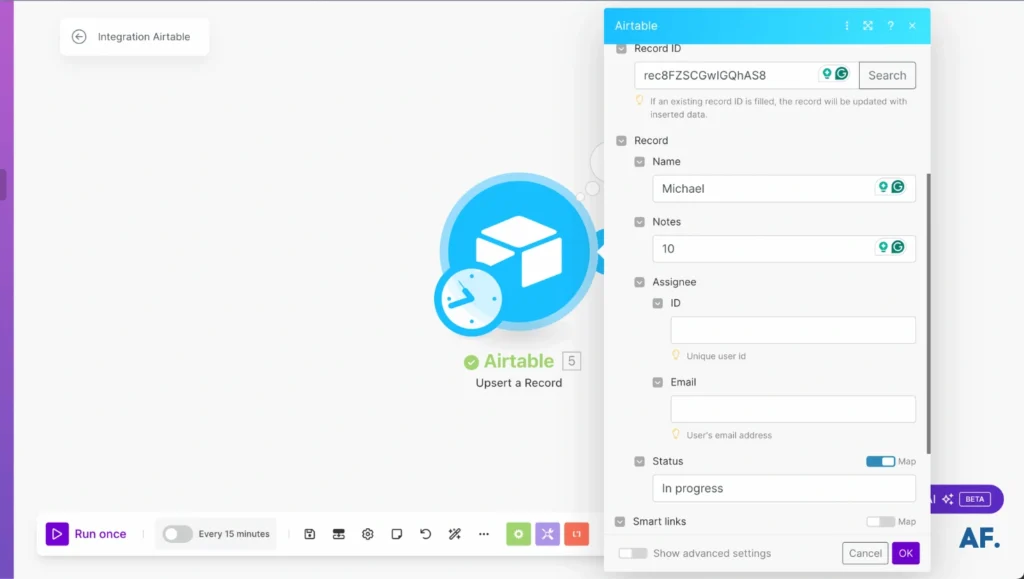
- Enter the Record ID of an existing entry
- Fill in all the fields with our new values
When we run this, the Upsert module will recognize the Record ID and update that specific record instead of creating a new one. Let me show you how I’ve configured it:
And voilà, the magic of Upsert in action! Check your Airtable, and you’ll see that instead of creating a new record, it updated our existing one. All the fields we modified have their new values, exactly as we planned.
💡 See how versatile this is? We’ve successfully created new records and updated existing ones with the same module. This is what makes Upsert such a powerful tool in your automation toolkit!

Delete An Airtable Record
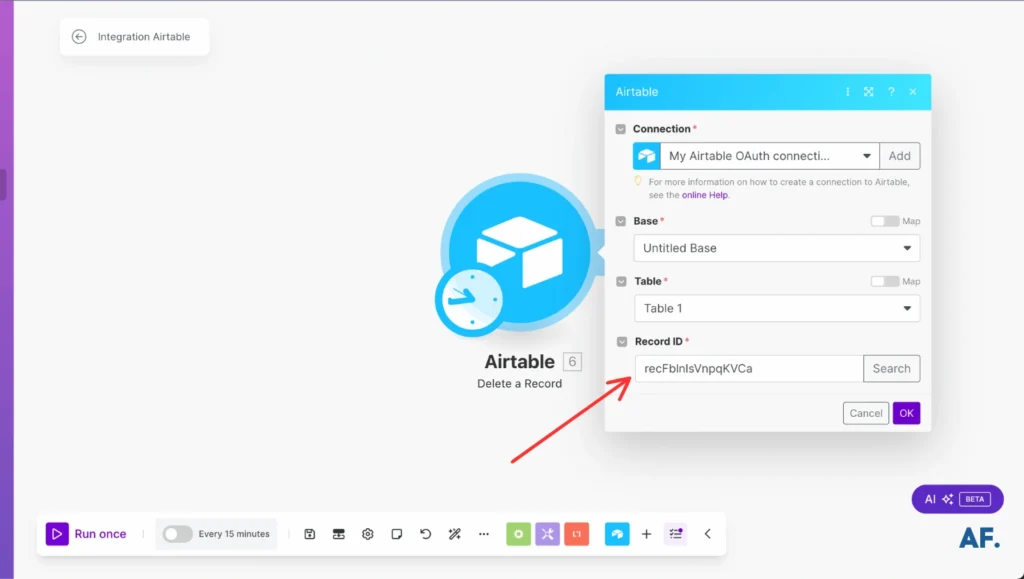
Time to learn how to remove records from our table! Let’s set up the Delete Record module:- Add a new module to your scenario
- Search for and select ‘Delete a record‘
- Paste in the Record ID of the entry you want to remove
💡 Pro tip: Double-check your Record ID before running this module deletion can’t be undone!
Hit ‘Save’ and ‘Run,’ then check your Airtable. The record you selected should now be gone from your table.
💡 Quick verification tip: Scan your table to confirm the correct record was removed. If you can’t find it, congratulations – your deletion was successful!

Make An API Call
Now we’ll dive into something really powerful – leveraging the Airtable API through Make! This is where things get extra interesting, as we’ll see how to interact with Airtable in even more flexible ways.
💡 Fun fact: Using API calls opens up new possibilities for what we can do with our Airtable data!

Let’s look at the Airtable API documentation; it will show us all the available API endpoints and how to use them. While you don’t need special credentials to view the documentation, we’ll use our regular Airtable authentication to make the API calls through Make.
First, browse through the API documentation to understand the available endpoints. We’ll use this information to configure our Make API call module.
💡 Tip: Pay special attention to the different API methods (GET, POST, PUT, DELETE) and their corresponding endpoints – we’ll need these details soon!

- List records
- Create records
- Update records
- Delete records And many more options!
💡 Tip: Take a moment to explore these different endpoints – each represents a different way to interact with our Airtable data through the API. Pay attention to the example requests and responses – they’ll help us format our API calls correctly.

For example, let’s use the API to create new records – an exciting way to add data to our base! Let’s focus on the ‘Create records’ endpoint, which gives us robust control over adding new information.
💡 Tip: The ‘Create records’ API method is perfect when you need to add multiple records at once or want more control over how your data is inserted.

- Your Base ID
- Your Table ID
- Your Method
💡 Pro tip: You can find your Base ID in the API documentation – it’s that long string of characters in the URL when viewing your base!

- Copy the example JSON structure from the Airtable documentation
- Paste it into the ‘Body‘ field in Make
- Replace the sample values with your own data
💡 Tip: Make sure to match your field names exactly as they appear in your Airtable base. Even a small typo can cause the API call to fail!

Perfect, our API call was a success! Look at your Airtable, and you’ll see two new records have been added to your table. This demonstrates one of the significant advantages of using the API – we can create multiple records in a single call!
💡 Pro tip: Compare the newly created records with your JSON input to verify that all the data was transferred precisely as intended. This is a great way to confirm our API call worked perfectly!

Webhook On Airtable
Conclusion
Mastering the integration between Airtable and Make opens up endless possibilities for automation and efficiency. Remember to start simple and gradually build up to more complex scenarios as you become more comfortable with both platforms. Don’t forget to regularly review and optimize your automation to ensure it continues to meet your needs effectively. Ready to transform your workflow? Start implementing these strategies today!
FAQs
What is the difference between Make and Airtable?
Airtable is a database platform for organizing and managing your data, while Make is an automation tool that connects different apps and automates workflows between them. While Airtable stores your information, Make helps you automate what happens with that data.

Further Resources
- How to Use Filters in Make: A Complete Guide
- How to Use JSON in Make: A Comprehensive Guide
- How to Schedule Automations in Make
- How to Automate Photo Pins on Pinterest with Make
- How to Automate Twitter with Make
- How to Automate YouTube Shorts with Make
- How to Automate Facebook Posts with Make
- How to Automate Instagram Posts with Make