How to Automate Pinterest Video Posts with Make
Are you tired of manually posting videos to Pinterest every single day? I get it – maintaining a consistent Pinterest presence can be time-consuming! Here’s some good news: automation can save you hours each week. According to recent statistics, Pinterest users watch 1 billion videos daily on the platform, making video content a crucial part of any Pinterest strategy. In this comprehensive guide, I’ll show you exactly how to automate Pinterest video posts with Make (formerly Integromat), helping you maintain a consistent posting schedule without the daily hassle.

What You’ll Learn
- Set up Pinterest automation workflow for video posting.
- Connect Canva for automated design publishing.
- Post automatically to the Pinterest
- How to use Airtable
- Send Notification
- Create Your OAuth Authorization
- Make API Request
What You’ll Need
Pinterest Business Account
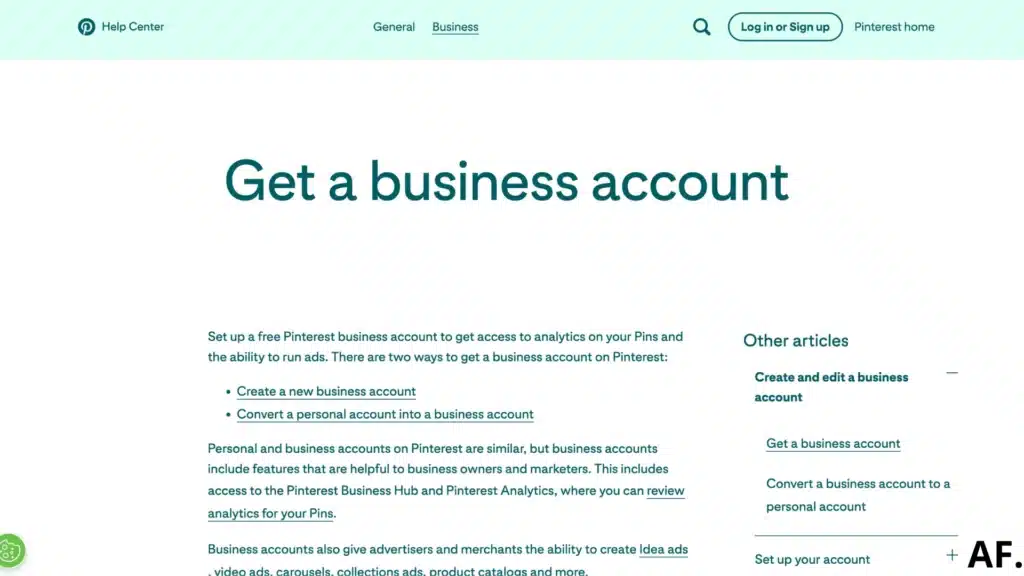
- Sign up for a Pinterest business account at pinterest.com/business
- Complete your business profile
- Create at least one board for your automated posts
Pinterest App
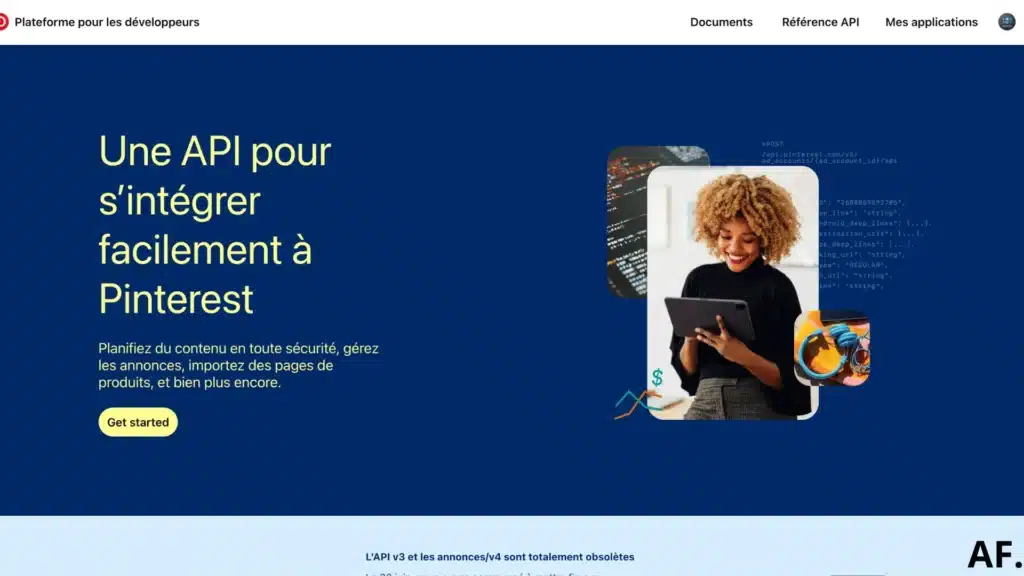
- Go to developers.pinterest.com and sign in with your Pinterest account. Then click on “Create app” or “New app”.
- Fill out the app details form:
- Enter your app name
- Add a brief description
- Select the type of app (Web/Mobile/Client-side)
- Add your website URL and integromat redirect URI
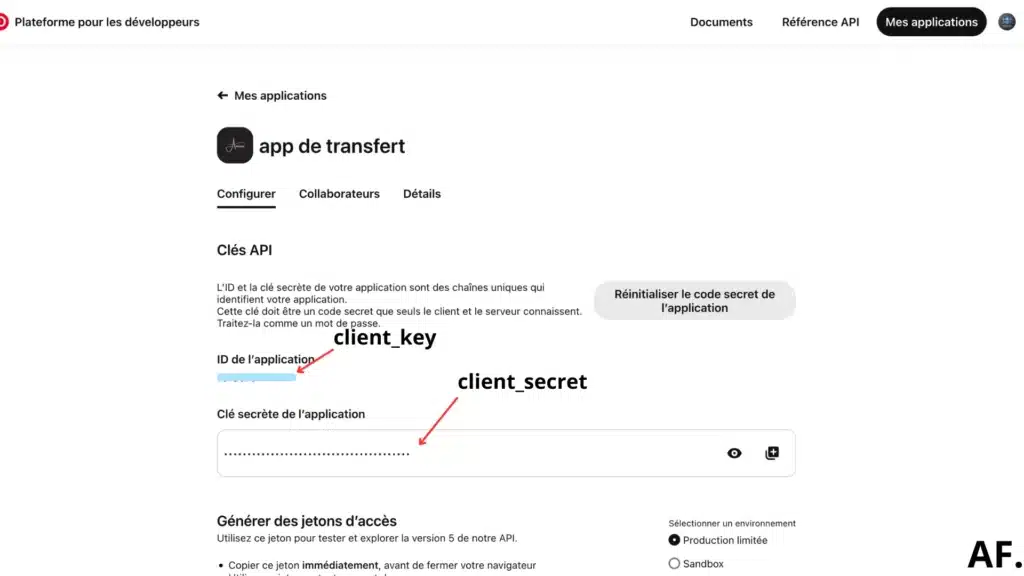
- Submit the form, and Pinterest will generate your client ID (app ID) and client secret. You can find these credentials in your app’s settings dashboard.
Creating Your First Automated Pinterest Video Workflow
Step 1: Set Up Your Content Database in Airtable
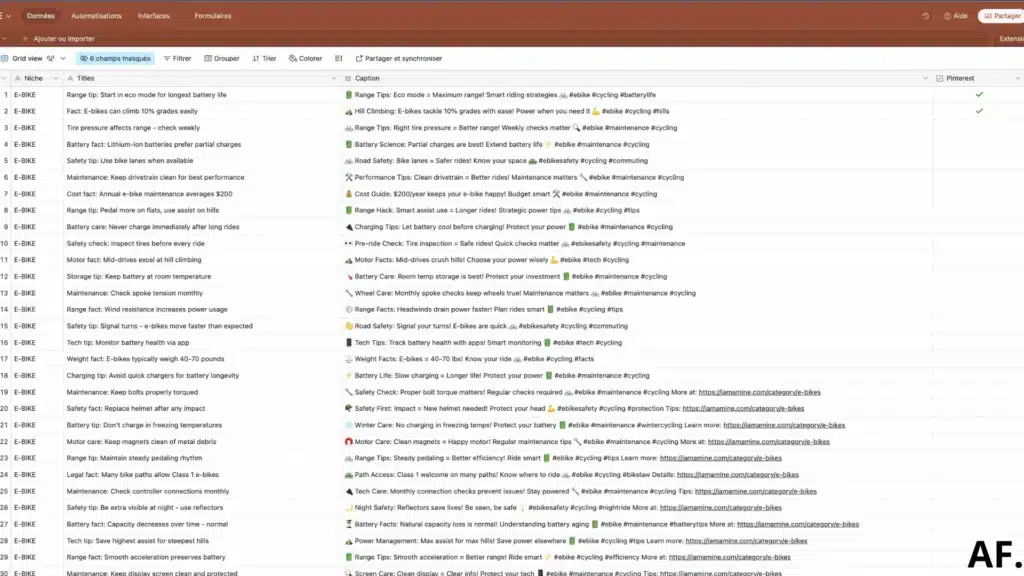
To get started, you’ll want to set up an Airtable database to organize all your automation essentials. In my case, I created a simple table with columns for my niche categories, content titles, Pinterest captions, and Pinterest check boxes; I use it to see if a post has been published. This structure makes it super easy to manage all your content in one place!
Step 2: Prepare Your Visual Content in Canva
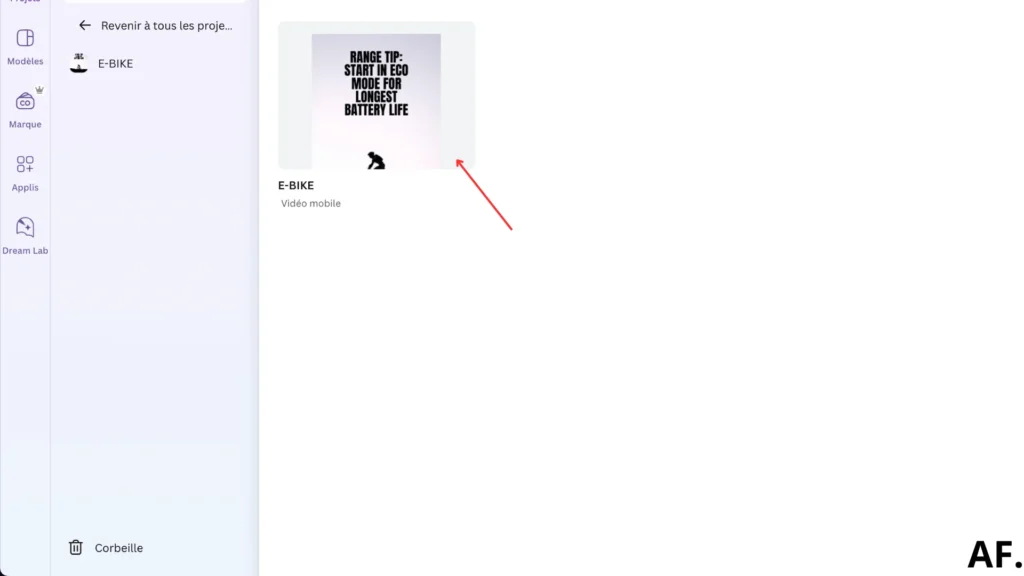
Before we dive into automation, you’ll need to create your visual templates in Canva. These designs will be the foundation of your automated content, so take some time to craft templates that represent your brand. Don’t worry if you’re not a design expert – Canva makes it easy to create professional-looking graphics!
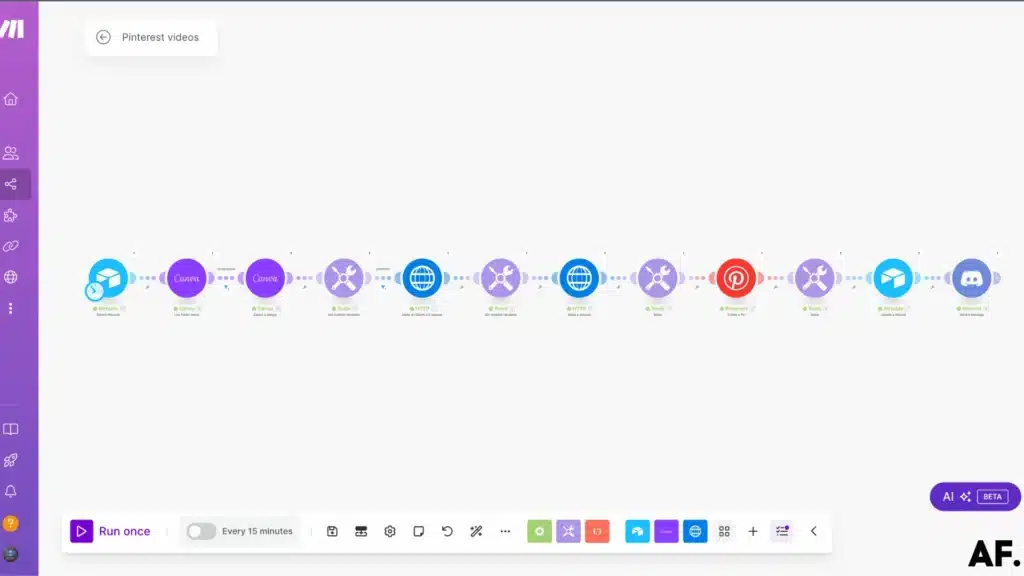
Step 3: Initialize Your Automation Scenario in Make
Next, head over to Make.com and create a new scenario – this is where the magic of automation begins! If you’re new to Make, don’t worry – think of a scenario as your automation recipe that we’ll build together.
Step 4: Configure Your Airtable Connection
Once you create your new scenario, let’s set up your first module. Click ‘Add Module‘ and select ‘Search Records‘ from the Airtable options. This is where we’ll connect to your database—choose your base and table from the dropdown menu. Want to keep things organized? You can also add sorting options to your search by selecting specific fields. For example, I like to sort by date to process my newest content first!
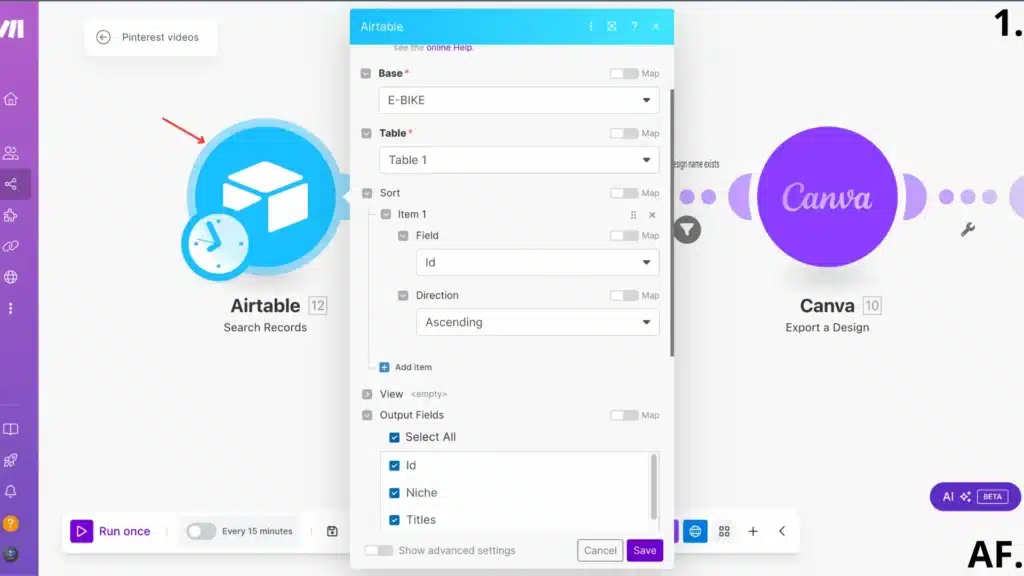
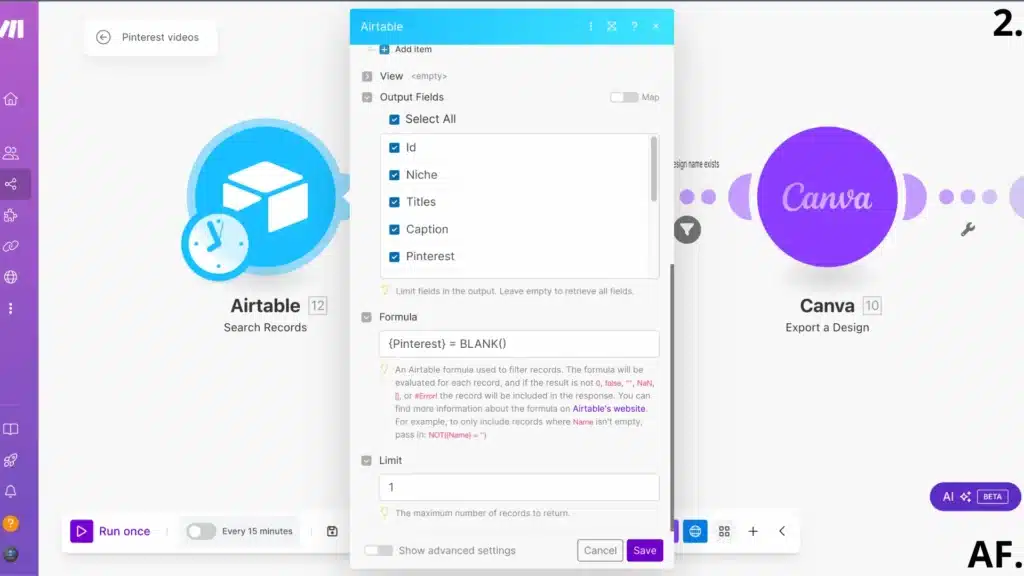
Next, we’ll add a unique formula that helps us work smarter. Set up your formula as {Pinterest} = BLANK() – This tells Make to look for records where the Pinterest field hasn’t been checked yet.
Here’s a helpful tip: set your limit to 1 record at a time. This ensures we process one post at a time, keeping things neat and manageable. Think of it as handling your social media posts individually instead of rushing through them all simultaneously!
Step 5: Set Up Your Canva Integration
Now comes the fun part – connecting your Canva designs! Click to add the Canva module and locate the folder where your beautiful templates are stored. Pro tip: having your designs in a dedicated folder smooths this step. Navigate to and select the folder containing your design template, and Make will know exactly where to find your creative assets!
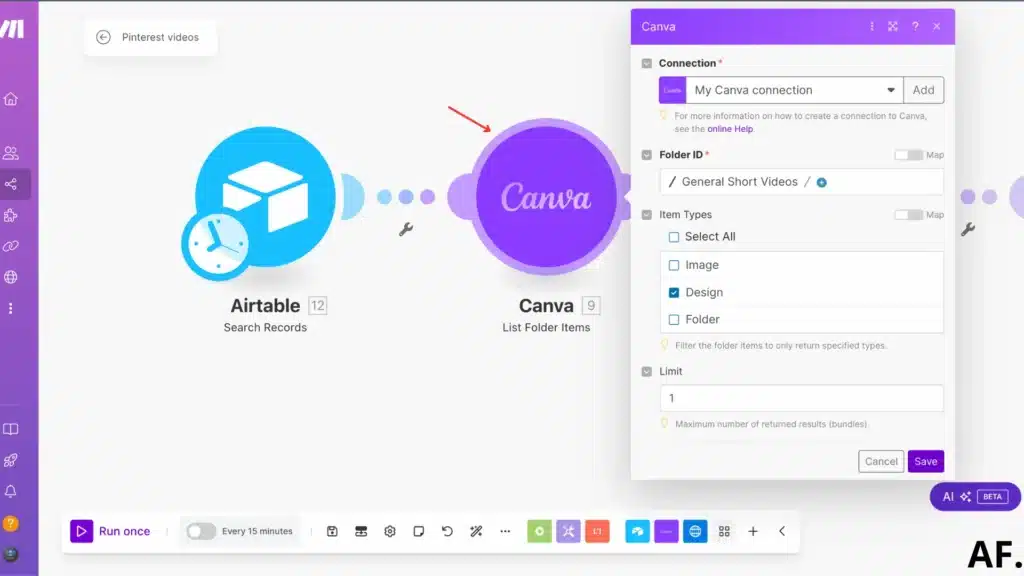
- First, select your design folder again
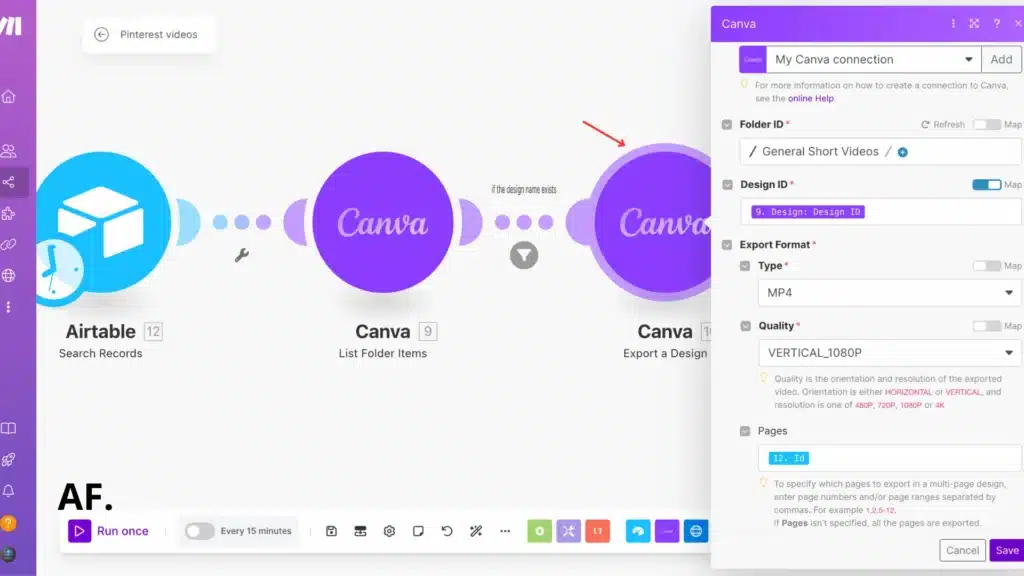
- Choose MP4 as your export type (perfect for video content!)
- Pick your preferred quality setting (remember, higher quality means larger file size)
- Many people miss this crucial detail: specify which page of your design you want to export. If your Canva design has multiple pages, you’ll want to enter the exact page number to avoid any mix-ups!

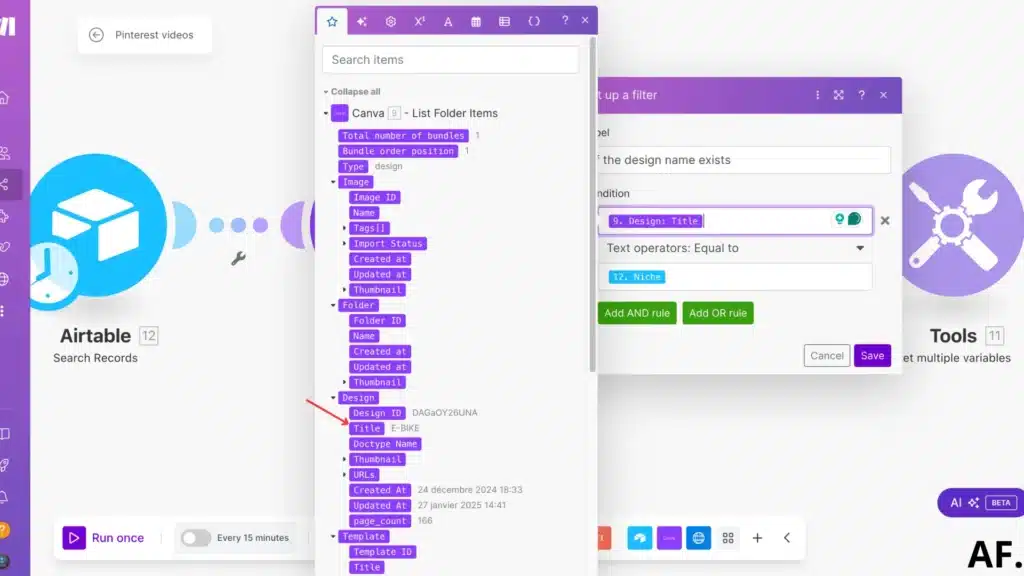
Step 6: Add Content Filtering Rules
Let’s ensure we’re grabbing the right design with a quick filter setup. Add a filter after your Canva module – consider it your personal design selector! Set it to pick just one design from your folder, even if you have dozens of templates. This way, your automation stays focused and doesn’t get confused by all your other amazing designs in the same folder!
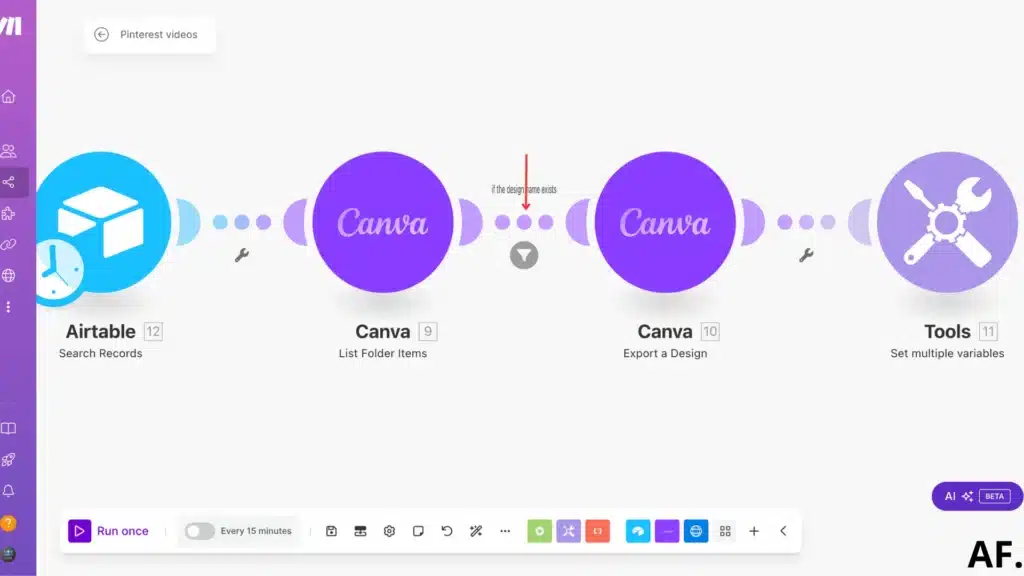
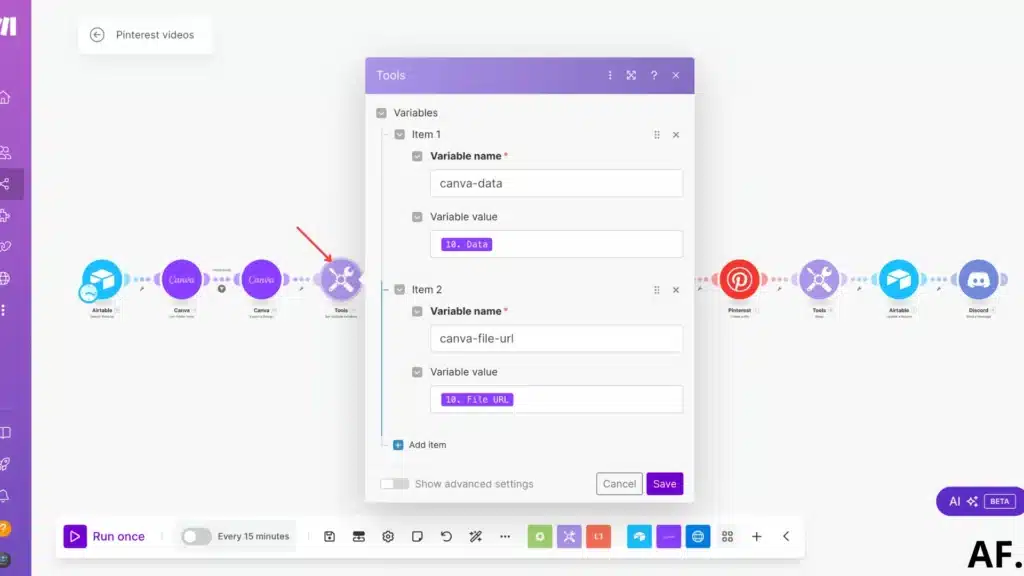
Step 7: Configure Data Storage Variables
Now, we’ll use the ‘Set Multiple Variables‘ module to keep track of our important information. This is like creating little storage boxes for our Canva data and file URLs. Add the module and create two variables:- One to store your Canva design details
- Another for your file URL (this is where your exported video will live)
This step might seem small, but it helps keep our automation organized and ensures we can access these details later in our workflow!
Step 8: Establish Pinterest Authentication
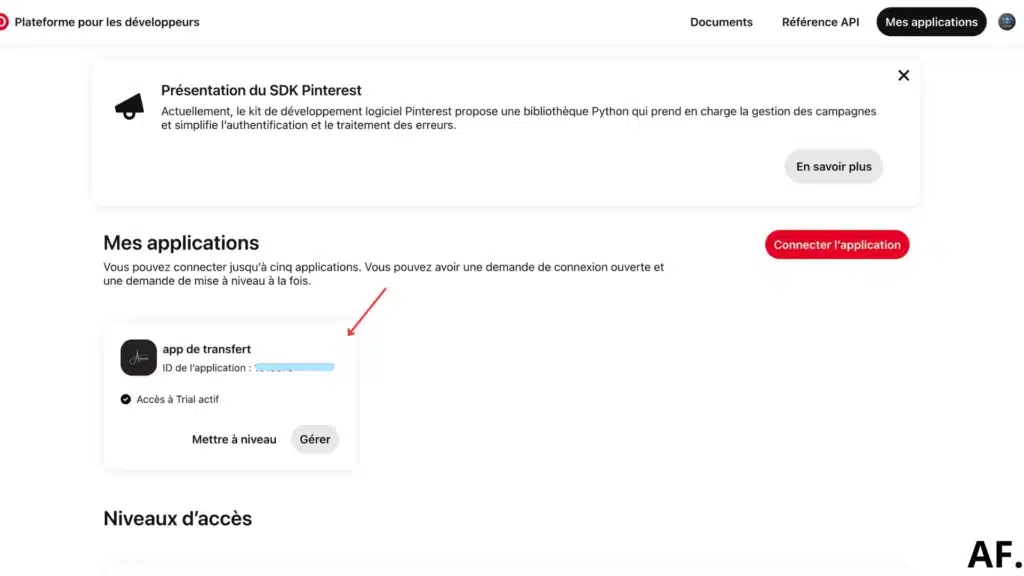
Now, let’s connect Pinterest to our automation! First, you’ll need to set up the Pinterest API connection. Head over to your Pinterest Developer Portal and open your application (if you haven’t created one yet, don’t worry – I’ll add some tips below!). This is where we’ll grab the credentials needed to converse with Pinterest.

- Your Client Key (sometimes called Client ID)
- Your Client Secret (keep this one extra safe!)
Copy these credentials carefully – like your unique keys to connect Make with Pinterest.
Pro tip: Always keep these credentials private and never share them publicly. Think of them as the password to your Pinterest automation kingdom!
Let’s head back to Make and set up our Pinterest connection! Click the plus icon to add a new module, and search for ‘OAuth 2.0 Request.’ When you find it, hit the Add button. This will open up the configuration panel where we’ll plug in those Pinterest credentials we just copied. Don’t worry if OAuth sounds technical – we’ll walk through this together!
It’s time to fill in all those fields in the OAuth setup. Let’s go through each field you’ll need to complete:
Flow Type: Authorization Code
Authorize URI: https://www.pinterest.com/oauth/
Token URI: https://api.pinterest.com/v5/oauth/token/
scope:
boards:read
pins:read
boards:write
pins:write
Client ID: MY CLIENT ID
Client Secret: MY CLIENT SECRET
Authorize parameters
client_key: MY CLIENT ID
response_type: code
scope: boards:read,pins:read,boards:write,pins:write
redirect_uri: https://www.integromat.com/oauth/cb/oauth2
client_id: MY CLIENT ID
duration: permanent
Access token parameters
grant_type: authorization_code
redirect_uri: https://www.integromat.com/oauth/cb/oauth2
client_key: MY CLIENT ID
client_secret: MY CLIENT SECRET
client_id: MY CLIENT ID
Refresh Token Parameters
grant_type: refresh_token
Custom Headers
Authorization: Basic (here tranforsm client_key:client_secret into base64)
Token placement: in the header
Header token name: Bearer
Think of this as filling out a form that helps Make communicate properly with Pinterest. Take your time with this step—accuracy here is super important for your automation to work smoothly!

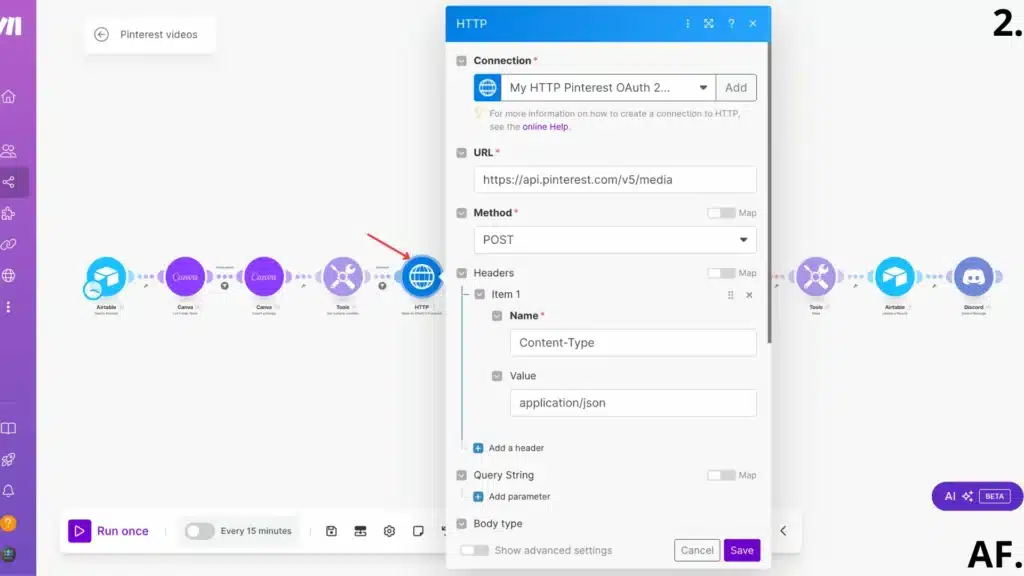
Step 9: Set Up Pinterest Media Handling
Great! Now that we’ve set up our OAuth connection, it’s time to work with Pinterest’s Media API. This is where the magic happens—we’ll prepare to upload our beautiful Canva video to Pinterest! Let’s add the Media API endpoint to our scenario. This will allow us to handle our video file properly before creating the Pin.
Step 10: Create Data Storage Variables for Pinterest
We’ll capture all data using the ‘Set Multiple Variables’ module. Please think of this as creating labeled containers for all the information we need for Pinterest. Here’s how to set it up:
Let’s create variables to store:- The media ID from Pinterest’s response
- The upload URL where we’ll send our video
- The upload parameters Pinterest gives us
- Any other essential response data
Pro tip: Give your variables clear, descriptive names. Reviewing or editing your automation later will make your life much easier. For example, name them ‘PinterestMediaID‘ or ‘UploadURL‘ instead of just ‘ID‘ or ‘URL‘!
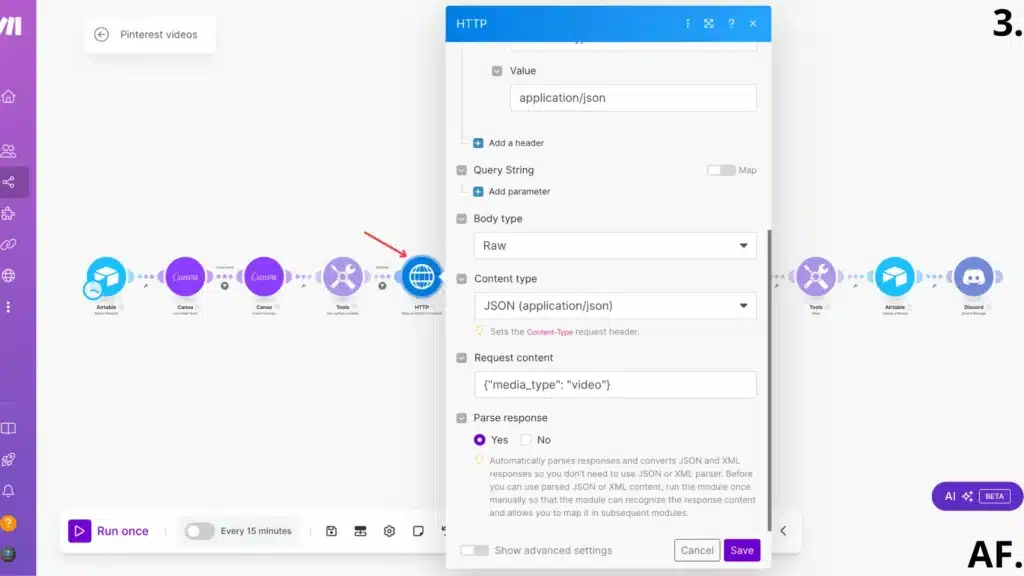
Step 11: Configure Upload Request Settings
- Click the plus sign to add a new module
- Search for ‘HTTP Request‘ or ‘Make a Request‘
- When configuring the request, you’ll use those variables we just stored
- Make sure to match the request settings exactly with Pinterest’s requirements
Pro tip: Double-check your request method (GET, POST, etc.) and headers—these little details make all the difference in uploading your video successfully!
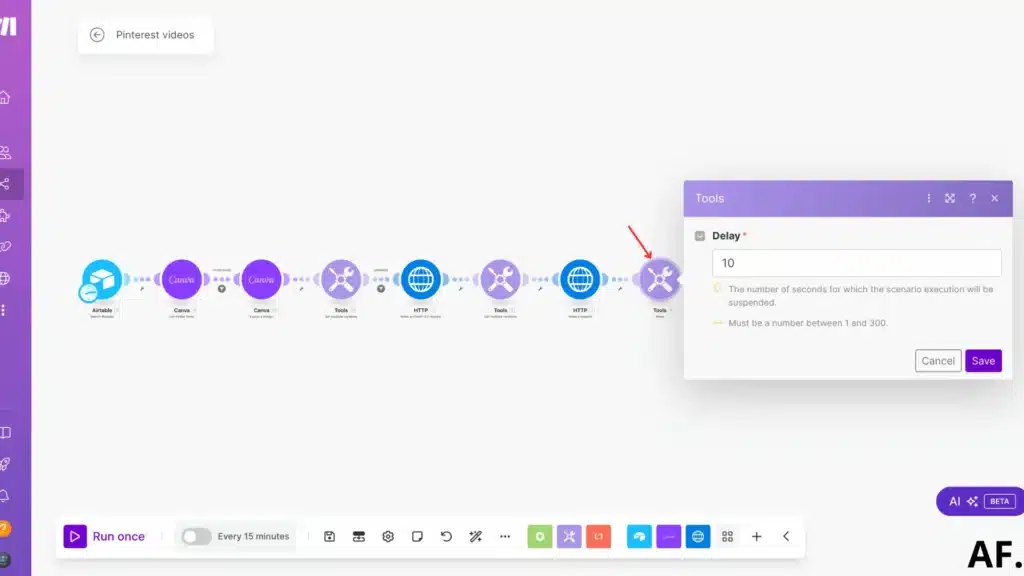
Step 12: Add Processing Delay Timer
Let’s add a short breather to our automation! Insert a ‘Sleep’ module and set it to 10 seconds. This little pause gives Pinterest time to process our upload properly – think of it as giving Pinterest a moment to catch its breath!
Step 13: Set Up Pinterest Pin Creation
Now comes the fun part – we’re ready to create your Pinterest pin! This is where all our previous setup comes together to share your fantastic content on Pinterest. Let’s configure the pin creation module to transform your video into an engaging Pinterest post!
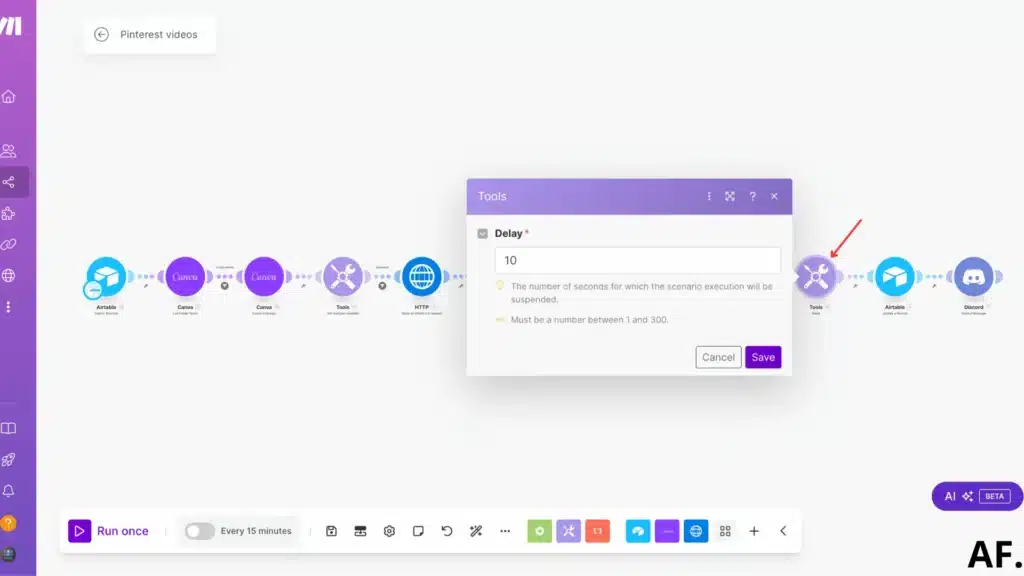
Step 14: Add Final Processing Delay
Let’s add another strategic pause here – insert another ‘Delay‘ module set to 10 seconds. This second pause is crucial as it ensures your pin is properly processed before we move on to the next step. Think of it as giving Pinterest one final moment to perfect your post!
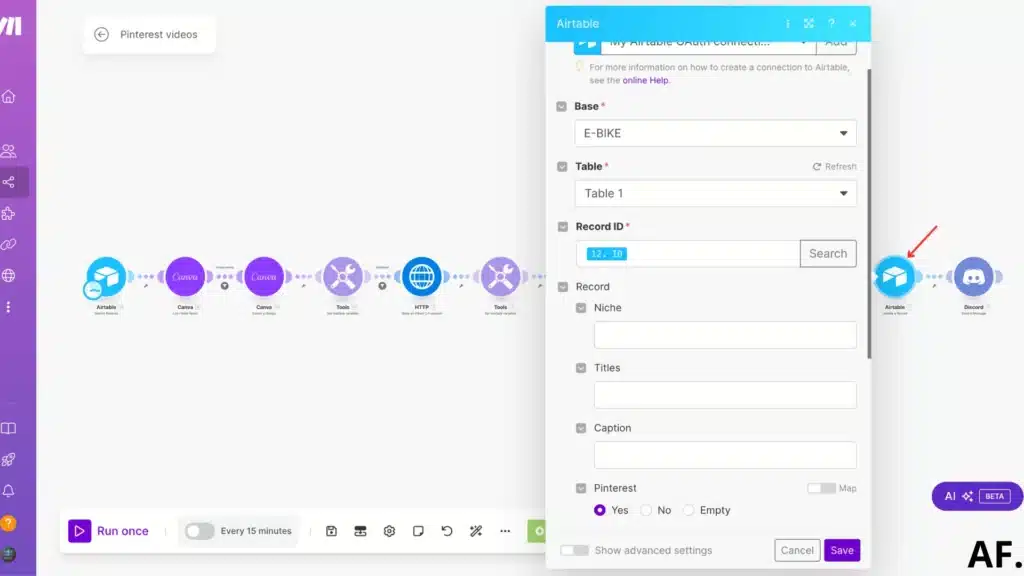
Step 15: Configure Airtable Record Updates
Finally, let’s keep our Airtable database up-to-date! Add an ‘Update Record‘ module to mark this content as published on Pinterest. This way, your Airtable stays organized, and you’ll know exactly what’s been shared. Update the Pinterest field for the record we just processed – it’s like checking off a task on your to-do list!
Step 16: Set Up Automation Notifications
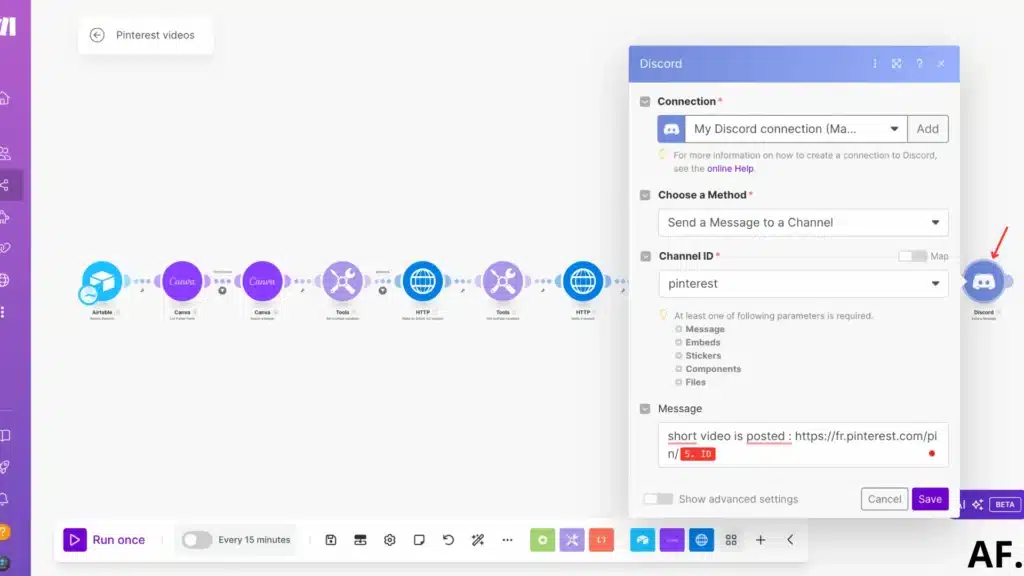
Want to stay in the loop about your Pinterest posts? Here’s a bonus step: Add a Discord notification module! This will send you a message whenever a pin is successfully published. It’s like having your own social media assistant keeping you updated!
Add a Discord module and customize your message to include details like:- The title of the published pin
- When it was posted
- A link to view it on Pinterest
Pro tip: While I use Discord for these notifications, you could also set this up with other platforms like Slack or email – choose whatever works best for your workflow!
Step 17: Launch and Test Your Automation
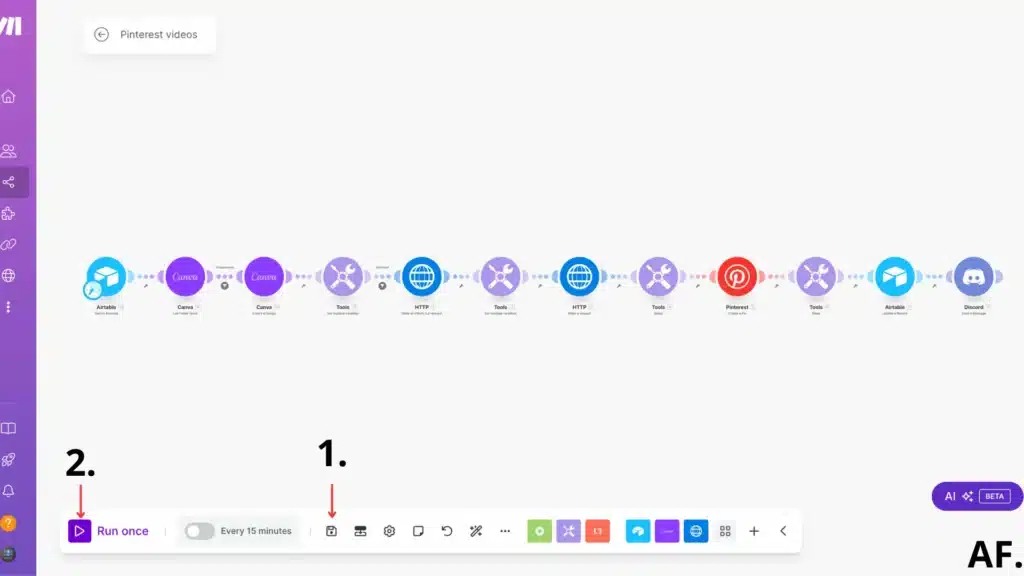
Step 18: Result
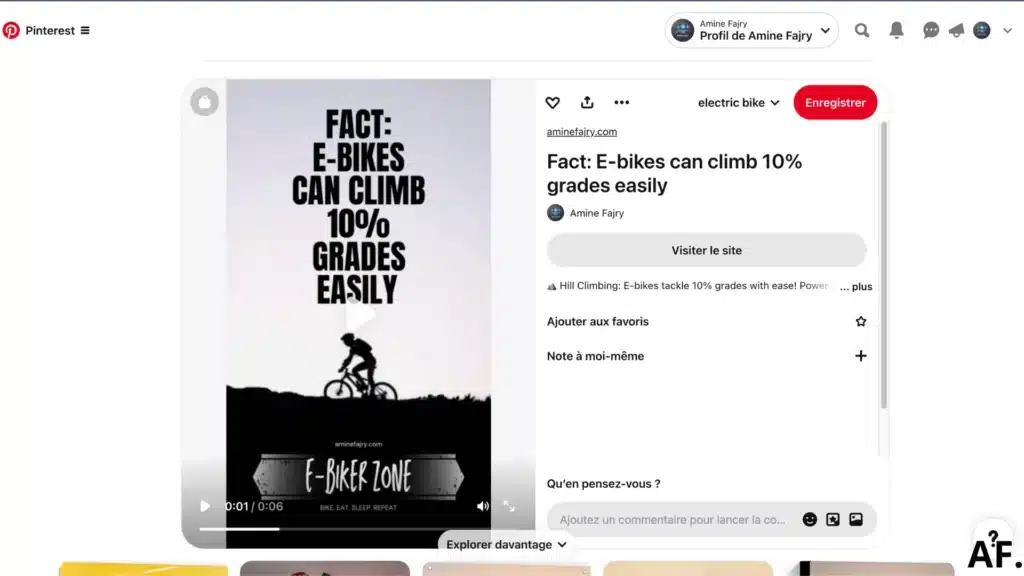
And voilà! Your automation is now complete and working its magic! 🎉 The video has been successfully uploaded to Pinterest, your Airtable is updated, and (if you set it up) you’ve got a notification in Discord. You can now see your beautiful video live on Pinterest, ready to attract your target audience.
This automation will save you hours of manual work – imagine all the videos you can share automatically while you focus on creating more amazing content! Feel free to check your Pinterest profile to see your freshly posted video in action.
How does it feel to have your Pinterest posting automated? Let me know if you need help fine-tuning any part of the process!
Step 19: Schedule Your Automation
If you want to schedule your automation, I just wrote this article; it might help you :
Get this scenarioConclusion
Implementing these Pinterest video automation strategies with Make will save you countless hours while maintaining a consistent presence on the platform. Remember to monitor your automation performance and make adjustments as needed regularly. Start small, test thoroughly, and gradually expand your automation as you become more comfortable with the system. Ready to transform your Pinterest marketing strategy? Get started with Make today!
Join the Newsletter
Subscribe to get our latest content by email.
We won’t send you spam. Unsubscribe at any time.
✅ You’re subscribed!
FAQs
Q: How long does it take to get started?
A: The process typically takes 5-10 minutes to complete, and you can begin using the service immediately after signing up.
Q: Do I need any special equipment?
A: No, you only need a standard computer or smartphone with an internet connection.
Q: Can I cancel my subscription at any time?
A: You can cancel your subscription anytime through your account settings with no cancellation fees.
Q: Can you automate Pinterest posts?
A: Yes, you can automate Pinterest posts using Make by connecting your Pinterest account and setting up scheduled posting workflows.
Q: How do I automate my posts?
A: Create a content calendar in Airtable, connect it to Make, and set up automated publishing schedules for consistent posting.

Further Ressources
- How to Build Customer Feedback Automation in Make
- How to Get YouTube Transcripts Using Make
- How to Automate Customer Onboarding in Make
- Discord Message Integration with Make: A Complete Guide
- How to Automate Document Approvals with Make
- How to Convert Base64 to PDF Using Make
- How To Trigger Instantly Google Form On Make
- How to Automate Cold Emails with Make