How to Convert Base64 To PDF using Make
Have you ever been stuck with Base64 encoded data that you need to convert into a readable PDF? You’re not alone! Base64 encoding is commonly used for transmitting binary data, but converting it back to PDF can be tricky. The good news? Make (formerly Integromat) offers a powerful solution to this technical challenge. In this comprehensive guide, we’ll walk you through the exact steps of how to convert Base64 to PDF using Make. Whether you’re handling document automation, data processing, or system integration, this tutorial covers you! And you don’t need any extra third-party modules; this is great because it is all for FREEEE and is very easy. I love it

Let’s go!
Step-by-Step Base64 to PDF Conversion Process
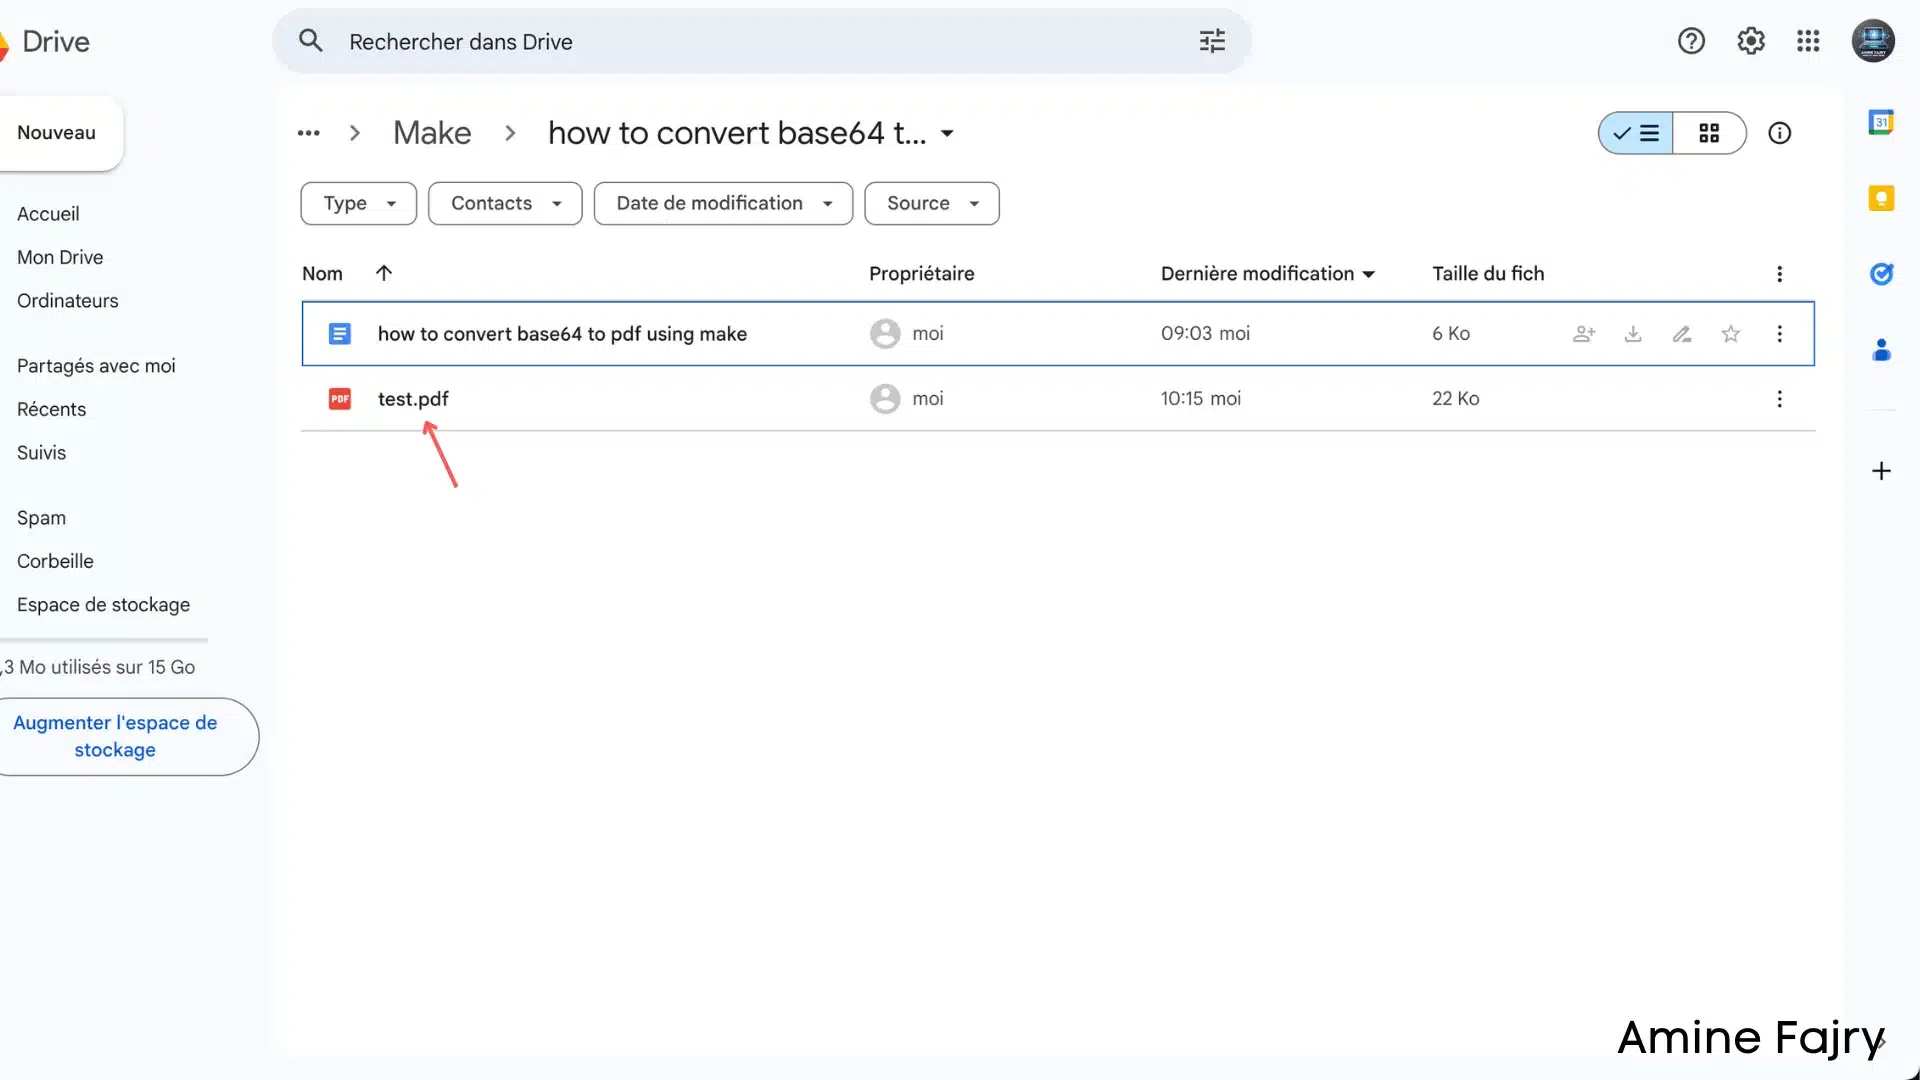
Step 1: Create Your Google Drive Folder
Let’s start by setting up your own space in Google Drive – I’ll show you how to create a folder like mine. Take a look at this example:
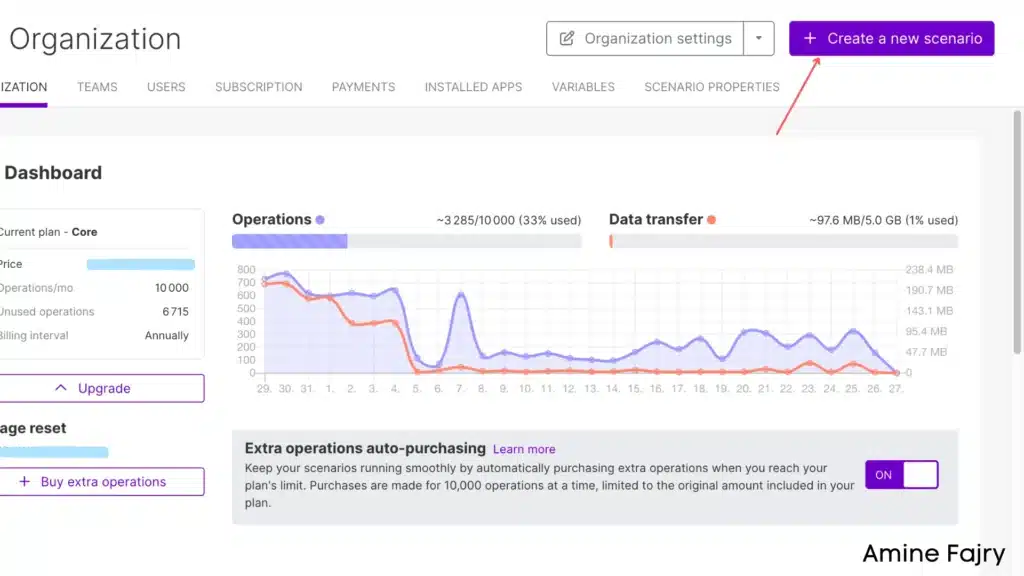
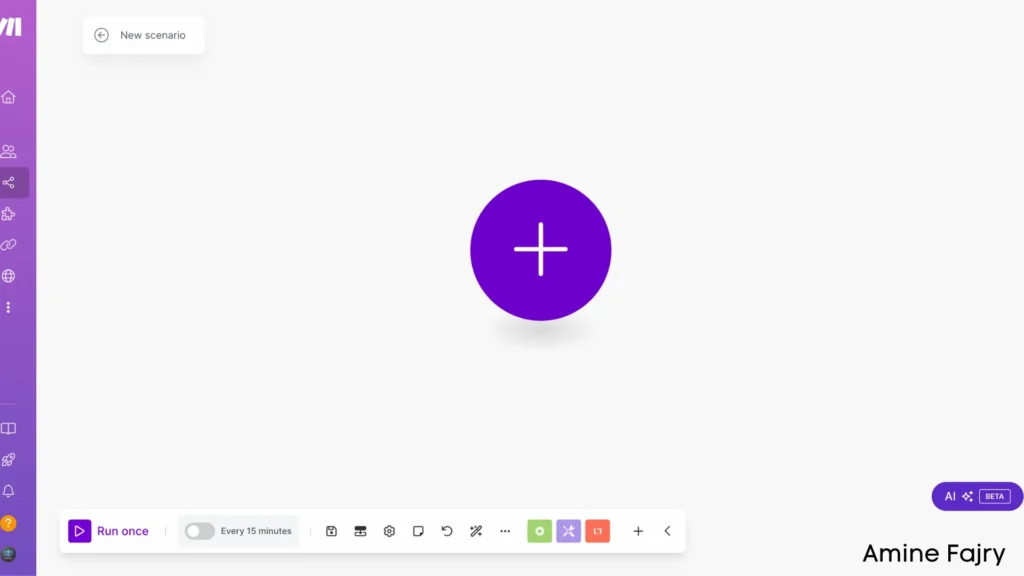
Step 2: Set Up Your Make Scenario
Time to dive into Make! Launch your Make dashboard and click on ‘Create a new scenario‘ :
Step 3: Configure Your Conversion Workflow
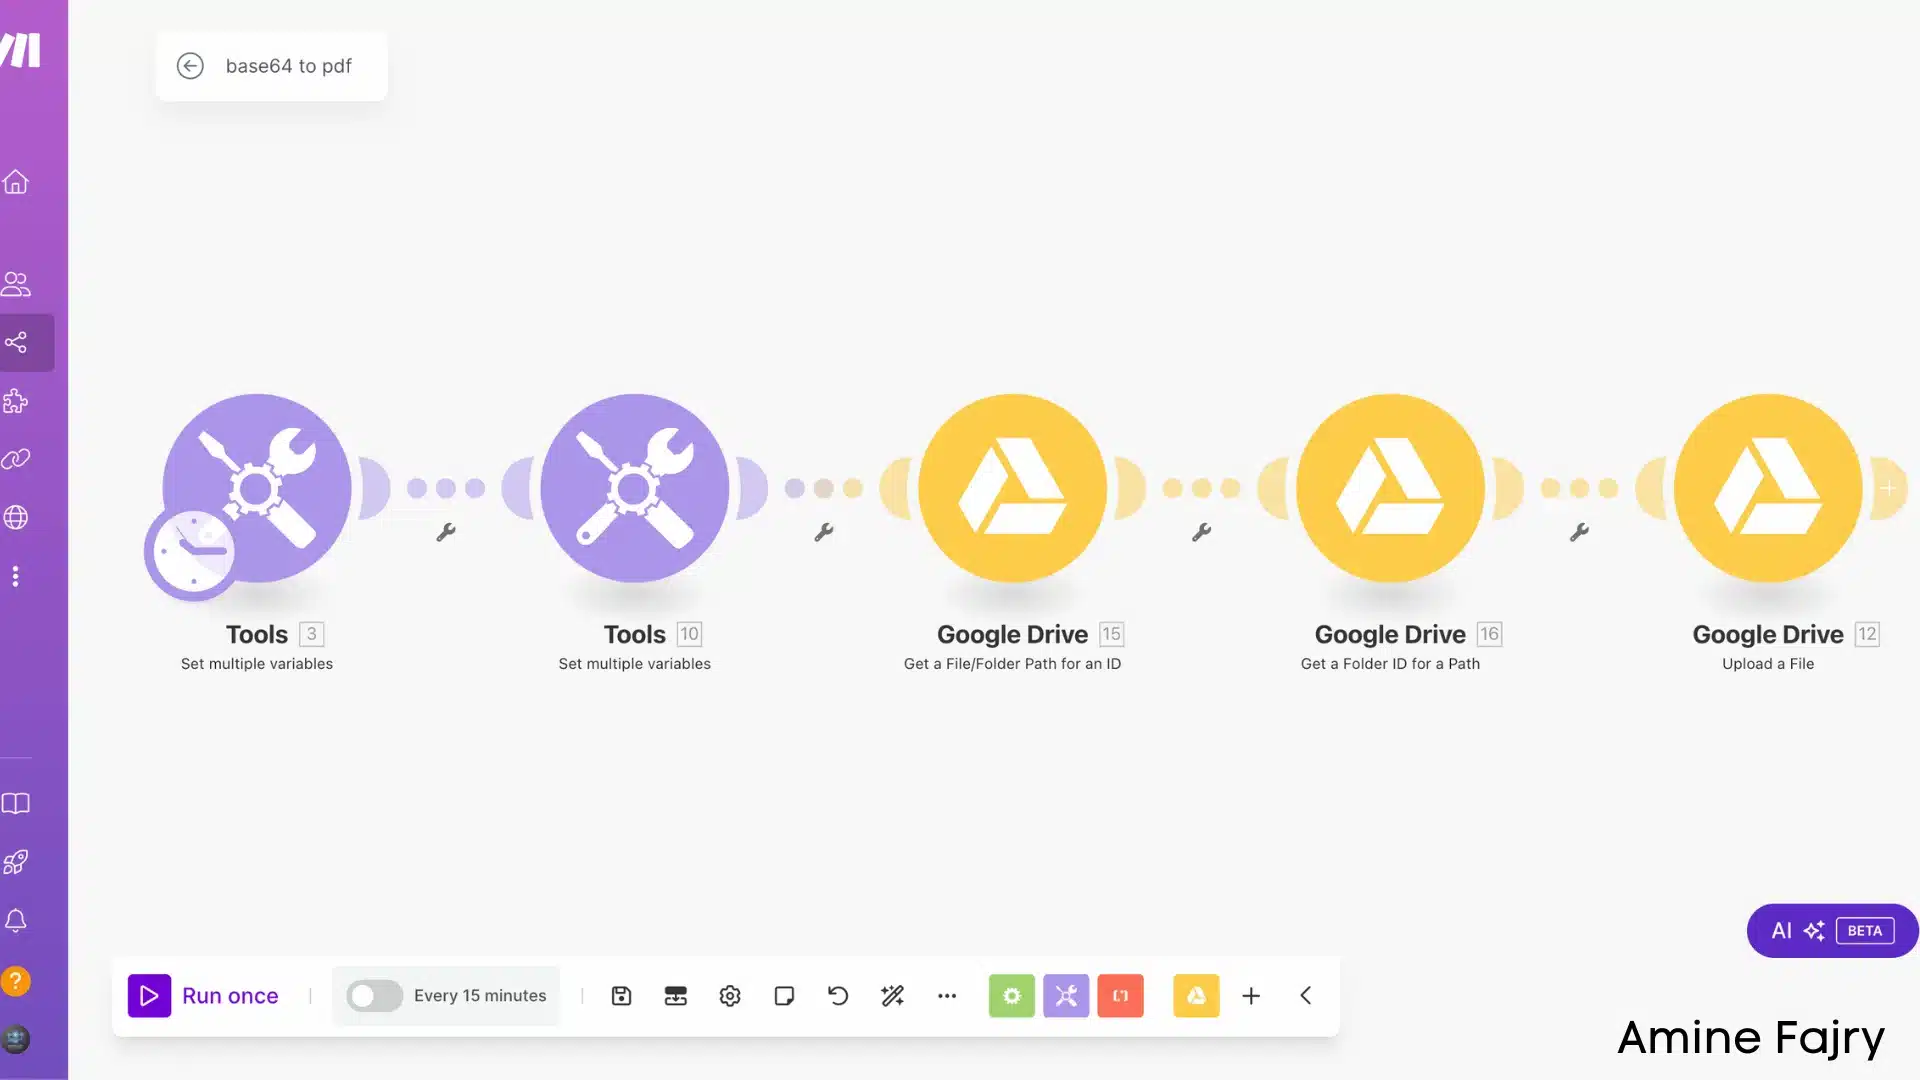
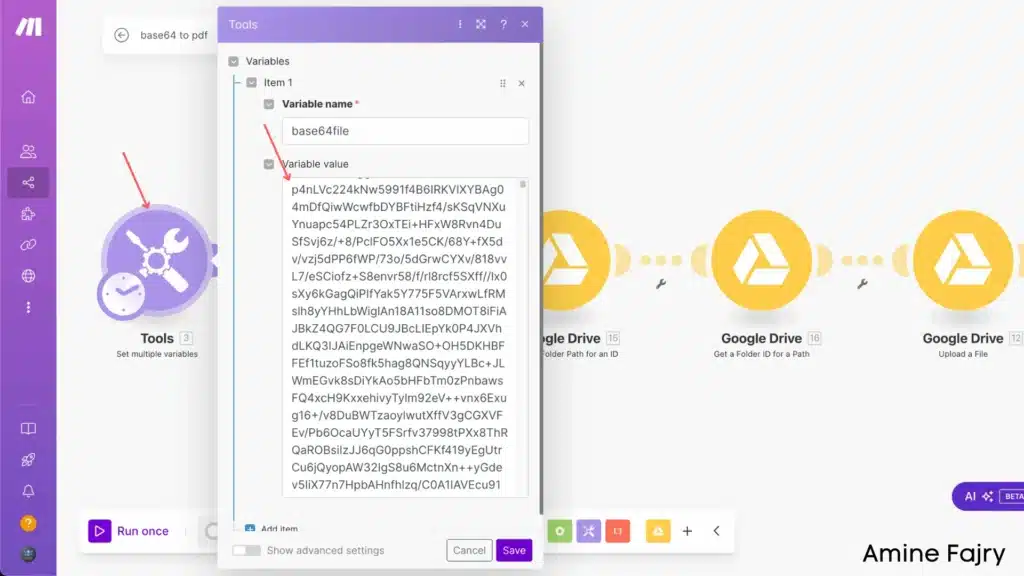
The first step is super important: locate the ‘Set Multiple Variables‘ module and add it to your workspace. Here, you’ll need to fill in two key pieces of information: your variable name and the corresponding base64 value.
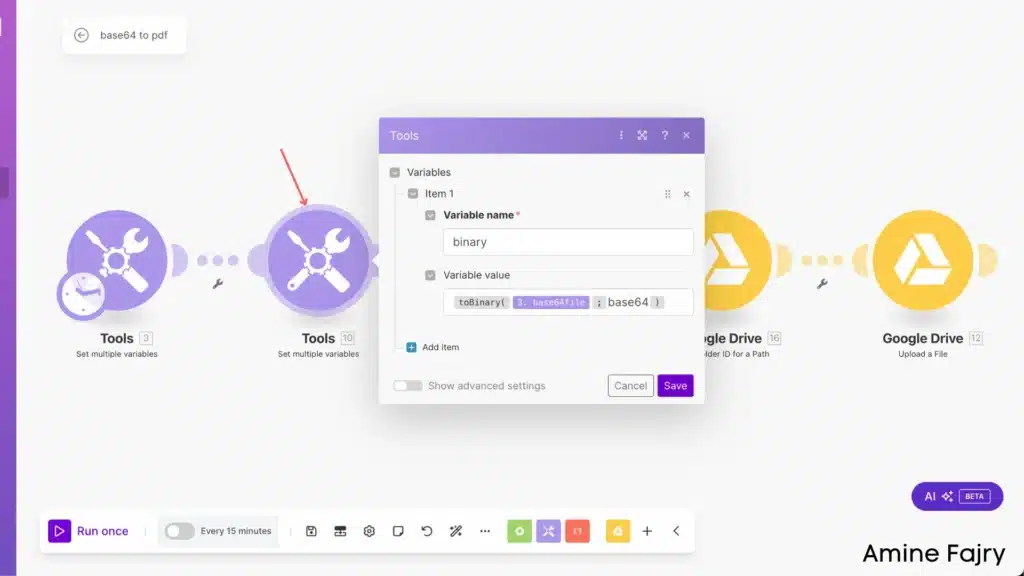
Next up, we’ll create another ‘Set Multiple Variables‘ module. This time, let’s name our variable ‘binary‘ (that’s what I used, but feel free to customize it!). For the variable value, you’ll want to use this specific format:
{{toBinary(3.base64file; "base64")}}This will help convert your base64 file into the format we need.
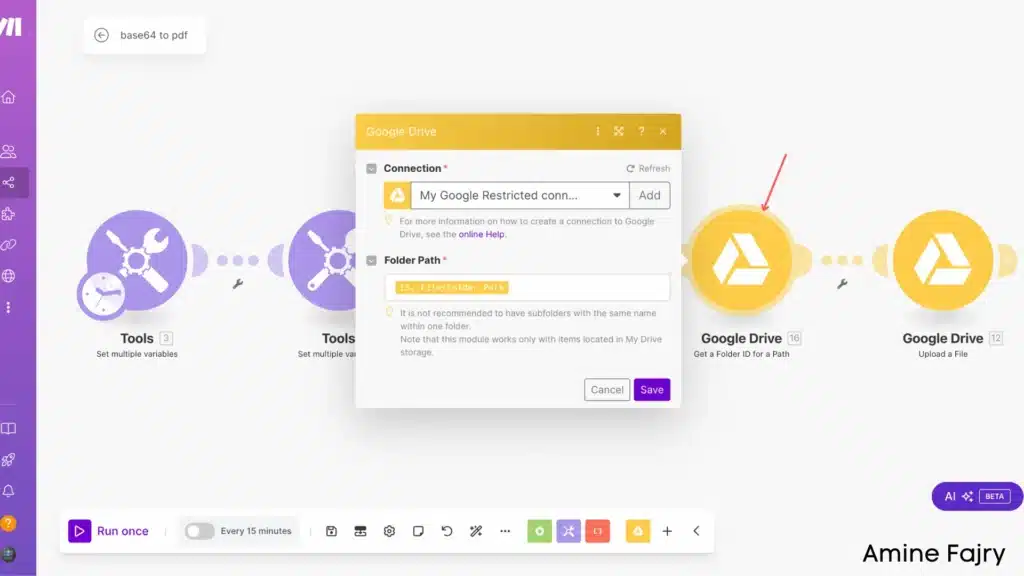
Now, let’s connect your Google Drive! Add the ‘Get a File/Folder for an ID‘ module from Google Drive and point it to your folder location. This is where we’ll be working with your files :
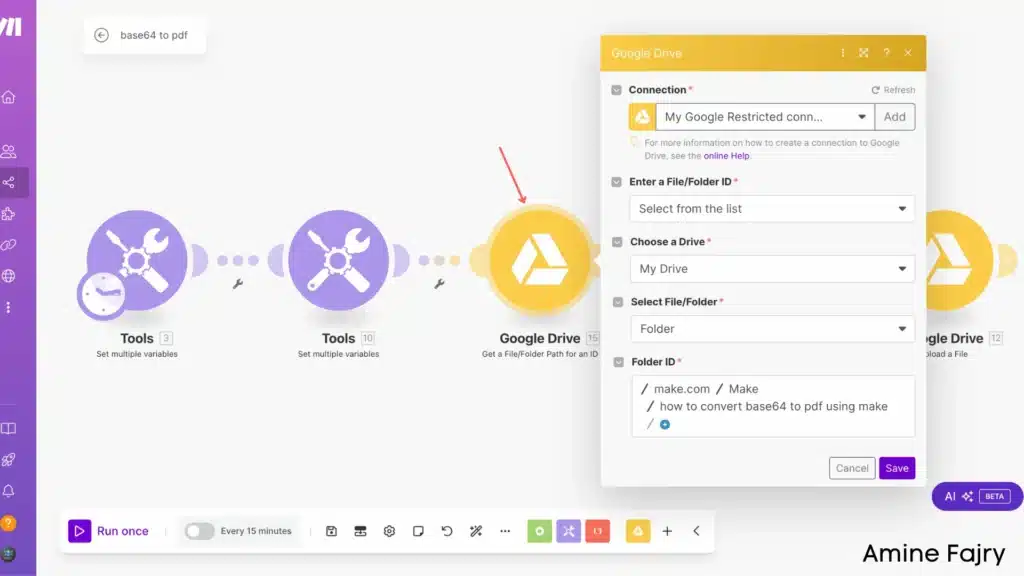
The next simple step is to grab the folder path from the module we created and connect it here. This creates a link between your modules.
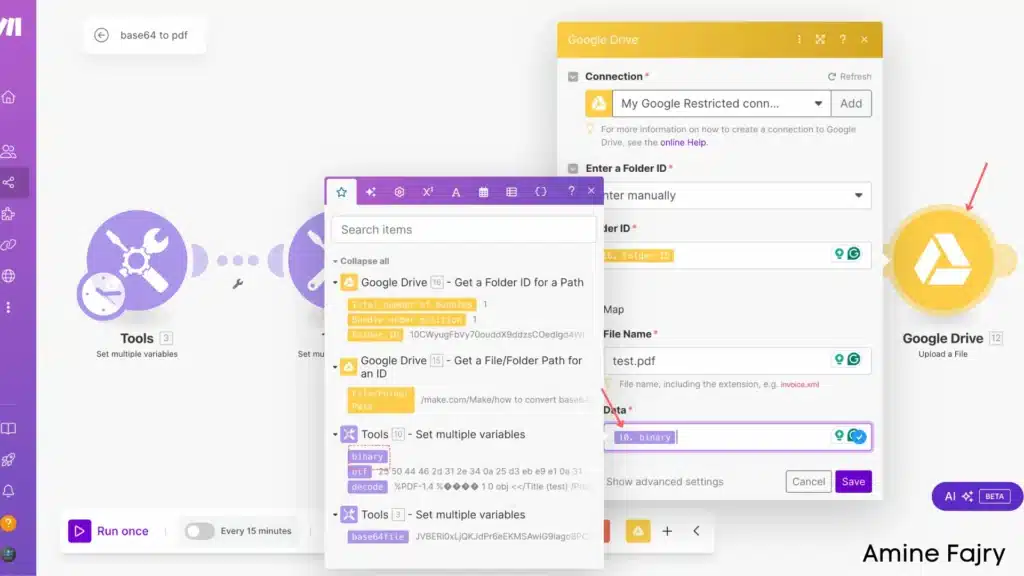
- Find the ‘Upload a File‘ module
- Take the binary data we created in our multiple variables step and connect it to the ‘Data‘ field.
- Give your file a name in the ‘Filename‘ field.
- Finally, link the Folder ID from our previous module to tell Google Drive exactly where to save your file.
This is where everything comes together – we’re telling the system what to upload and where to put it!
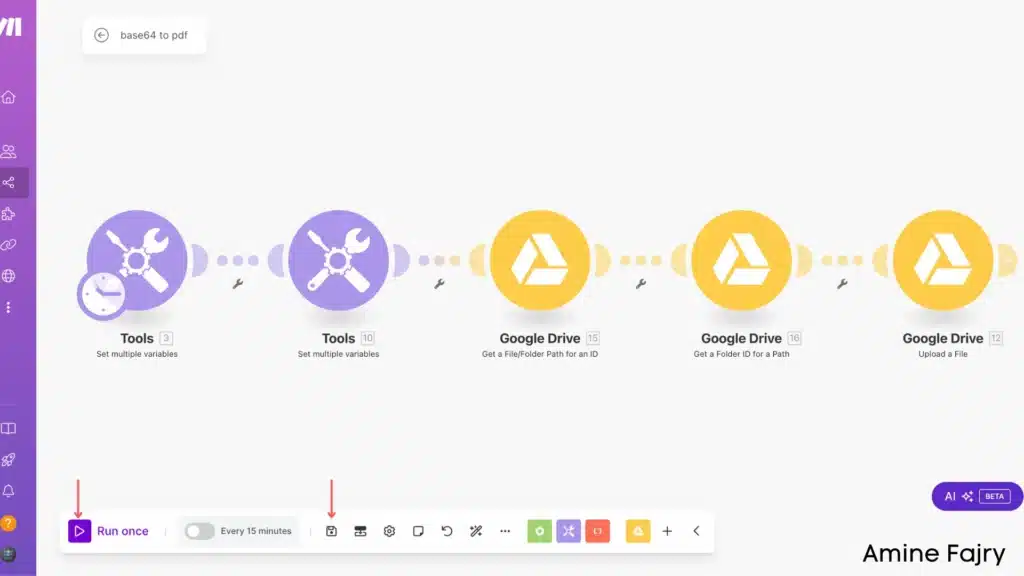
Step 4: Save and Run Your Scenario
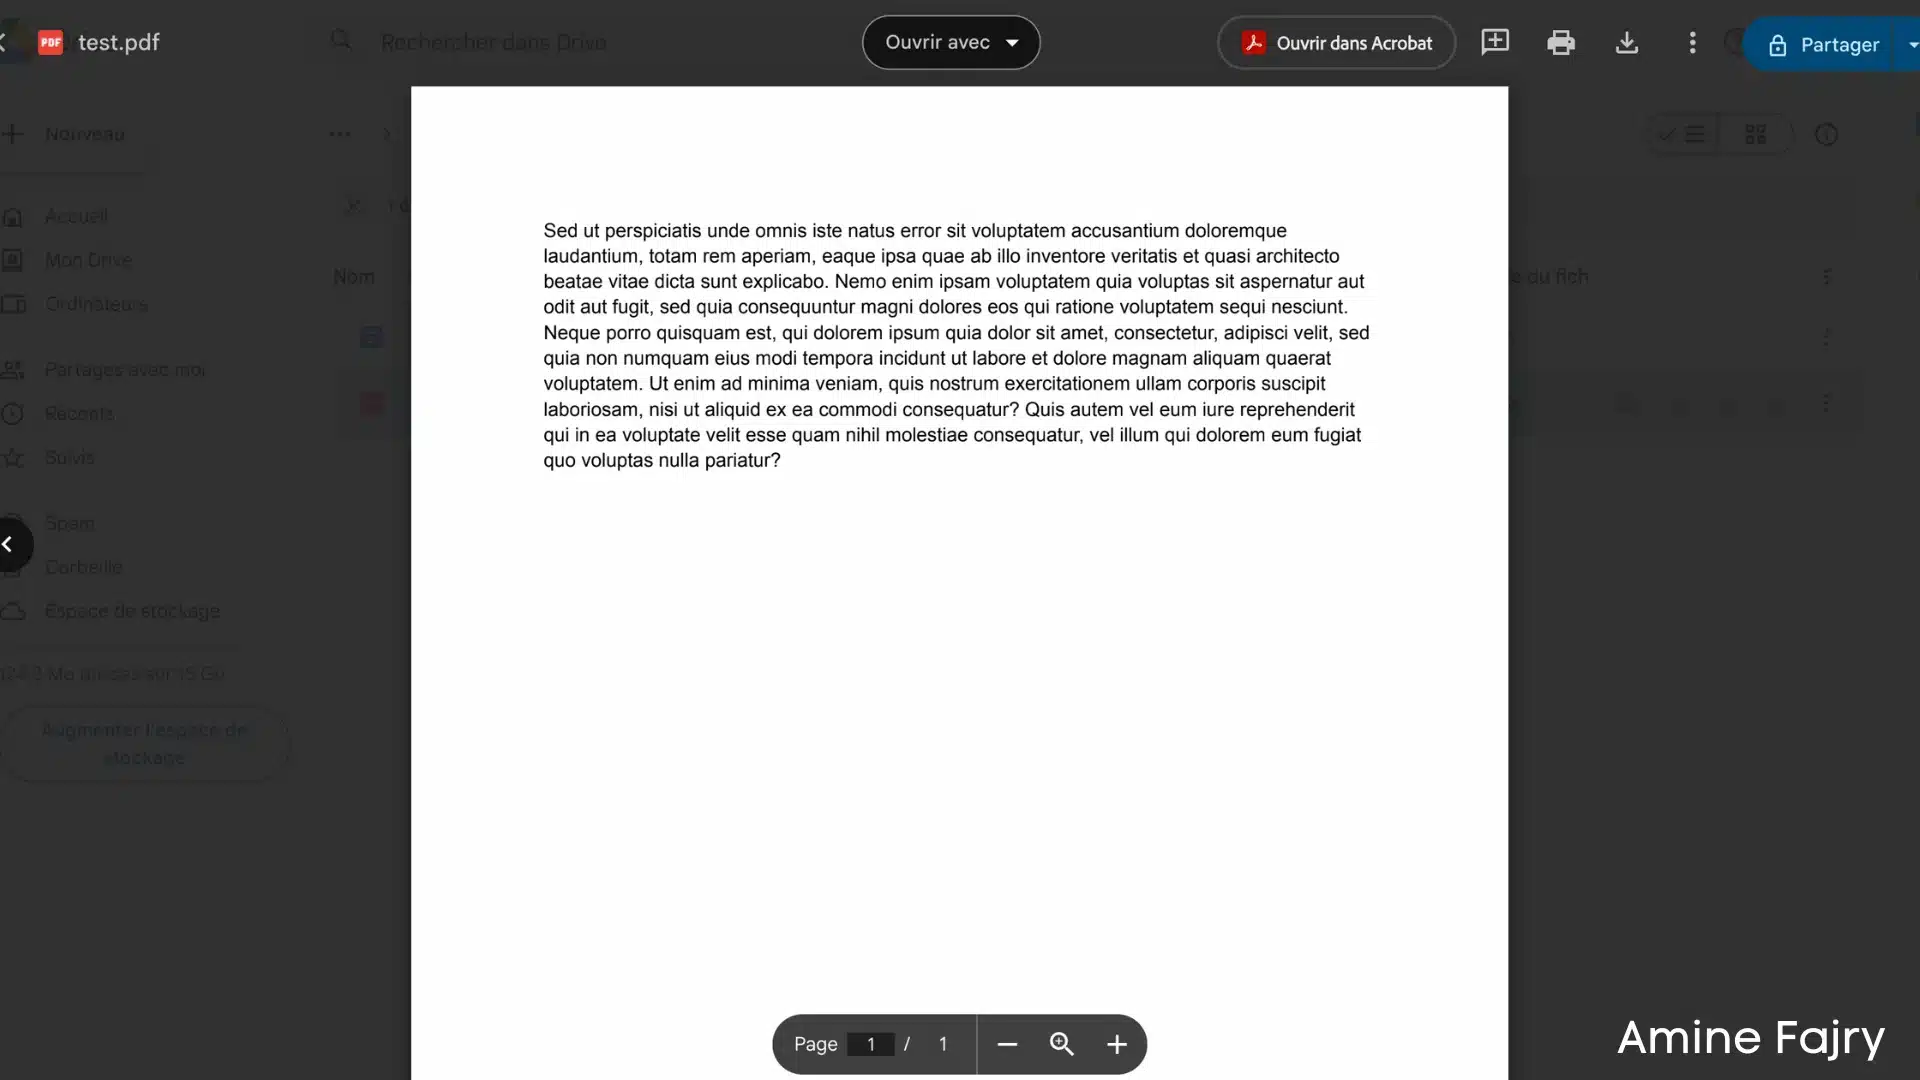
Step 5: Verify Your PDF Conversion
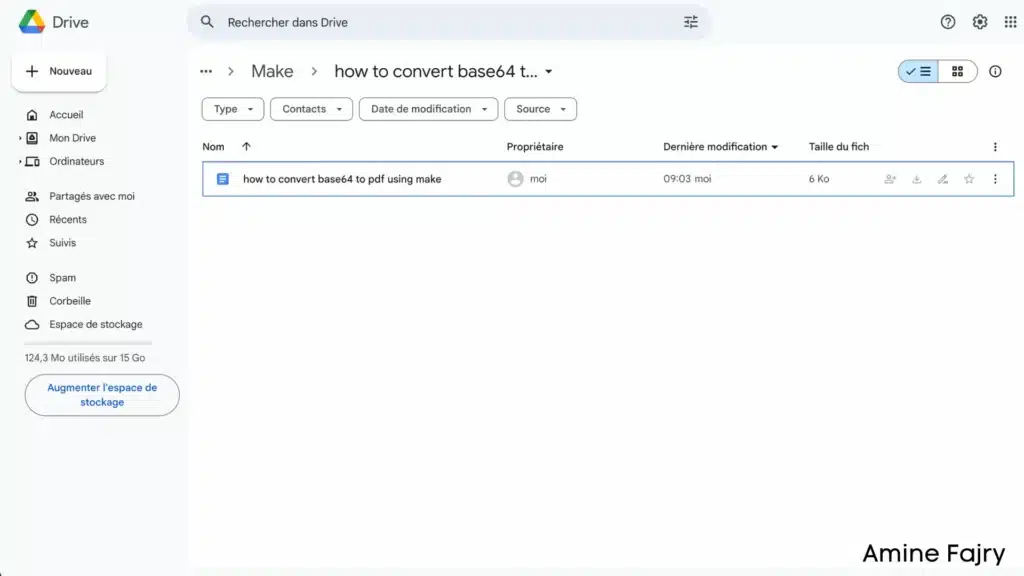
Great job! Now, let’s double-check that everything worked correctly. Head to your Google Drive and peek at your folder – your newly uploaded PDF is waiting for you. If it’s there, congratulations – you’ve successfully completed the process! 🎉
If you don’t see your file immediately, don’t worry – it might take a few seconds to appear. Just refresh your Google Drive page, and it should pop up.

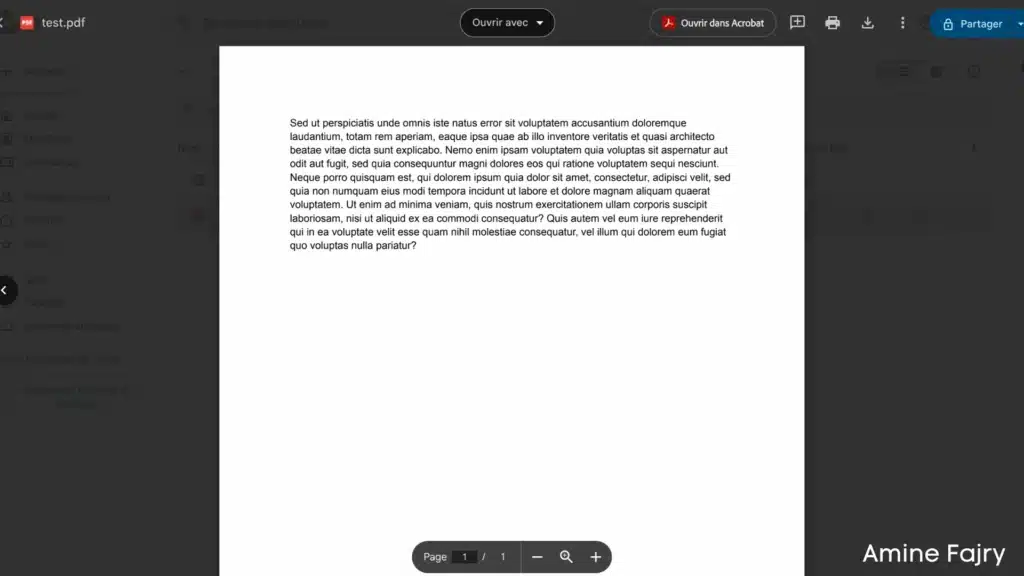
Once you find your PDF in Google Drive, click to open it. Voilà! You should now be able to view your PDF document in your browser, just like I’m showing here.
Pretty cool, right? This means everything worked perfectly, and your file was not only uploaded but is also fully readable!
Conclusion
Converting Base64 to PDF using Make doesn’t have to be complicated. With the proper setup and understanding of the process, you can automate this conversion effortlessly. Remember to validate your Base64 input and implement proper error handling for robust automation. Now it’s your turn to put this knowledge into practice and streamline your document processing workflow!
FAQs
Q: Do I need to pay for any third-party tools to convert Base64 to PDF using Make?
A: No! One of the best things about this method is its completely free. You can perform the conversion using Make’s built-in modules and Google Drive integration, with no additional costs or third-party tools required.
Q: How long does the conversion process take?
A: The conversion process is nearly instantaneous. Once you run your scenario, your PDF should appear in your Google Drive folder within seconds. If you don’t see it immediately, refresh your Google Drive page.
Q: Can I automate this process for multiple files?
A: Absolutely! While this guide shows you how to convert a single file, you can easily modify the scenario to handle multiple Base64 files. Adjust your input module and iterate through your files using Make’s built-in features.
Q: How to convert Base64 into PDF?
A: Using Make, create a scenario that uses the ‘Set Multiple Variables’ module to handle your Base64 data, convert it to binary format, and then use Google Drive’s ‘Upload a File’ module to save it as a PDF. The process is free and requires no third-party tools.
Q: How to decode a PDF?
A: In Make, use the toBinary() function with your Base64 data in a ‘Set Multiple Variables’ module. The format should be {{toBinary(3.base64file; "base64")}}. This decodes the Base64 data into a format that can be saved as a PDF.
Q: How to convert Base64 to file?
A: Set up a Make scenario using two key steps: first, convert your Base64 data to binary using the ‘Set Multiple Variables’ module, then use the ‘Upload a File’ module connected to Google Drive to save it as your desired file format.
Q: How to convert bytes to PDF?
A: In Make, after converting your Base64 to binary data, use the Google Drive ‘Upload a File’ module. Connect your binary data to the ‘Data’ field, specify a filename with a .pdf extension, and select your destination folder in Google Drive.

Further Ressources
- How to Build Customer Feedback Automation in Make
- How to Get YouTube Transcripts Using Make
- How to Automate Customer Onboarding in Make
- Discord Message Integration with Make: A Complete Guide
- How to Automate Document Approvals with Make
- How to Use Airtable on Make
- How To Trigger Instantly Google Form On Make
- How to Automate Cold Emails with Make