How to Build Customer Feedback Automation in Make

Did you know 77% of customers view brands more favorably when actively seeking and implementing customer feedback? Building an automated customer feedback system isn’t just about collecting responses – it’s about creating a seamless experience that helps your business grow! In this comprehensive guide, I’ll walk you through building a robust customer feedback automation system using Make‘s powerful platform. Whether a business owner, marketing professional, or automation enthusiast, you’ll discover how to build customer feedback automation in Make!

Let’s dive in!
What You’ll Learn

- Set up Customer Feedback automation workflow.
- Set up a Table on Airtable.
- Get automatic Response from Google Forms.
- Send Automatically Emails.
Setting Up Your First Feedback Automation Workflow
Step 1: Creating Your Initial Scenario
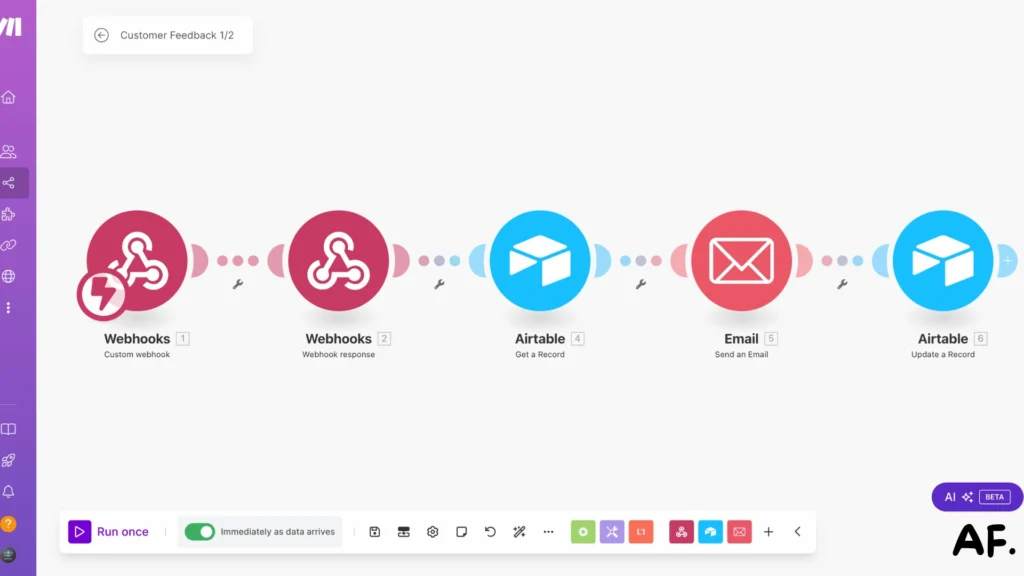
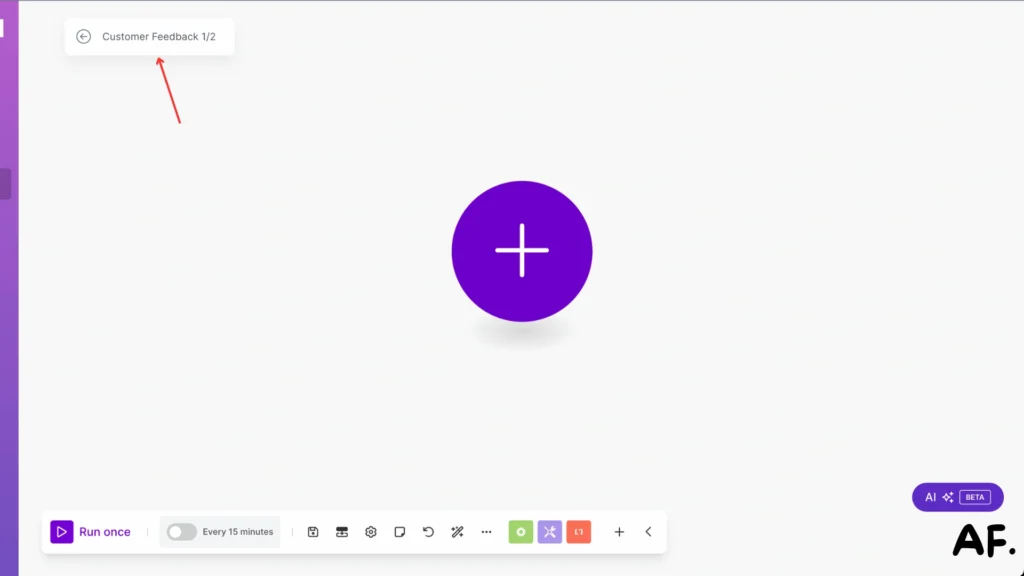
Let’s start by creating your first test scenario! Name it something like ‘Customer Feedback 1/2‘ so we can easily track it later.
Step 2: Configuring Your Airtable Database
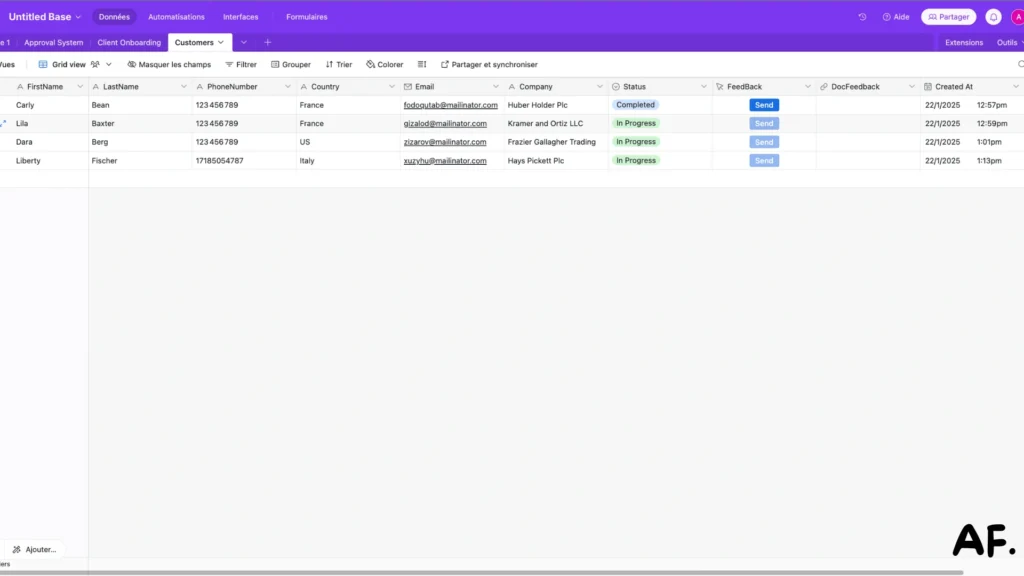
In Airtable, set up a new table with these essential columns:- First Name and Last Name fields for customer details
- Contact info: Phone Number, Email, and Country
- Company name
- Status tracking
- A Feedback Button column for submissions
- DocFeedback Link field
- Created At timestamp to track entries
Feel free to match this structure with mine or customize it for your needs!
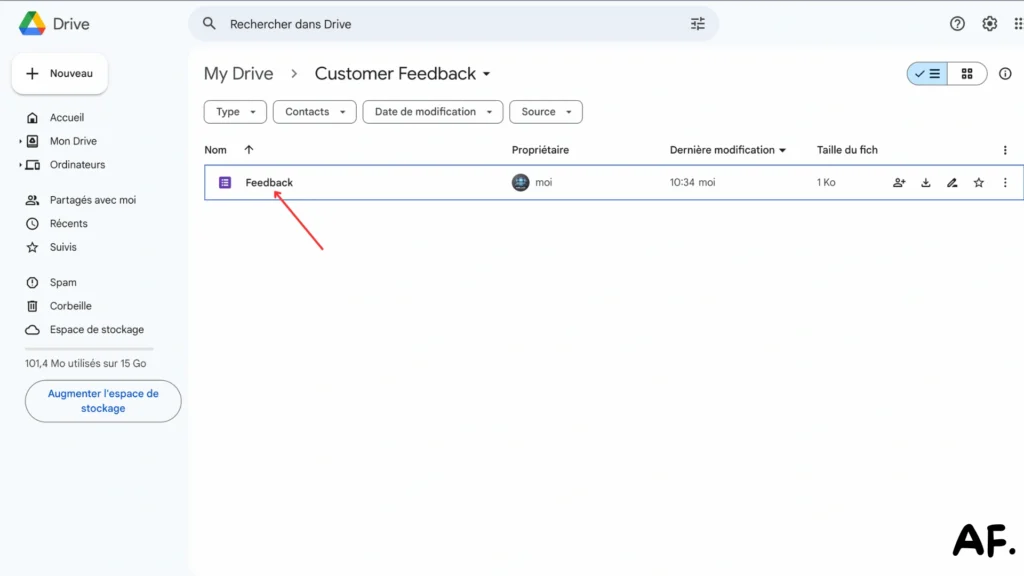
Step 3: Building Your Feedback Form
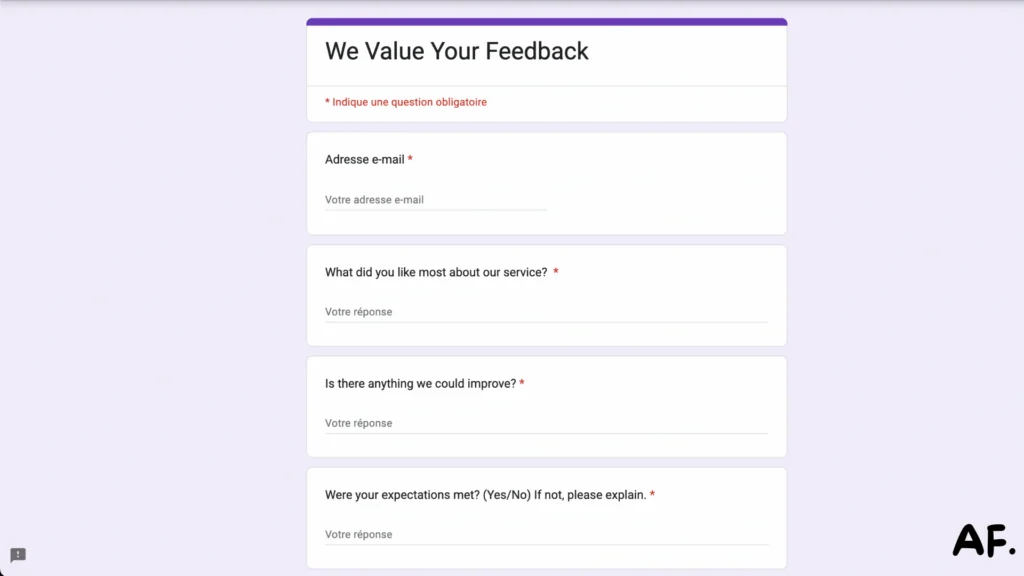
Next up, create a feedback form in Google Forms with your key questions. This will be where your customers can share their thoughts easily
I’ve added a set of key questions to the Google Form to capture customer feedback:
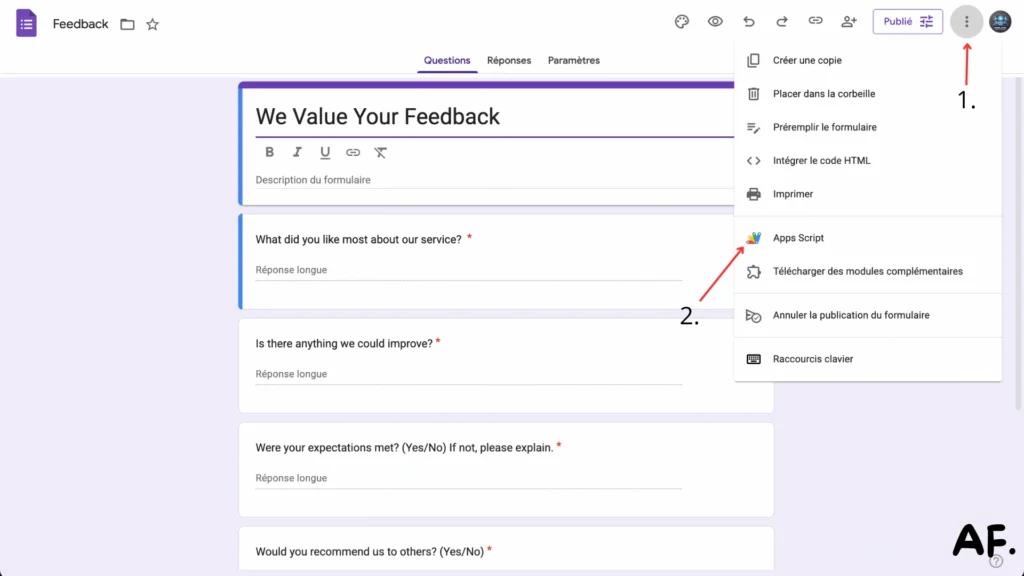
Step 4: Implementing the Automation Script
Open Apps Script by clicking the Extensions menu in Google Forms to add your custom automation script:
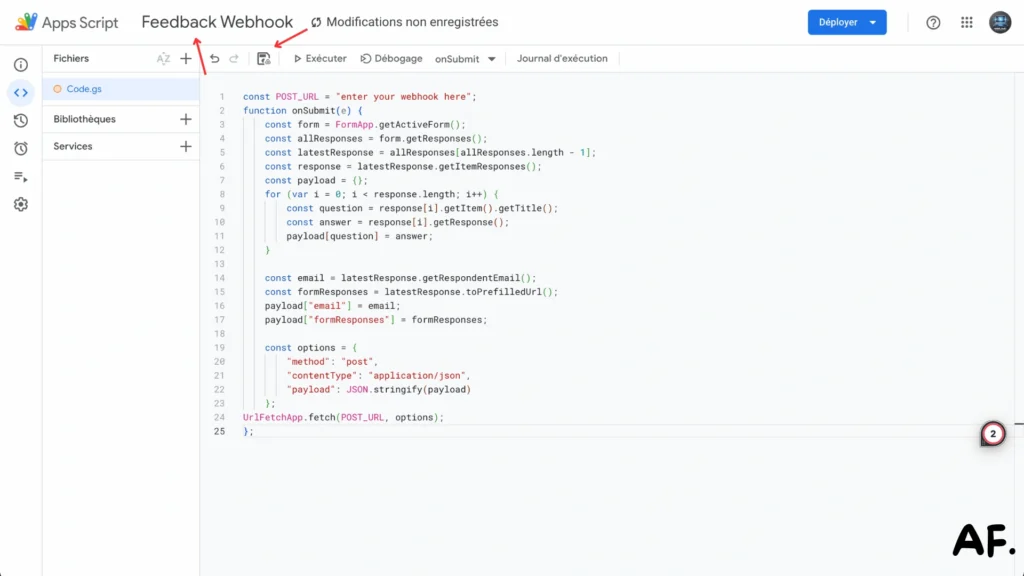
Paste your automation script into Apps Script, give it a descriptive name, and click ‘Save‘ to store your changes :
const POST_URL = "enter your webhook here";
function onSubmit(e) {
    const form = FormApp.getActiveForm();
    const allResponses = form.getResponses();
    const latestResponse = allResponses[allResponses.length - 1];
    const response = latestResponse.getItemResponses();
    const payload = {};
    for (var i = 0; i < response.length; i++) {
        const question = response[i].getItem().getTitle();
        const answer = response[i].getResponse();
        payload[question] = answer;
    }

    const email = latestResponse.getRespondentEmail();
    const formResponses = latestResponse.toPrefilledUrl();
    payload["email"] = email;
    payload["formResponses"] = formResponses;

    const options = {
        "method": "post",
        "contentType": "application/json",
        "payload": JSON.stringify(payload)
    };
UrlFetchApp.fetch(POST_URL, options);
};
Step 5: Configuring Primary Webhook
Return to your scenario and add a webhook module. Copy the provided webhook URL – we’ll need this for the next step:

Step 6: Setting Up Webhook Integration
Back in your Airtable, add the webhook URL to your feedback button using a formula. Make sure to format it like the example shown in the image:

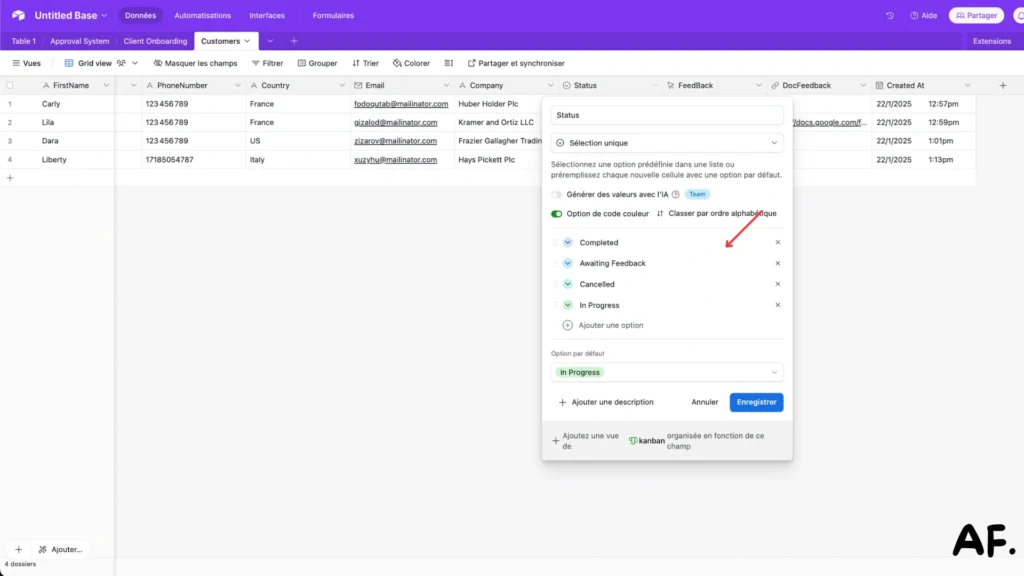
Step 7: Establishing Status Tracking
Next, configure your status options in Airtable to track feedback stages effectively :
Step 8: Building the Primary Workflow
Return to your scenario, add a webhook response module, and insert the script exactly as shown in the image :

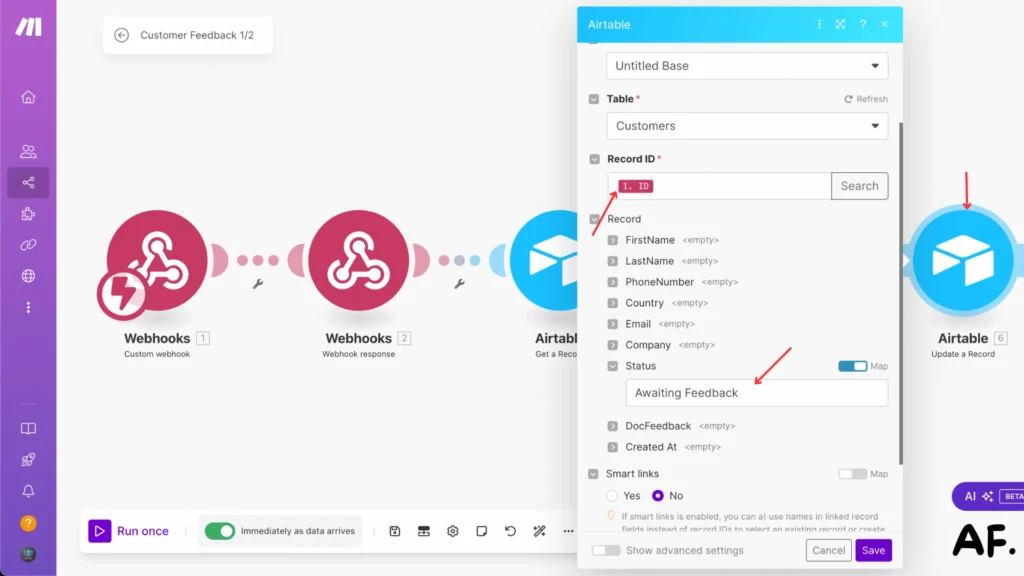
In the ‘Get a Record‘ module, input the ID value received from the webhook response :

Add a ‘Send an Email‘ module using the email and name fields from your Airtable record. Insert your Google Form link in an HTML href tag :

Add an ‘Update a Record‘ module. Set the ID from your webhook response and update the Status field to ‘Awaiting Feedback‘ :
Step 9: Deploying First Scenario

Step 10: Validating Primary Workflow
Go to your Airtable and click the ‘Send‘ button to trigger the workflow :

Check your inbox – you should now receive the feedback request email :

Step 11: Establishing a Secondary Scenario
Create a second scenario and name it ‘Customer Feedback 2/2‘ or choose your preferred name :

Step 12: Webhook Configuration
In your new scenario, add a webhook module as the first step and copy the generated webhook URL :

Return to your Apps Script and paste in the webhook URL you just copied :

Now add a new trigger to your Apps Script. I’ll help you configure it once you share the tutorial video :

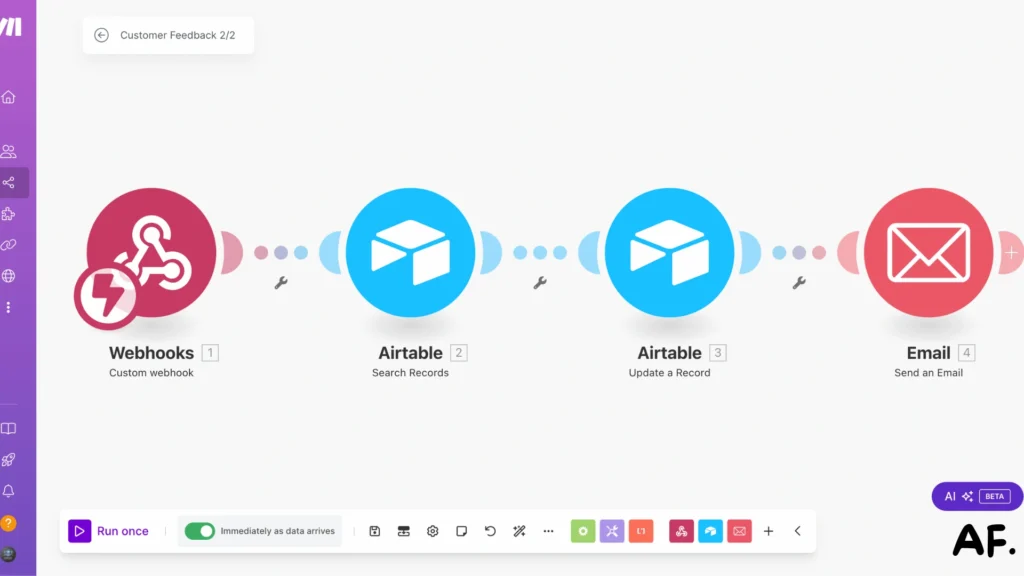
Step 13: Constructing the Secondary Workflow
In your scenario, add a ‘Search Records‘ module and configure it to search by email address :

Add an ‘Update a Record‘ module and set the DocFeedback field to use the form responses data from your webhook :


Add an email module using the Airtable email field. Personalize the thank you message by including the customer’s first name and last name from your records :

Step 14: Implementation and Verification

Step 15: Form Completion Process
Click the feedback link in the first email you received:

Complete the feedback form with your responses:

Submit the completed feedback form:

Step 16: Reviewing Automation Results
Check your Airtable – you should see that the record has been automatically updated with the submitted feedback :

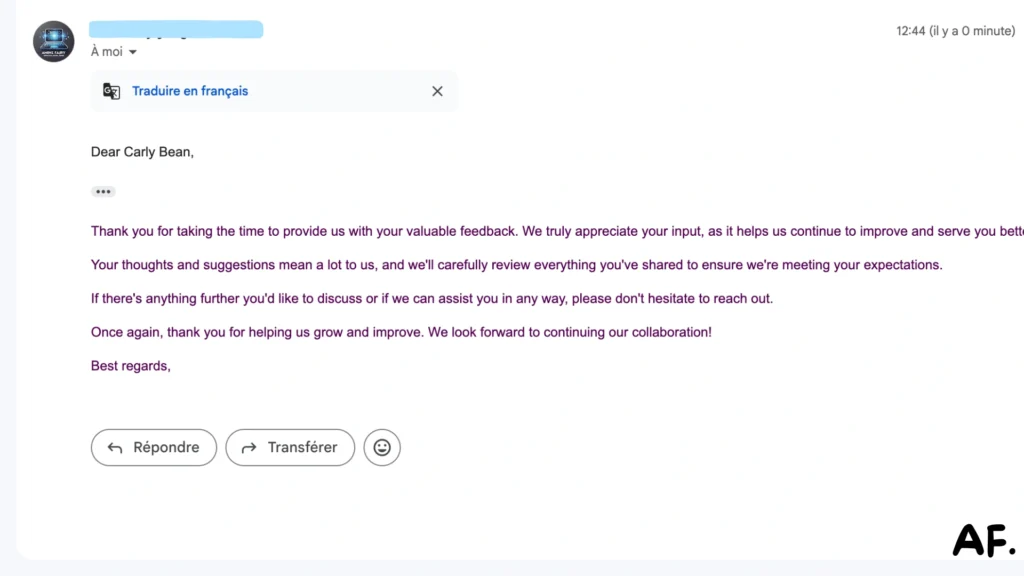
Perfect! You’ll receive a thank you email confirming your feedback has been recorded:

Conclusion
Building a customer feedback automation system in Make doesn’t have to be complicated! By following this guide and implementing the suggested workflows, you’ll be well on your way to creating an efficient feedback collection process that saves time and provides valuable insights. Remember, the key to success is starting simple and gradually adding complexity as your needs evolve. Ready to transform your customer feedback process? Let’s get started with Make Today!
Join the Newsletter
Subscribe to get our latest content by email.
We won’t send you spam. Unsubscribe at any time.
✅ You’re subscribed!
FAQs
Q1: How long does it take to set up this automation?
A1: The setup process takes approximately 30-45 minutes, assuming you have accounts ready for Make, Airtable, and Google Forms.
Q2: Can I customize the feedback form questions?
A2: You can customize the Google Form questions to match your business needs while maintaining the same automation workflow.
Q3: Will this system work for large numbers of customers?
A3: Yes, the automation can handle hundreds of feedback requests daily, with Make’s free plan allowing up to 1,000 operations per month.

Further Ressources
- How to Get YouTube Transcripts Using Make
- How to Automate Customer Onboarding in Make
- Discord Message Integration with Make: A Complete Guide
- How to Automate Document Approvals with Make
- How to Use Airtable on Make
- How to Use Filters in Make: A Complete Guide
- How to Use JSON in Make: A Comprehensive Guide
- How to Schedule Automations in Make