How to Easily Use the Router Module in Make
Have you ever handled multiple data streams in Make and wondered how to direct them efficiently? The Router Module is your traffic controller in the automation highway! This powerful tool lets you split, merge, and direct your data flow with precision. Whether you’re a Make newbie or a seasoned automator, understanding the router module in Make is crucial for creating efficient, scalable workflows.
In this article, I will provide a step-by-step guide to using a router. I will use the weather as an example and notify it in Discord.

Let’s dive into everything you need to know about the Router Module!
What You’ll Learn
This step-by-step guide will show you how to:
Prerequisites
Before we begin, you’ll need:- A Make account
- Discord Account
What is the Router Module
The Router Module is your workflow’s traffic controller. Think of it as a smart switch for your automation. It determines your data’s path based on the conditions you set. I learned this the hard way when I built my first primary workflow and initially tried using multiple scenarios (trust me, don’t do that!).
One of the most powerful features I’ve come to appreciate is condition-based routing. It’s like having an intelligent sorting system. Instead of creating separate scenarios for different conditions, the Router Module lets you define multiple paths and direct your data based on specific criteria. This has saved me countless times when working with complex workflows where data needed different treatment based on its attributes.
When should you use the Router Module? If you’re building anything beyond a simple linear workflow, you’ll want to implement it. I typically use it in these scenarios:- Workflows where data needs different processing based on specific conditions
- When handling multiple types of records that require different treatment
- For implementing error handling and fallback paths in complex automation
The Router Module shines when you need to handle diverse data streams efficiently. I’ve found it particularly useful for processing incoming webhooks, where you can route different types of notifications to different processing paths.
Remember that one mistake I made early on was overcomplicating my routing conditions. Keep them as clear and maintainable as possible while meeting your automation needs.
What is FallBack
A fallback in a Make workflow is like having a plan B for when something goes wrong. Imagine your automation hits a problem, an API request fails, or some data is missing. The workflow could break without a fallback, leaving you scrambling to determine what went wrong.
With a fallback in place, your workflow knows precisely what to do. It might send you a notification, log the error for later, or even retry the action automatically. It’s like telling your automation, “If this doesn’t work, here’s the backup plan.”
Setting up a fallback is simple in Make. You create an alternative route in your scenario that activates only when the primary path encounters an error. This is a great way to keep everything running smoothly and avoid interruptions, especially when working with complex workflows.
Think of it as adding a safety net. Even if things don’t go as planned, your automation won’t leave you hanging. It’ll handle the problem gracefully and keep you in control.
Setting Up Your First Router Module
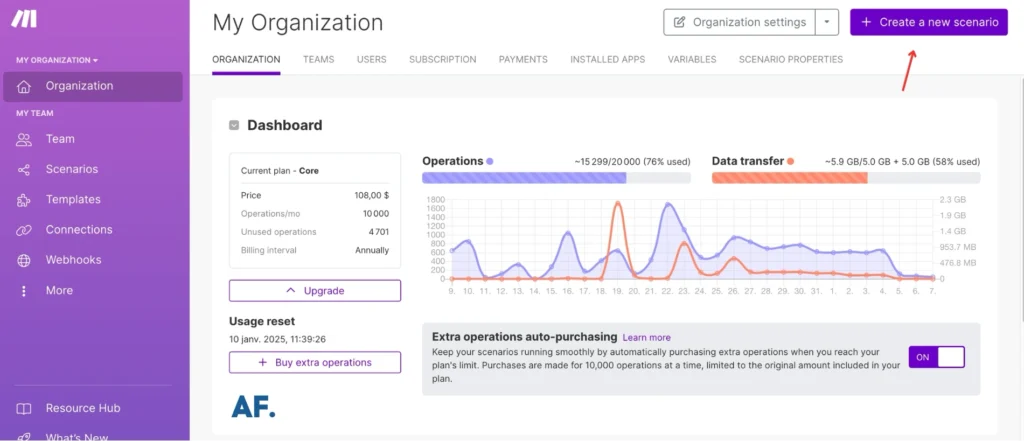
Step 1: Create your scenario
Begin by creating your scenario
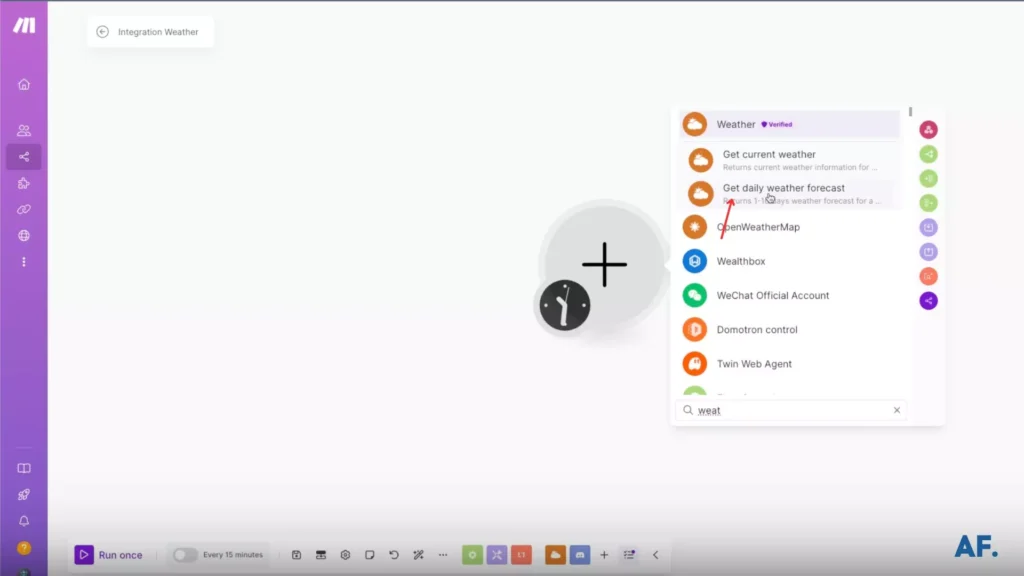
Step 2: Add Your First Module
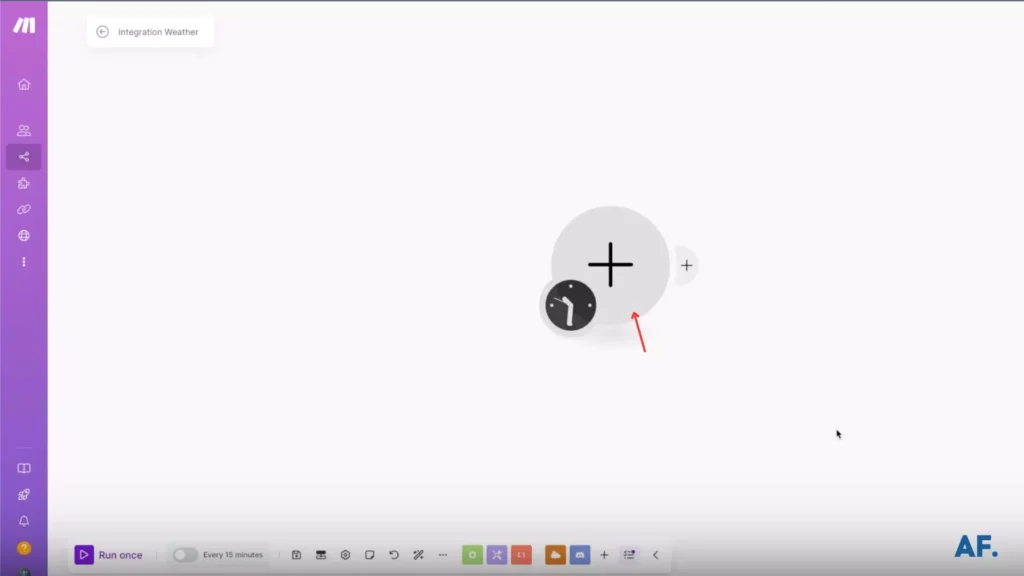
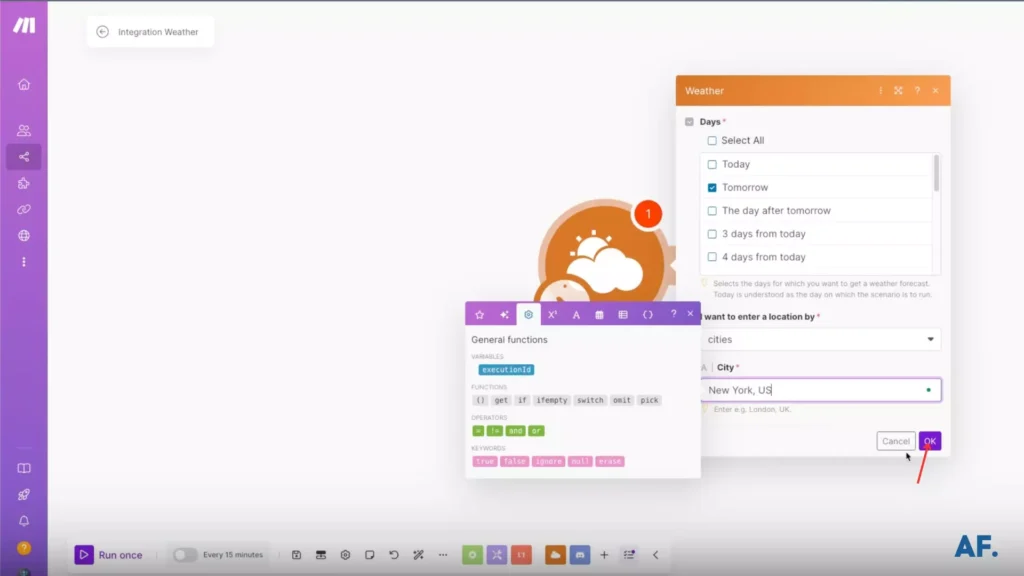
Let’s opt for “Get daily weather forecast“:
Next, complete the form by selecting “Tomorrow” and adding the “City“:
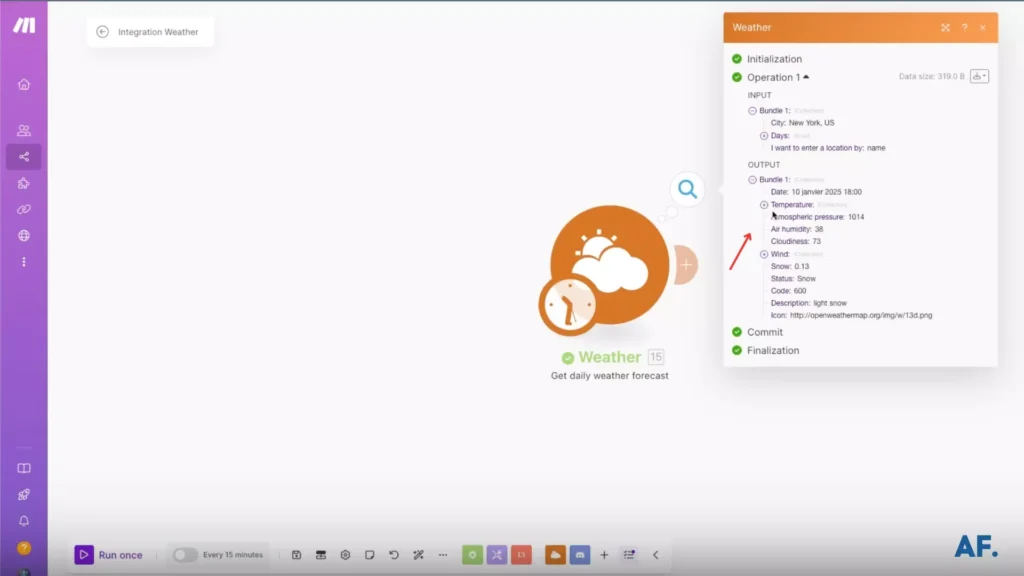
Then run your scenario for the test:
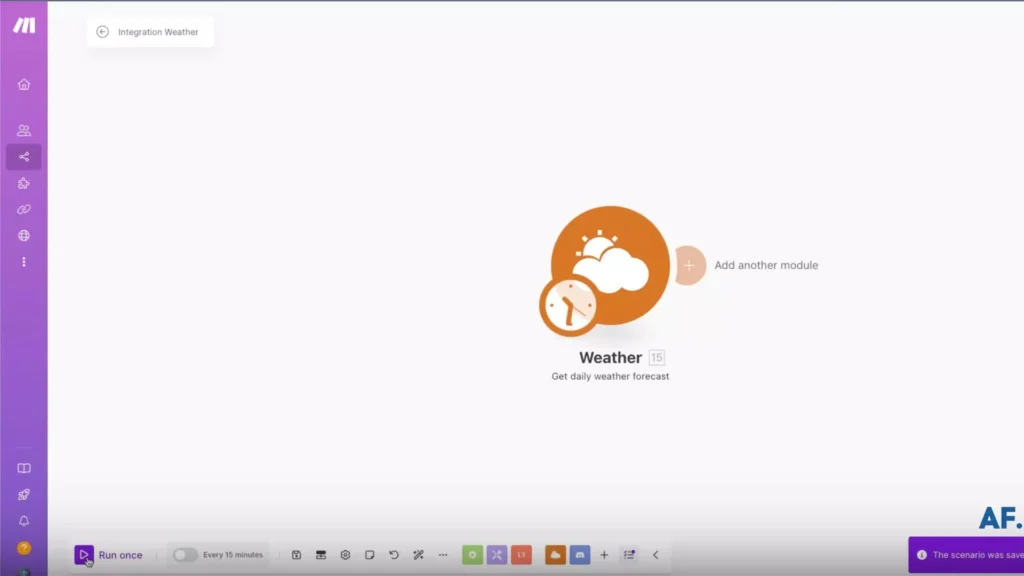
Here’s what your response should look like:
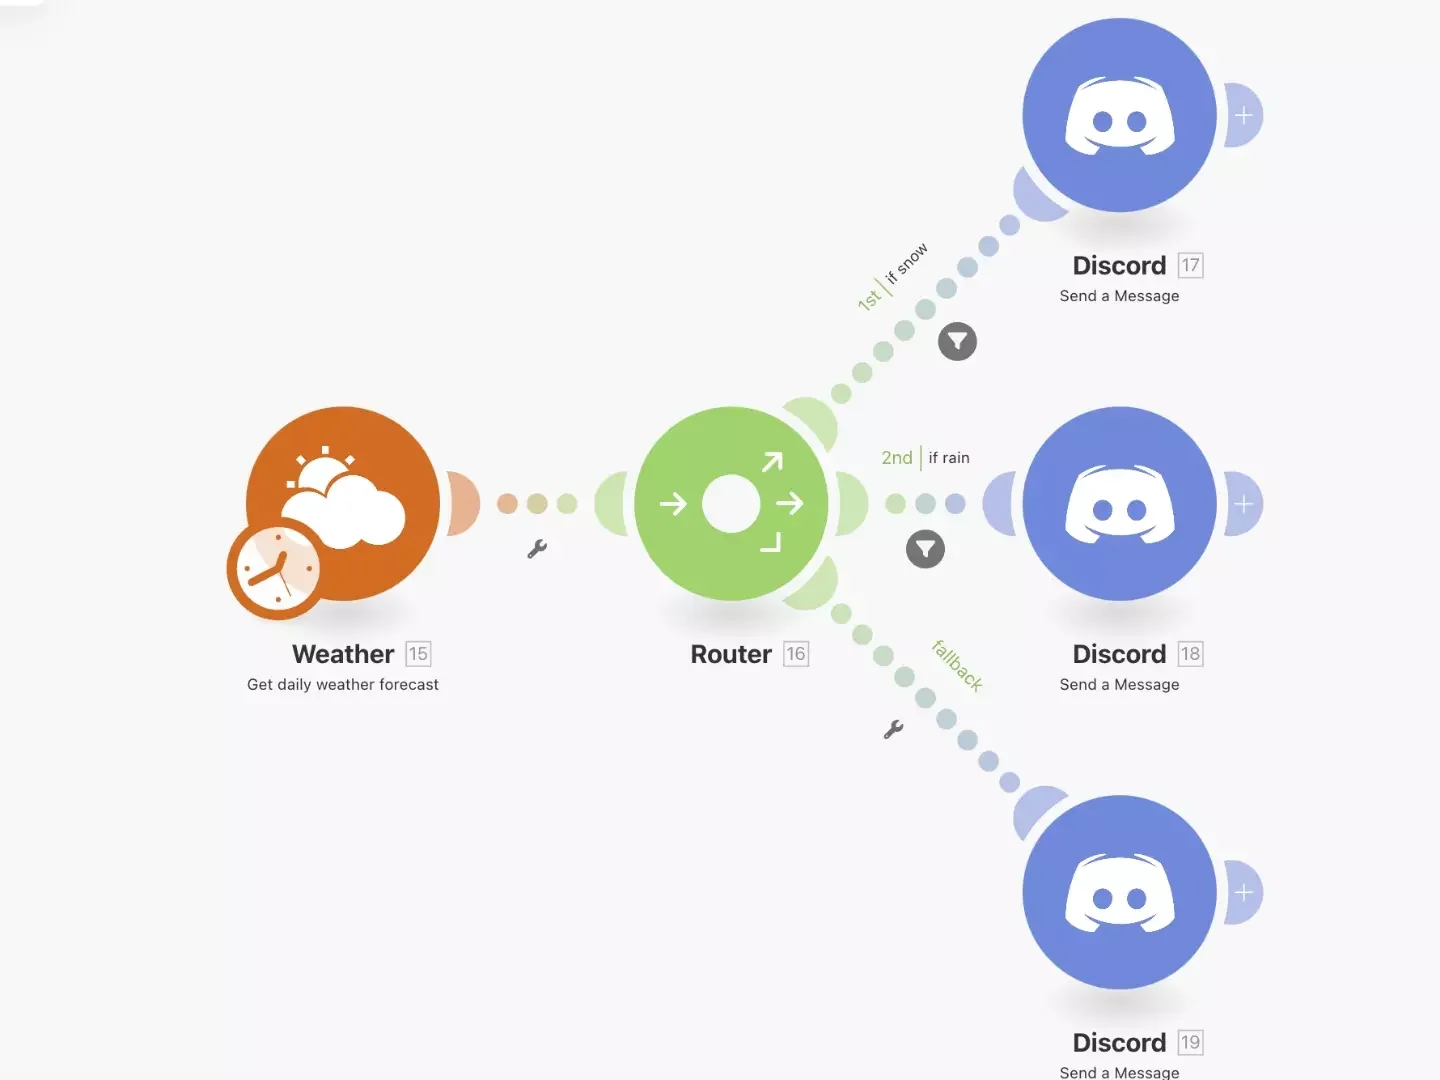
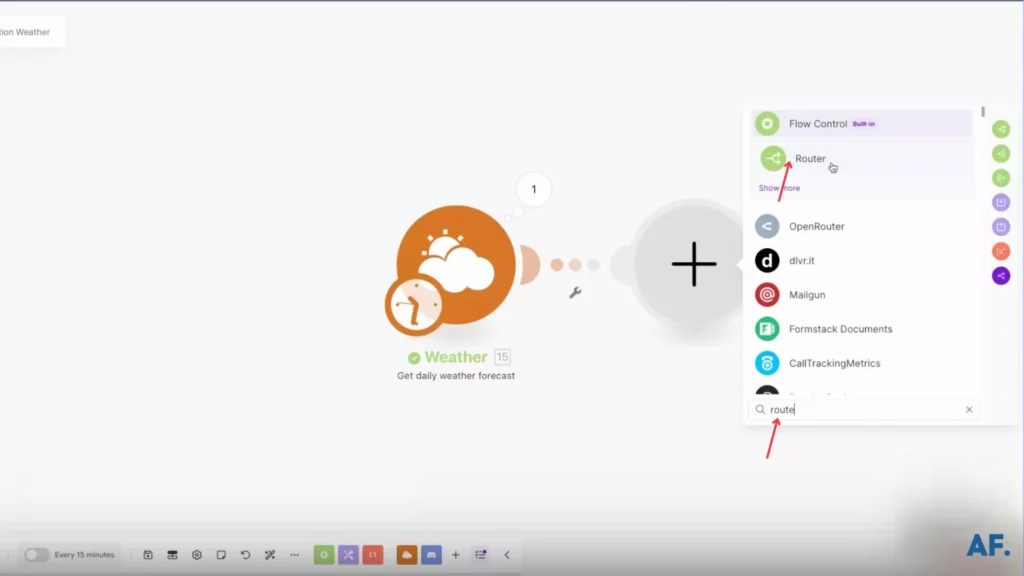
Step 3: Add Your Router
Write “router,” and then choose the “Router” option:
Step 4: Add Notifications
Click the “Send a Message” module :
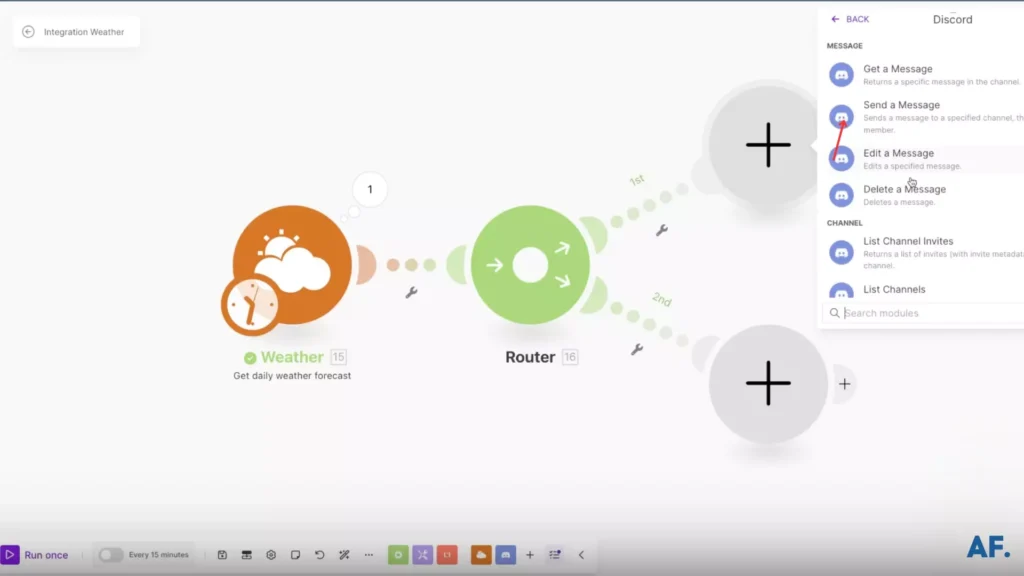
Fill in the required fields, add your message, and ensure you select your channel:

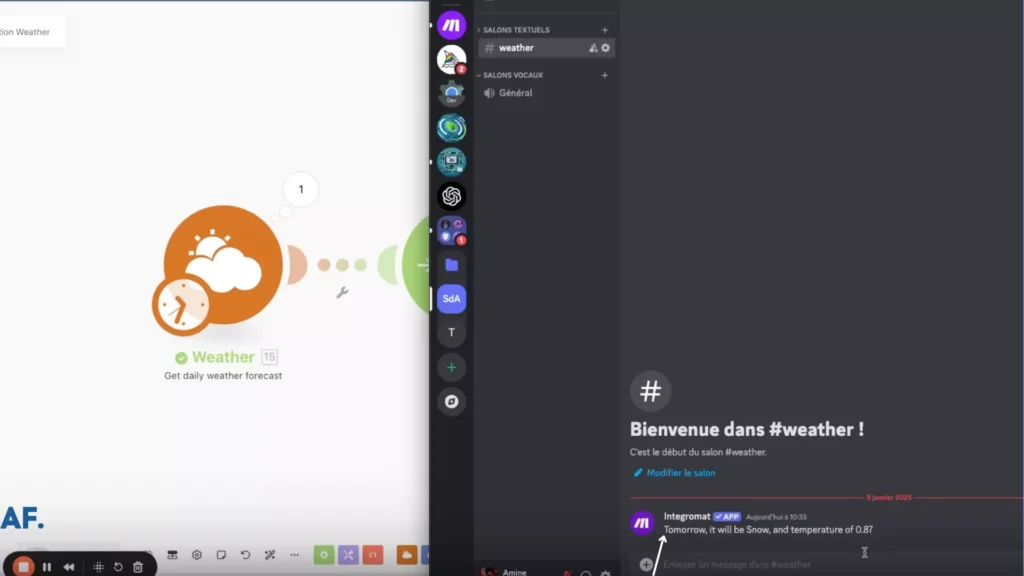
Once you’ve completed and executed your scenario, you should see this message on Discord:
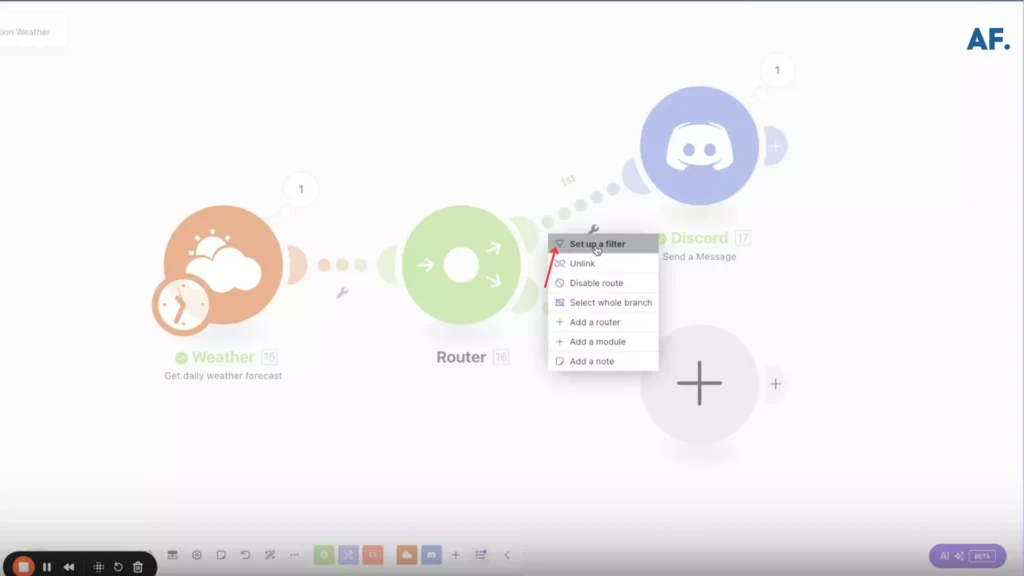
Step 5: Set up filters
To add a filter, click on the link and select “Set up a filter”:
Once you’ve filled it out and added your condition, click on “Ok“:

Afterward, execute your scenario to conduct a test:

Step 6: Add Fallback Route
To incorporate a fallback route, add an additional route, click on “set up filters,” and select “Yes” as shown in this image:

Step 7: See the Results
After incorporating Discord into your setup, proceed to test the configuration:


Conclusion
The Router Module is your secret weapon for creating sophisticated, efficient workflows in Make. By mastering its features and implementing our discussed strategies, you can build more robust and flexible automation. Remember, properly planning and understanding your data flow requirement is the key to success. Start small, experiment with different configurations, and gradually progress to more complex routing scenarios. Your Make workflows will never be the same!
FAQs
What is a router module?
A simple traffic controller in Make that helps direct your data flows to different paths based on conditions you set.

Further Resources
- How to Automate Instagram Posts with Make
- How to Automate Photo Posts on Reddit with Make
- How to Set Up Webhooks in Make: Complete Guide
- How to Build a Social Media Automation System with Make
- How to Automate Facebook Posts with Make
- How to Automate YouTube Shorts with Make
- How to Automate Twitter with Make
- How to Automate Photo Pins on Pinterest with Make