How to Send Automated Emails with Make
Did you know that businesses using email automation see a 119% increase in click-through rates? That’s right! In our busy, always-connected world, manually sending emails is becoming a thing of the past. Whether you’re a marketer, business owner, or productivity enthusiast, learning to send automated emails with Make can transform your workflow. Let me show you how to harness the power of Make’s automation capabilities to streamline your email communications and save countless hours!

Let’s jump right in!
Setting Up Your First Email Automation Workflow
Step 1: Setting Up Your Airtable Database
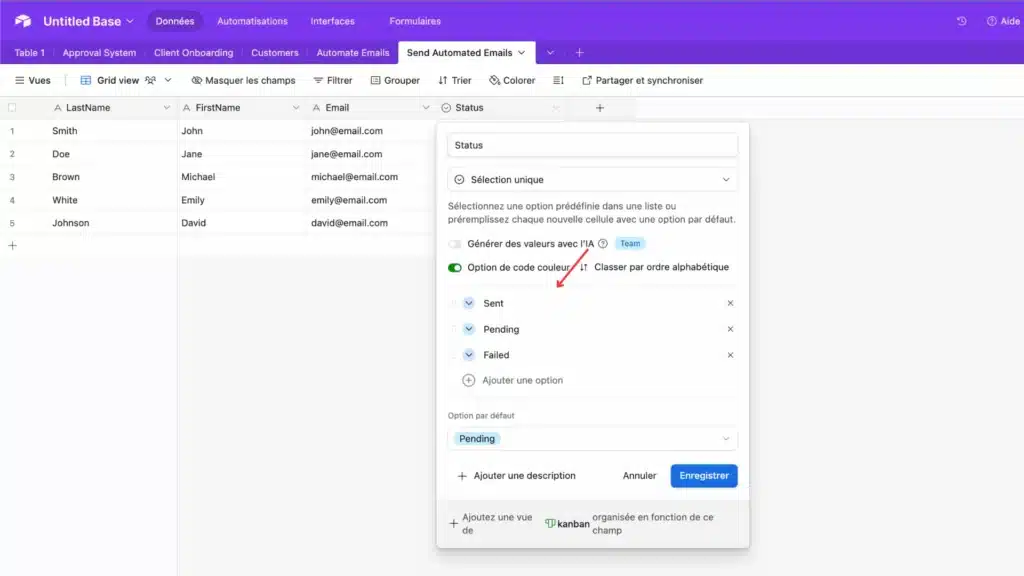
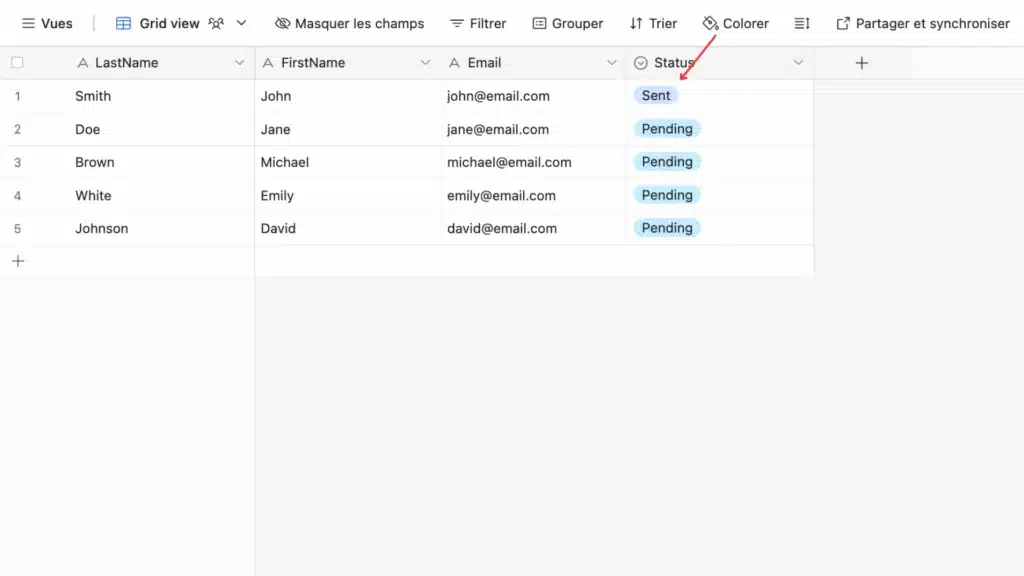
Let’s start with the foundation of our project – the data storage! I went with Airtable as my go-to solution for managing data, and I’d love to show you how I’ve set it up. Here’s what my database structure looks like:
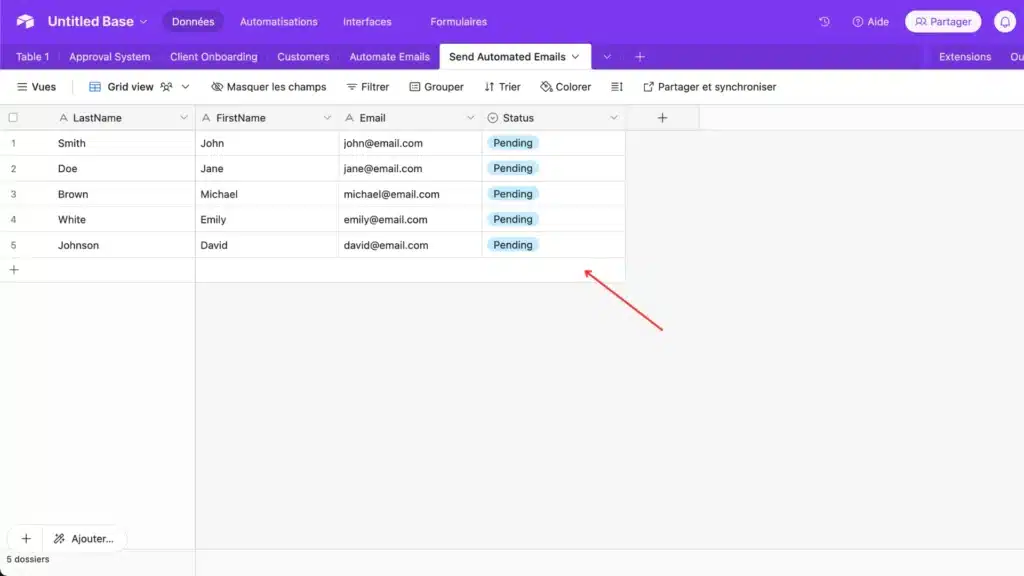
I added a ‘Status‘ column to my database to track what’s been processed. This helps me automatically identify and send only the data that hasn’t been marked as ‘Sent‘ yet.
Step 2: Creating Your First Make Scenario
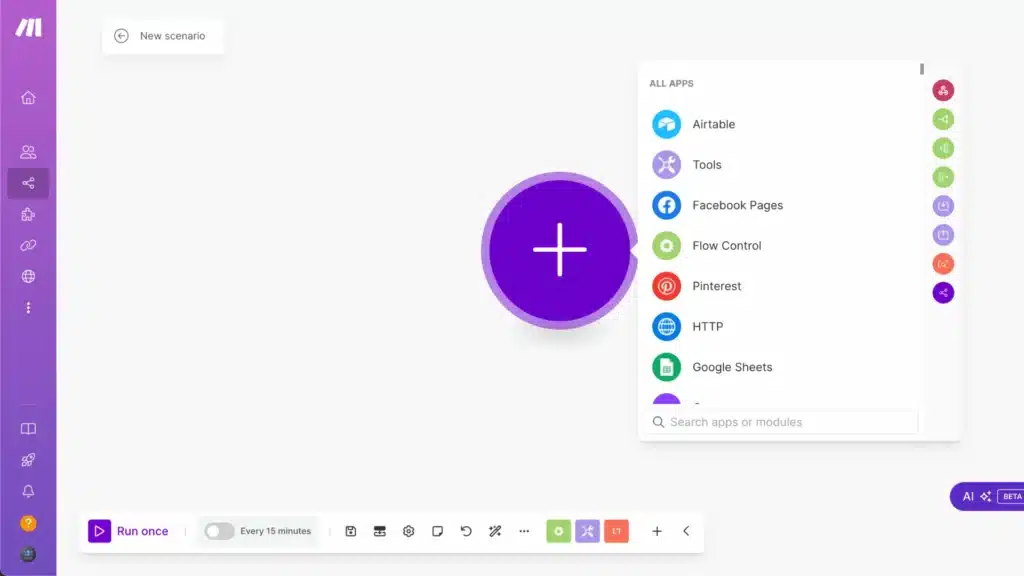
Next, you’ll need a Make.com account to create your automation scenario. If you’re new to Make, don’t worry – head to their website and sign up for a free account. Once you’re logged in, we can start building our awesome automation scenario together!
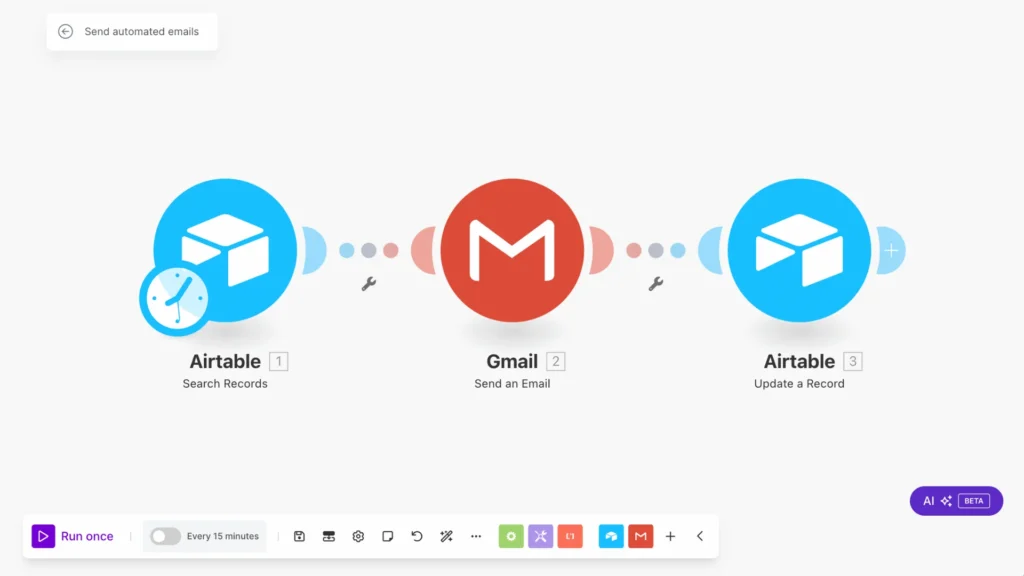
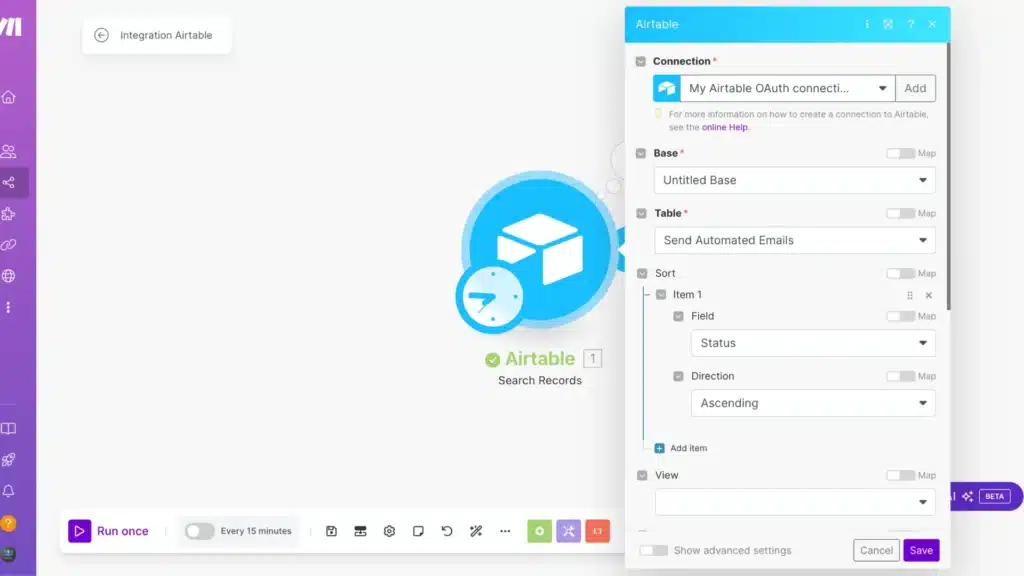
Step 3: Configuring the Airtable Search Module
Once you’re in Make, your first step is to find the ‘Search Records‘ module. Click on the ‘+‘ button to add a new module, and use the search bar at the top to look for ‘Search Records‘. This will help us find and filter the exact data we need to work with!
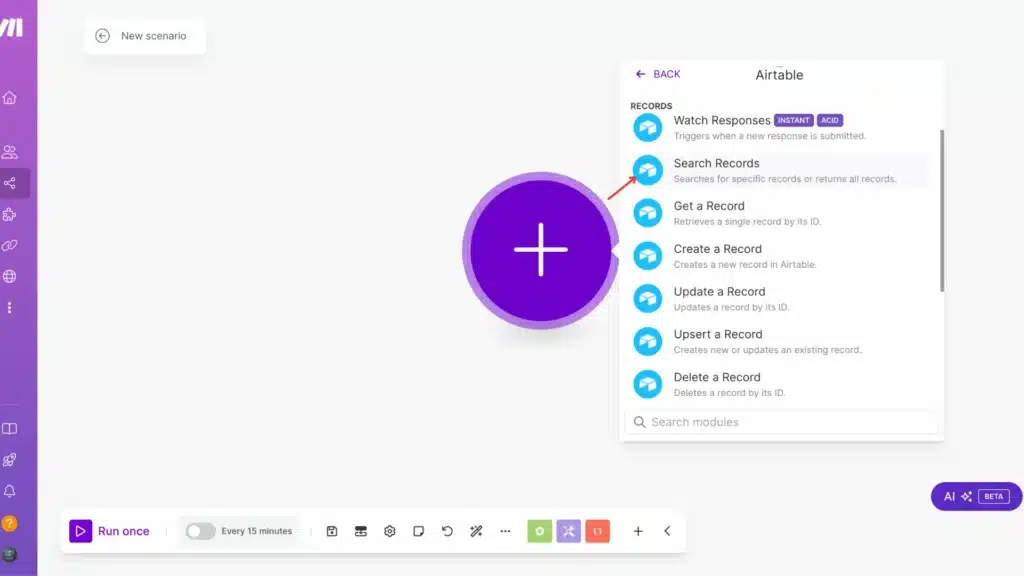
Now, let’s set up our Search Records module together! First, connect your Airtable base by selecting it from the dropdown menu. Then, choose the specific table you want to work with. Here’s a pro tip: don’t forget to add sorting options – this will help keep your data organized exactly how you need it. I’ll show you how I configured mine as an example:
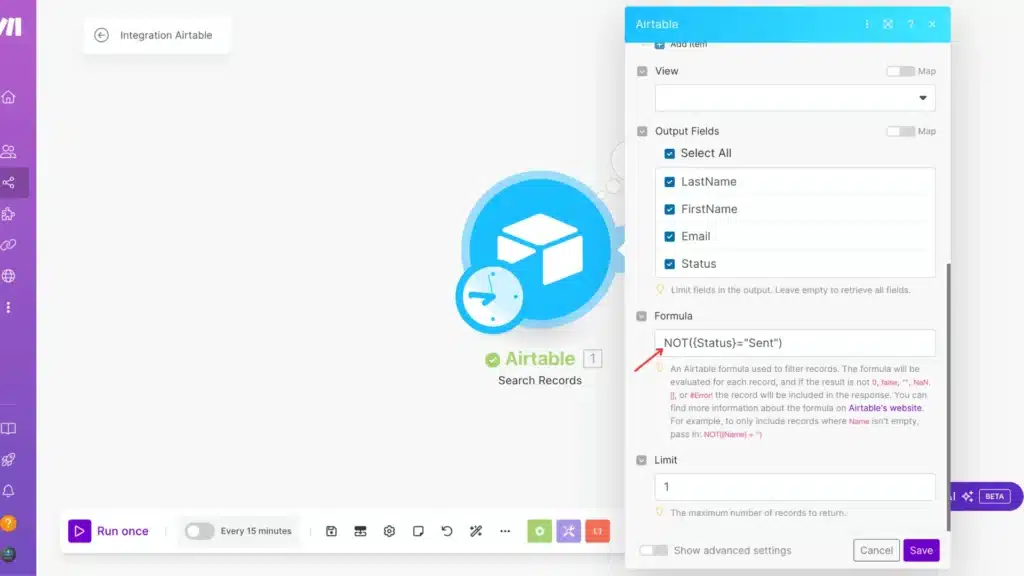
we’ll add a simple but powerful filter formula: NOT({Status} = "Sent"). I know formulas can look intimidating, but this one’s quite straightforward! It tells our automation only to grab records that don’t have ‘Sent‘ in their Status field. Think of it as a smart filter that shows me everything that hasn’t been sent yet.
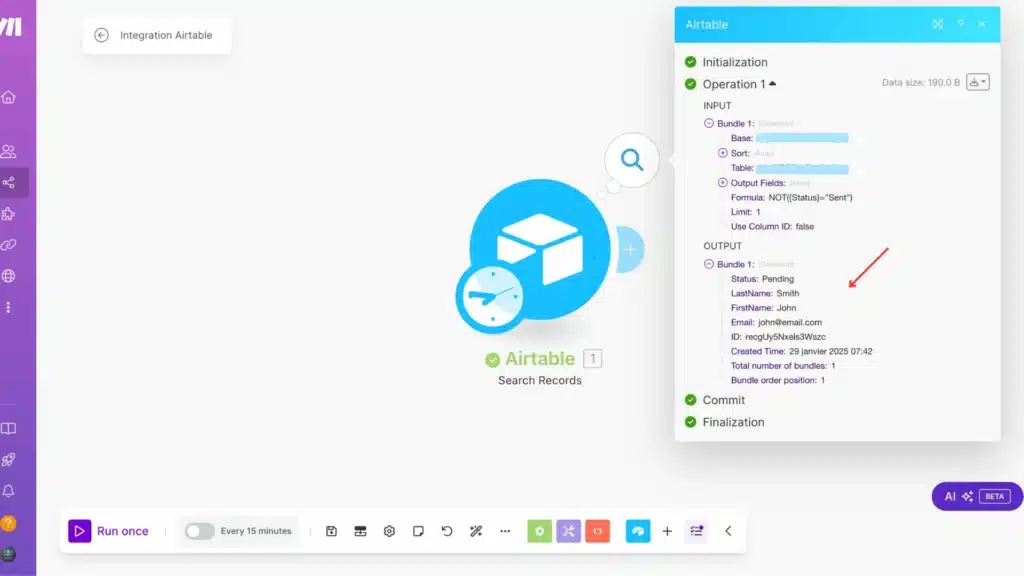
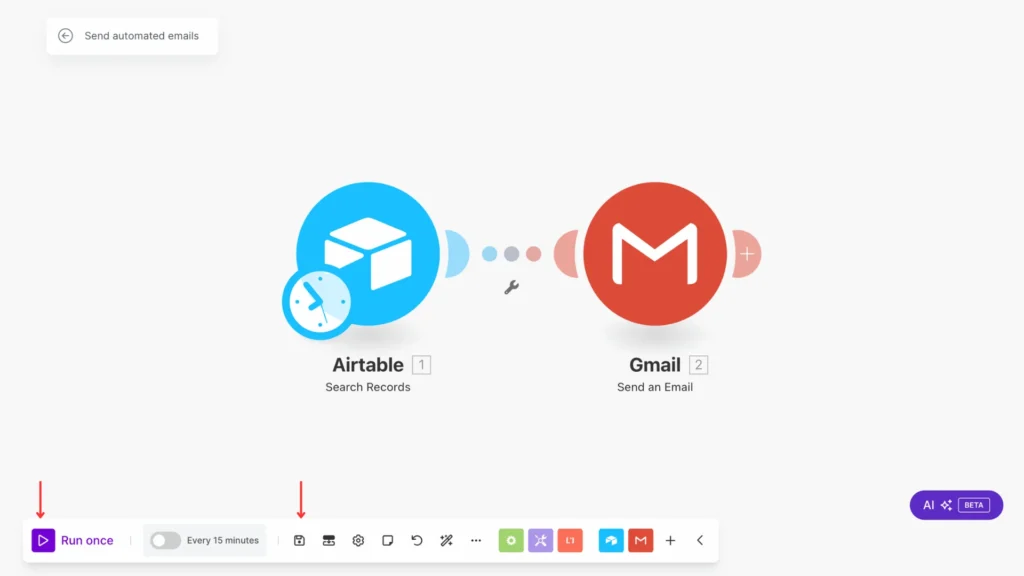
Let’s test our setup. When you click ‘Run once‘ to execute the scenario, the results will appear in the output section. Please take a look at what we got. It’s pretty good. All the records we wanted to work with are perfectly filtered to show only the unsent items. This is exactly what we were aiming for!
Step 4: Building Your Email Automation
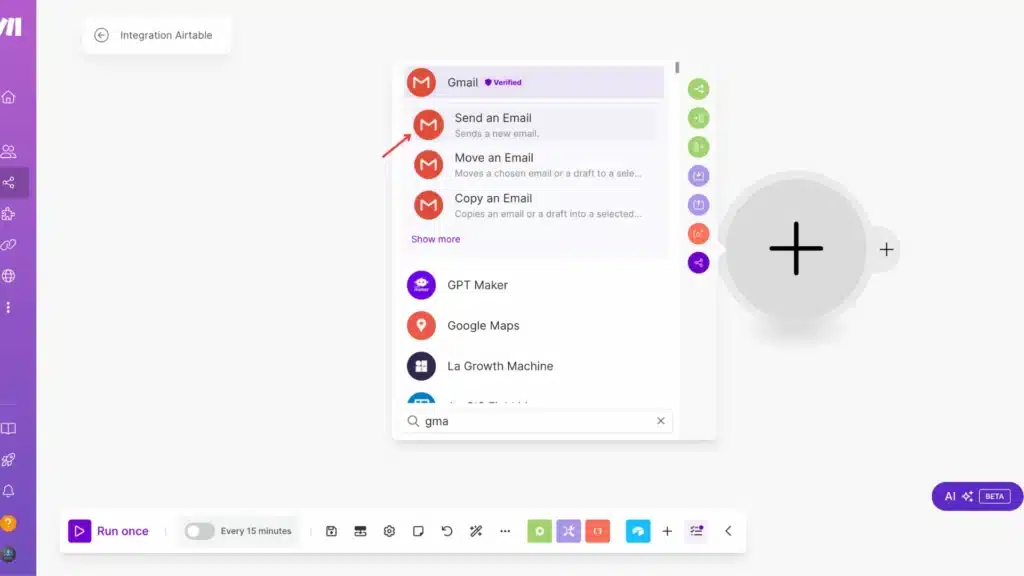
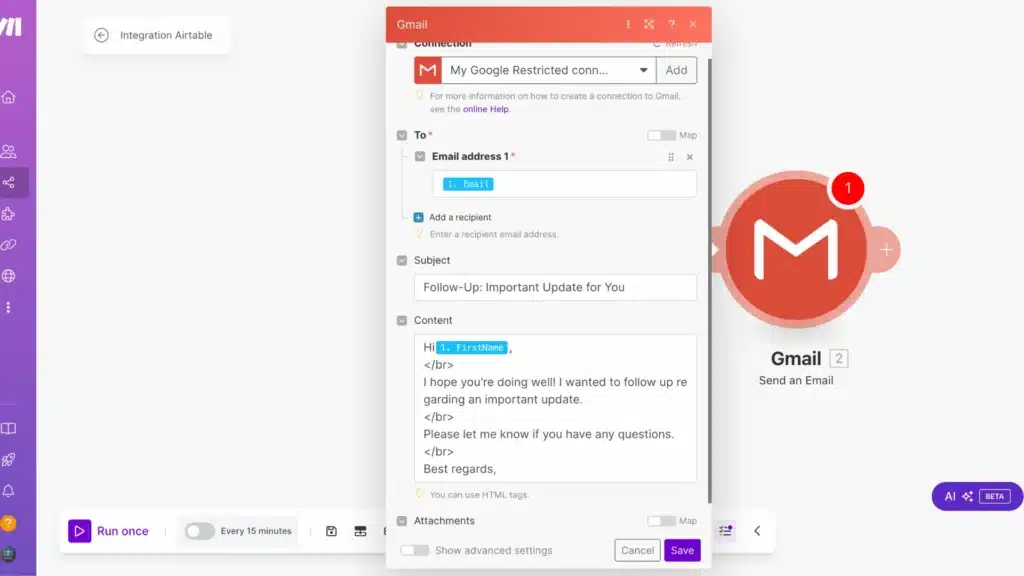
Now comes the fun part – setting up our email automation! Click the ‘+‘ button to add a new module, and look for the ‘Email‘ app. From there, select the ‘Send an Email‘ module. This will be our messenger that will send out those important updates automatically!
- Write your desired email subject in the ‘Subject‘ field (I’ll show you mine soon!)
- For the ‘Content‘ section, craft the message you want to send
- In the ‘To‘ field, map it to the email column from your Airtable data by clicking on the input and selecting your email field
This way, each email will automatically go to the right person using their email address from your Airtable database. Pretty cool, right?
Step 5: Testing Your Automation
Now for the exciting part – let’s bring our automation to life! Hit that ‘Save‘ button to store all our hard work, then click ‘Run once‘ to test everything out. You should see your scenario in action, sending those emails exactly as we planned. Take a moment to check your test email to make sure everything looks perfect!
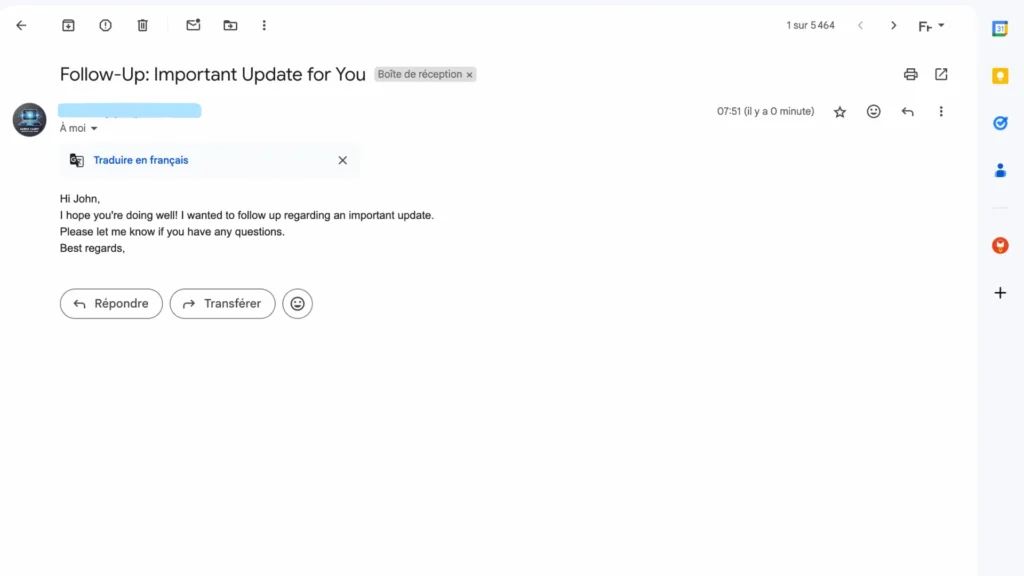
Ta-da! 🎉 Let’s check out what we’ve accomplished. Here’s the email our automation just delivered – seeing your work in action is always exciting! As you can see in the screenshot below, everything has come together perfectly, from the subject line to the content we carefully crafted earlier:
Step 6: Setting Up Automatic Status Updates
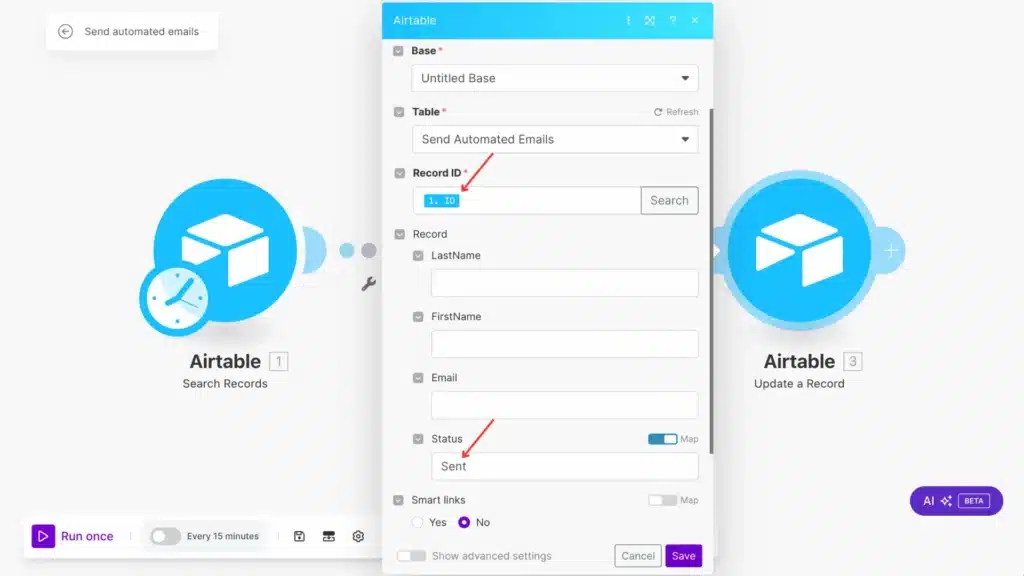
Let’s put the finishing touch on our automation by adding automatic status updates! We’ll add an ‘Update a Record‘ module that changes each record’s status from ‘Pending‘ to ‘Sent‘ after the email goes out. Here’s how to set it up:- Add the ‘Update a Record‘ module from Airtable
- Map the record ID from your earlier Airtable data
- In the Status field, type ‘Sent‘
This clever addition ensures your Airtable stays perfectly organized. Once an email is sent, the status updates automatically. No more manual tracking is needed!
Time for the grand finale! Save your scenario one last time and hit ‘Run‘ to watch your complete automation. You’ll see it flow through each step – automatically sending the email AND updating your Airtable record. Double-check both your email and Airtable to see what will happen: a new email in the inbox, and that status will be automatically changed to ‘Sent‘!

Look at that beautiful automation at work! 🎯 As you can see in the image below, our record has been automatically updated – the status has smoothly transitioned from ‘Pending‘ to ‘Sent‘. This is precisely what we wanted: proof that our automation works perfectly, keeping our database organized without manual effort!
Step 7: Scheduling Your Automation

Last but not least, let’s set up your automation schedule! See that handy clock icon? That’s your gateway to running this automation whenever you need it. Click it to set up your preferred timing – every hour, daily, weekly, or any custom schedule that works for you.
Want to dive deeper into scheduling options? I’ve got you covered! Check out my detailed article about Make.com scheduling, which I have broken down into all the possibilities. Trust me, once you’ve got this schedule, you can sit back and let your automation do all the work! 🚀
Get this scenarioConclusion
Automating your emails with Make is a game-changer for productivity and consistency in your communications. By following this guide, you can create powerful email automation workflows that save time and deliver results. Remember, the key to successful automation is starting simple and gradually building more complex scenarios as you become comfortable with the platform. Ready to get started? Launch Make and begin creating your first automated email workflow today!
FAQs
Q: Does Make.com offer a free plan for email automation?
A: Yes! Make.com offers a free plan to start with basic automation scenarios, including email automation. It’s perfect for testing the features and learning how the platform works.
Q: How often should I schedule my email automation?
A: The scheduling frequency depends on your needs. For business communications, daily or weekly schedules are common. You can adjust the timing based on your data flow and recipient preferences.
Q: What happens if an email fails to send?
A: Make.com will show you any errors in your scenario’s execution history. You can set up error notifications, and the record will maintain its original status so you can easily identify and fix any issues.

Further Ressources
- How to Build Customer Feedback Automation in Make
- How to Get YouTube Transcripts Using Make
- How to Automate Customer Onboarding in Make
- Discord Message Integration with Make: A Complete Guide
- How to Automate Document Approvals with Make
- How to Convert Base64 to PDF Using Make
- How To Trigger Instantly Google Form On Make
- How to Automate Pinterest Video Posts with Make