How To Handle Errors In Make: A Complete Guide
Have you ever found yourself staring at a failed scenario in Make, wondering what went wrong? You’re not alone! Error handling in Make (formerly Integromat) is crucial for building robust and reliable automated workflows. According to recent statistics, over 60% of automation failures occur due to improper error handling! This comprehensive guide will dive deep into Make‘s error-handling capabilities, exploring everything from basic error routes to advanced debugging techniques. Whether you’re a beginner or an experienced automation architect, mastering error handling will save you countless hours of troubleshooting and ensure your workflows run correctly.

What is Error Handling?
Error Handling is like having a plan B (or C, or D!) when your workflows go wrong. Instead of everything crashing when there’s a problem, you can tell Make precisely what to do when encountering a bump in the road.
Think of it as a safety net for your automation. You have different options:- Rollback: Undo changes and stop
- Ignore: Skip the error and keep going
- Commit: Save what worked and stop
- Break: Save the error for later and continue
- Resume: Use a backup plan and keep going
It’s like having an instruction manual for when things don’t go as planned! 🔧
Setting Up Error Handlers
1. Break

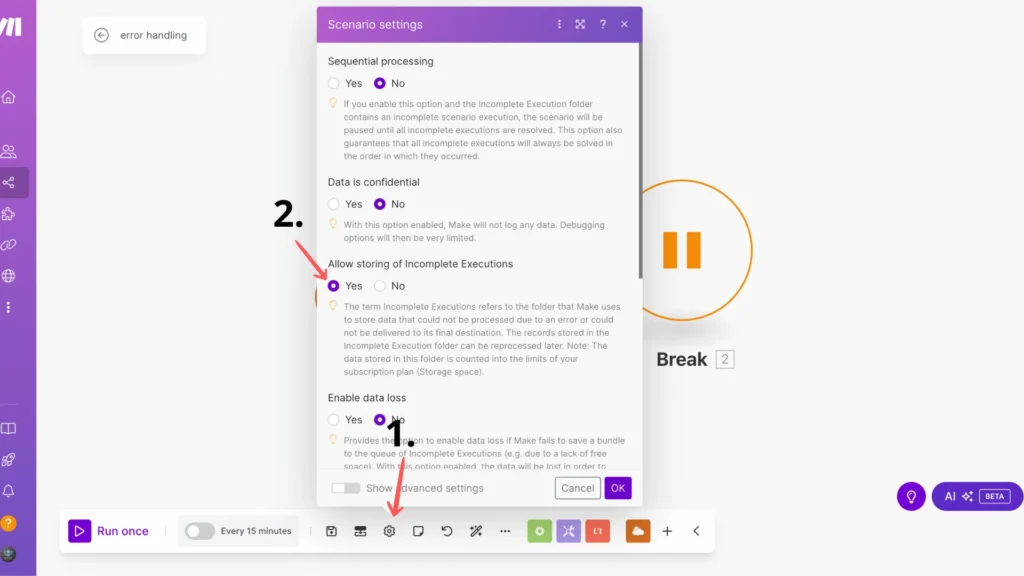
To use the Break error handler, you must turn on one important setting: “Allow storing of incomplete executions.” Go to your scenario settings and switch to “Yes.”
Think of Break as a “pause and save for later” button. It’s like having a bookmark for your errors, letting you or Makes try again later!
Here’s what Break does:- Stops the current task when it hits an error
- Saves all the essential info about what went wrong
- Keeps running other tasks in your scenario
- It creates a unique “incomplete execution” that you can fix later
- Automatic Mode: Make tries to complete the failed task again automatically (great for temporary issues like connection timeouts)
- Manual Mode: You can check what went wrong and fix it yourself
- You’re dealing with temporary errors that might work on retry
- You want to review failures before fixing them
- You don’t want one error to stop your entire workflow
Just enable “incomplete executions” in your scenario settings for this to work! 🔄
2. Ignore
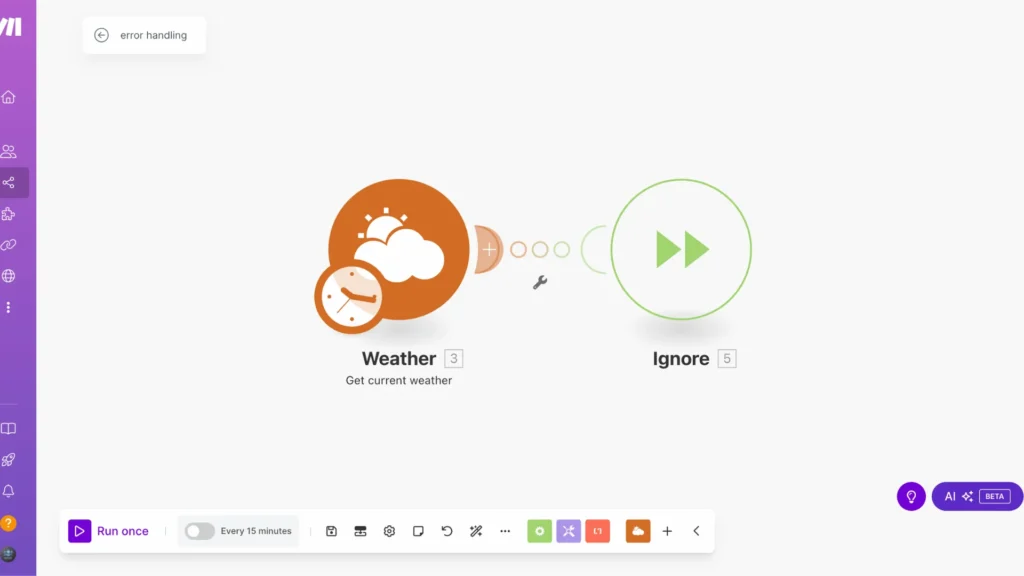
Ignore error handler; it’s like having a bouncer at a club who lets the party continue even when someone causes trouble!
When you use the Ignore error handler, you tell Make, “Hey, if something goes wrong here, just skip it and keep going with the rest of the tasks.” This is perfect for situations where you know some data might be incorrect, but it’s not critical enough to stop everything.
Here’s what happens when you use Ignore:- If there’s an error, it skips just that specific task
- All other tasks keep running normally
- Your scenario stays on schedule
- The run is marked as successful, even with the error
Think of it like a conveyor belt in a factory. If one product is defective, the Ignore handler removes that item and keeps the belt moving with the rest. There is no need to shut down the whole factory!
When should you use it? When dealing with non-critical errors, that shouldn’t stop your entire workflow. Just remember – use it wisely! You don’t want to ignore errors that might cause bigger problems down the line. 🎯
3. Commit
Think of Commit as a “save and stop” button. When something goes wrong in your scenario, Commit does two main things:- It saves (or “commits”) any database changes that happened before the error
- It stops the rest of the tasks from running
- The changes to Record 1 are saved permanently
- Any successful changes to Record 2 (before the error) are also saved
- Record 3 stays untouched
Important note: Commit only works with database-type actions (marked as “ACID” in Make). For other types of actions (like sending emails), it just stops the scenario without doing anything special.
When should you use Commit? When you want to keep the successful changes in your database even if something goes wrong later in your workflow. It’s like saying, “Save what worked, stop at the error.” 💾
4. Resume
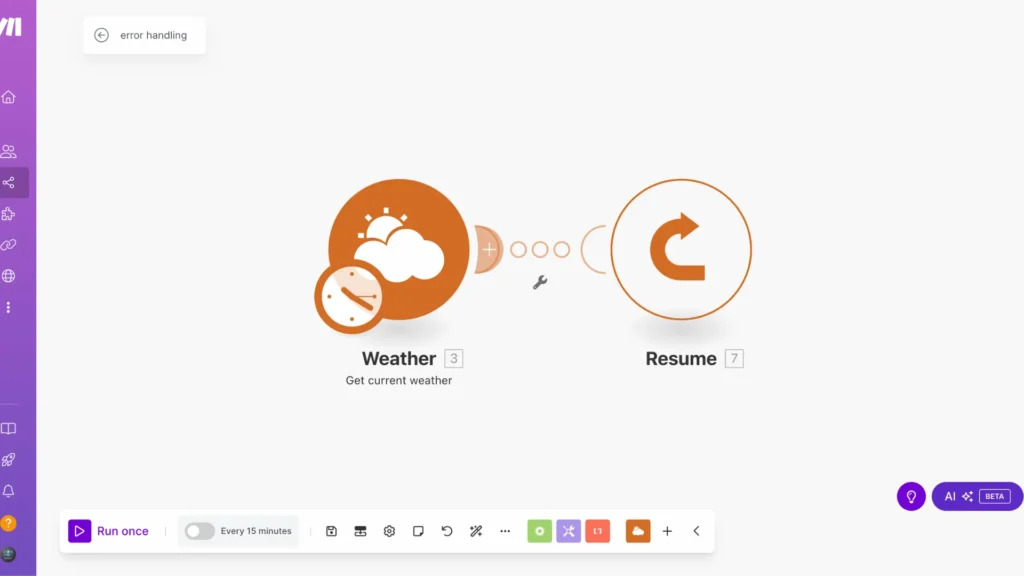
Think of your Resume as your backup plan! When something goes wrong, instead of stopping or skipping, it swaps in a “Plan B” that you’ve prepared in advance.
Here’s how it works:- When a task hits an error, Resume jumps in
- It replaces the failed data with your pre-set backup data
- The scenario continues running with this backup data
- All other tasks keep processing normally
- Want to flag items for review later
- Have a safe default value to use
- Need your workflow to keep going no matter what
- Want to add placeholder data when something’s missing
Think of it as having an understudy in a play – if the main actor can’t perform, the show must go on with the backup! 🎭
The best part? You get to decide exactly what that backup data looks like. Just set it up in the Resume handler settings, and you’re good to go! 🔄
5. Rollback
Imagine you’re performing multiple tasks in a sequence, such as updating customer records, sending emails, and saving files. Rollback helps you “undo” specific changes if something breaks in the middle, like pressing Ctrl+Z in a document.
But here’s the catch: Rollback can only undo changes in database-type actions (marked as “ACID” in Make). It can’t unsend an email or undelete a file. It’s like trying to unring a bell—some things can’t be reversed!
When you use Rollback:- It stops everything when it hits an error
- It tries to undo database changes
- It prevents any remaining tasks from running
- It marks the run as failed but doesn’t turn off your scenario
The cool part is that you can undo the last action or all database changes in your scenario by toggling the “Auto-commit” setting.
So next time something goes wrong in your Make scenario, Rollback has your back – at least for your database operations! 🔄
How Can Error Handling Help You?
Think of Error Handling as your workflow’s insurance policy! It helps you in several key ways:- Keeps Your Data Safe 🛡️ Instead of losing or messing up your data when something goes wrong, you can control exactly what happens.
- Prevents Total Shutdowns 🚦 Rather than your whole automation stopping because of one small error, you can choose how to handle issues – skip them, try again later, or use backup data.
- Saves Time ⏰ You don’t have to fix every little problem manually. Your workflows can handle issues automatically based on your instructions.
- Gives You Options 🔄 Different situations need different solutions. Sometimes, you want to stop everything, and sometimes, you want to keep going. Error Handling lets you choose!
- Maintains Control 🎮 You decide what happens when things go wrong instead of letting random errors dictate how your automation runs.
Conclusion
Error handling in Make doesn’t have to be intimidating! By implementing the strategies and best practices we’ve covered, you’ll be well-equipped to handle any errors that come your way. Remember, proper error handling isn’t just about fixing problems – it’s about building reliable, professional-grade automation that stands the test of time. Start implementing these techniques today, and watch your workflows become more robust and reliable!
Join the Newsletter
Subscribe to get our latest content by email.
We won’t send you spam. Unsubscribe at any time.
✅ You’re subscribed!
FAQs
How do you handle errors properly?
Use error handlers like Break to pause and save, Ignore to skip non-critical errors, Commit to save successful changes, Resume to use backup data, or Rollback to undo database changes.
What happens if I don’t use error handling in my workflows?
Your entire automation could crash when encountering errors, potentially losing data and stopping all subsequent tasks.
Which error handler should I use for temporary issues like timeouts?
Use the Break handler, as it saves the error state and allows automatic retries when the temporary issue is resolved.
Can I undo changes if something goes wrong in my workflow?
Yes, the Rollback handler can undo database changes but can’t reverse actions like sent emails or deleted files.

Further Ressources
- How to Do Web Scraping in Make
- How to Build an Automated Time Tracking System on Make
- The Ultimate Guide to Data Mapping in Make
- How to Automate Employee Onboarding in Make
- How to Send Automated Emails from Google Forms Using Make
- How To Use Variables in Make
- How to Automate Invoice Processing with Make
- How to Build a Customer Support System Automation in Make