How to Automate Your Follow-Up Emails in Make

Have you ever felt overwhelmed by the constant need to send follow-up emails? You’re not alone! According to a recent study by Woodpecker, proper email follow-ups can increase your response rates by up to 40%. Automating your follow-up emails in Make isn’t just a convenience – it’s a game-changer for productivity and business success. In this comprehensive guide, we’ll walk you through everything you need to know about setting up automated follow-up emails in Make, from basic setup to advanced techniques.

Let’s transform your email workflow together!
Setting Up Your First Automated Follow-up Sequence
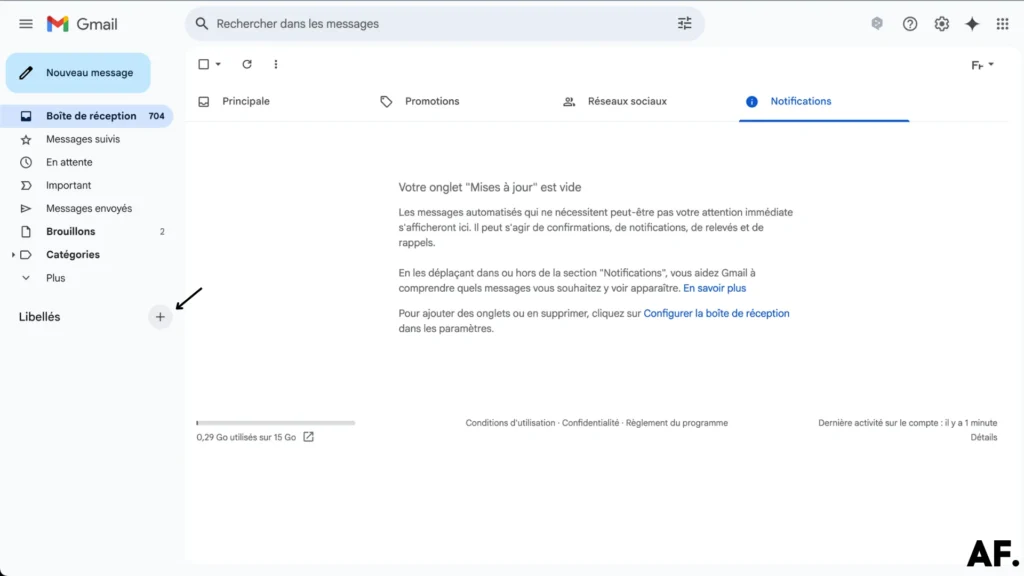
Step 1 – Create A Label
Let’s start by organizing your Gmail! Head to your inbox and look for the ‘+‘ option (that little plus sign) to get started.
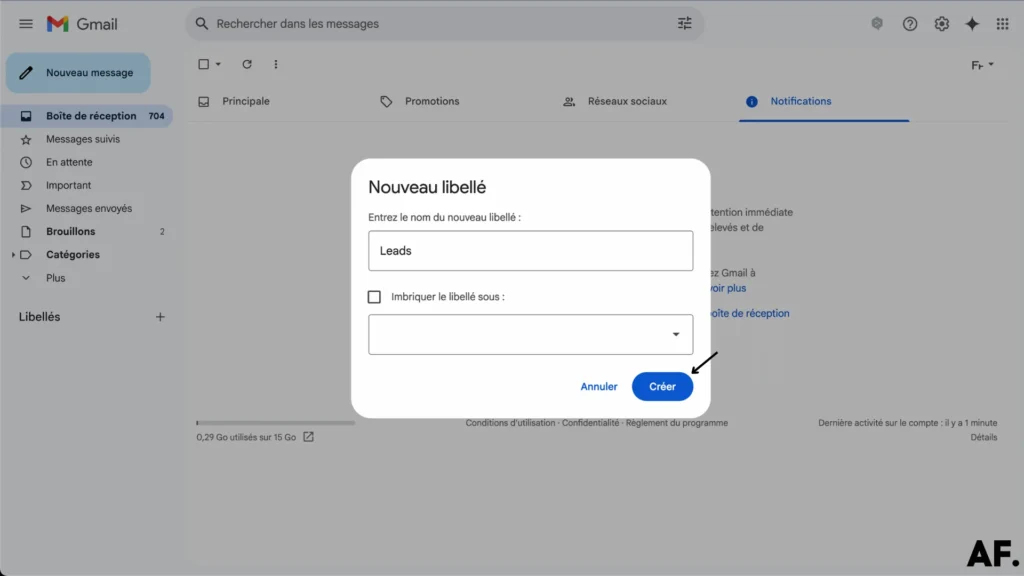
Now comes the fun part – giving your label a name! Type something that makes sense for your organization style (I use names like ‘Leads’ or ‘Follow Up’), and hit the Create button. Like that, you’ve got a new way to sort your emails!
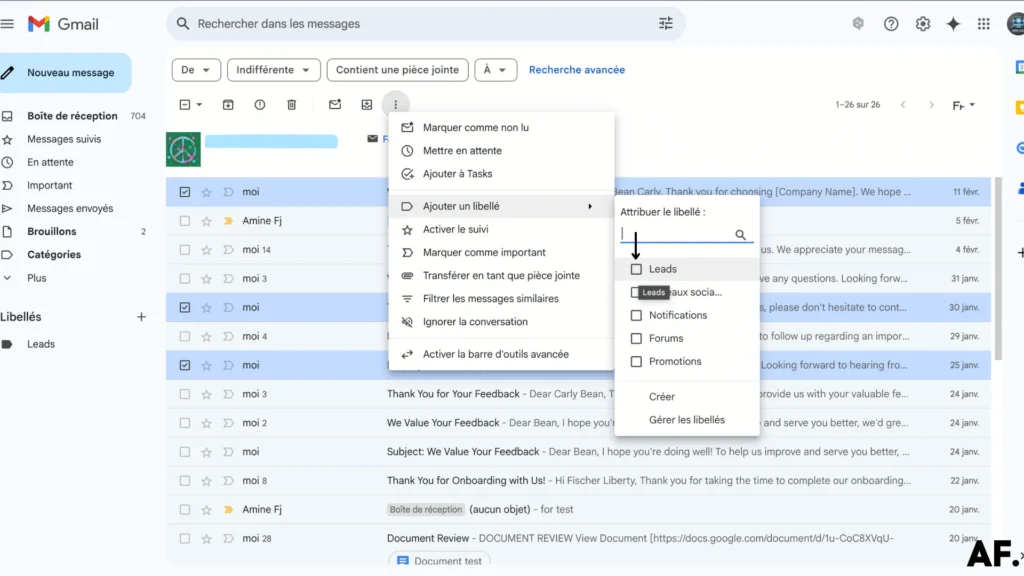
It’s time to use your new label! Browse through your emails and select the ones you want to organize. Check the boxes next to them, click the three-dot menu at the top, and choose your freshly created label from the list. Watch your emails get instantly organized
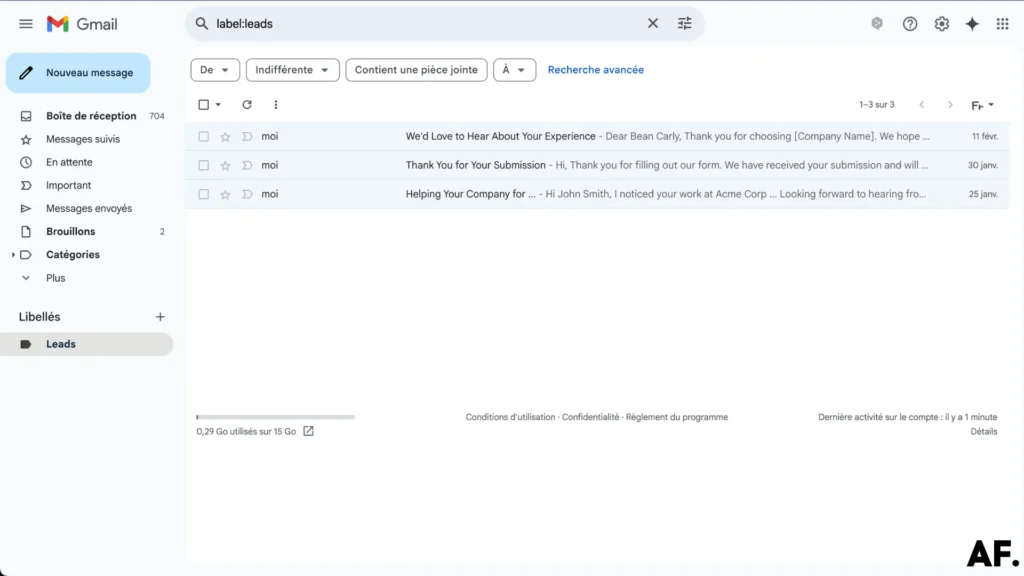
Now for the best part – seeing your organized inbox in action! Click on your new label in the left sidebar of Gmail, and voilà! All your labeled emails will appear neatly grouped together in one place. It’s like having your own filing system, but digital and way easier to manage!
Step 2 – Create Your Scenario
Now, let’s take your email organization to the next level! Head to Make.com (you can start with a free account), and we’ll create a scenario that automates your workflow. Don’t worry – building your first automation is easier than you think!
Step 3 – Add Your First Module
Let’s set up your first automation module! In Make.com, look for the Email section and select the email module. This is where the magic begins – connect it to your Gmail account, select the label you created, and enter the sender’s email address you want to track. Think of this as telling Make.com exactly which emails to watch for you.
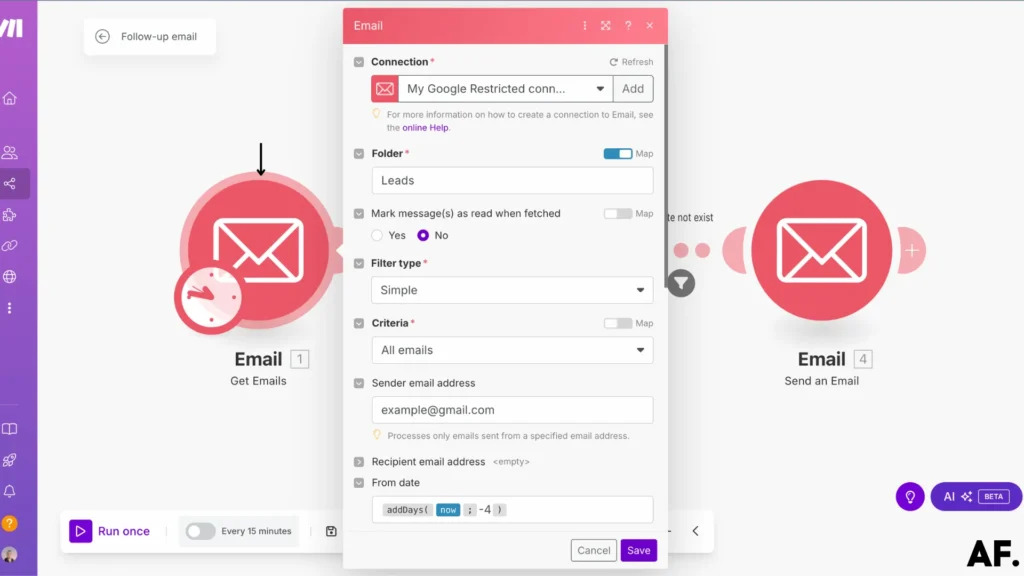
Let’s tell Make.com which emails to grab based on their date. Set it to scan for emails from the past 3-4 days. This sweet spot gives you enough wiggle room to catch all important messages without overwhelming your automation. Think of it as creating a time window for your digital assistant to work its magic!
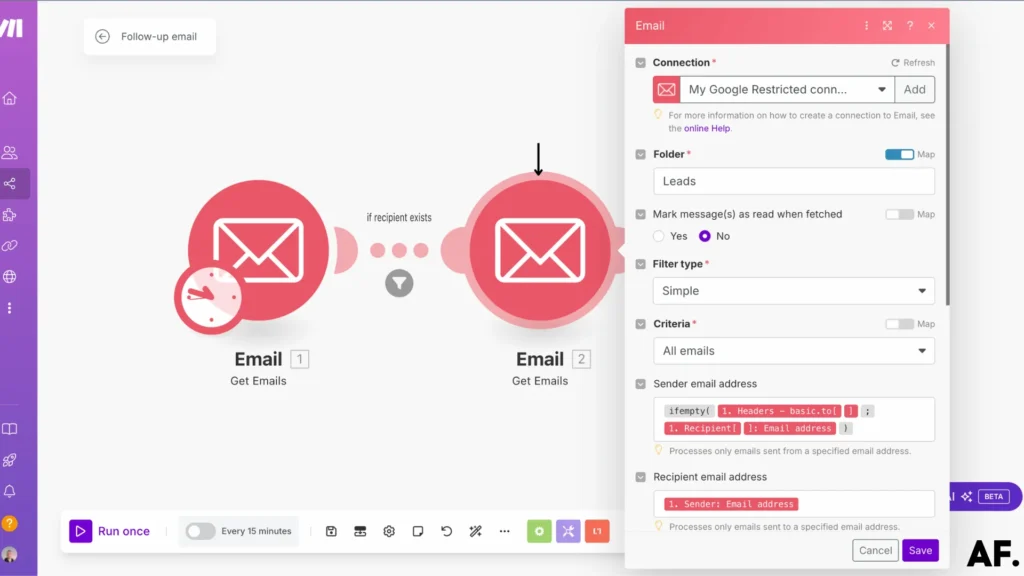
Step 4 – Get Email
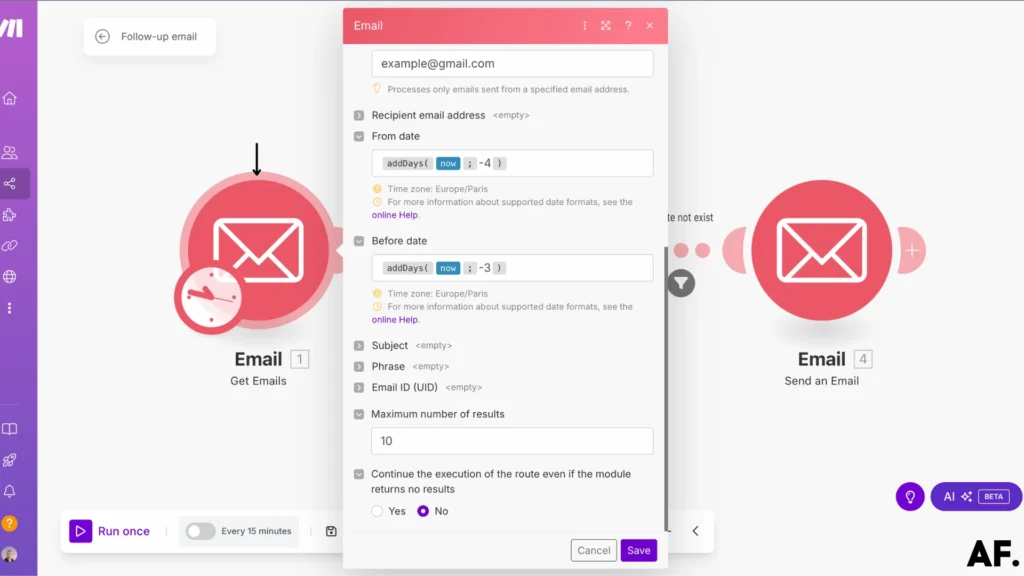
Next, we’ll add another ‘Get emails‘ module to process your messages individually. The key part is configuring it only to fetch emails you’ve sent. This creates a perfect pair with our first module, like having a smart filter that specifically catches your outgoing messages. After all, we want to focus on tracking your responses!
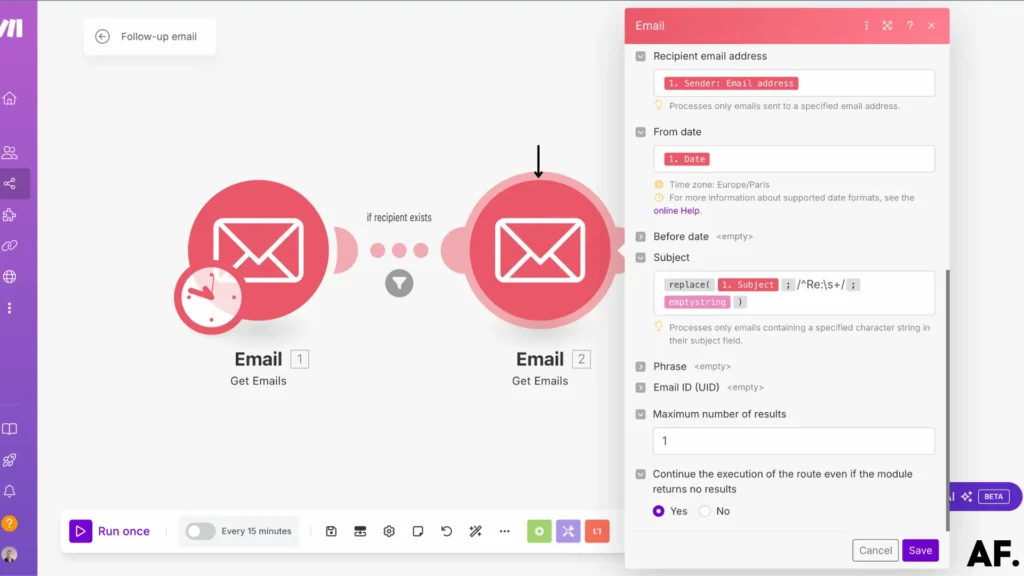
Here’s a super important checkbox to watch for: make sure you turn on ‘Continue the execution of the route even if the module returns no results‘. This might seem small, but it’s your reminder system’s secret sauce! When this is set to ‘YES‘, your automation will keep running even when it doesn’t find any replies from you, and that’s exactly when we want to send those gentle reminders!
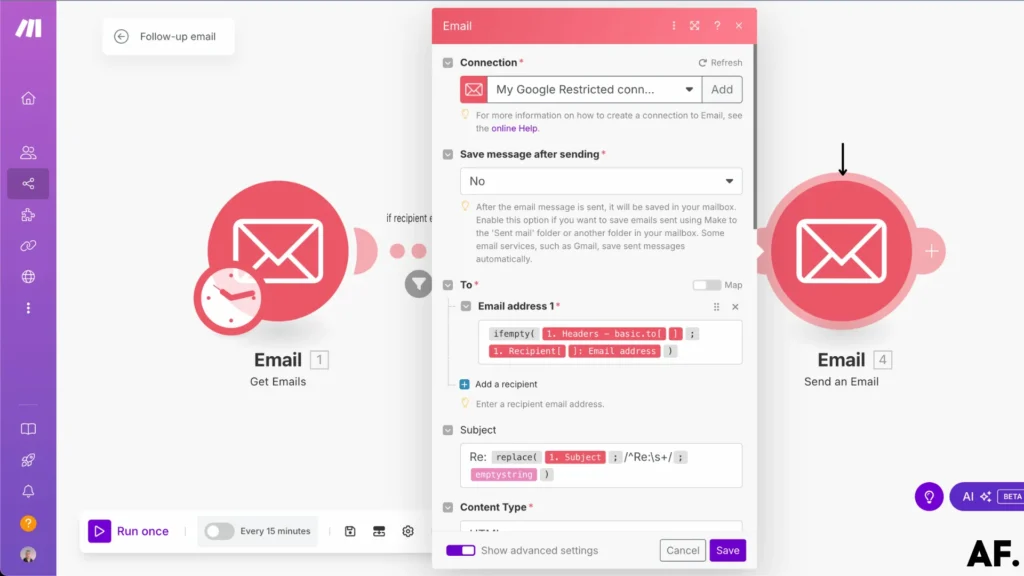
Step 5 – Send Emails
It’s time for the final piece of our automation puzzle—setting up the email reminder! Search for the ‘Send an email‘ module in the Email section. The module will automatically send an email.
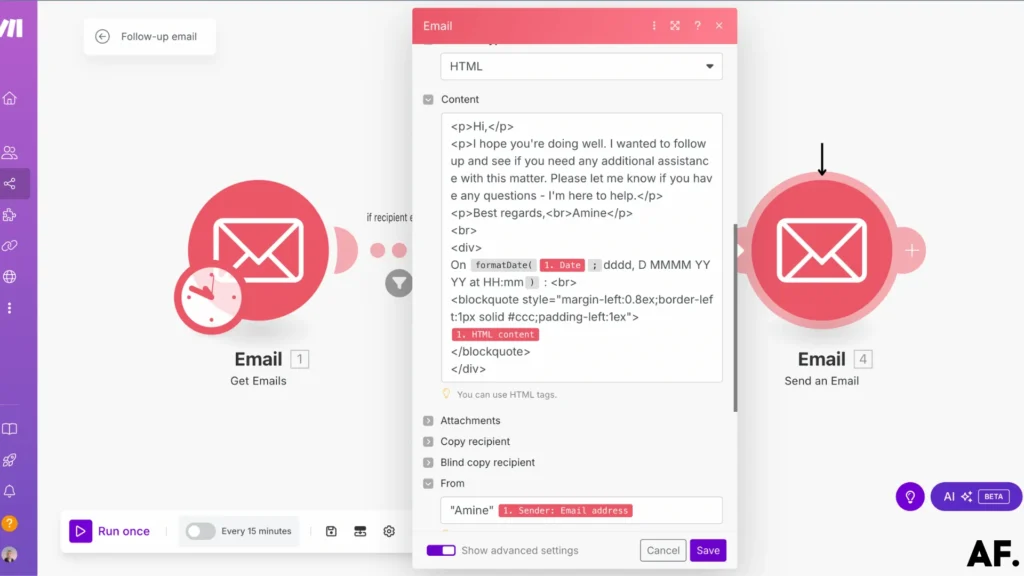
Now, let’s make your reminder email personal and helpful! Craft your reminder message, and here’s the clever part – we’ll include the original email below it. This means you’ll get your friendly reminder and the full context of the conversation to follow up on.

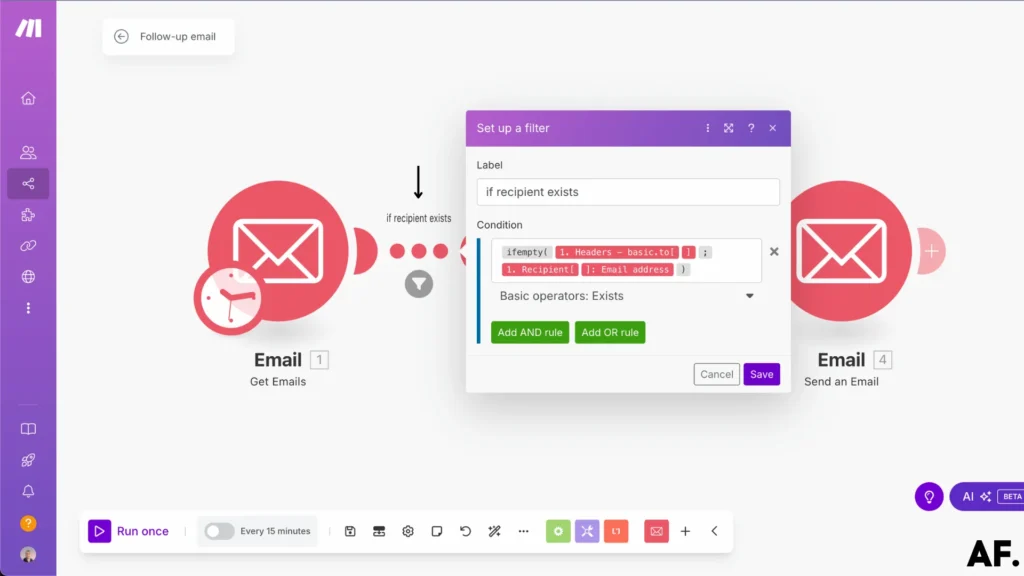
Step 6 – Add Filters
Time to add a filter to your automation! We’ll start with a simple but powerful check: ‘if recipient exists.’ This filter acts like your personal email detective, checking whether there’s actually someone to send a reminder about. It’s our first safeguard to ensure your automation runs smoothly and only sends reminders when needed.
Next, we’ll add our second filter: checking if no date is found. This matters because when there’s no date, you haven’t replied yet (that’s exactly when we want a reminder!). But if a date exists, you’ve already responded, so our automation can stay quiet.

Step 7 – Save And Run
You’re all set – it’s time to bring your automation to life! Click the ‘Save‘ button to lock in all your hard work, then hit ‘Run‘ to set your email reminder system in motion. Take a moment to watch your first automation spring into action – it’s pretty exciting to see something you built start working automatically!

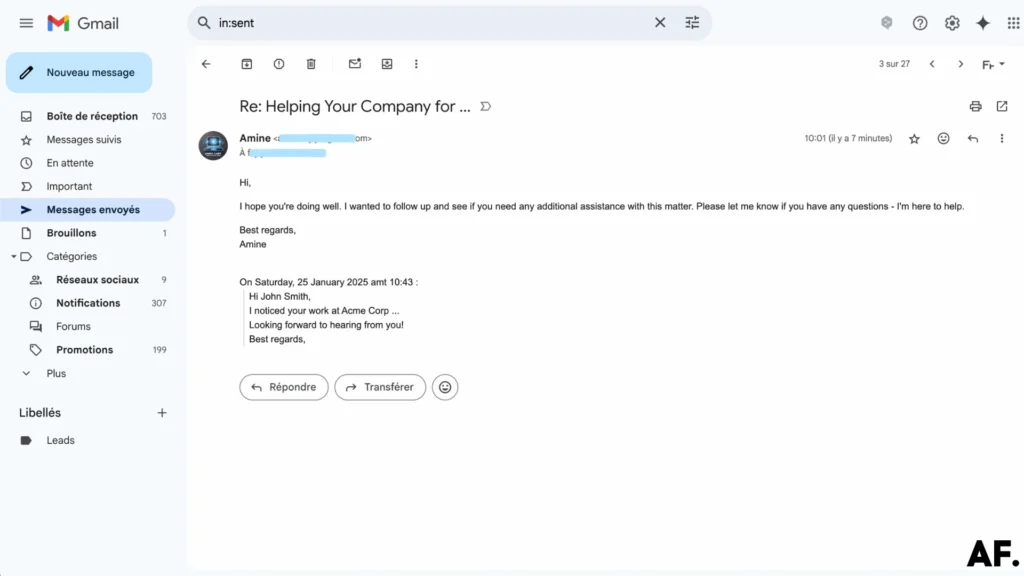
Result
Let’s peek at what your automated reminder actually looks like in action! Below is an example of the friendly nudge your inbox will receive when it’s time to follow up on a conversation. You’ll see how it combines your personal reminder message with the original email for perfect context.
How This Follow-Up Automation Can Help You?
With automated follow-ups, you can stay connected without spending hours manually sending emails or messages. Whether it’s a thank-you note, a reminder, or a check-in, automation ensures consistent and timely communication. This saves you time and helps build stronger relationships by keeping you at the top of your mind.
Plus, automation isn’t just about efficiency; it’s about results. Studies show that follow-ups significantly increase response rates and conversions. Instead of losing potential customers due to delayed or missed messages, you can engage them immediately.
Even better, modern automation tools allow for personalization. You can tailor messages based on customer actions, preferences, or behaviors, making your outreach feel natural rather than robotic.
In short, follow-up automation helps you work smarter, not harder. It keeps your business running smoothly, improves engagement, and ultimately boosts your success, all with minimal effort on your part. Who wouldn’t want that?
Conclusion
Automating your follow-up emails in Make is a powerful way to enhance your business communications while saving precious time. Review and optimize your automation workflows regularly and maintain a personal touch in your automated messages. Start small, test thoroughly, and gradually expand your automation capabilities as you become more comfortable with the platform.
FAQs
How do you automate your follow-up emails?
Create a new scenario in Make.com. Connect your email account. Set up email triggers to check for messages needing follow-up. Add filters to catch unreplied emails. Create reminder messages. Let’s Make send automatic follow-ups.
Can we automate follow-up emails in Outlook?
Make.com works with Outlook, too. Connect your Outlook account to Make. Follow the same steps as Gmail automation, and your follow-ups will work automatically.
How to set up automatic follow-up email Gmail?
Go to Make.com, connect your Gmail account, create a new scenario, add email modules, set up triggers for unopened or unreplied emails, create your follow-up message, test, and activate.
How do I automate follow-up emails in Salesforce?
Make.com connects with Salesforce. Link your Salesforce account to Make. Set up email triggers. Create follow-up rules. Add your message template. Let Make handle the follow-ups automatically.

Further Ressources
- How to Run Custom Code on Make: Step-by-Step Guide
- How to Use Midjourney to Create AI-Generated Images in Make
- How to Automate xAI Grok with Make : Comprehensive Guide
- How To Use Deepseek AI In Make: Step-By-Step Guide
- How to Convert Videos into Blog Posts Automatically with Make
- How to Use FLUX AI Image Generator in Make: Step-By-Step
- How to Automate Perplexity AI with Make
- How to Use Leonardo AI Image in Make: Step-By-Step Guide