How to Automate Google Reviews with Make

Managing Google Reviews manually can be time-consuming and distract from your core business activities. But what if I told you there’s a way to automate this process? Engaging with customer feedback is crucial, as 92% of consumers read Google reviews before engaging with a business. In this comprehensive guide, I’ll show you exactly how to automate Google Reviews using Make (formerly Integromat), helping you save countless hours while maintaining meaningful customer relationships.

Let’s dive right in!
Step-By-Step Google Review Automation
Step 1: Copy Google Review Link
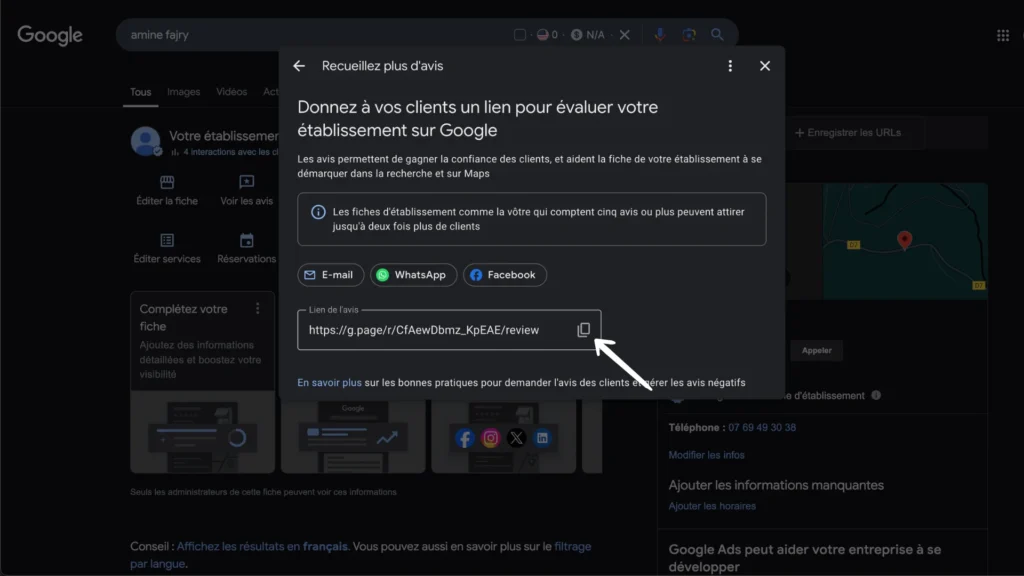
First, head to your Google Business Profile page, where customers leave their reviews. You can find all your Google reviews here!
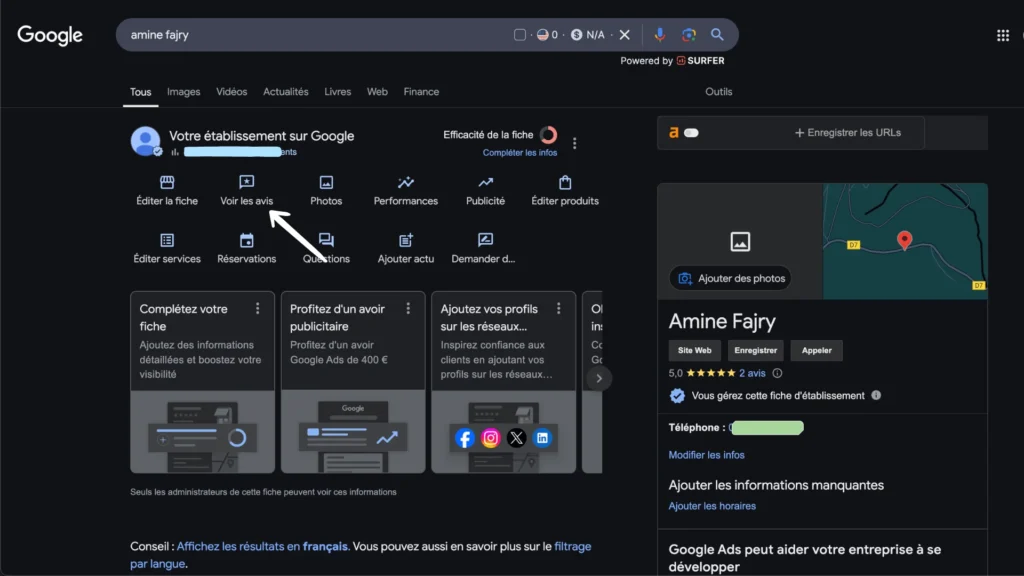
Look for the ‘Share’ button (it looks like a little arrow or connection icon) and give it a click. You’ll find it near the top of your reviews section.
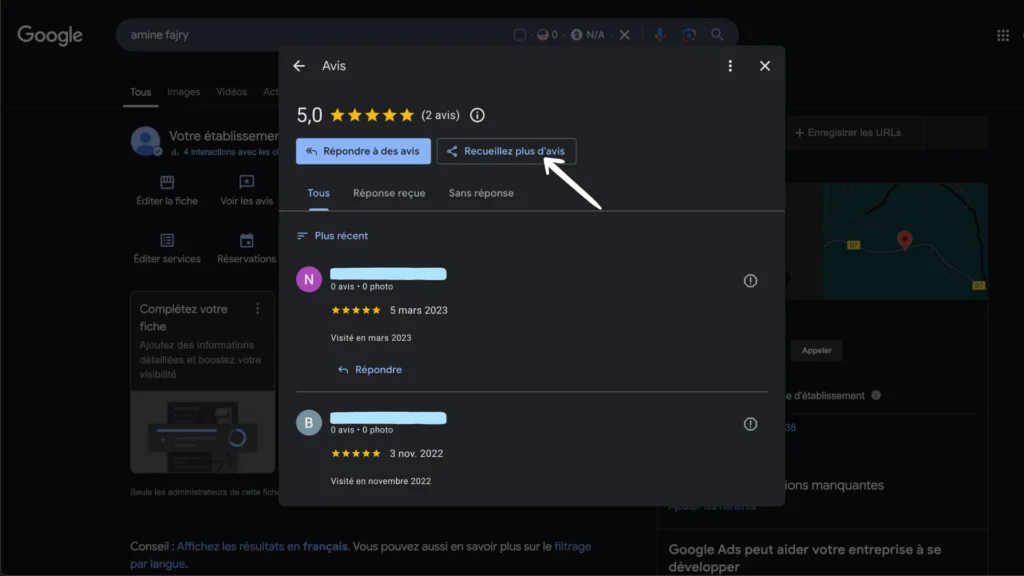
Once the sharing options appear, copy your unique review link to your clipboard. This is the direct link you’ll be sharing with your customers!
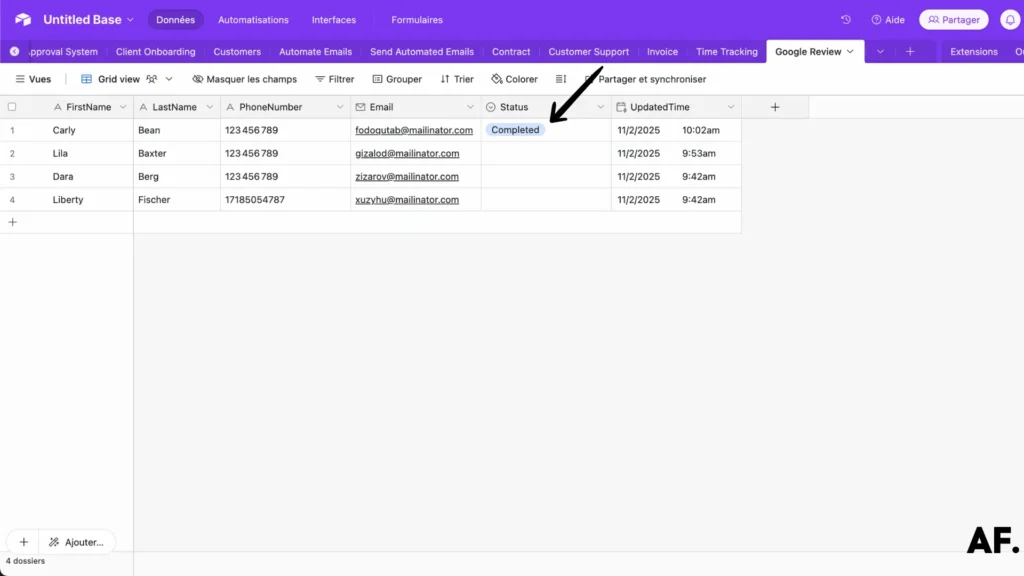
Step 2: Set Up Your Table
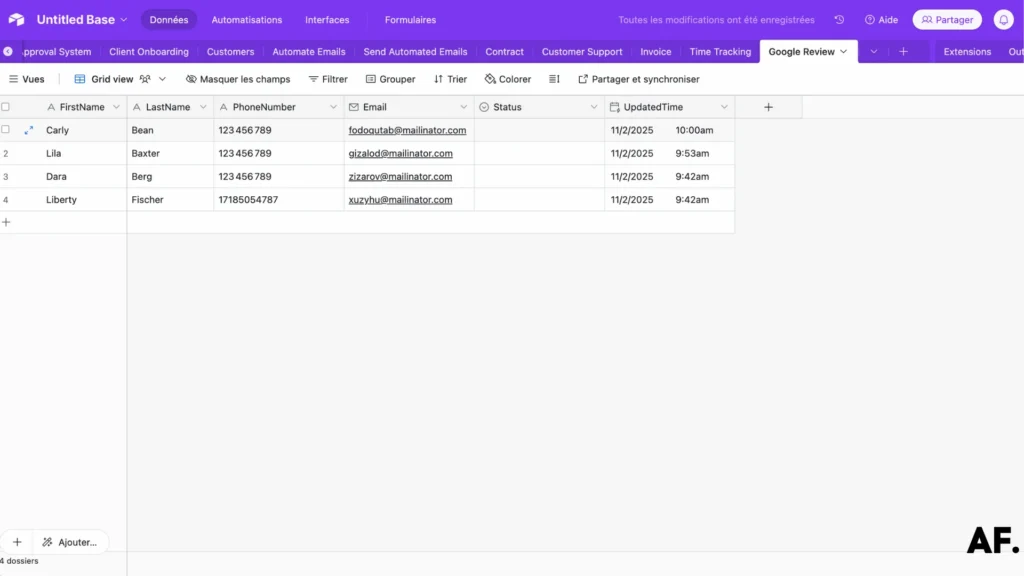
Now comes the fun part – creating your custom tracking table! Set up your columns based on what information matters most to you. In my case, I’ve included these helpful fields:- First Name
- Last Name
- Phone Number
- Email Address
- Review Status
- Last Updated
Feel free to customize this layout to match your needs – it’s completely flexible! Consider adding additional columns like preferred contact method or customer type. Make it work for you!
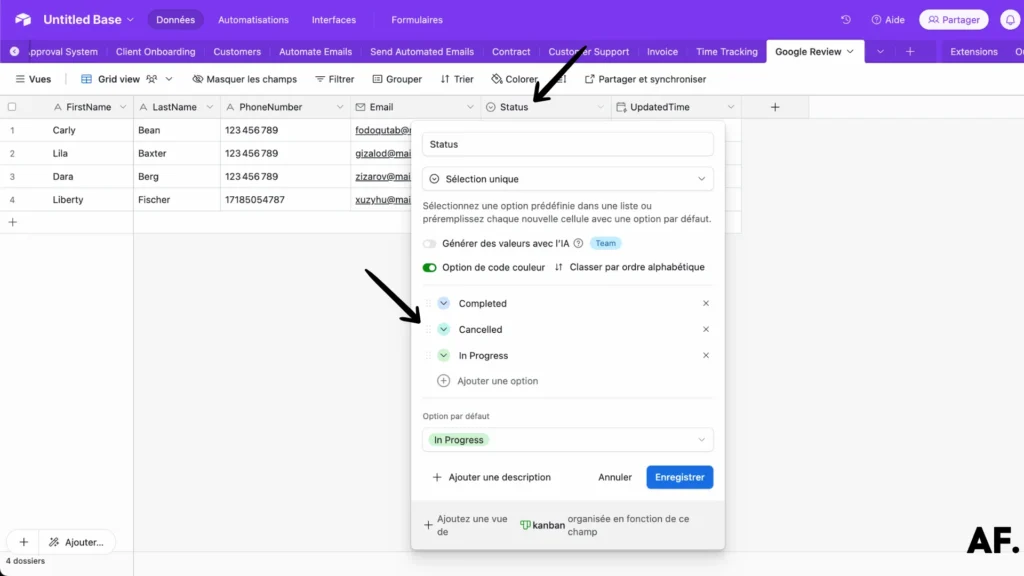
- ‘In Progress‘ – This indicates you’re actively working on the client’s project or task
- ‘Completed‘ – The client’s project has been successfully finished and delivered
- ‘Canceled‘ – The project was discontinued or canceled by the client
These status markers help you maintain a clear overview of all your client work at a glance. It’s a simple but powerful way to stay organized!
Step 3: Create Your Scenario
Next, we’ll set up our automation scenario! Don’t have a Make.com account yet? You can start with their free plan, which is perfect for this workflow. Just head over to Make.com and sign up if you haven’t already!
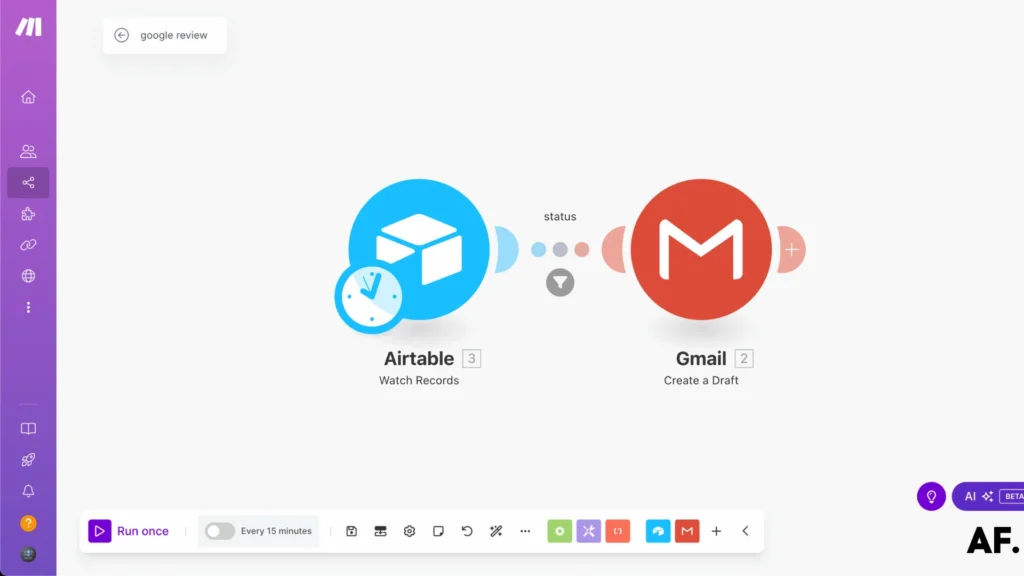
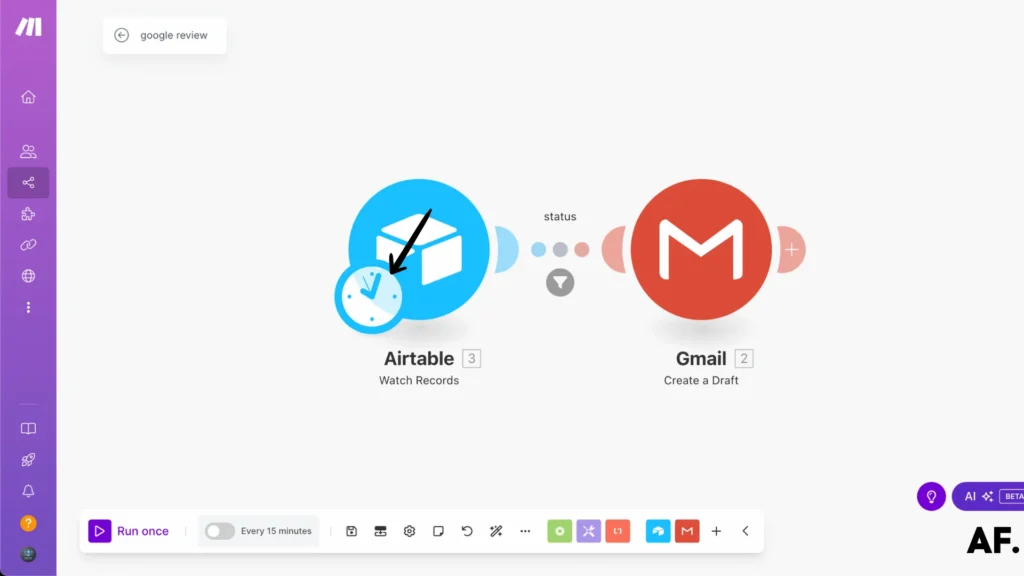
Step 4: Add Your First Module
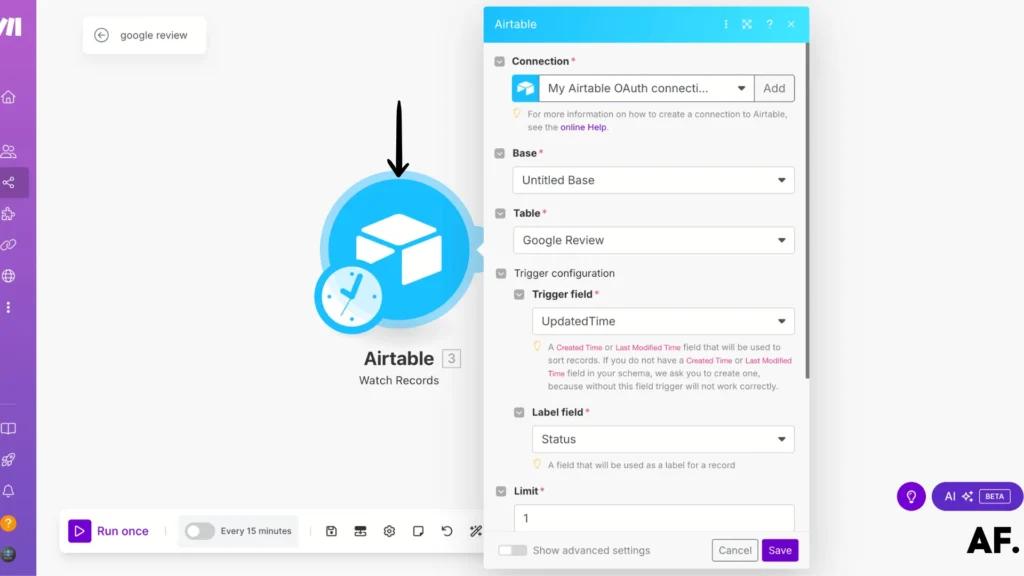
Let’s start building our automation in Make! Here’s how to set up your first module:- Begin by adding the ‘Watch Records‘ module from the Airtable app
- Connect it to your Airtable base and select your table
- Now for the important settings:
- Set your trigger field to ‘UpdatedTime‘ – this tells Make when to check for changes
- Choose ‘Status‘ as your label field – this helps track what’s happening with each record
This setup will monitor your table for any changes in real time, ensuring you stay on top of all updates!
Step 5: Sending Email
Now comes the exciting part – I’ll show you two different ways to handle your email automation:- Option 1: Create email drafts in Gmail that you can review and send personally
- Option 2: Set up a fully automatic email system that sends messages immediately
Both approaches have their benefits, and I’ll walk you through each one so you can choose what works best for your workflow!
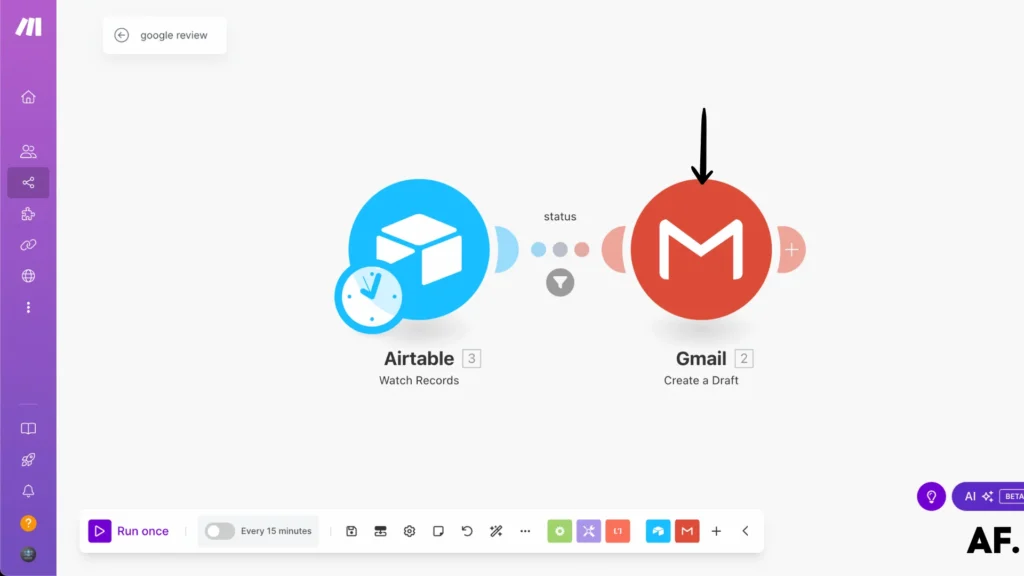
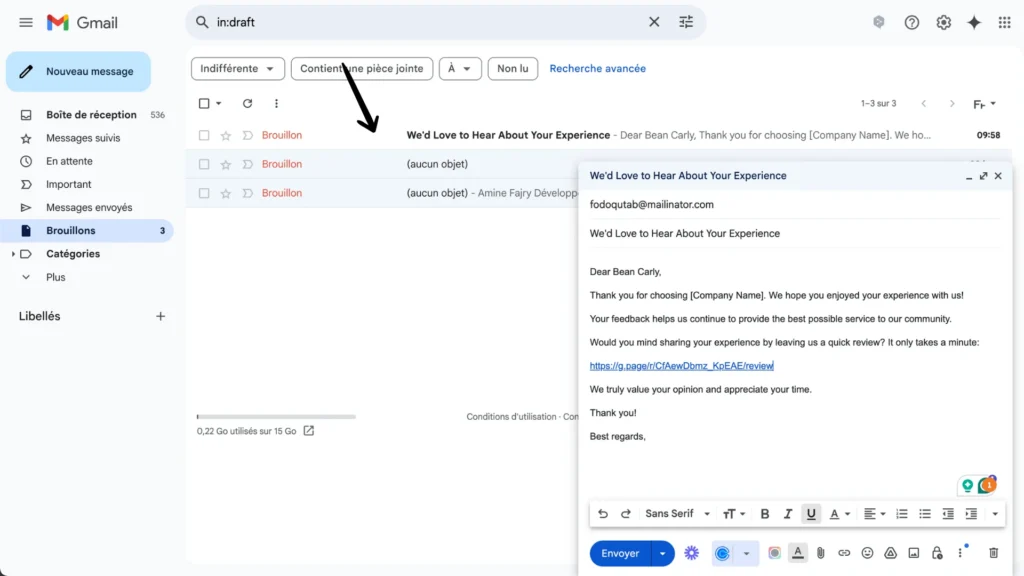
1. Creating email drafts for your review
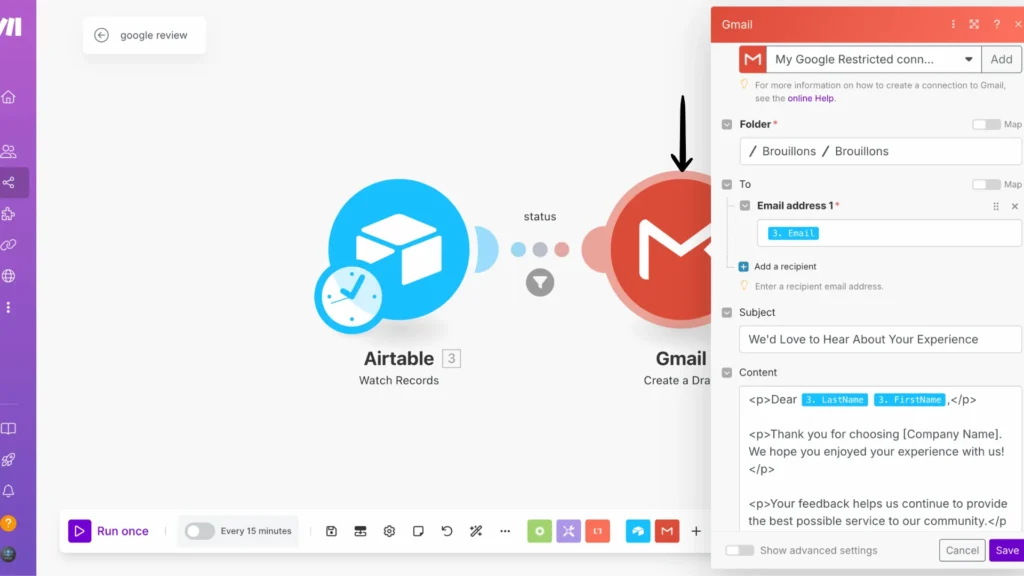
In the Make.com workflow, search for the Gmail module and select ‘Create a Draft.’ This option allows you to review and personalize each email before it goes out.
- First, select your Draft folder, where the emails will be saved
- For the ‘To‘ field, click the mapping button and select the email address from your Airtable data
- Create your subject line – make it clear and professional!
- For the email content, let’s use HTML format for better styling. Here’s a pro tip: HTML formatting allows you to create beautifully structured emails with custom fonts, colors, and layouts.
This will give your automated emails a polished, professional look while maintaining a personal touch!
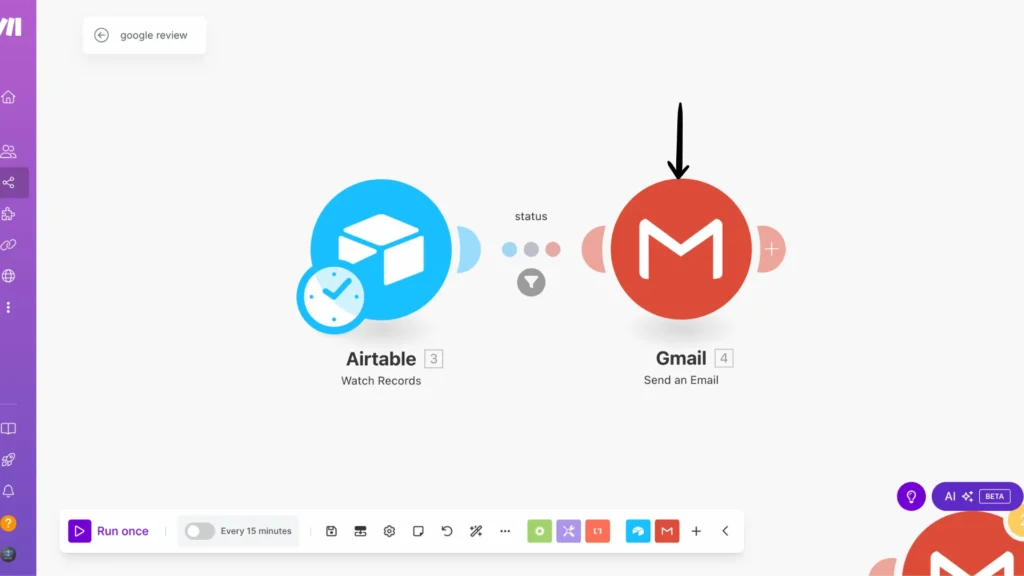
2. Immediate email sending Option
Let’s set up automatic delivery:- In the Gmail modules list, look for ‘Send an Email‘ instead of the draft option
- This powerful option automatically sends your emails when the trigger conditions are met – no manual review is needed!
A quick tip: This is perfect when you’re confident in your email template and want to speed up your communication process. Just make sure you’ve thoroughly tested your email content first!
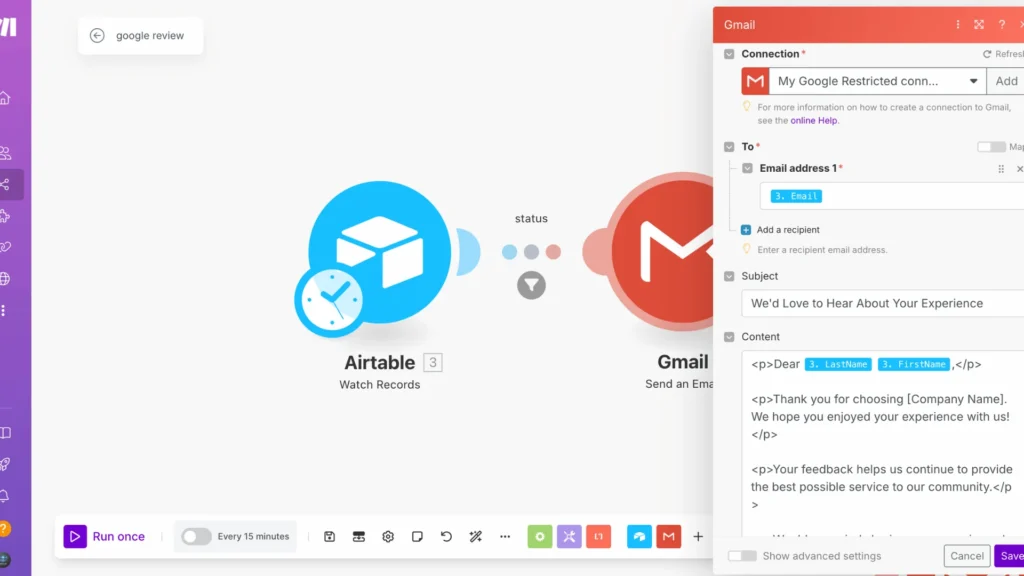
- Add the recipient’s email by mapping it from your Airtable data
- Create your subject line
- Design your email body content – again, using HTML formatting is recommended for the most professional look
The main difference is that these emails will be sent automatically without first landing in your drafts folder. The setup is identical, but the outcome is instant communication!
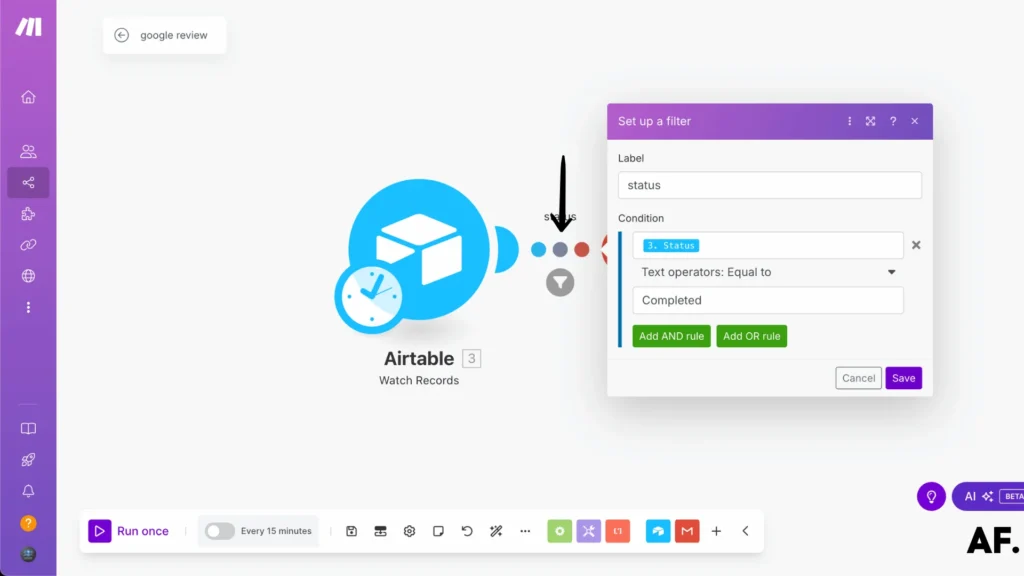
Step 6: Add A Filter
Now comes an important step – setting up an intelligent filter to control when emails are sent:- Add a filter module between your Airtable and Gmail modules
- Name your filter ‘Status Check‘ (or any name that makes sense to you)
- Set up the condition like this:
- Select ‘Status‘ from your Airtable data
- Choose ‘Equal to‘ as your operator
- Type in ‘Completed‘ as your value
- This filter acts like a smart gate: it only allows the automation to continue and send emails when a project’s status is marked as ‘Completed.’
Think of it as your virtual assistant making sure emails only go out at exactly the right moment – when you’ve finished the work for your client!
Step 7: Save And Run Your Scenario
Now, let’s complete the automation cycle by updating your Airtable:- Head back to your Airtable record
- Find the Status column
- Change the status to ‘Completed.’
This will trigger your automation, and if everything is set up correctly, an email will be sent (or saved as a draft, depending on which option you choose)! This is a great way to test whether your automation works as intended.
- Click the ‘Save‘ button to preserve all your hard work
- Hit ‘Run Once‘ to test your scenario right away
- Watch your automation in action – you should see it process through each module

Pro tip: Keep an eye on your Gmail and Airtable to confirm everything works exactly as planned. Success looks like this: your status update in Airtable should trigger the email to either send or save as a draft, depending on which option you choose.
Step 8: Results
1. Email Draft Option Result
Let me show you how the draft option looks in action! When you’re using Gmail’s draft feature in your automation:- The email will land safely in your Gmail drafts folder instead of sending immediately
- You can review and personalize each message before sending
- It gives you complete control over the final communication with your client
This approach is perfect for adding that personal touch or making last-minute adjustments before hitting send!
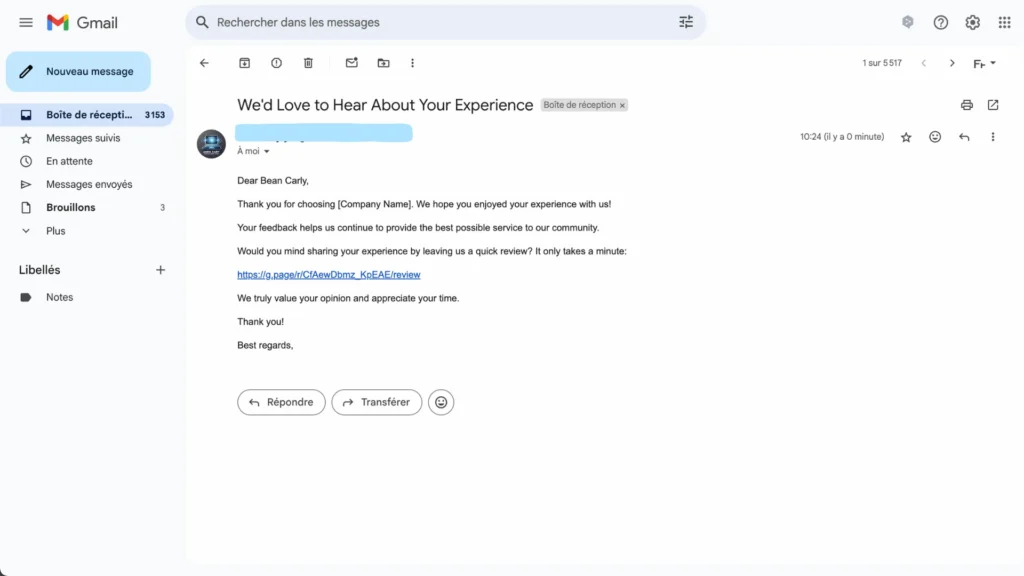
2. Automatic Sending Email Option Result
And there you have it – when using the automatic sending option, you’ll see the magic happen in real time! As soon as a status is marked as ‘Completed‘ in your Airtable:- The automation triggers instantly
- Your email is composed and sent automatically to your client
- The whole process happens seamlessly without any manual intervention
It’s like having a super-efficient virtual assistant handling your client communications promptly! This is perfect for streamlining your workflow when you’re confident in your email template.
Step 9: Automate Your Scenario
Want to make your automation run on a regular schedule? It’s super easy! Just click the clock icon in Make to set up your preferred timing:- Every hour
- Every few minutes
- Every 15 minutes
- Or any custom schedule that fits your needs
For a deep dive into all the scheduling possibilities and best practices, I’ve written a detailed guide that covers everything you need to know. Check out my complete scheduling article [link].
This scheduling feature turns your automation into a hands-off system that works for you around the clock!
How This Google Review Automation Will Help You
Managing client reviews doesn’t have to be a time-consuming task anymore. This automation system transforms how you handle Google Reviews by streamlining the entire process from start to finish. Instead of manually tracking and following up with clients, the system does the heavy lifting for you.
Picture this: your client’s project is completed, and without any extra effort on your part, they receive a perfectly timed email invitation to share their experience. The automation keeps track of every review request, status, and follow-up, ensuring nothing falls through the cracks.
This system helps you maintain consistent communication with clients while saving hours of manual work each week. You’ll never miss an opportunity to collect valuable feedback, and your clients will appreciate the professional and timely follow-up.
The best part? You can choose between automated sending or draft reviews, allowing you to add personal touches when needed. Whether you’re a small business owner or managing a larger team, this automation scales with your needs and keeps your review collection process running smoothly.
Say goodbye to scattered spreadsheets and forgotten follow-ups – let automation handle your review management while you focus on growing your business.
Conclusion
Automating your Google Reviews with Make is a game-changing strategy that can transform your business’s review management process. Remember, while automation saves time, maintaining a personal touch in your responses is crucial. Start small, test thoroughly, and gradually expand your automation workflows. Ready to revolutionize your review management? Get started with Make today!
Join the Newsletter
Subscribe to get our latest content by email.
We won’t send you spam. Unsubscribe at any time.
✅ You’re subscribed!
FAQs
Is there an API for Google reviews?
You don’t need an API – you can use the share link from your Google Business Profile page.
How do you generate Google reviews?
Get your Google review link, set up an automated email system using Make and Airtable, and send review requests to customers when their projects are completed.
Do Google reviews post automatically?
No, customers must write and submit their reviews themselves. The automation only helps send out review requests.

Further Ressources
- How to Do Web Scraping in Make
- How to Build an Automated Time Tracking System on Make
- The Ultimate Guide to Data Mapping in Make
- How to Automate Employee Onboarding in Make
- How To Handle Errors In Make: A Complete Guide
- How To Use Variables in Make
- How to Automate Invoice Processing with Make
- What Are Make’s Data Iterators & Array Aggregators? Full Guide