How to Automate Data Entry with Make
Are you tired of spending countless hours on repetitive data entry tasks? You’re not alone! Studies show that employees spend an average of 4.5 hours per week on manual data entry, reducing productivity and increasing errors. The good news? Make (formerly Integromat) offers a powerful solution to automate these time-consuming processes. In this comprehensive guide, we’ll walk you through everything you need to know about automating data entry with Make, helping you reclaim valuable time and minimize errors.

Let’s transform your workflow into an efficient, automated system!
Creating Your First Data Entry Automation
Step 1 – Create Your Table in Airtable
Step 2 – Create a Folder
Step 3 – Create Your Google Form
Step 4 – Create Your Scenario
Step 5 – Add a Webhook
Step 6 – Connect Make with Google Form
Step 7 – Start Building
Step 8 – Create a Prompt
Step 9 – Insert Data
Step 10 – Add Filters
Step 11 – Save, Start, and Test Your Automation
Step 1 – Create Your Table in Airtable
First, create your table in Airtable by adding the following essential columns: Email, Phone Number, Address, Birth Date, and File Link.

Step 2 – Create a Folder
Next, head to Google Drive and create a dedicated folder to organize everything. I named mine ‘Data Entry‘ – a simple name that makes it easy to find when needed.

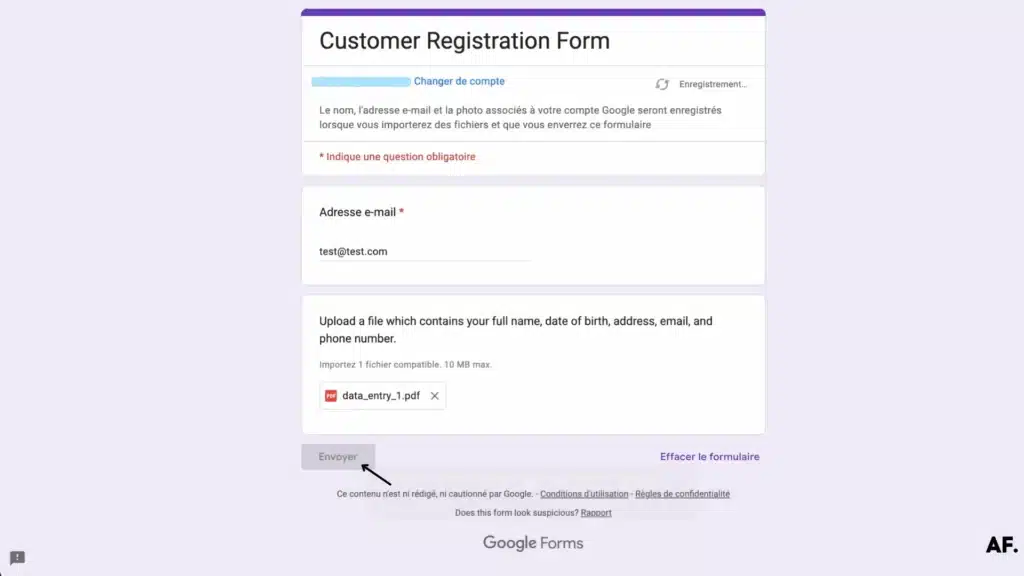
Step 3 – Create Your Google Form
Then, create your Google Form and include an option for file attachments. This critical step lets your respondents upload their documents directly through the form.

Step 4 – Create Your Scenario
Then, create your scenario in Make. Good news for newcomers – Make offers a free plan that includes 1,000 monthly operations! If you don’t have an account, sign up directly using this link and start building your automation immediately.
Step 5 – Add a Webhook
Next, search for the ‘Custom Webhook‘ module within your scenario under the Webhooks options. Once you find it, locate the webhook URL and click ‘Copy address to clipboard‘ to save this vital link for later use.

Step 6 – Connect Make with Google Form
Now, head back to your Google Form and look for the three-dot menu in the top-right corner. Click on those three dots and select ‘Apps Script‘ from the dropdown menu. This will open the powerful script editor, where we’ll add our custom code.

Then paste the following code into the Apps Script editor:
const POST_URL = "<your_webhook_url>";
function onSubmit(e) {
    const form = FormApp.getActiveForm();
    const allResponses = form.getResponses();
    const latestResponse = allResponses[allResponses.length - 1];
    const response = latestResponse.getItemResponses();
    const payload = {};
    for (var i = 0; i < response.length; i++) {
        const question = response[i].getItem().getTitle();
        const answer = response[i].getResponse();
        payload[question] = answer;
    }

    const email = latestResponse.getRespondentEmail();
    const formResponses = latestResponse.toPrefilledUrl();
    payload["email"] = email;
    payload["formResponses"] = formResponses;

    const options = {
        "method": "post",
        "contentType": "application/json",
        "payload": JSON.stringify(payload)
    };
UrlFetchApp.fetch(POST_URL, options);
};
Please replace the code’s placeholder with the webhook URL you copied earlier. This code will connect your form responses directly to your Make scenario.

Next, navigate to the trigger section, as shown in the image below. Look for the ‘Add a trigger‘ button and click on it. This critical step will ensure your code automatically runs whenever someone submits your form.

Then, modify the trigger settings to match your needs and click the ‘Submit’ button to save your configuration. This finalizes the connection between your form and the Make scenario, putting your automation into action. If you encounter any errors, here is an article to help you correct them: “How To Trigger Instantly Google Form On Make“

Step 7 – Start Building
Return to your Make scenario and run a test to ensure your trigger is working correctly. If you encounter any issues, check out this helpful article that discusses common troubleshooting steps. Once everything’s connected, continue building your automation by adding the ‘Download a File‘ module from Google Drive. Then, map the File ID from your webhook to complete the connection.

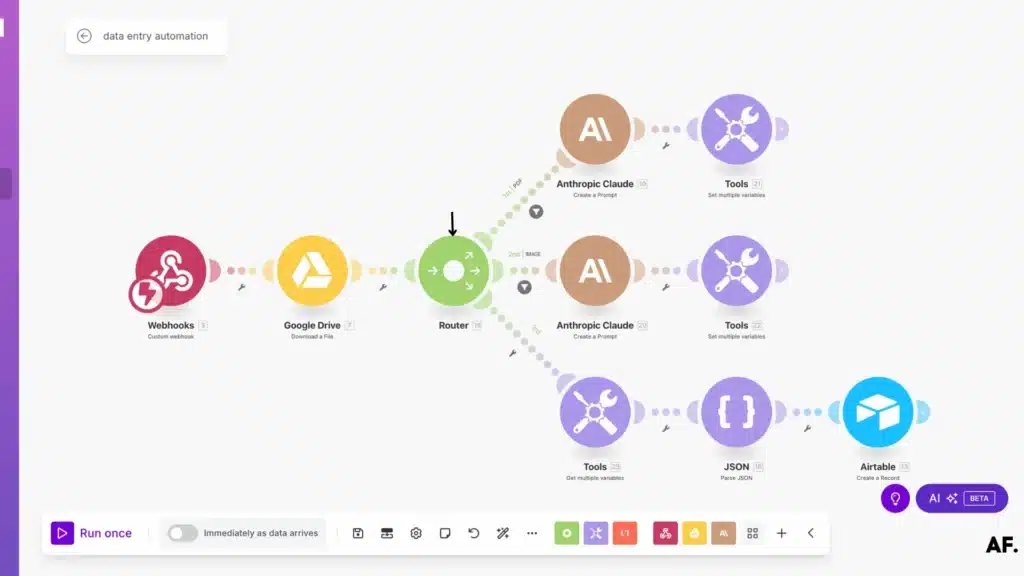
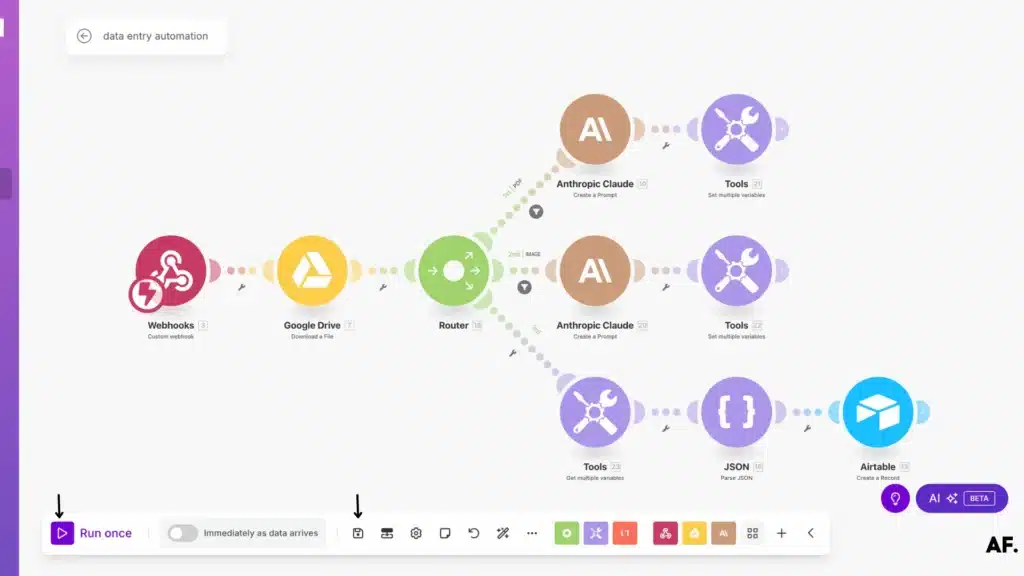
Next, add a Router module to your scenario. This powerful tool lets you create multiple paths in your automation, allowing different actions based on file types or other criteria – I found this especially useful for handling various document formats in my data entry process.
Step 8 – Create a Prompt
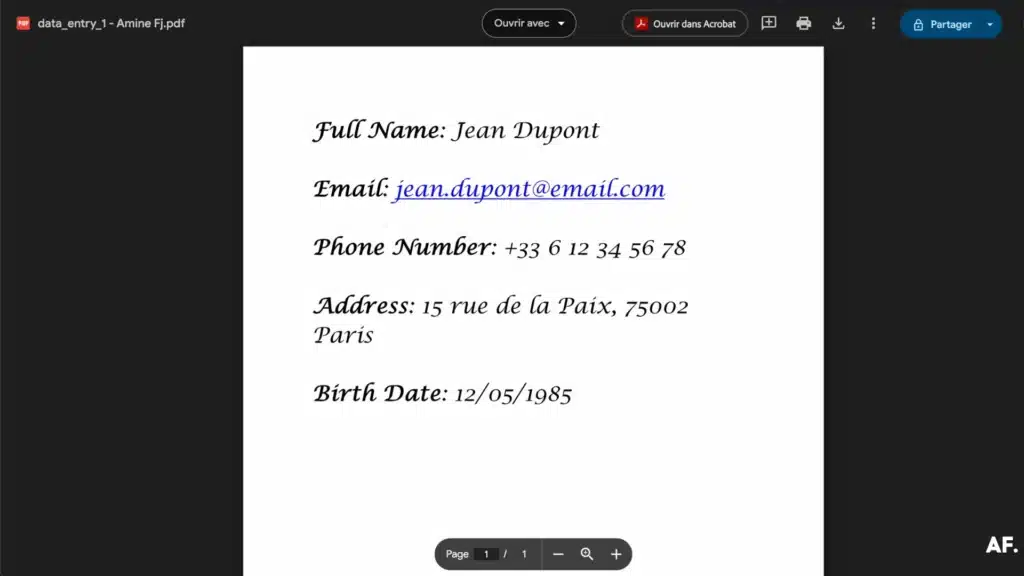
Next, we’ll harness the power of Claude AI to extract specific data from your PDF files. In this crucial step, we’ll add a prompt module that tells Claude exactly what information to pull from each document. I was amazed at how accurately Claude could identify and extract data like emails and addresses from poorly formatted PDFs!
IMPORTANT: Extract ONLY these fields from the document: FullName, BirthDate, Address, Email, and PhoneNumber. Your entire response must be a single JSON object with no text before or after. Do not include any explanations, descriptions of the document, or statements about what you're doing. The response must start with { and end with } with absolutely nothing else. If a field is not found, use null for its value.

OUTPUT FORMAT:
{
  "FullName": "value",
  "BirthDate": "value or null",
  "Address": "value or null",
  "Email": "value or null",
  "PhoneNumber": "value or null"
}
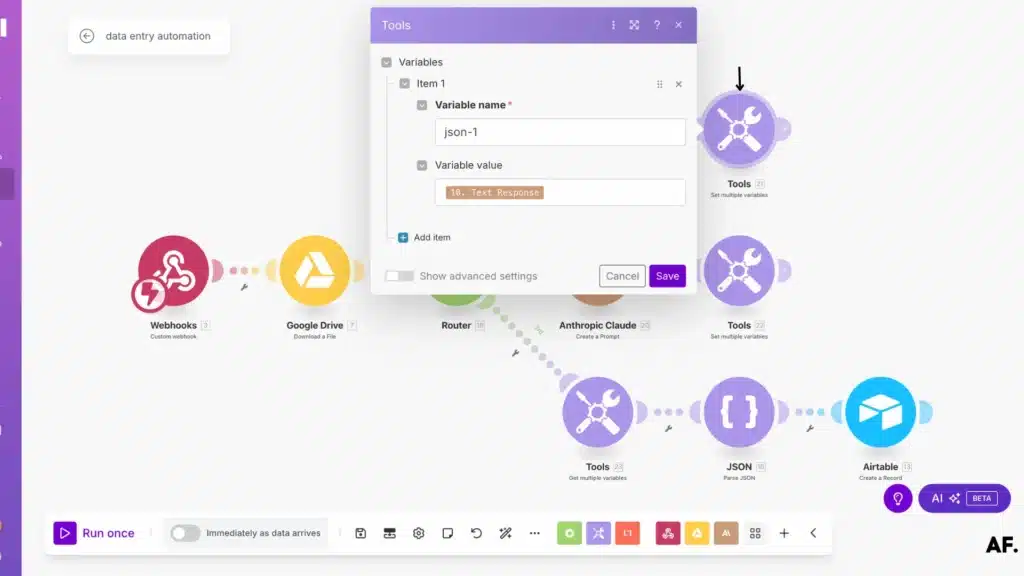
Then, add a ‘Set Multiple Variables‘ module to your scenario. This is where the magic happens – we’ll capture Claude AI’s extracted data and store it in a variable named ‘json-1‘ for easy access later. This step ensures that all the valuable information Claude pulled from your PDF is saved correctly and ready to use in subsequent modules.
For the second route, we’ll focus specifically on images. Add the same Claude AI prompt as before, but set the ‘Type’ parameter to ‘Image’ instead of PDF this time. I’ve found this distinction crucial. Claude uses different extraction techniques for image files compared to PDFs, significantly improving the accuracy of documents like scanned receipts or handwritten notes.
IMPORTANT: Extract ONLY these fields from the document: FullName, BirthDate, Address, Email, and PhoneNumber. Your entire response must be a single JSON object with no text before or after. Do not include any explanations, descriptions of the document, or statements about what you're doing. The response must start with { and end with } with absolutely nothing else. If a field is not found, use null for its value.

OUTPUT FORMAT:
{
  "FullName": "value",
  "BirthDate": "value or null",
  "Address": "value or null",
  "Email": "value or null",
  "PhoneNumber": "value or null"
}
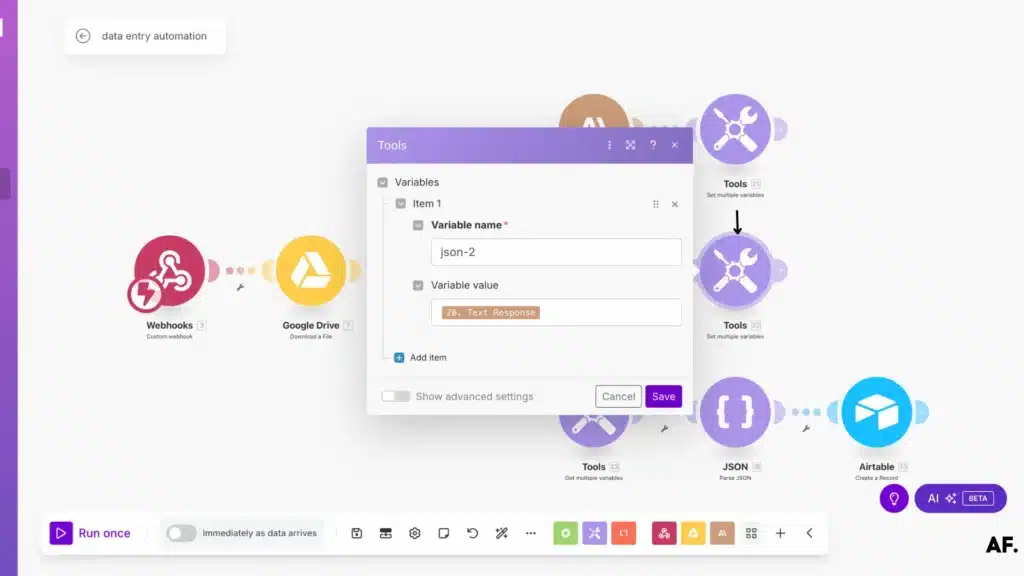
Next, as we did for the PDF route, add another ‘Set Multiple Variables‘ module after your image processing step. Capture Claude AI’s image analysis results and store them in a new variable named ‘json-2‘. This parallel structure keeps your data organized and makes it easier to reference the correct information depending on which file type you’re processing.
Step 9 – Insert Data
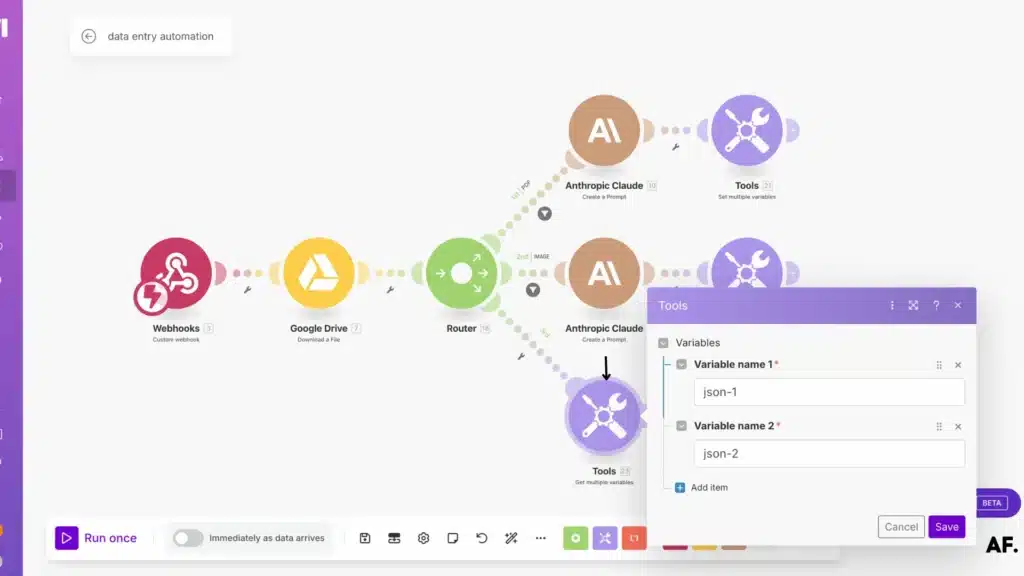
We’ll set up the final step for the third route: directly pushing all that extracted data into Airtable. First, add a ‘Get Multiple Variables‘ module and retrieve json-1 and json-2 variables. This clever approach consolidates the data from your PDF and image processing routes, ensuring that the correct information flows into your Airtable database regardless of which file type was processed.
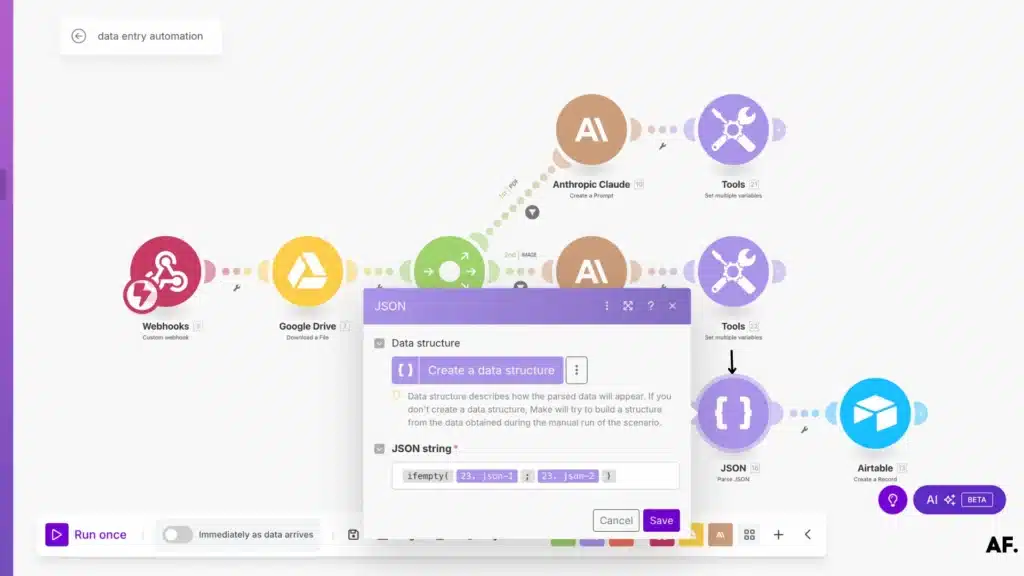
Next, add a ‘Parse JSON‘ module – a critical step that converts our JSON from a simple string into a structured format that Make can work with. Here, we’ll use the ‘empty ()’ function to tell our system to choose between our two variables. This function says, ‘Use json-1 if it contains data, but if it’s empty, use json-2 instead’ – a simple yet powerful way to handle data from either processing route.
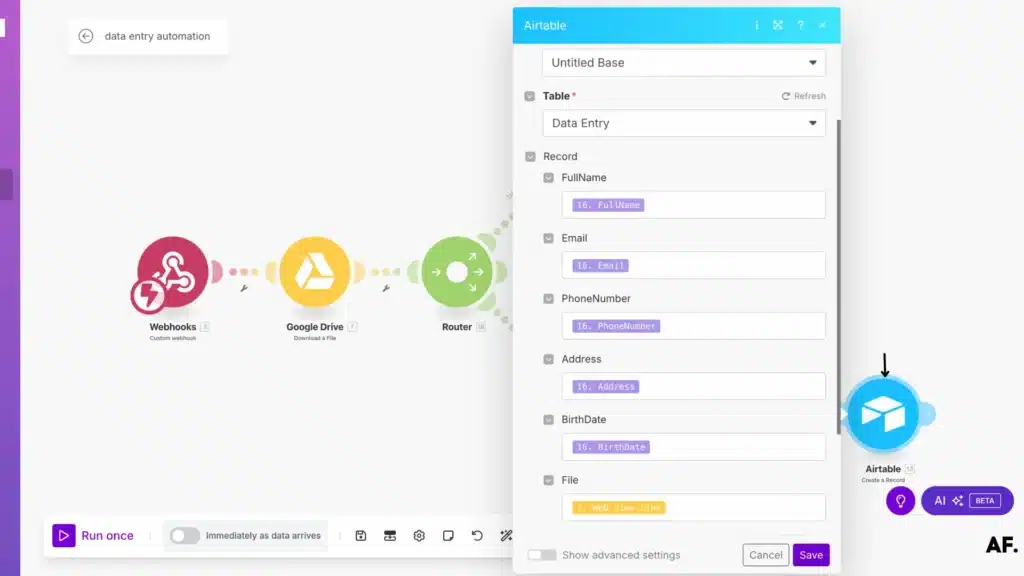
After parsing the JSON, it’s time to map each field to its proper destination in Airtable. Connect each piece of extracted data (email, phone number, address, etc.) to the corresponding Airtable field. Use the ‘Web View Link‘ from Google Drive instead of the raw file for the attachment. This creates a clickable link in Airtable that opens the original document with a single click, making your data organized and genuinely accessible.
Step 10 – Add Filters
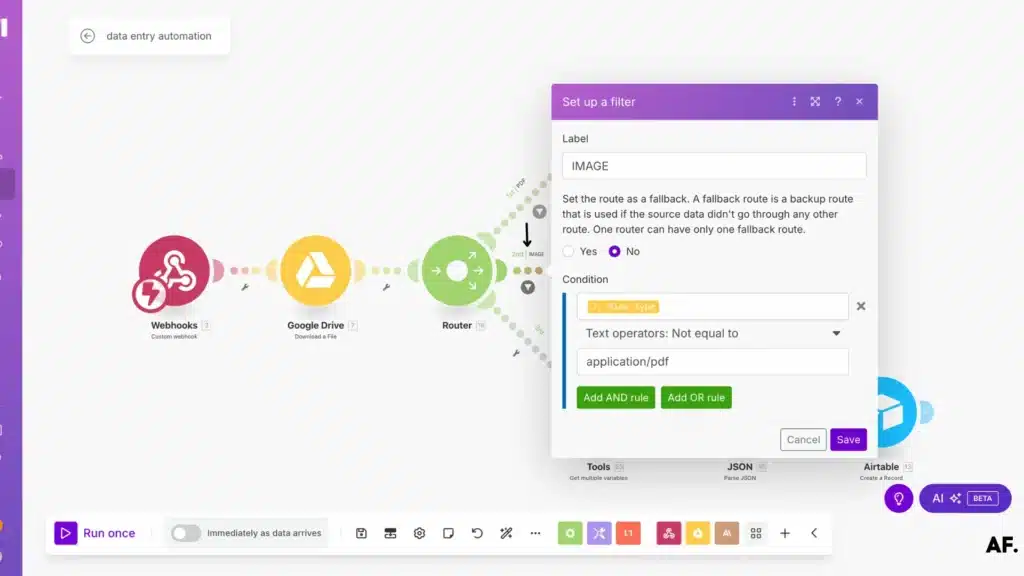
Next, let’s fine-tune our automation by adding a filter to the first route. Set this filter to only process PDF files. This targeted approach ensures that your PDF-specific extraction runs only when needed, making your automation more efficient and preventing potential errors from trying to process the wrong file types.

For the second route, add a similar filter – but this time configure it to process only image files. This complementary filter ensures that images are directed exclusively to your image-processing branch, where Claude AI can apply its specialized image analysis techniques. By clearly separating PDFs and images this way, you create a robust system that handles each file type appropriately. I was amazed at how much this improved my extraction accuracy across different document formats!
Step 11 – Save, Start, and Test Your Automation
Finally, it’s time to bring your automation to life! Click the ‘Save‘ button to preserve all your hard work, then hit ‘Run‘ to activate your scenario. I recommend watching that first test run carefully – there’s something incredibly satisfying about seeing data flow automatically from form submission to an organized database without lifting a finger. This moment when everything connects is why I fell in love with automation in the first place!
Now, it’s time to test the complete workflow! Return to your Google Form and submit a test entry with sample data and an attachment. Fill out each field as if you were an actual user. This allows you to see your automation in action from start to finish. I still get a little thrill watching my submissions automatically populate my Airtable within seconds!
Results
The moment of truth arrives when you check your Airtable—like magic, your form data has appeared automatically in your database! Each field is neatly populated, and the file link is ready to click, all without manual copying and pasting. This seamless connection between form submission and organized data makes this automation powerful. I remember staring at my screen in disbelief the first time I saw it working—hours of tedious data entry eliminated forever!
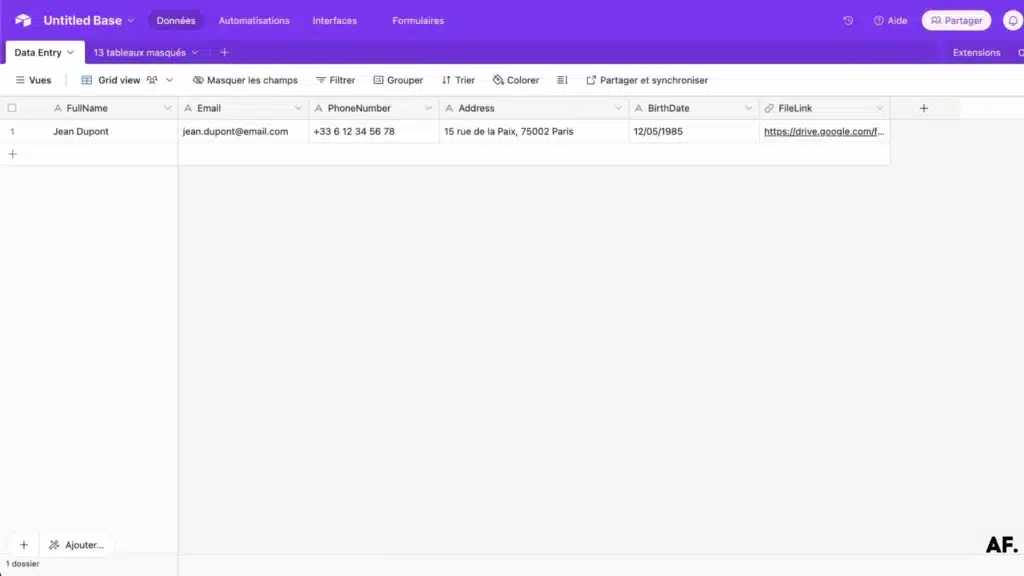
When you click on the file link in your Airtable, the original document opens instantly in Google Drive – giving you immediate access to review the source material whenever needed. This direct connection between your database and your files creates a seamless reference system, a game-changer for document management. I use this feature constantly to verify information or check details without searching through folders!
The possibilities are endless now that you’ve successfully built this robust automation scenario! You can scale it up, customize it for your needs, or adapt it for different industries. Healthcare providers might use it to process patient forms, legal teams could extract data from contracts, and educational institutions might streamline student applications. The basic framework remains the same, but the impact is transformative across different contexts. I’m constantly discovering new ways to refine my setup—that’s the beauty of building your automation system!
Wrapping Up
Ready to revolutionize your data entry processes? Implementing the automation techniques we’ve covered can significantly reduce manual work and allow you to focus on more strategic tasks. Remember to start small, test thoroughly, and gradually expand your automation capabilities. The time you save will be worth the initial setup effort! Also, remember to optimize your automation regularly for the best results.
FAQs
How to automate data entry process?
You can automate data entry by using platforms like Make. First, a data collection system like Google Forms must be set up. Then, create a scenario in Make that connects your form to a database like Airtable. Add AI tools like Claude to extract information from documents automatically. This eliminates manual copying and pasting.
How to do data entry work step by step?
Traditional data entry involves collecting information from documents, reading each document carefully, typing the information into spreadsheets or databases, double-checking for accuracy, and organizing files. With automation, you create a form, set up a database, connect it with Make, and let the system handle the rest.
Is it possible to automate data entry jobs?
Yes, it’s possible to automate data entry jobs. Tools like Make, Google Forms, and AI services can handle most repetitive data entry tasks. The article shows how to automatically extract information from PDFs and images and send it to Airtable without manual work. This saves about 4.5 hours per week that employees typically spend on manual data entry.
How to use AI for data entry?
Integrate AI services like Claude into your automation workflow to use AI for data entry. In Make, add a Claude AI module that reads documents and extracts specific information like emails, phone numbers, and addresses. Create a clear prompt telling the AI what data to look for. The AI works with PDFs and images, even handling poorly formatted documents and handwritten notes with reasonable accuracy.

Further Ressources
- How To Automate Expense Reports with Make in 9 Steps
- How to Use Midjourney to Create AI-Generated Images in Make
- How to Automate xAI Grok with Make : Comprehensive Guide
- How To Send Emails From Google Sheets Using Make
- How to Automate Your Follow-Up Emails in Make
- How to Use FLUX AI Image Generator in Make: Step-By-Step
- How to Automatically Write Blog Posts With Make and AI
- How to Use Leonardo AI Image in Make: Step-By-Step Guide