How to Automate Contract Management with Make

Did you know businesses waste 9 hours weekly on manual contract management tasks? That’s over 400 hours annually! In this comprehensive guide, I’ll show you how to automate contract management process using Make‘s automation capabilities. From document generation to approval workflows, we’ll explore everything you need to know to save time and reduce errors in your contract management system.

Let’s transform your contract processes from manual into automated workflows!
Building Your First Contract Automation Workflow
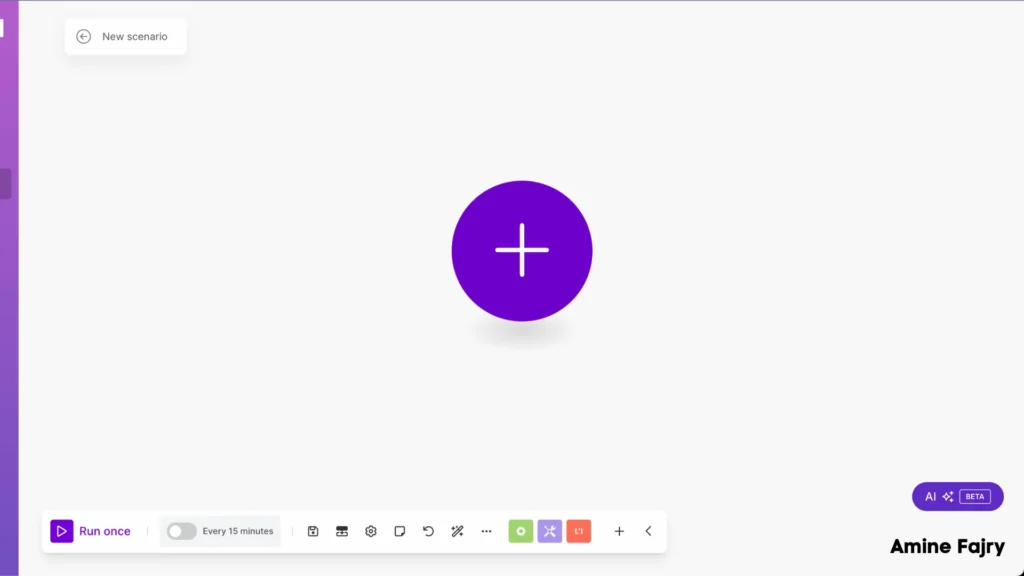
Step 1: Create Your scenario
Ready to get started? If you’re new here, you can create your scenario for free by clicking this link to set up your account. Don’t worry – the entire process is quick and simple!
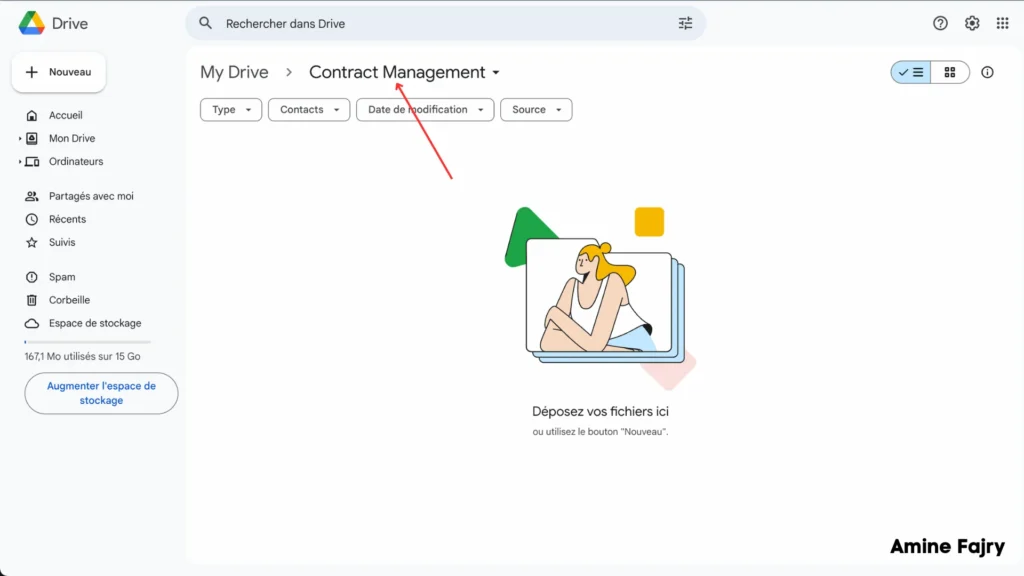
Step 2: Create your folder on Google Drive
Next, go to Google Drive and create a new folder. Let’s name it ‘Contract Management’—this will be our central hub for organizing everything!
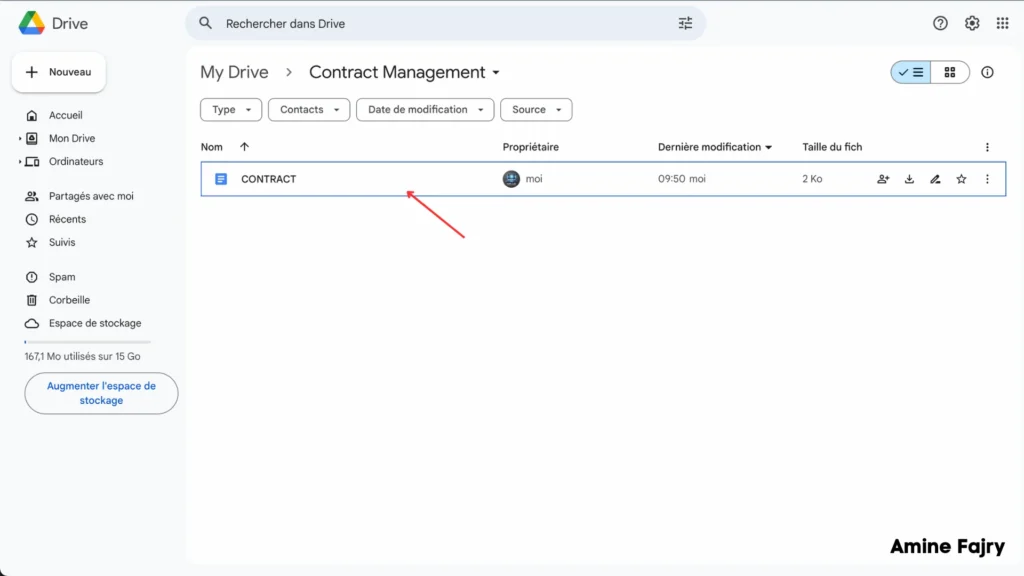
Step 3: Create Document
Inside your Contract Management folder, let’s create a new document for your contract template. This will be your master template that you can use again and again for all your future contracts!
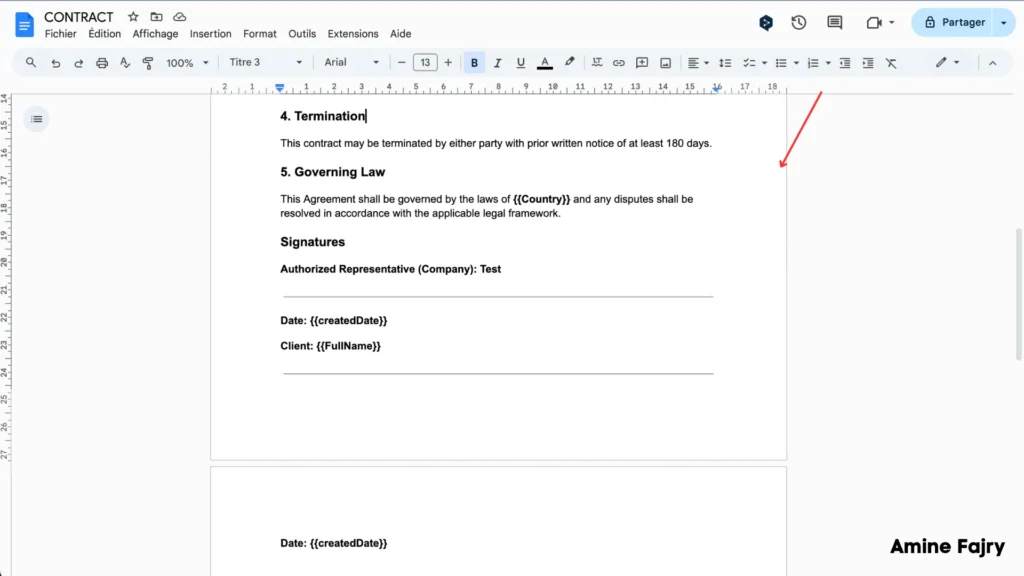
Step 4: Add Template of Contract
When creating your template, you’ll notice special placeholders marked with double curly braces like this: {{ }}. These are little markers that will automatically fill in your data later! For example, {{client_name}} or {{project_date}} will be replaced with actual information when you use the template.

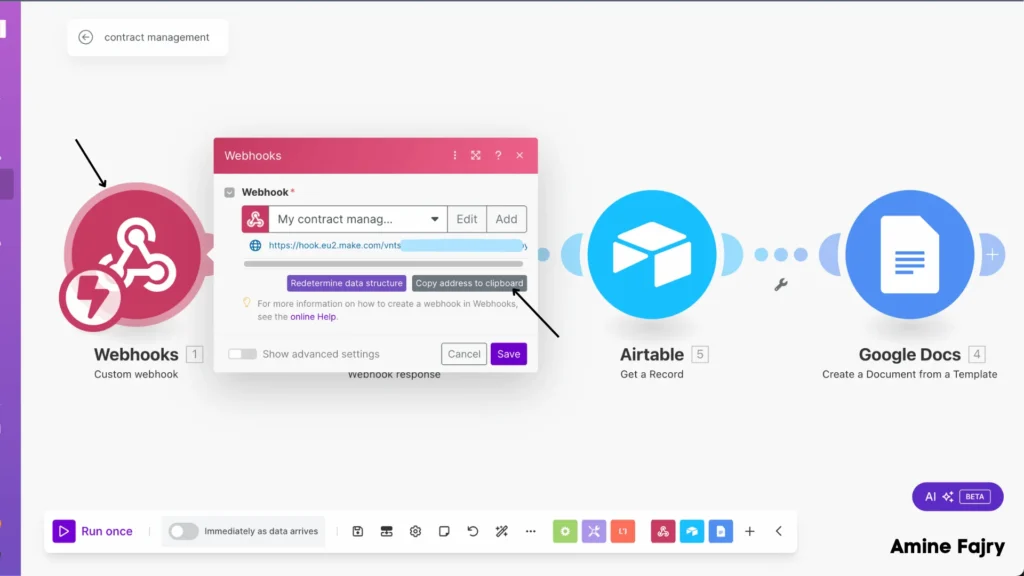
Step 5: Create a webhook
Time to set up your webhook! Head back to Make and follow these easy steps:- Create a new module
- Select ‘Custom Webhook‘ from the options
- Once created, you’ll see a webhook URL—copy this somewhere safe, as we’ll need it in a moment!
Step 6: Create a table on Airtable
Now, let’s set up your Airtable database! Here’s what to do:- Create a fresh table in Airtable – I’ve named mine ‘Contract,’ but feel free to get creative with your own name!
- Next, you’ll need to add these essential columns (think of them as information containers):
- Full Name
- Phone Number
- Company Name
- City
- Zip Code
- Country
- Button Create (we’ll use this for automation later!)
Pro tip: Make sure each column has the right data type – for example, set ‘Email‘ as an email field and ‘Phone Number‘ as a phone number field to keep your data clean and organized!

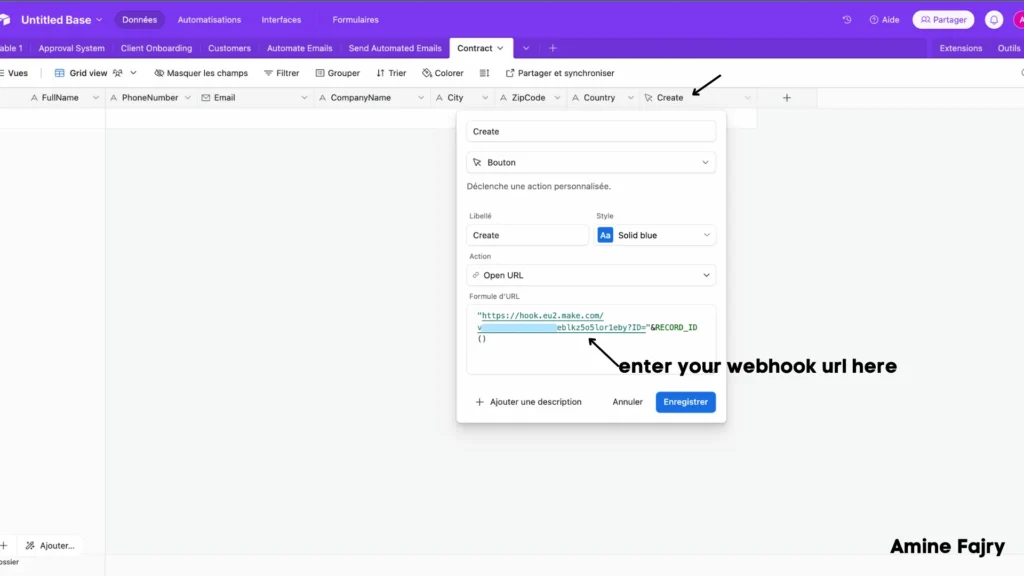
Step 7: Add Webhook on Contract Table
Now for the exciting part – connecting your webhook! Here’s what to do with that button we created:
In the ‘Button Create‘ field, we’ll add your webhook URL with a special formula. It should look exactly like this:
'your-webhook-url?ID='&RECORD_ID()
- The first part is the webhook URL that you copied earlier
- Add ‘?ID=’ right after it (no spaces!)
- Then &RECORD_ID(), which will automatically grab each record’s unique ID
Make sure to replace ‘your-webhook-url’ with the actual webhook URL you copied earlier from Make. This magical formula will help trigger your automation whenever the button is clicked!
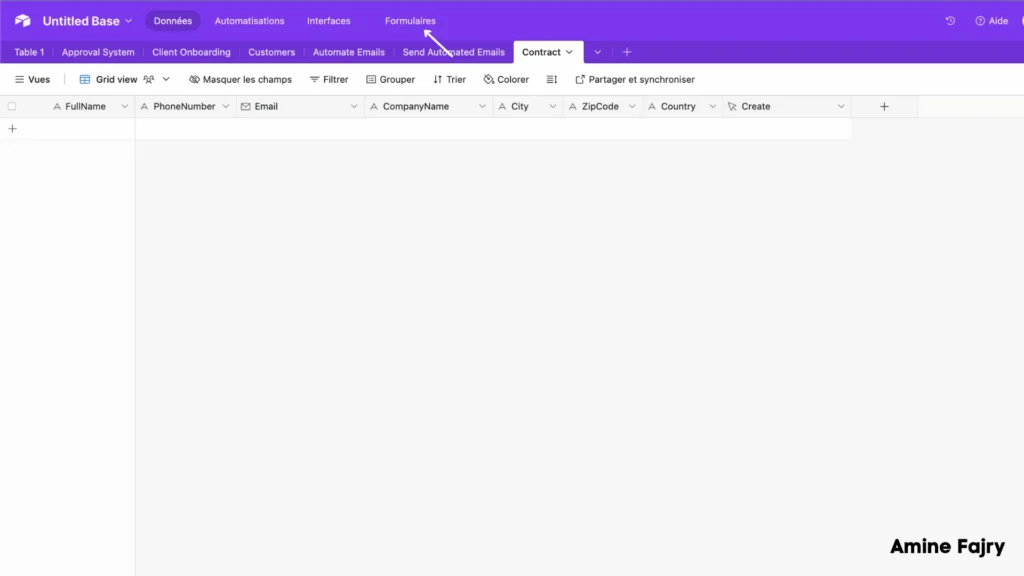
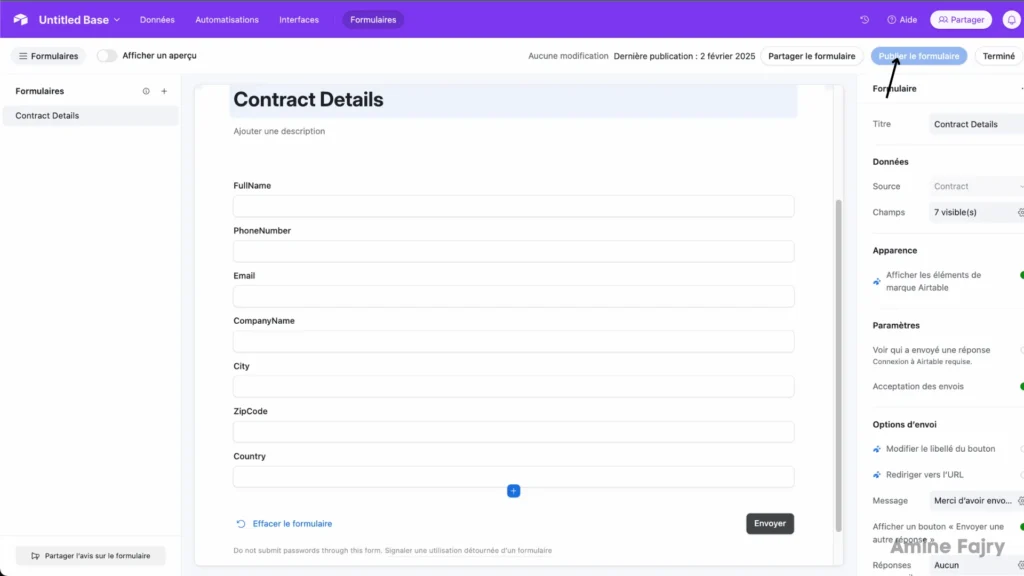
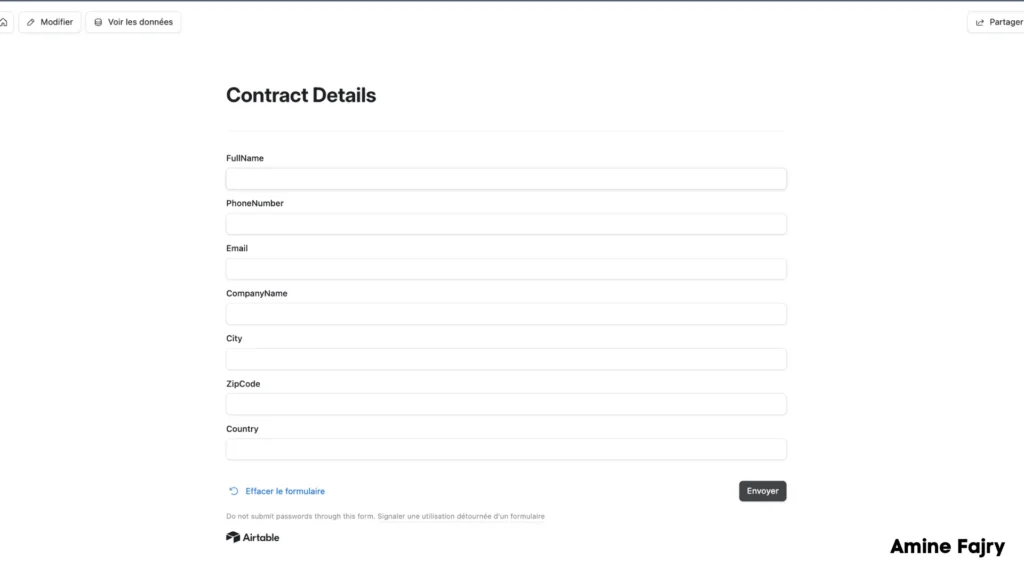
Step 8: Create Form
Ready to create your form? Look at the top of your Airtable page, and you’ll spot a handy ‘Form‘ button – click it! This is where the magic begins as we turn your table into an interactive form.
- Fill in your form details with a catchy name that makes sense for your use
- Make sure all the fields from your table are included
- When you’re happy with how everything looks, hit that ‘Submit‘ button to save your work!
Pro tip: Choose a clear, descriptive name for your form – something you and your clients will easily understand. Something like ‘Client Contract Details‘ works great!
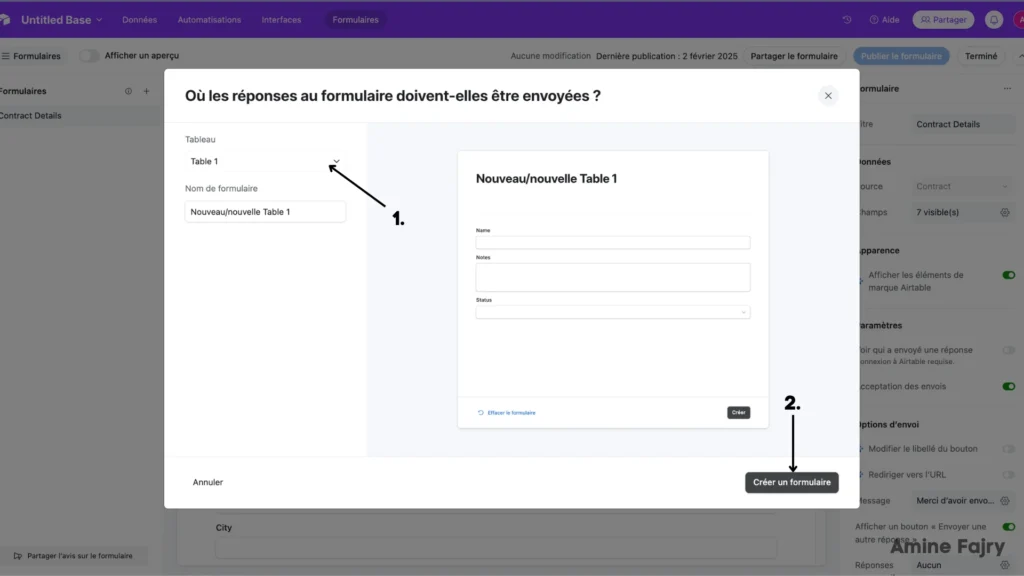
Time to make your form live! Click the ‘Publish‘ button, and voilà – your form is ready to share with the world! You’ll get a unique link to send to anyone who needs to fill out the contract details.
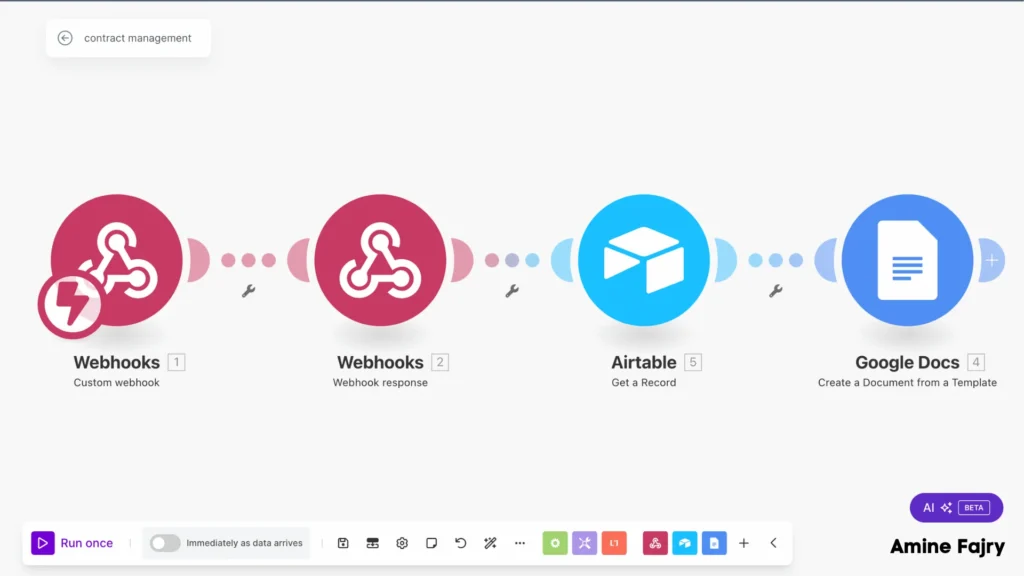
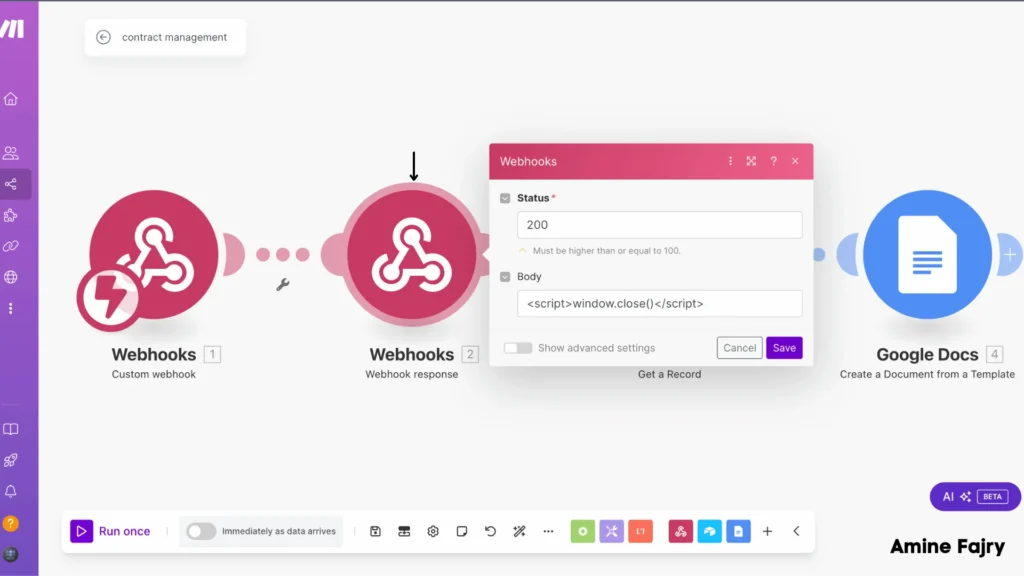
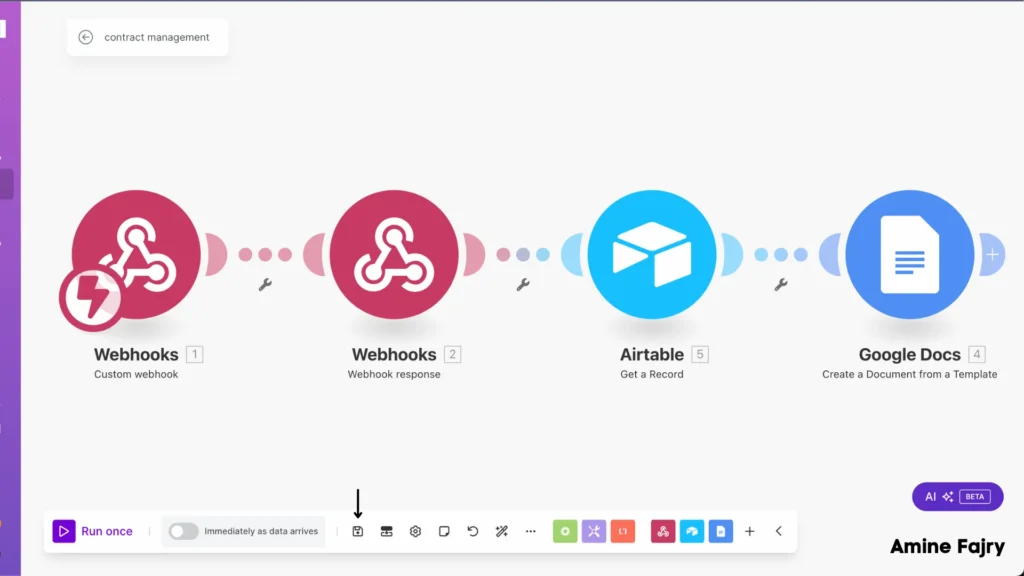
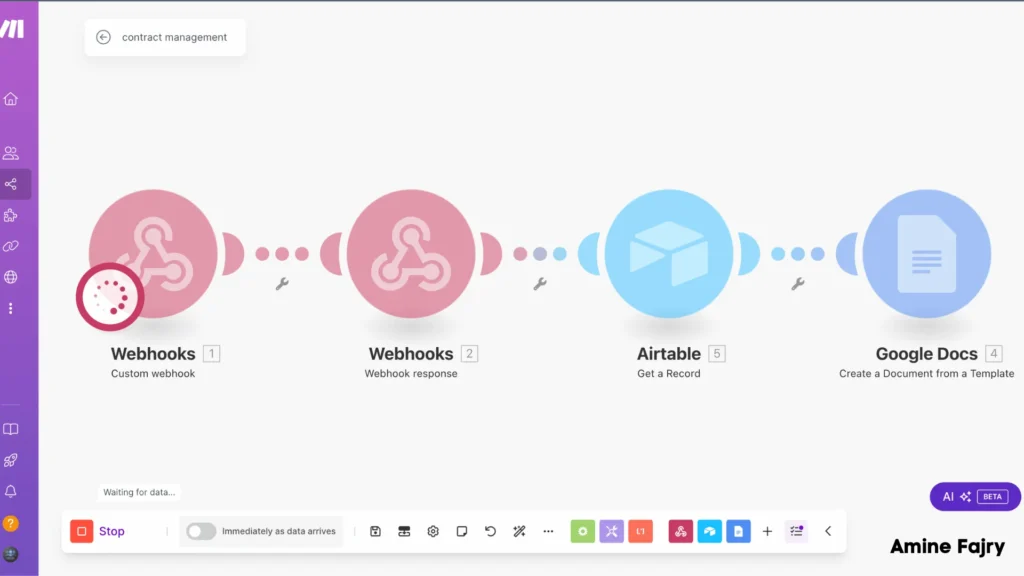
Step 9: Continue Building Scenario
Now, we’ll add another webhook module – but with a twist! This time, select ‘Webhook Response‘ as your module type. Here’s the important script you’ll need to add:
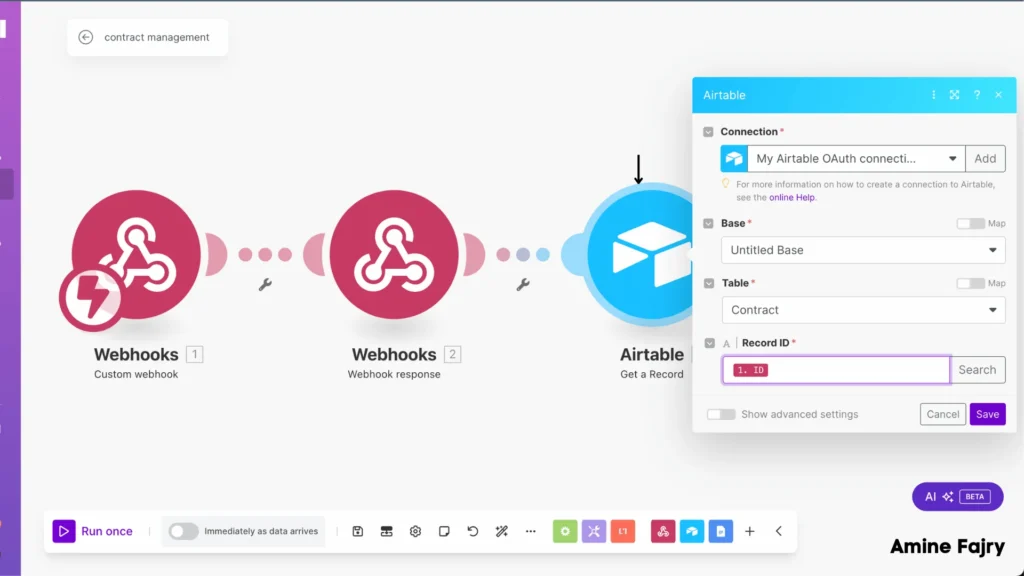
- Add an Airtable ‘Search Records‘ module to your workflow
- Connect it to your webhook by using the ID that comes from your webhook module
- This will help us find the exact record that triggered our automation
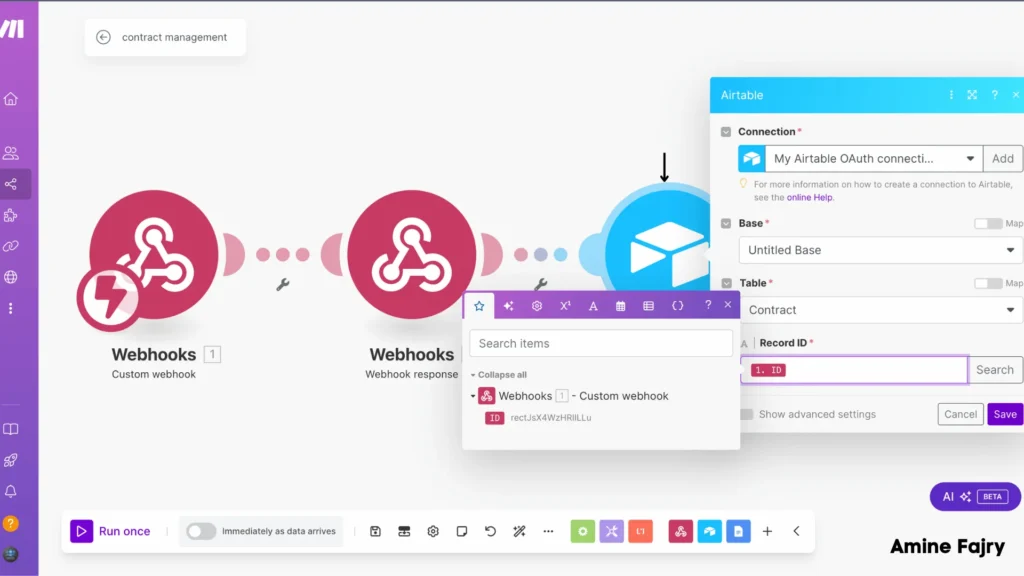
Pro tip: When connecting the ID, click on the input to map and look for the ID parameter from your webhook – it’s the key to making everything work correctly!
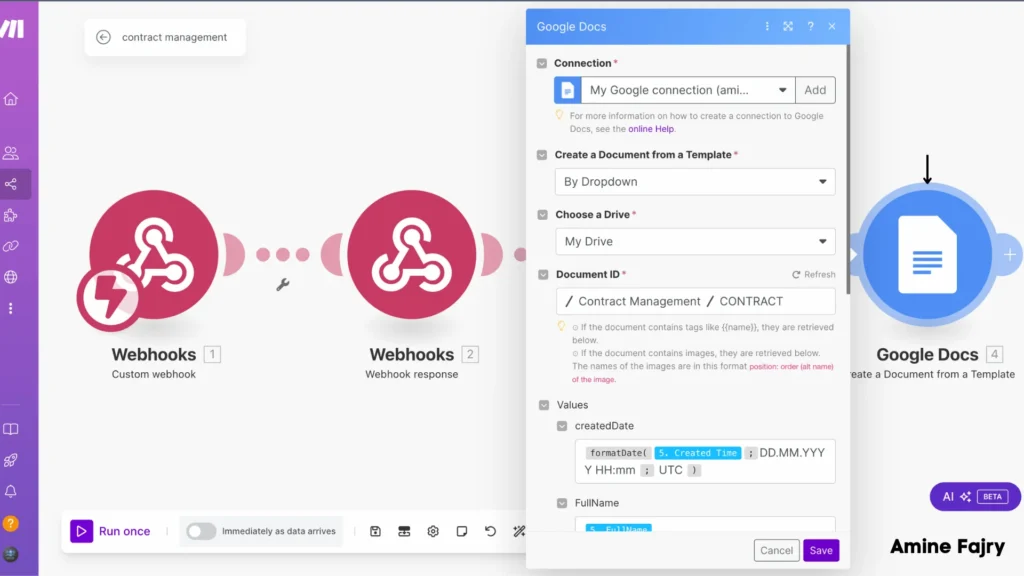
- Add the ‘Google Docs – Create Document from Template‘ module to your workflow
- Configure these important settings:
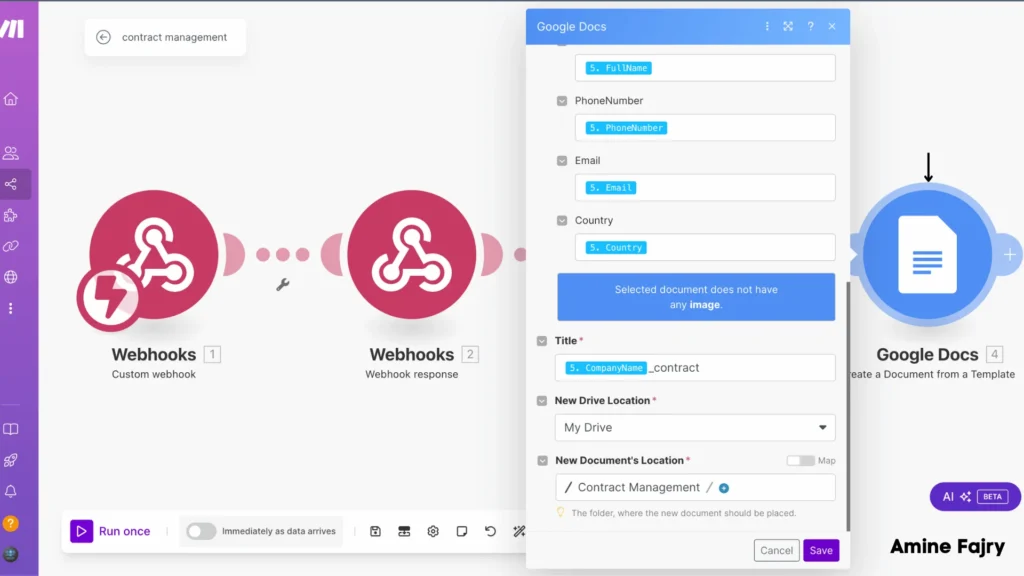
- Choose your template location (the one we created earlier in the Contract Management folder)
- Select where your new documents will be saved
- Map your Airtable fields to the template placeholders (those {{ }} markers we set up)
Pro tip: Make sure each placeholder in your template matches exactly the data you’re pulling from Airtable. For example, {{fullname}} from your template should connect to the ‘Full Name’ field from Airtable.
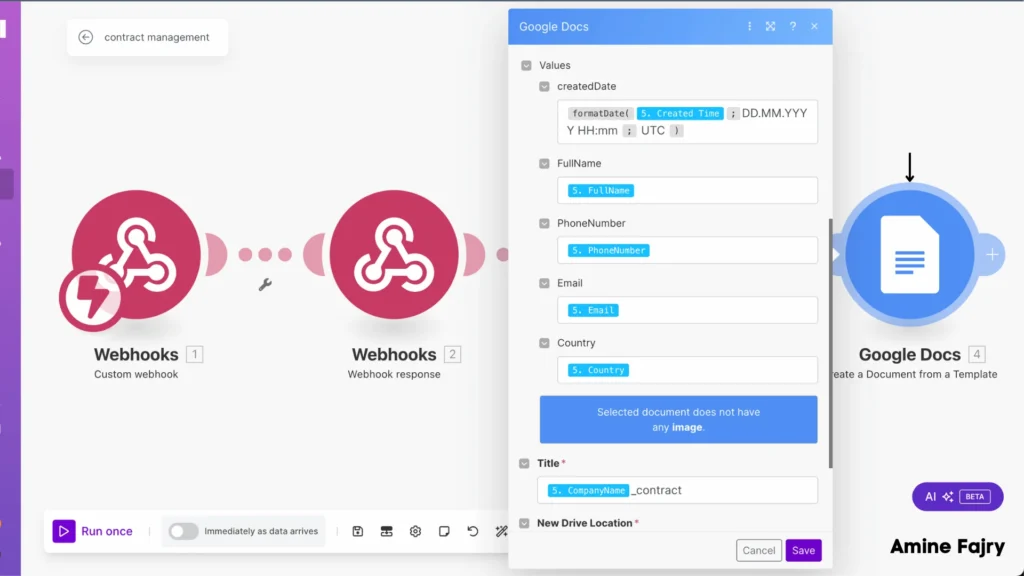
Time to give your document a meaningful name! You can be creative with the naming format when setting up the Google Doc creation. For example:
‘Contract – {fullname} – {companyname}’
This will automatically create documents with names like ‘Contract – John Smith – ABC Company’. Pick a format that helps you easily find and organize your contracts later!
💡 Pro Tip: Get into the habit of saving your scenario frequently! Click that ‘Save‘ button often – especially after making changes. It’s a simple step that can save you from frustration later. Think of it as your digital safety net!
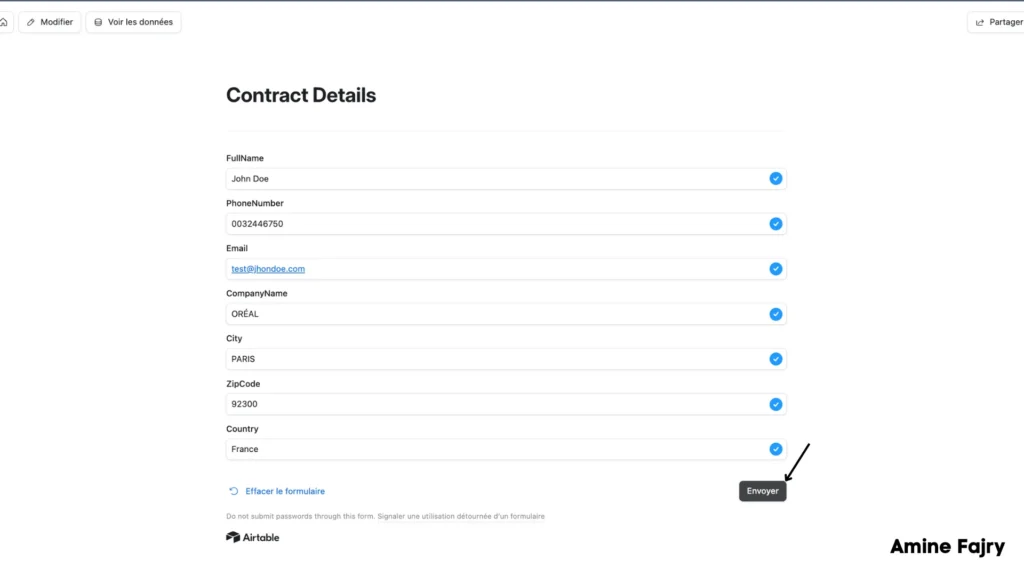
Step 10: Fill the form
Now comes the exciting part—let’s test everything out! Go to your form and fill it out with sample data to see your automation in action.
Quick test checklist:- Open your published form
- Fill in all the fields with test information
- Submit the form and watch the magic happen!
You’ll soon see your automation working wonders, creating a perfectly formatted contract with all your information!
Hit that ‘Submit‘ button and watch your automation spring into action! Your form data will transform into a professionally formatted contract document in just a few moments.
Keep an eye on your Google Drive folder – your new contract will appear automatically!
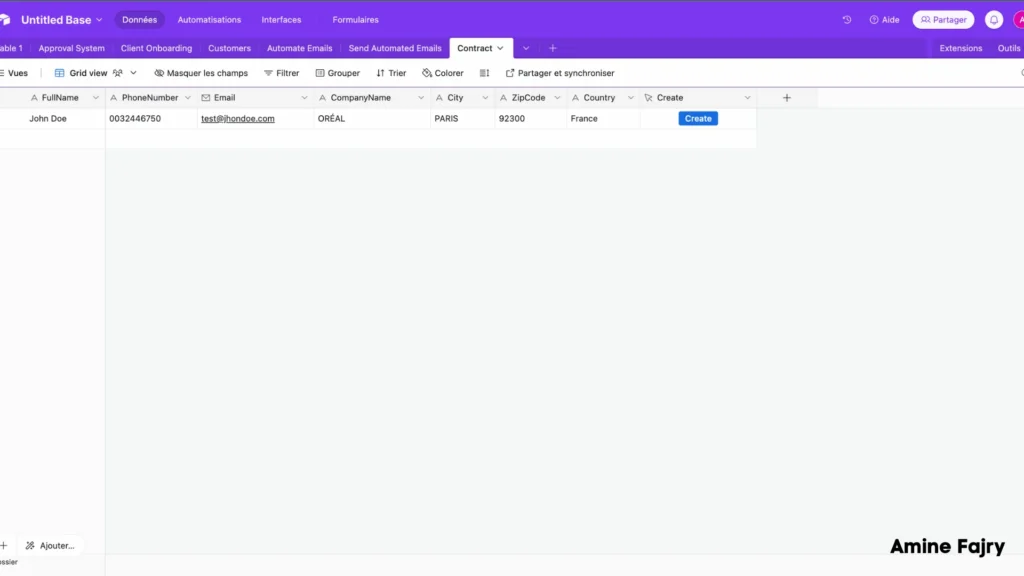
Your submitted information instantly appears in your Airtable – no copy-and-paste needed. Take a peek at your table, and you’ll see all those form fields perfectly organized in a new row.
Tip: This automatic data population shows your automation is working smoothly. Each new submission will create its own neat row in your table!
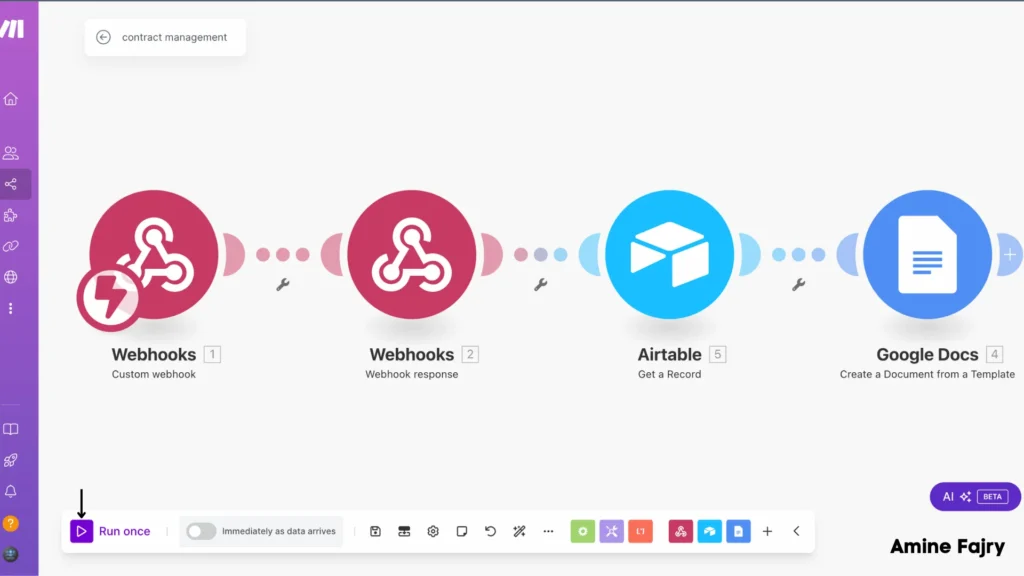
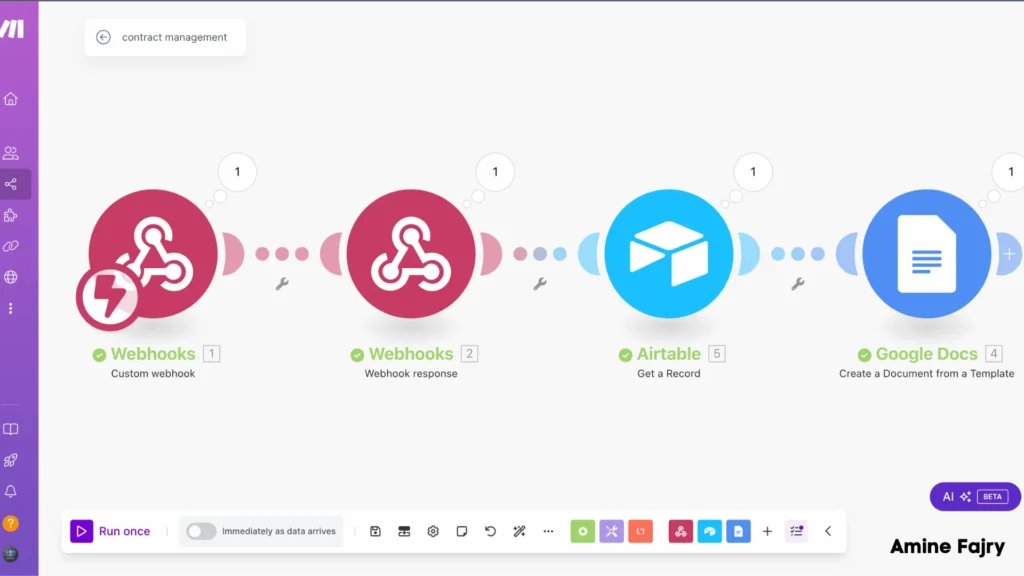
Step 11: Run Your Scenario
Time to see everything in motion! Go ahead and click the ‘Run‘ button in your Make scenario. This is where all our setup comes together:- Your data flows from the form
- Through your webhook
- Into your perfect contract template
Once you click ‘Run‘, your scenario will work and generate your customized contract document!
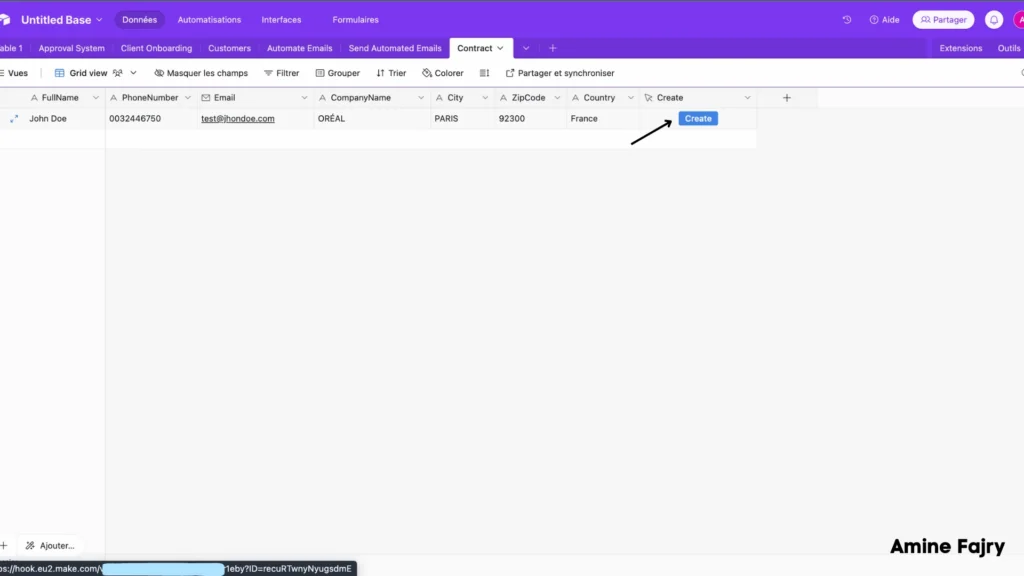
Now for the moment of truth – click the ‘Create‘ button in your Airtable record! This triggers your entire automation sequence and:
Your custom contract will be generated automatically in your Google Drive folder with all the information you just entered. It’s like having a personal assistant create your contracts in seconds!
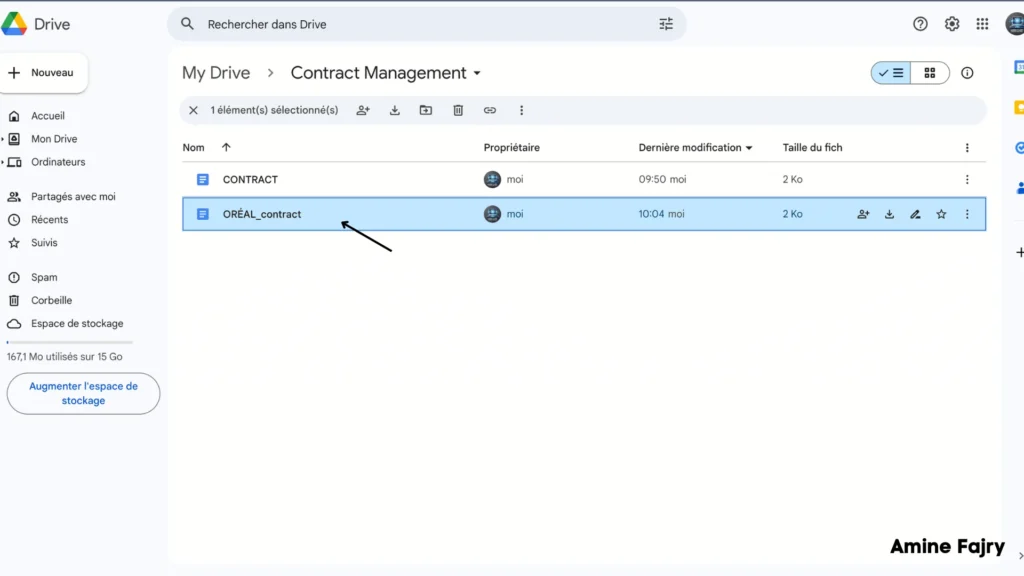
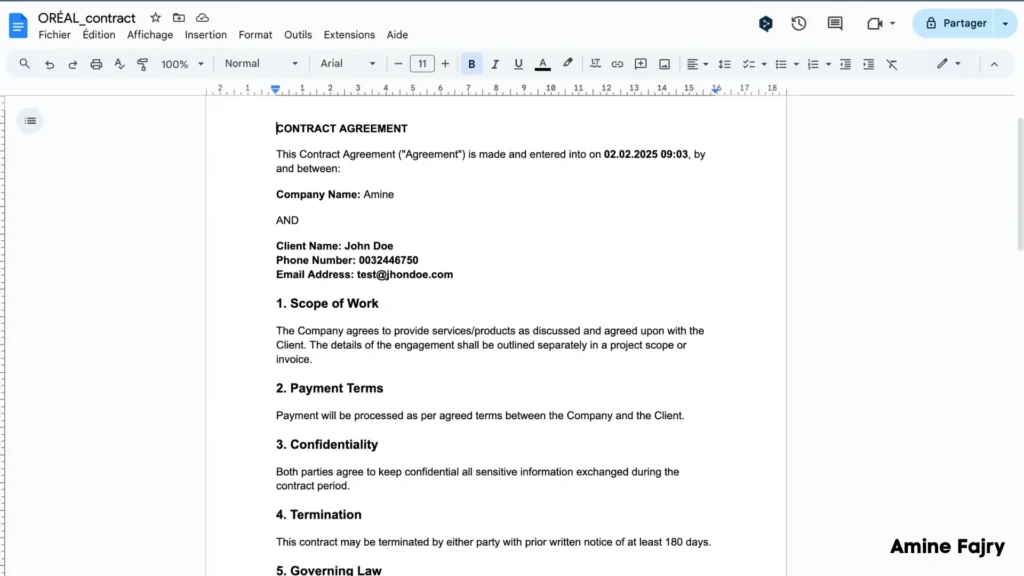
Step 12: Results
And there you have it – your automation masterpiece in action! Let’s look at what we’ve accomplished:
Your new contract has been automatically:- Generated in your Google Drive folder
- Filled with all your form data
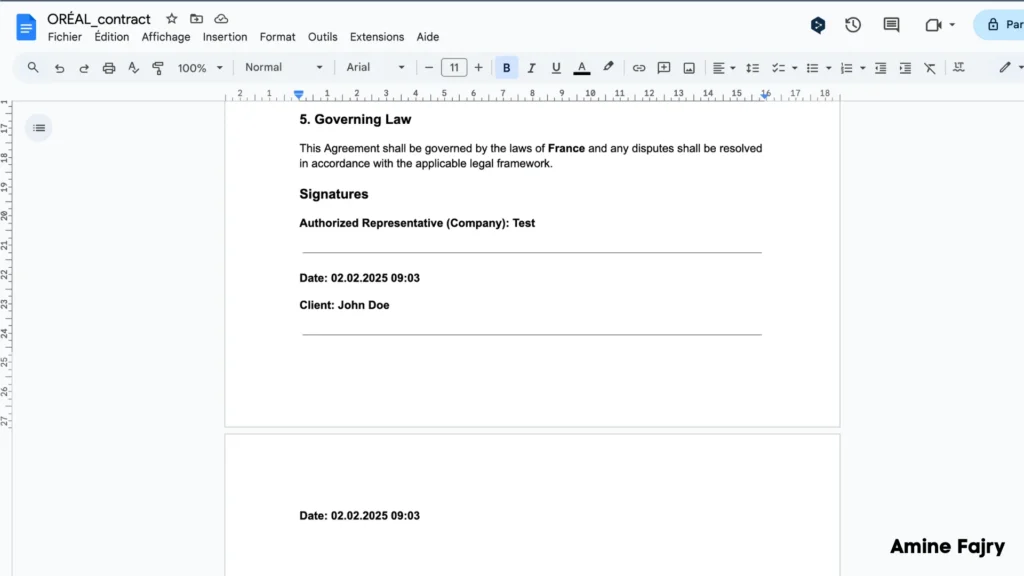
- Formatted perfectly based on your template
Take a moment to open your new document and admire your handiwork. Everything from the form has been seamlessly transformed into a professional contract – all without manual copying and pasting!
Fantastic! Your contract automation system is now up and running perfectly! 🎉
Look at your newly created contract – everything from your form has been automatically formatted and filled in exactly where it should be. This means you’ve successfully built a system that:- Saves you hours of manual work
- Eliminates copy-paste errors
- Creates professional contracts in seconds
- Works automatically every time
What you’ve built is pretty amazing, right? Now, you can create new contracts with just a few clicks instead of hours of manual work!
As you can see, this automation is pretty powerful – and what we’ve built is just the beginning! Let your creativity run wild and take this system even further. Here are some exciting ways you could enhance this automation:
Email Integration:- Send automatic welcome emails to clients
- Get notifications when contracts are generated
- Forward completed contracts to relevant team members
- Auto-organize contracts in specific folders by date or client name
- Create contract tracking spreadsheets
- Add automatic document versioning
- Set up Discord alerts for your team
- Get Slack messages for new submissions
- Create mobile notifications for urgent contracts
- Add automatic signature collection
- Include payment tracking
- Create follow-up task reminders
- Generate custom reports and analytics
The possibilities are endless – this foundation you’ve built can grow with your needs. Start small, test what works for you, and keep building!
Get this scenarioConclusion
Automating your contract management with Make isn’t just about efficiency—it’s about transforming how your business handles essential documents and agreements. Following this guide, you’ll be well-equipped to create powerful automation workflows that save time, reduce errors, and improve your overall contract management process. Ready to get started? Start by setting up your Make workspace and build your first automated contract workflow today!
FAQs
Q: What do the double curly braces {{ }} represent in the contract Google Doc template?
A: The double curly braces are placeholders that automatically fill in with actual data when the template is used. For example, {{client_name}} will be replaced with the client’s real name from the form submission.

Further Ressources
- How to Build Customer Feedback Automation in Make
- The Ultimate Guide to Data Mapping in Make
- How to Send Automated Emails with Make
- How to Automate Employee Onboarding in Make
- How to Send Automated Emails from Google Forms Using Make
- How to Convert Base64 to PDF Using Make
- How to Build a Pinterest Automation System with Make
- How to Automate Pinterest Video Posts with Make